
How To Make a PowerPoint On iPhone? (Here’s Your Guide)
Are you looking for a quick and easy way to create stunning PowerPoint presentations on your iPhone? Whether you’re a student, a business professional, or just someone who wants to make a presentation quickly, you’ll be glad to know that it can be done in a few simple steps.
In this guide, we’ll walk you through the process of creating a PowerPoint presentation on your iPhone from start to finish, including what you need to get started, how to download and install the PowerPoint app, and how to customize a template.
Plus, we’ll show you how to add images, sound, and video, and how to collaborate with others.
Let’s get started!
Table of Contents
Short Answer
Making a PowerPoint on an iPhone can be done using the PowerPoint app.
First, open the app and create a new presentation.
Then, select a blank presentation or choose from one of the templates provided.
After that, you can add images, add text, change the layout, and adjust the design settings.
When you’re finished, save the presentation and share it with others.
What is Microsoft PowerPoint?
Microsoft PowerPoint is a popular presentation software program developed by Microsoft.
It is used to create slideshows, which can be used to illustrate ideas, give presentations, or create multimedia projects.
PowerPoint is available for both Windows and Mac systems, and can also be used on mobile devices such as iOS and Android.
The app includes features such as the ability to add images, videos, sound, and animations to a slideshow, as well as the ability to collaborate with others in real-time.
It also has a wide range of templates to help get started quickly, as well as other features such as transitions and animations to help make your presentation stand out.
With its wide range of features and its easy-to-use interface, PowerPoint makes creating a presentation on your iPhone a breeze.
What You Need To Get Started
Making a PowerPoint on your iPhone is a breeze all you need is the Microsoft PowerPoint app and a few minutes of your time.
Once youve got the app installed, youre ready to start creating presentations.
You can use the app to create a blank presentation from scratch, or you can use one of the many templates included in the app to get you started.
You can customize the template to fit your projects needs, or you can use the blank presentation to design your slides from the ground up.
If youre looking for more than just text, the Microsoft PowerPoint app has you covered.
You can easily add images, sound, and videos to your slides, giving your presentations a more dynamic look.
You can also collaborate with others in real-time, so you can work together to create the perfect presentation.
In addition to the app itself, youll also need some content for your presentation.
Depending on the type of presentation youre creating, you may need to gather images, sound clips, videos, and text for your slides.
You can easily add these elements to your presentation using the app, so you dont need to worry about creating them yourself.
Finally, youll need a device to create and view your presentation.
The Microsoft PowerPoint app is available for both iPhone and iPad, so you can create presentations on either device.
You can also view your presentations on other devices, such as a laptop or desktop computer, so you can share them with others.
Making a PowerPoint on your iPhone is a great way to create professional-looking presentations on the go.
With the Microsoft PowerPoint app, you have all the tools you need to create stunning presentations in no time.
How To Download and Install the PowerPoint App
Making a PowerPoint presentation on your iPhone is easy and convenient with the Microsoft PowerPoint app.
To get started, you’ll need to download and install the app from the App Store.
The download and installation process is simple and straightforward.
To get the app, open the App Store on your device and search for PowerPoint.
Once you find the app, simply tap the Get button to begin the download and installation process.
The app will then be installed onto your device and ready to use.
Once the app is installed, you can open it by tapping the app icon.
You will then be taken to the main screen, where you can create a new presentation, open an existing presentation, or access the apps settings.
From here, you can start creating your presentation right away.
The PowerPoint app also offers several helpful tutorials to help you get started.
You can access these tutorials by tapping the Tutorials button on the main screen.
The tutorials cover everything from basic editing to creating complex presentations.
Whether youre a novice or an experienced PowerPoint user, the tutorials can help you make the most of the app.
How To Create a PowerPoint Presentation With a Blank Template
Creating a PowerPoint presentation with a blank template on your iPhone can be a great way to quickly and easily create a professional-looking presentation.
With the Microsoft PowerPoint app, you can start with a blank presentation and design your slides from scratch no matter where you are.
To start, open the Microsoft PowerPoint app on your iPhone and select Blank Presentation from the templates.
This will open a blank canvas where you can design your presentation from scratch.
You can add text, images, audio, and video to each slide, and customize the look and feel of each slide with colors, fonts, and animations.
Once youve created your slides, you can easily rearrange them or add new slides.
You can also add transitions and animations to your slides to make them more engaging.
When youre done, you can save your presentation to the cloud or share it with colleagues or friends.
This makes it easy to collaborate with others in real-time and ensure everyone is on the same page.
Creating a PowerPoint presentation with a blank template on your iPhone is a great way to quickly and easily create a professional-looking presentation.
So, what are you waiting for? Give it a try and create your next presentation today!
How To Customize a PowerPoint Template
Customizing a PowerPoint template on your iPhone is a simple process that can help you create an engaging and professional presentation quickly. With the Microsoft PowerPoint app, you can choose from a wide variety of templates, many of which are customizable. Once youve chosen a template, you can customize it with your own photos, sound, and videos. You can also add text boxes, shapes, and other elements to further customize the look of your presentation. Heres a step-by-step guide for customizing your PowerPoint template on your iPhone:
1. Open the Microsoft PowerPoint app and select the Create button.
2. Select Create from Template and choose from the available templates.
3. Once youve chosen a template, you can customize it with your own photos, sound, and videos.
4. To add photos, tap the Add Photo button and select from your Camera Roll, or take a photo directly from the app.
5. To add sound, tap the Add Sound button and select from your music library, or record your own sound directly from the app.
6. To add videos, tap the Add Video button and select from your Camera Roll, or record a video directly from the app.
7. To add text boxes, shapes, and other elements, tap the Insert button and select from the available options.
8. Finally, when youre finished customizing your template, tap the Save button to save your presentation.
By following these steps, you can easily customize a PowerPoint template on your iPhone to create an attractive and professional presentation.
With the Microsoft PowerPoint app, you can create presentations on the go, no matter where you are.
Start customizing today and take your presentations to the next level!
How To Add Images, Sound, and Video
Adding images, sound, and video to your PowerPoint presentation on your iPhone is easy.
With the Microsoft PowerPoint app, you can quickly upload images from your photo library, or take a new image and add it directly to your presentation.
You can also add sound effects and music to your presentation to help emphasize different points.
Finally, you can add videos directly to your slides, either from your library or from the internet.
To add an image, sound, or video to your presentation, simply tap the + icon on the top right of the app, then select the type of media youd like to add.
From there, you can choose from your library, or search for an image, sound, or video online.
Once youve found the media youd like to add, simply tap Add to Slide and it will be added to your presentation.
You can then move, resize, and rotate your media, or add additional effects like transitions and animations to help make your presentation stand out.
With the Microsoft PowerPoint app, you can quickly and easily add images, sound, and video to your presentations to make them more engaging and interesting.
How To Collaborate With Others
Making a PowerPoint on your iPhone is made even easier when you need to collaborate with others.
With the Microsoft PowerPoint app, you can work together with your team or classmates in real-time from the comfort of your own device.
You can easily share your presentation to your colleagues and friends, allowing them to make edits and comments.
The collaboration feature is especially useful when you need to simplify a complex process like designing a presentation.
You can easily add images, sound, and videos to the slides with just a few clicks.
Plus, you can keep track of changes made by other collaborators, making it easy to stay organized while working together.
The Microsoft PowerPoint app also allows you to review changes with other collaborators.
You can chat with your team in real-time, making it easy to share ideas and ask questions.
You can also set deadlines for tasks and track progress so that everyone is on the same page.
Finally, the app also enables you to securely share your presentation with anyone.
All you have to do is generate a secure link that you can share with your colleagues or friends.
They can then view and comment on your presentation without having to download the app.
This makes the collaboration process even easier, allowing you to quickly get feedback from your peers.
Final Thoughts
With the powerful capabilities of the Microsoft PowerPoint app, you can create amazing presentations on your iPhone with ease.
Whether you’re starting from scratch or customizing a template, the app makes it easy to add images, sound, and videos to your slides.
You can even collaborate with others in real-time! Now that you know how to make a PowerPoint on iPhone, the possibilities are endless! So go ahead and get started on creating your presentation today!
James Wilson
James Wilson has extensive knowledge in the information technology industry.His second love, besides dealing with computers, is smart home technology. He is continually updating information to better comprehend this problem and has a deep understanding of the apartment’s support system.
Recent Posts
Is Airtable a Public Company? Unveiling the Truth
No, Airtable is not a public company. As of now, Airtable is a private company that has raised funds from various investors but has not gone through an initial public offering (IPO) to be listed on...
How to Make Money with Airtable: Top Strategies and Success Stories
To make money with Airtable, you can offer consulting services to businesses looking to optimize their workflows through the platform. You can also create and sell templates or automation scripts...
The 5 Best Apps to Make Slideshow Presentations on Your iPhone
There are lots of high-quality iPhone apps to choose from if you need to make a slideshow presentation from your phone.
Back in the day, creating a slideshow presentation meant turning on the PC and opening PowerPoint. Now, with so many great apps out there, you can create an impressive presentation right from your iPhone. Whether you need a slideshow for school, work, or just personal use, you have plenty of options.
When you’re done, you can send your slideshow presentation to your PC or share it straight from your device. If you’re wanting to know how to create a slideshow presentation on your
iPhone, this list will show you all the best apps to try.
1. Microsoft PowerPoint
The most popular program for creating slideshows, Microsoft PowerPoint, has an official app for iPhone. Like the desktop version, you can create a new PowerPoint and edit each slide. Add your pictures, text, and transitions to make it your own. With all the same features that are available on a desktop, nobody will be able to tell you made it on your iPhone.
Microsoft PowerPoint syncs with OneDrive, so if you use Outlook for school or work you can find your PowerPoint in your OneDrive account. You can also share and edit your PowerPoint presentation on the go, and even add new collaborators.
Aside from OneDrive, Microsoft PowerPoint also syncs with Box, Dropbox, Edmodo, and more. With Microsoft PowerPoint, you get all the features you want in one app.
Download: Microsoft PowerPoint (Free, subscription required)
2. Google Slides
A popular alternative to Microsoft PowerPoint, Google Slides has many of the same features with a major difference. That is, Google Slides is totally free and doesn’t require any subscription. All you need is a free Google account to access Google Slides.
Related: Microsoft PowerPoint vs. Google Slides: Which One Should You Be Using?
Google Slides also makes it easy to make a slideshow presentation on your iPhone. With great templates, plenty of effects, and easy editing, you can create something impressive in minutes.
Google Slides is also better for collaborating than Microsoft PowerPoint. The reason is that not everyone has Microsoft 360 or wants to pay for a subscription. Whereas most people have a Google account or can make one for free in under a minute. To collaborate with others, all you need to do is enter their email and they will get invited to edit the slideshow. Google Slides also syncs with your Google account, so you can access your slideshow on any device with access to Google.
For these reasons, Google Slides is a must-try if you’re looking to create a slideshow on your iPhone.
Download: Google Slides (Free)
Keynote is Apple’s presentation software, designed to compete with Microsoft PowerPoint. Keynote comes pre-installed on all iOS devices running the latest version iOS, so there’s a good chance you already have this app.
Like Microsoft PowerPoint and Google Slides, you can create a slideshow using a template and add your own text, images, and transitions. Keynote comes with 40 templates pre-installed, giving you plenty of options to choose something unique. Keynote also has some notable features that differentiate it from the competition. For example, there’s a feature called Instant Alpha that will remove the backgrounds from an image. You can also import live videos and photos to your slideshow.
Keynote is also the best slideshow app for rehearsing your presentation. Keynote has a built-in timer that shows you the time, presentation notes, and the slide on one page. You can rehearse your slides and see how long it takes to make sure you hit your time limit.
Related: The Best Slideshow Maker Apps
With all these features, Keynote is a great app to create your next slideshow. However, the collaboration feature isn’t as strong as Microsoft PowerPoint or Google Slides. So if you need several collaborators, one of the other options might work better.
Download: Keynote (Free)
Canva is one of the most popular graphic design apps in the App Store right now. With Canva, you can create flyers, brochures, and even logos. However, most people aren’t aware that Canva has a powerful Slideshow feature as well.
With many great slideshow templates available, you are sure to find something that stands out and will impress your audience. In fact, Canva has thousands of slideshow templates available—more than any other slideshow app. After you find your template, you can easily add your photos and text.
Since Canva has many customization features for photos, you can edit your images before importing them to your slideshow as well. Once your slideshow is completed, you can access it through the Canva website or save it to your device.
Canva is the best choice for a slideshow app if you don’t have any collaborators and want to make something truly unique. It works great for school projects, creative presentations, and showcasing your art or photographs.
Download: Canva (Free, in-app purchases available)
5. Adobe Spark Page
Adobe Spark Page is a beginner-friendly Adobe app that allows you to make impressive web pages, newsletters, and slideshows. Most Adobe apps like Photoshop or Premiere have a steep learning curve. For this reason, the name Adobe can scare off beginners. Thankfully, Adobe Spark Page is an exception.
Related: How to Make a Slideshow on iPhone
With a simple-to-use interface and dozens of premium theme combinations, you can make a slideshow right from your iPhone. The slideshow presentations made with Adobe Spark Page are simple, professional, and look great on large screens. All creations made on Adobe Spark Page are available on your Adobe account so you can access your slideshows anywhere. You can also create a public access link and share it over text or email.
While lacking some features like collaboration, it’s still a great slideshow app that’s simple and easy to use on the go. As long as you don’t need collaborators, this app is a must-try.
Download: Adobe Spark Page (Free, in-app purchases available)
Want to Make a Slideshow Presentation on iPhone? There Are Options
With so many apps available for creating a slideshow on your iPhone, you can certainly find something that fits your needs. Whether you need a professional slideshow for work or a creative slideshow for a class, there’s an iPhone app for you out there. Who knows, maybe you won’t ever need to make a slideshow on your computer again.
- SMB Technology
- Mobile Productivity
- Mobile Security
- Computing & Monitors
- Memory & Storage
- Digital Signage
- Trending Tech
- Hospitality
- Manufacturing
- Transportation
- Food & Beverage
- Live Events & Sports
- Spectaculars & DOOH
- Gaming & Esports
- White Papers
- Infographics
- Assessments & Calculators
- Case Studies
- About Samsung Insights
- Our Experts
Subscribe to Insights
Get the latest insights from Samsung delivered right to your inbox.
See our Privacy Policy
Samsung Business Insights

Featured posts in
5 reasons to switch to Galaxy Z Flip5
6 productivity apps that are better on Galaxy Z Fold5
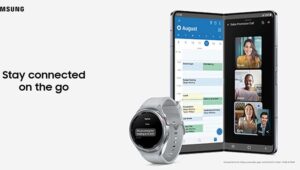
How to maximize productivity with Galaxy Z Fold5 and the Galaxy ecosystem
How to take advantage of microsoft powerpoint on your galaxy smartphone.
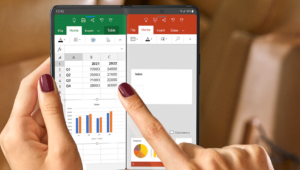
This is one of a trio of user guides for getting the most out of Microsoft Office apps on your Samsung Galaxy smartphone. Be sure to explore our tips for Word and Excel to maximize your mobile productivity.
If you’ve ever wished you could use your Microsoft Office apps as easily on your mobile device as you do on your laptop or desktop computer, you’re in luck. With the integrated Office Mobile app, Samsung and Microsoft have brought Office productivity to the Samsung Galaxy.
Office Mobile comes natively integrated on the latest flagship smartphones from Samsung, including the Note 20 and Note20 Ultra 5G and new S21, S21+ and S21 Ultra 5G . Microsoft Word, Microsoft PowerPoint and Microsoft Excel documents can all be created and edited in one powerful and intuitive application. The integrated approach means you get a single view of all recent documents you’ve opened, regardless of file type, making it easier to locate exactly the document you want on the spot. Meanwhile, OneDrive integration gives you secure and instant access to all of your important files in the cloud. Smart assistants also offer suggestions to help you stay organized, streamlining your workflow as you go.
Need to track changes or add comments to a document you’re editing while en route to that next meeting? Easy. Want to make some quick annotations to a PowerPoint while you’re waiting for your flight or even live during a client presentation? You can do it in a snap with your S Pen . You can keep working when you’re away from a computer, efficiently wrapping up your tasks even as you’re on your way to your next appointment.
Shop special offers
Find out about offers on the latest Samsung technology.
Speak to a solutions expert
Get expert advice from a solutions consultant.
Who are you buying for?
I'm buying for myself
I'm buying for a small business
I'm buying for a large enterprise
With these tips and tricks for Microsoft Word, PowerPoint and Excel, you can start getting the most out of Microsoft Office on your Galaxy smartphone right away. And they become even more powerful when combined with Samsung DeX , which lets you power a full desktop experience from your phone.
Microsoft PowerPoint tips and tricks
When you’re on the way to give a client presentation or speak at a conference, having the ability to make last-minute changes to your PowerPoint deck can be especially clutch. Now, you can tweak your presentation at the moment inspiration strikes. And with your Galaxy smartphone and Samsung DeX at your command, you can make a compelling pitch — no laptop required . With that in mind, here are a few tips and tricks for getting the most out of PowerPoint on your Galaxy smartphone.
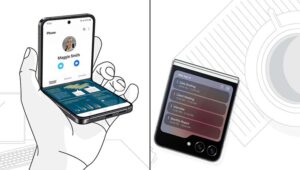
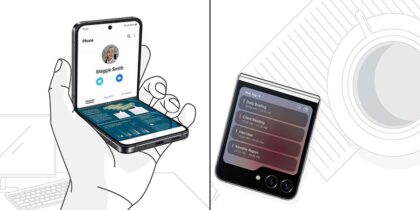
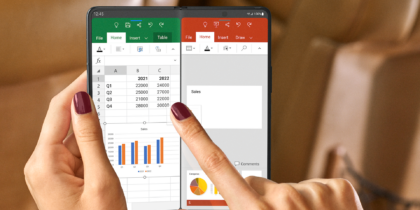
To begin, open a PowerPoint you’d like to work on or create a new one. Here’s a PowerPoint presentation with multiple slides:

If you want to make quick changes to a particular slide, you can tap on it and a window will appear, giving you the option to edit, copy, add a comment or share.

When you tap on the A icon with the pencil, a gray toolbar will open up along with a thumbnail view of the slides in your presentation. From here, you can tap on the arrow at the right-hand corner and access the full suite of PowerPoint commands.

Among other options in the Home menu, you have the ability to add a new slide, adjust fonts and their formatting, and even change text rotation. Other menus give you additional controls — just tap on Home and you will see a full list of menus with options to explore.
Insert shapes into your PowerPoint presentation
If you need to create a flowchart or a graphical representation of a concept, you may want to put shapes in your presentation. If you select the Insert menu, you can insert a range of shapes directly into your PowerPoint, such as a circle or square, and even change their color and appearance as desired.

If you tap on Shapes as seen above, for example, you have access to a large collection of preset shapes, lines, flowchart diagram elements and callouts that can come in handy when preparing a presentation.

To select a shape you would like to add to your PowerPoint, simply tap on it and it will be placed into the slide you have open.

Here, we’ve inserted a circle into our opening slide of the presentation. We can now drag it to our desired location, or resize it.
A menu appears above as well, allowing us to duplicate the shape, add a new comment to it and more. You’ll notice that the shape is shaded and filled by default, but there are other options. Tap the red up arrow at the bottom right or the A icon with the pencil in it, then go to the Shape menu.
You’ll see an option for Shape Styles. Tap on it.

A large selection of shape styles, from transparent and opaque to shaded and flat, will appear. You can change the appearance of the shape you have selected by tapping on the option that you prefer.
Insert pictures, audio and video into your PowerPoint presentation
If you want to add pictures, audio or video to your presentation, the process is the same. To add rich multimedia to your PowerPoint deck, simply go back to the Insert menu and select the option you want.

Once you tap to insert a picture, audio or video file, you’ll be prompted to load the audio or video file you would like to insert. You can insert files directly from your mobile device or, if you have it connected, a OneDrive or Google Drive account.
Annotate your PowerPoint presentation
Using the S Pen on the Note20, you can quickly mark up or make annotations to your PowerPoint presentation while you’re on the go. Access the Draw menu and choose the pen or highlighter you would like.

Then take out your S Pen and begin marking up your PowerPoint deck. Here, we’re making a note in red pen that says we should add an extra step in the flowchart depicted in this slide.

You can even mark up your PowerPoint during a live presentation while your S21 is in DeX mode, just as sports commentators make quick drawings on the TV while explaining a play. Simply connect your phone to a display, projector or Miracast-enabled smart TV using DeX, access Presenter View as mentioned in the section below, tap the paintbrush and begin making real-time annotations.

When you’re done giving your presentation, tap the icon at the far right to quit. PowerPoint will ask you if you would like to keep or discard your ink annotations.
Access Presenter View
If you just want to look at your PowerPoint directly on your Galaxy smartphone or you’re preparing to display it on a larger screen using DeX, you can do so using the Presenter View option. Tap the Presenter View icon (highlighted in green at the top of the below image) and your PowerPoint will go into a fullscreen mode. Just rotate your phone to shift to landscape view for an expansive look at your presentation.
Edit and display your presentation using wireless DeX
If you need to view, edit or share your presentation on a broader canvas, Samsung DeX lets you take it from your phone to the big screen. All you need is an HDMI to USB-C adapter — or you can connect wirelessly if you have a smart TV or monitor that supports Miracast.
To use wireless DeX with your smartphone, first enable screen mirroring mode on your TV or monitor. Then tap DeX in your Quick Settings panel on your Galaxy device. From there, tap on DeX on TV or Monitor and choose the display you want to connect to. DeX will then boot on the display, giving you access to all your mobile apps in an intuitive desktop interface.
You can now use your phone as a touchpad to launch Office and open PowerPoint, or you can connect a keyboard and mouse to create or edit slides just as you would on a traditional PC.
While your phone is wirelessly connected to the TV or monitor, you can still keep using it as a phone, checking text messages or emails without disturbing the presentation. With wireless DeX, you get a full-featured second screen experience, without any additional cables or peripherals needed.
Advance PowerPoint slides using the S Pen
You can also use your phone to present your PowerPoint in DeX mode. Once you have the PowerPoint open in DeX, just tap the present icon to go full screen. Now use your phone as a touchpad, tapping to advance slides. If you have a device with an S Pen with Bluetooth, you can use the S Pen as a clicker while delivering a presentation. Tap the S Pen button to progress slides while you make your pitch. Need to go back a slide or two? Simply double-tap the S Pen button to reverse your slides.
What's the best phone for your business?

Take this quick assessment to discover the smartphone most tailored to your business needs. Explore the phones
Get more done with Microsoft Office and your Galaxy smartphone
When you’re jumping from one appointment to the next, time is of the essence. You need to be able to work quickly without hunting for the feature you need. The Microsoft Office suite on your Samsung Galaxy smartphone puts that power at your fingertips, giving you the full range of Word, PowerPoint and Excel capabilities you enjoy on your PC. This way, you can get the most out of your Galaxy phone and experience peak productivity wherever the day takes you. With a Galaxy smartphone and Microsoft Office, there’s no limit to what you can accomplish.
Explore more ways the Samsung Galaxy S21 lineup empowers the mobile professional to do more from anywhere. Then discover how to enhance your productivity by going mobile-only with DeX in this free guide .

Rose de Fremery
Rose de Fremery is a New York-based B2B technology content marketing writer specializing in cybersecurity, AI, IoT, digital transformation, enterprise communications and mobility. In addition to contributing to Samsung Business Insights, Rose has also worked with brands such as Vonage, HP, IBM, Intel, WordPress, Sage and Rapid7.
- Galaxy Note20
- Smartphone Tips
Related Posts

4 pillars of keeping AI secure for business
Artificial intelligence (AI) can do amazing things in the workplace. It can accelerate information gathering, supercharge marketing, simplify data analysis, optimize resource allocation and

Integrated solutions empower productivity for SMBs
Integrated solutions for SMBs are the best way to power up greater productivity. Learn how Samsung can help.

5 features SMBs should look for in a mobile device protection plan
Samsung Care+ for Business offers everything small businesses need to deal with broken smartphones and other devices.
Featured Posts
Samsung Galaxy Z Flip5 is a small phone with big productivity enhancements and a beautiful design.
Samsung is partnering with leading business software providers to optimize apps for Galaxy Z Fold5's form factor.
Galaxy Z Fold5 syncs effortlessly with a Galaxy Book, Buds, and Watch to simplify your life — so busy days are that much easier.
How can we help you?
I'm buying for myself
I'm buying for a small business
I'm buying for a large enterprise
Our solutions architects are ready to collaborate with you to address your biggest business challenges.
- Mobile Phones
- Laptops/2-in-1
- Business Services
- Displays & Digital Signage
- Hospitality TVs
- Wireless Networks
- Public Safety

A member of our solutions architect team will be in touch with you soon.
Video Review: Control Your PowerPoint through Your Phone with Office Remote for Android
Want more presentation training resources? Check out our Training page!
Earlier this month in a somewhat “under the radar” move, Microsoft released its Office Remote for Android mobile application that allows users to start PowerPoint presentations, advance slides, see speaker notes and control an on-screen laser pointer with a touch of a finger—all directly through the free Android app.
We were excited to see Office Remote in action and decided to check it out for ourselves. After using it for a few days with a variety of presentations, we were pretty impressed with the app’s capabilities and responsiveness. Many mobile presentation apps simply replicate what a presentation remote can do in a somewhat less reliable way, but this app brought new features and capabilities that make it an easy recommendation for PowerPoint users.
• Easy Bluetooth connection: We’ve experimented with apps that rely on network WiFi connections in the past and have had difficulty getting them to work reliably, especially on corporate networks. Office Remote relies on a Bluetooth connection between the phone and presenting computer so the pairing process went much more smoothly for us.
• Easy software install: The install process for the program was pretty simple. Download and install the Microsoft Office Remote PC Setup on the computer you’re using for the presentation and download the Office Remote app on your Android smartphone. Go through the setup on each and you’re ready to present!
• Responsiveness: We had no problems with lag during our experiments with the app and found the performance to be equally as responsive as any presentation remote we’ve used with PowerPoint.
• Jump to Slide: In addition to previewing the next slide in your presentation, you can use the app to scroll through all your slides and pick any one of them to jump to. The audience only sees the slide you were on and the slide you clicked, so it’s a much more professional way to jump to a different part of the presentation versus aggressively clicking through an entire deck with a presentation remote!
• No horizontal mode: The app only opened and worked in vertical mode, with the forward and backward buttons taking up half the screen. We would’ve liked to see a horizontal option so the slide previews could take up more screen space. While vertical mode is probably ideal for a presenter holding the phone will walking around, horizontal mode would make it easier for a presenter to place the phone on a stand or podium during a presentation.
• No iOS support: Office Remote is currently unavailable to iPhone and iPad users. Hopefully the Android release signals Microsoft’s willingness to open this app up to more users, so perhaps iOS will be the next step.
If you’re interested in checking out the Office Remote app on your Android device, here are the relevant download links:
Computer software: http://www.microsoft.com/en-us/download/details.aspx?id=41149
Android app: https://play.google.com/store/apps/details?id=com.microsoft.office.officeremote
Good luck and happy presenting!
To see more Puffingston training videos, check out our Training Page .
To see Puffingston presentation designs in action, check out our Portfolio Page .
RECENT POSTS
- 5 Virtual Strategies for Your In-Person Events
- 10 Strategy & Screenshare Tips for Effective Virtual Meetings
- Virtual Meeting Checklist: 4 Ways to Maximize Webinar Opportunities
- Special Delivery! New Office Painting Arrives
- Create Amazing User Conference Keynotes – Part 1: VISUALS
- Success Stories
- Pitch Decks & Investor Materials
- B2B Graphic Design
- Startup Consulting
- Trainings & Workshops
- Case studies
- Downloadable resources
Presentation Tips: How to make mobile friendly presentations
- Presentation design

Welcome back to our article series on practical and short tips to help you create better presentations.
So far, we’ve tackled the issue of compressing presentations , followed by some tips on how to make a presentation printer friendly. Now we’re going to dive into yet another topic that is often overlooked when creating a presentation and that is making sure your presentation is mobile friendly.
Why is this important?
We’re living in a world where smartphones have become ubiquitous (and for some people, their smartphone is even more than that, as it’s almost become an extension of their body). In 2020, for the first time ever, mobile internet traffic surpassed desktop traffic.
More and more businesses adopt a mobile first approach when it comes to their website, apps and overall user experience of their clients. So why don’t we apply the same logic to presentations too?
Whether we’re sending a presentation through email (either before or after a meeting), holding an online meeting or giving a webinar, high chances that someone from the audience will view it on their mobile device.
So here are some simple tips on how to create your own mobile-friendly presentation.
1. Larger Text Size
This is probably the most important guideline out of all and it makes sense why. If the text size is too small, your presentation is unreadable and people will stop paying attention.
So make sure your text sizes are large enough to be viewed on a mobile screen. But how large is “large enough” you may be wondering?
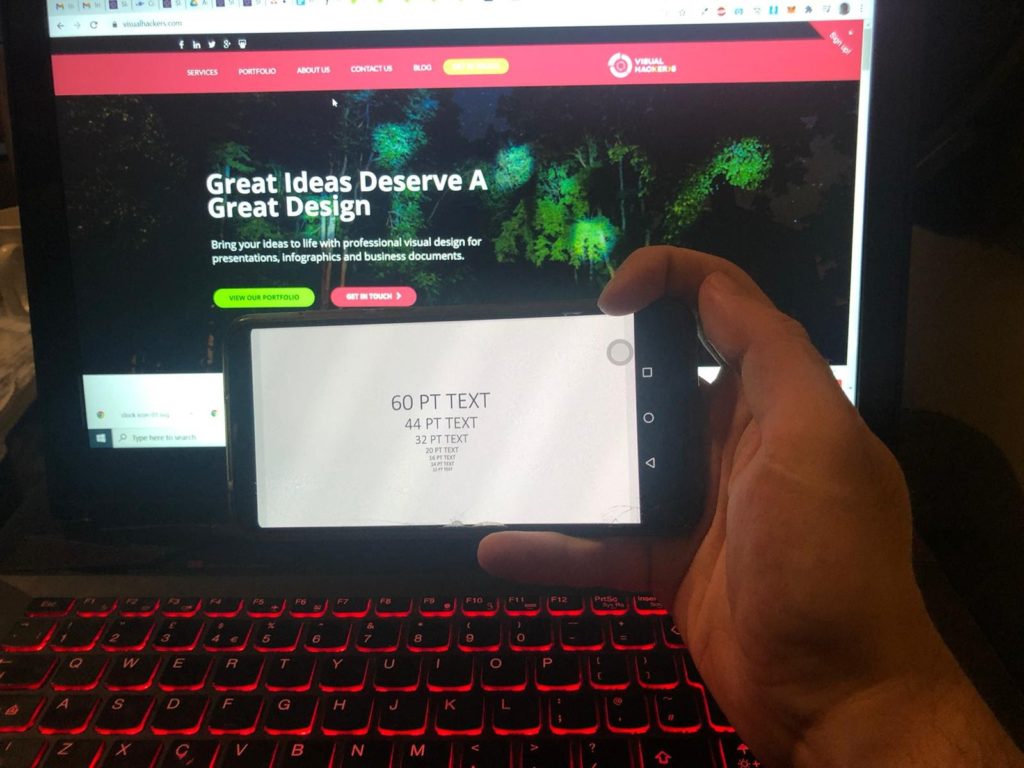
Well I’ve done this quick experiment with various font sizes on my own phone to test it out.
I put different sized-lines and took the picture from how I would see it. Feel free to judge yourself and see what is the smallest size that your eyes are comfortable with.
As a rule of thumb, I’d go with at least a 60 point size for headlines and a 30-32 point size for body content. You could probably get away with a bit smaller text, but I wouldn’t go smaller than 20 points.
2. Less is more
Due to the small size of mobile devices, you definitely don’t want to overcrowd your slides. Keep them simple, uncluttered and follow the cardinal rule of “1 idea = 1 slide”. I’d take that one step further and say even “1 sub-idea = 1 slide”
What do I mean by that? Well, let’s say you have a slide called “5 Success Factors for X” and typically you’d add all 5 points on your slide, along with some accompanying graphics like icons or numbers or pictures (we hope that by this point, you stopped using bullet points in your presentations).
But in a mobile version, after enlarging your text to be the minimum readable size, you might want to split those 5 points into 2 slides, or even have one success factor per slide.
If you’re worried that your presentation will get too long in this case, then don’t. In the end, your audience will still see the same amount of content in the same amount of time, so why not at least space out that content for a better understanding?
3. Large images
When adding images to your presentation, make sure they are large enough so that the audience doesn’t have to squint to see them.
Ideally the image should occupy the whole slide and work as a background with minimal content on top of it. But if you need to add more than one image, make sure that each image takes up at least a quarter of the slide.
Because of this, I don’t recommend using more than 4 images on your slide, and if you need to use more (for example to showcase multiple products), just remember guideline #2 and split it up across multiple slides.
4. Show & tell, don’t write
As a result of guideline #2, you’d have to keep your slide content to a minimum. When thinking whether to keep a certain word or phrase, think of it from this perspective: is this something I can visually illustrate or represent with an image or icon?
Graphics don’t even have to be a literal representation of the content, but can be more subtle and indirect in order to cover more of the slide content while you explain the context
5. Make a higher contrast
Contrast is one of design’s key principles, and it plays an even bigger role on a smaller screen size.
Make sure your slide content, whether it’s text, graphics, images or charts, has enough contrast between its different parts. Contrast doesn’t refer just to color contrast, but also contrast in size or placement.
A good way to tell if your presentation has enough contrast is to slightly squint your eyes when viewing your presentation on your mobile. If some colors get blended together or if pieces of text look the same when they shouldn’t (eg. a main point and a sub-point), then you have to increase the contrast of those elements.
6. Clean & simple charts & diagrams
Charts and diagrams can easily become overwhelming on small screens if you’re not careful. A standard chart in Powerpoint would have both axes, it would have a legend, a slide title, maybe some data labels or some trend lines and so on. If you have all of these elements, then it can become over cluttered and people won’t be able to properly distinguish them.
Try and think of any unnecessary elements and remove them. Remember that less is more. For example, if you have a bar chart, you should keep either your vertical axis or your data labels, you shouldn’t keep both.
7. No fancy stuff
For the purpose of a simpler and seamless viewing experience, don’t overdo it with animations and transitions. In fact, if they don’t serve a real useful purpose, just take them out completely (I’d argue that 80-90% of animations are useless beyond just being flashy and we rarely use them).
Without animations and transitions you will also make sure that who is viewing the presentation will have a minimum risk of the presentation lagging. Another way to achieve this is to just save your presentation as a PDF and send it like that.
Creating a mobile friendly doesn’t require a huge amount of extra work, you just have to keep these tips in mind from the very beginning.
Following these guidelines will help your presentation stand out from a mobile viewer’s perspective, giving them a better overall experience. And that in turn will better reflect back on you, as you’ll be perceived as a professional that has a high attention to details, cares about the audience and does not let things to chance.
Top articles
- Infographics
- Personal branding
- Pitch deck design
- PowerPoint tutorial
- Public speaking
- Visual communication
Sign up for our monthly newsletter
Leave a reply cancel reply.
Save my name, email, and website in this browser for the next time I comment.
This site uses Akismet to reduce spam. Learn how your comment data is processed .
- PRO Courses Guides New Tech Help Pro Expert Videos About wikiHow Pro Upgrade Sign In
- EDIT Edit this Article
- EXPLORE Tech Help Pro About Us Random Article Quizzes Request a New Article Community Dashboard This Or That Game Popular Categories Arts and Entertainment Artwork Books Movies Computers and Electronics Computers Phone Skills Technology Hacks Health Men's Health Mental Health Women's Health Relationships Dating Love Relationship Issues Hobbies and Crafts Crafts Drawing Games Education & Communication Communication Skills Personal Development Studying Personal Care and Style Fashion Hair Care Personal Hygiene Youth Personal Care School Stuff Dating All Categories Arts and Entertainment Finance and Business Home and Garden Relationship Quizzes Cars & Other Vehicles Food and Entertaining Personal Care and Style Sports and Fitness Computers and Electronics Health Pets and Animals Travel Education & Communication Hobbies and Crafts Philosophy and Religion Work World Family Life Holidays and Traditions Relationships Youth
- Browse Articles
- Learn Something New
- Quizzes Hot
- This Or That Game
- Train Your Brain
- Explore More
- Support wikiHow
- About wikiHow
- Log in / Sign up
- Computers and Electronics
- Presentation Software
- PowerPoint Presentations
Simple Steps to Make a PowerPoint Presentation
Last Updated: April 28, 2024 Fact Checked
Creating a New PowerPoint
Creating the title slide, adding a new slide, adding content to slides, adding transitions, testing and saving your presentation.
This article was co-authored by wikiHow staff writer, Darlene Antonelli, MA . Darlene Antonelli is a Technology Writer and Editor for wikiHow. Darlene has experience teaching college courses, writing technology-related articles, and working hands-on in the technology field. She earned an MA in Writing from Rowan University in 2012 and wrote her thesis on online communities and the personalities curated in such communities. This article has been fact-checked, ensuring the accuracy of any cited facts and confirming the authority of its sources. This article has been viewed 4,327,450 times. Learn more...
Do you want to have your data in a slide show? If you have Microsoft 365, you can use PowerPoint! PowerPoint is a program that's part of the Microsoft Office suite (which you have to pay for) and is available for both Windows and Mac computers. This wikiHow teaches you how to create your own Microsoft PowerPoint presentation on a computer.
How to Make a PowerPoint Presentation
- Open the PowerPoint app, select a template and theme, then like “Create.”
- Click the text box to add your title and subtitle to create your title slide.
- Click the “Insert” tab, then “New Slide” to add another slide.
- Choose the type of slide you want to add, then add text and pictures.
- Rearrange slides by dragging them up or down in the preview box.
Things You Should Know
- Templates make it easy to create vibrant presentations no matter your skill level.
- When adding photos, you can adjust their sizes by clicking and dragging in or out from their corners.
- You can add animated transitions between slides or to individual elements like bullet points and blocks of text.

- If you don't have a Microsoft Office 365 subscription, you can use the website instead of the desktop app. Go to https://powerpoint.office.com/ to use the website version.
- You can also use the mobile app to make presentations, though it's easier to do this on a computer, which has a larger screen, a mouse, and a keyboard.

- If you don't want to use a template, just click the Blank option in the upper-left side of the page and skip to the next part.

- Skip this step if your selected template has no themes available.

- If you're creating a PowerPoint presentation for which an elaborate title slide has been requested, ignore this step.

- You can change the font and size of text used from the Home tab that's in the orange ribbon at the top of the window.

- You can also just leave this box blank if you like.

- You can also click and drag in or out one of a text box's corners to shrink or enlarge the text box.

- On a Mac, you'll click the Home tab instead. [1] X Research source

- Clicking the white slide-shaped box above this option will result in a new text slide being inserted.

- Title Slide
- Title and Content
- Section Header
- Two Content
- Content with Caption
- Picture with Caption

- Naturally, the title slide should be the first slide in your presentation, meaning that it should be the top slide in the left-hand column.

- Skip this step and the next two steps if your selected slide uses a template that doesn't have text boxes in it.

- Text boxes in PowerPoint will automatically format the bulk of your text for you (e.g., adding bullet points) based on the context of the content itself.
- You can add notes that the Presentation will not include (but you'll still be able to see them on your screen) by clicking Notes at the bottom of the slide.

- You can change the font of the selected text by clicking the current font's name and then clicking your preferred font.
- If you want to change the size of the text, click the numbered drop-down box and then click a larger or smaller number based on whether you want to enlarge or shrink the text.
- You can also change the color, bolding, italicization, underlining, and so on from here.

- Photos in particular can be enlarged or shrunk by clicking and dragging out or in one of their corners.

- Remember to keep slides uncluttered and relatively free of distractions. It's best to keep the amount of text per slide to around 33 words or less. [2] X Research source

- Slide content will animate in the order in which you assign transitions. For example, if you animate a photo on the slide and then animate the title, the photo will appear before the title.
- Make your slideshow progress automatically by setting the speed of every transition to align with your speech as well as setting each slide to Advance . [3] X Trustworthy Source Microsoft Support Technical support and product information from Microsoft. Go to source

- If you need to exit the presentation, press Esc .

- Windows - Click File , click Save , double-click This PC , select a save location, enter a name for your presentation, and click Save .
- Mac - Click File , click Save As... , enter the presentation's name in the "Save As" field, select a save location by clicking the "Where" box and clicking a folder, and click Save .
Community Q&A
- If you save your PowerPoint presentation in .pps format instead of the default .ppt format, double-clicking your PowerPoint presentation file will prompt the presentation to open directly into the slideshow view. Thanks Helpful 5 Not Helpful 0
- If you don't have Microsoft Office, you can still use Apple's Keynote program or Google Slides to create a PowerPoint presentation. Thanks Helpful 0 Not Helpful 0

- Your PowerPoint presentation (or some features in it) may not open in significantly older versions of PowerPoint. Thanks Helpful 1 Not Helpful 2
- Great PowerPoint presentations avoid placing too much text on one slide. Thanks Helpful 0 Not Helpful 0
You Might Also Like

- ↑ https://onedrive.live.com/view.aspx?resid=DBDCE00C929AA5D8!252&ithint=file%2cpptx&app=PowerPoint&authkey=!AH4O9NxcbehqzIg
- ↑ https://www.virtualsalt.com/powerpoint.htm
- ↑ https://support.microsoft.com/en-us/office/set-the-timing-and-speed-of-a-transition-c3c3c66f-4cca-4821-b8b9-7de0f3f6ead1#:~:text=To%20make%20the%20slide%20advance,effect%20on%20the%20slide%20finishes .
About This Article

- Send fan mail to authors
Reader Success Stories
Artis Holland
Sep 22, 2016
Is this article up to date?
Oct 18, 2016
Jul 23, 2016
Margery Niyi
Sep 25, 2017
Jul 21, 2016

Featured Articles

Trending Articles

Watch Articles

- Terms of Use
- Privacy Policy
- Do Not Sell or Share My Info
- Not Selling Info
Keep up with the latest tech with wikiHow's free Tech Help Newsletter
Critical PowerPoint Shortcuts – Claim Your FREE Training Module and Get Your Time Back!
How to Create 3 Phone Icons in 30 Seconds (PowerPoint Icons)
- PowerPoint Tutorials
- Pictures, Icons, Videos, Etc.
- January 20, 2017
In this post, I’ll show you how to create 3 different styles of phone icons for your presentations in less than 30 seconds .
On top of that…
I’ll show you how to get at thousands of other free PowerPoint icons like these (using this same technique) by setting up a simple Icon Font Cutter Tool in PowerPoint.
If you build lots of slides in PowerPoint and are always looking for professional icons, a Font Cutter Tool like this is a no-brainer.
First off though, to help you nail this technique quickly, I’ve included both a video and written tutorial below, which you can choose depending on how you learn best.
[Watch] Creating 3 Phone Icons in 30 Seconds
You are currently viewing a placeholder content from Youtube . To access the actual content, click the button below. Please note that doing so will share data with third-party providers.
To learn more about PowerPoint icons, and how to use them in your presentations, see our guide here .
1. Insert a rectangle
2. Insert a text box and type ()
Insert a text box over your rectangle so that it extends off the right side of your rectangle as pictured below.
After adding the text box, type the a forward and backward parentheses ‘(‘ and ‘)’ into the text box. In the picture below, I’ve increased the font size to 250 so it’s easier to see for this tutorial.
Note: You need both the rectangle AND the text box to pull off these phone icons correctly, layered as they are pictured below.
3. Change your font to Wingdings
From the Home tab in PowerPoint, open the font style dropdown menu and find Wingdings. You can alternatively just type it into the input box and hit Enter.
Notice, that switching your font style to Wingdings instantly turns your parentheses into two different styles of phone icons (soon to be three), but don’t stop here…
As is, these are still just icon text, not the fully customizable PowerPoint icons that you want for your slides. So don’t skip the next few steps.
4. Select your two objects
Pay special attention to the order below. If you mess this step up, this trick will not work.
Holding the SHIFT key, first select your text box with the phone icons in it, then (and only then) select the background rectangle, so that both objects are selected.
With your objects selected in the correct order described above, navigate to the Drawing Tools Format tab, open up the Merge Shapes dropdown and select Fragment.
6. Clean up the pieces
After fragmenting your two objects (and depending on the icon you are cutting out) remove the extra pieces to get at your fully customizable phone icons.
Again, these are just a few of the 886 FREE PowerPoint icons that are already sitting on your computer.
7. Format your phone icons
Now that you have your phone icons properly cut out, these are 100% editable vector graphics that you can customize and edit using any of the default PowerPoint commands.
In the picture below, I’ve added:
- A red Shape Fill – to match a potential project
- A black Shape Outline
- A Round Bevel – to give the three icons a bit of 3-D texture
Other Free PowerPoint Icons
- Set up a rectangle and text box like I showed you how to do in the tutorial above.
- Add the 223 possible character types to your text box (including the capital cases, lower cases and all of the special characters).
What’s Next?
Related articles.
- What is a broken link chart in PowerPoint (and how to fix it)?
- Bar chart trick: Right aligning categories (PPT, Word, and Excel)
- PowerPoint settings: program level vs. presentation level
- What is a linked Excel chart in PowerPoint?
- Set Up Slide Show: Customize how your PPT presentations run
About The Author

This Post Has 4 Comments

You have the best videos by far! Forget Lynda. This one is game changer for me.

Thanks Alex! We’re happy that we can help make your slides better and get ya to Happy Hour! 🙂
Sorry to trouble you. I tried adding merge shapes to my tool bar so I could access fragment but it isn’t available in the ribbons option. Is this a feature available in PowerPoint 2010?
Hi Alex! Not a problem, this is an important tool and you’ll definitely enjoy having it on your QAT. By default, the Combine Shapes tool is not available in the PowerPoint 2010 Ribbon (don’t ask me why…). You can add it by following the steps below: – Click the File tab. – Select Options. – Switch to the Customize Ribbon page. – Click New Group to add a custom group to the Home tab. – Click Rename and name the group Shape Tools. – Choose Commands Not in the Ribbon in the top-left drop-down box. – Select Combine Shapes from the list and click Add to add it to the Shape Tools group. – Click Ok to close the options dialog. Once you have the tool on your Ribbon, you can right-click it and add it to your QAT. Hope that helps! Let me know if you have any trouble. Cheers, Camille
Comments are closed.
Popular Tutorials
- How to Strikethrough Text (l̶i̶k̶e̶ ̶t̶h̶i̶s̶) in Word, Excel & PowerPoint
- How to Make Animated Fireworks in PowerPoint (Step-by-Step)
- Strikethrough Shortcut (l̶i̶k̶e̶ ̶t̶h̶i̶s̶) for Word, Excel & PowerPoint
- How to Create a Flash Card Memory Game in PowerPoint (Like Jeopardy)
- Keyboard Shortcuts Not Working: Solved
PowerPoint Tutorial Categories
- Strategies & Opinions
- Shortcuts & Hacks
- Presentation Design
- New Features
- Miscellaneous
- Charts & Data Viz
We help busy professionals save hours and gain peace of mind, with corporate workshops, self-paced courses and tutorials for PowerPoint and Word.
Work With Us
- Corporate Training
- Presentation & Template Design
- Courses & Downloads
- PowerPoint Articles
- Word Articles
- Productivity Resources
Find a Tutorial
- Free Training
- For Businesses
We help busy office workers save hours and gain peace of mind, with tips, training and tutorials for Microsoft PowerPoint and Word.
Master Critical PowerPoint Shortcuts – Secure Your FREE Training Module and Save Valuable Time!
⌛ Master time-saving expert techniques.
🔥 Create powerful presentations.
🚀 Propel your career to new heights.
We value your privacy – we keep your info safe.
Discover PowerPoint Hacks Loved by Industry Giants - KKR, AmEx, HSBC!
Over 114,880 professionals in finance, marketing and sales have revolutionized their PPT skills with our proven methods.
Gain FREE access to a full module of our premium PowerPoint training program – Get started today!
We hate spam too and promise to keep your information safe.
You are currently viewing a placeholder content from Facebook . To access the actual content, click the button below. Please note that doing so will share data with third-party providers.

Google Slides: How to delete a text box
G oogle Slides is Google's version of Microsoft Office. It gives you tools to create effective presentations and collaborate with others in minutes. Google Slides works across a variety of devices, including contemporary Android tablets , and it's free. Sometimes, the creative process can go awry, and a redundant text box could ruin your thought process. This guide explains how to remove a text box in Google Slides.
Delete a Google Slides text box
Deleting a text box in Google Slides is straightforward. However, the process differs slightly depending on the device you use. Below are the steps for deleting a text box on the web and the Android app.
Delete a Google Slides text box on the web
On your web browser, go to Google.com and follow the steps below.
- Click Go to Slides .
- Go to the upper-left corner and choose Blank presentation .
- Choose a slide with a text box in it.
- Right-click the text box you want to delete.
- Choose Delete from the menu that appears. The slide is now gone.
- Left-click the Undo button at the top of the screen to revert your changes.
Alternatively, when you open Google Slides:
- Right-click the slide that you want to delete.
- Choose Edit from the menu in the upper-left corner.
- Select Delete from the menu that appears.
Delete a Google Slides text box using the mobile app for Android or iOS
We've used an Android for this part of the tutorial, but iPhone users should be able to follow along easily.
Google Slides is also available on the App Store and Google Play Store, so you can create or edit your presentation from your phone or tablet Deleting a text box in Google Slides in the mobile app is a bit different, though just as simple.
- Open the Google Slides app and open your presentation. Close
- Tap the slide and tap Edit slide . Close
- Tap the desired text box. A menu appears at the top.
- Tap Delete to remove the text box from your slide.
Alternatively:
- Tap and hold the text box. Close
- Tap the trash bin in the upper-right corner of the screen.
Regardless of the option you use, the text box disappears.
The best Google Slides templates for work, school, and home
Everyone loves a presentation with less text and more pictures.
Adding text to your Google Slides is a great way to make your presentation more informative. Adding too much can distract from its purpose. Removing a text box takes no more than a click. You can also improve your presentation with Google Slides templates and themes .


Use PowerPoint Mobile for Windows Phone
Want to review your Microsoft PowerPoint presentation before a big meeting? Or maybe fix a small typo you see? You can do it right on your phone using Microsoft PowerPoint Mobile. Just go to the Office Hub to get started.

To open a PowerPoint presentation

Do one of the following:
In Places , tap the place that the presentation is in, and then tap the presentation. It can be in any of these places—on your phone, in email, on OneDrive, on a Microsoft SharePoint 2010 or later site, or on a SharePoint Online site, which is available with Microsoft 365 .
Flick to Recent , and then tap a presentation you recently opened.

To open a presentation stored on OneDrive, a Microsoft account must be set up on your phone. For more info about saving and syncing documents on OneDrive, see Sync documents with OneDrive .
Looking for a presentation you already opened from email? Just flick to Places , tap Email , and then tap the presentation.
To learn about working with presentations that are on a SharePoint or SharePoint Online site, see Work with documents on SharePoint .
PowerPoint Mobile doesn't support all the features in Microsoft PowerPoint 2010 or later. If a presentation has content that's not supported, you can still open the presentation on your phone. The unsupported content won't be displayed or will be displayed differently, and you might not be able to edit the presentation.
Tip: Have a presentation you use a lot lately? Pin it to Start so you can get to it quickly. In the Office Hub, flick to Recent , tap and hold the presentation, and then tap Pin to start .
To navigate through slides in the presentation
Do one or more of the following in a PowerPoint presentation:
Flick left to go to the next slide (or slide animation), or flick right to go to the previous one.

To zoom in or out on a slide, you can either pinch your fingers together on the screen, or stretch them apart.
To edit text in a slide

To select the text you want to edit, tap the text.

To add a note to a slide
In a presentation, tap the slide you want to add a note to, and then tap anywhere in the notes area below the slide. (If you're in landscape mode, you'll need to flick up to see the notes area.)
To save a presentation

Type a new file name in the File name box, and then tap the Save to list > OneDrive or Phone > Save .
To send a presentation in email
Do one of the following to find the presentation you want to send:
For a presentation you already opened, flick to Recent .
Flick to Places and tap the place that the presentation is in.
Tap and hold the presentation, tap Share , and then tap the email account name.

Need more help?
Want more options.
Explore subscription benefits, browse training courses, learn how to secure your device, and more.

Microsoft 365 subscription benefits

Microsoft 365 training

Microsoft security

Accessibility center
Communities help you ask and answer questions, give feedback, and hear from experts with rich knowledge.

Ask the Microsoft Community

Microsoft Tech Community

Windows Insiders
Microsoft 365 Insiders
Was this information helpful?
Thank you for your feedback.
IMAGES
VIDEO
COMMENTS
💻 Download Templates Here: https://www.patreon.com/tylerstanczak🔥 PowerPoint Course (Discount): https://rebrand.ly/PowerPointCourse💌 Help me keep doing wh...
To choose a format, tap the Export button in the upper right-hand corner of the app. Select the format you want and then tap Export. Your presentation will then be saved to your device in the format you selected. Once youve saved your presentation, you can easily share it with anyone who has a Microsoft account.
PowerPoint for Android phones. You can walk into a meeting room with just a smartphone and present a slide show on a large screen. Video: Issa wirelessly sends (or "casts") the slide show from his phone to the Surface Hub screen. Click a section heading below to open it and see the details.
Hello every one, in this Tutorial w'll see how to create a presentation in Microsoft PowerPoint app. so in this video you will learn how to add and edit text...
A smartphone can be a laser pointer when you're showing a PowerPoint presentation in a meeting. Open your presentation in Presenter view on your mobile device to use it as a remote control. Advance through the slides with a touch, and emphasize interesting things with the laser pointer. Watch this video for a brief demonstration:
Short Answer. Making a PowerPoint on an iPhone can be done using the PowerPoint app. First, open the app and create a new presentation. Then, select a blank presentation or choose from one of the templates provided. After that, you can add images, add text, change the layout, and adjust the design settings.
1. Microsoft PowerPoint. The most popular program for creating slideshows, Microsoft PowerPoint, has an official app for iPhone. Like the desktop version, you can create a new PowerPoint and edit each slide. Add your pictures, text, and transitions to make it your own.
To put your cursor in an exact spot, double tap a text box, tap anywhere in the text, and then tap and drag this: to the exact spot. To start the slide show, tap Slide Show, and then tap From Beginning. Swipe from right to left to go forward. Swipe left to right to go backward. To end the show, swipe down in the middle of the slide.
Learn how to use Microsoft Powerpoint on your Smart Phone to create beautiful slides for your school, work and business presentations.Got any questions? Leav...
Here's a PowerPoint presentation with multiple slides: If you want to make quick changes to a particular slide, you can tap on it and a window will appear, giving you the option to edit, copy, add a comment or share. ... You can also use your phone to present your PowerPoint in DeX mode. Once you have the PowerPoint open in DeX, just tap the ...
Download and install the Microsoft Office Remote PC Setup on the computer you're using for the presentation and download the Office Remote app on your Android smartphone. Go through the setup on each and you're ready to present! • Responsiveness: We had no problems with lag during our experiments with the app and found the performance to ...
Microsoft PowerPoint is a presentation design software that is part of Microsoft 365. This software allows you to design presentations by combining text, images, graphics, video, and animation on slides in a simple and intuitive way. Over time, PowerPoint has evolved and improved its accessibility to users.
To do that, simply go up to the Home tab and click on New Slide. This inserts a new slide in your presentation right after the one you were on. You can alternatively hit Ctrl+M on your keyboard to insert a new blank slide in PowerPoint. To learn more about this shortcut, see my guide on using Ctrl+M in PowerPoint.
Start a slide show. Tap the From Current button, then swipe left to go forward, or swipe right to go in reverse. (It's just like turning pages in a book.) Tip: To start the show from the beginning, tap Show Ribbon > Home > Slide Show > From Beginning.
Whether we're sending a presentation through email (either before or after a meeting), holding an online meeting or giving a webinar, high chances that someone from the audience will view it on their mobile device. So here are some simple tips on how to create your own mobile-friendly presentation. 1. Larger Text Size.
Open the PowerPoint app, select a template and theme, then like "Create.". Click the text box to add your title and subtitle to create your title slide. Click the "Insert" tab, then "New Slide" to add another slide. Choose the type of slide you want to add, then add text and pictures. Rearrange slides by dragging them up or down in ...
If you want to create presentations on Android™ phone, watch this video and follow the steps to do so.-----...
Create a presentation. Open PowerPoint. In the left pane, select New. Select an option: To create a presentation from scratch, select Blank Presentation. To use a prepared design, select one of the templates. To see tips for using PowerPoint, select Take a Tour, and then select Create, . Add a slide.
So don't skip the next few steps. 4. Select your two objects. Pay special attention to the order below. If you mess this step up, this trick will not work. Holding the SHIFT key, first select your text box with the phone icons in it, then (and only then) select the background rectangle, so that both objects are selected.
Engaging PowerPoint Presentations for Students • Engaging Presentations • Learn how to create captivating PowerPoint presentations for students by focusing o...
Open the slide you want to put the picture on. On the floating ribbon, switch to Insert. Tap Video or Audio and follow the prompts. Tip: To record your own audio and add it to your slide use your favorite voice recorder app on your device to record an .mp3, .wav, or .mid/.midi and follow the steps above to insert it on your slide.
Like Microsoft PowerPoint, Google Slides lets users create text boxes in presentations. ... edit your presentation from your phone or tablet Deleting a text box in Google Slides in the mobile app ...
Samsung galaxy j7Ppt from your phoneAnd also how to saveInstagram: https://www.instagram.com/bhagatsingh266/?hl=enFacebook: https://www.facebook.com/Bhagat-S...
In the App list, tap Office . For a presentation you already opened, flick to Recent. Tap Search , and then search for the presentation. Tap and hold the presentation, tap Share, and then tap the email account name. Add the recipient and any other information to your email, and then tap Send . Learn how to use PowerPoint Mobile for Windows Phone.
Check out this and make better presentation: https://bit.ly/3IWaz29 PDFelement provides a fast, affordable, and easy way to edit, convert, and sign PDFs. It ...