- PRO Courses Guides New Tech Help Pro Expert Videos About wikiHow Pro Upgrade Sign In
- EDIT Edit this Article
- EXPLORE Tech Help Pro About Us Random Article Quizzes Request a New Article Community Dashboard This Or That Game Popular Categories Arts and Entertainment Artwork Books Movies Computers and Electronics Computers Phone Skills Technology Hacks Health Men's Health Mental Health Women's Health Relationships Dating Love Relationship Issues Hobbies and Crafts Crafts Drawing Games Education & Communication Communication Skills Personal Development Studying Personal Care and Style Fashion Hair Care Personal Hygiene Youth Personal Care School Stuff Dating All Categories Arts and Entertainment Finance and Business Home and Garden Relationship Quizzes Cars & Other Vehicles Food and Entertaining Personal Care and Style Sports and Fitness Computers and Electronics Health Pets and Animals Travel Education & Communication Hobbies and Crafts Philosophy and Religion Work World Family Life Holidays and Traditions Relationships Youth
- Browse Articles
- Learn Something New
- Quizzes Hot
- This Or That Game New
- Train Your Brain
- Explore More
- Support wikiHow
- About wikiHow
- Log in / Sign up
- Education and Communications
- Presentations

How to Do a Presentation in Class
Last Updated: March 13, 2024 Fact Checked
This article was co-authored by Patrick Muñoz . Patrick is an internationally recognized Voice & Speech Coach, focusing on public speaking, vocal power, accent and dialects, accent reduction, voiceover, acting and speech therapy. He has worked with clients such as Penelope Cruz, Eva Longoria, and Roselyn Sanchez. He was voted LA's Favorite Voice and Dialect Coach by BACKSTAGE, is the voice and speech coach for Disney and Turner Classic Movies, and is a member of Voice and Speech Trainers Association. This article has been fact-checked, ensuring the accuracy of any cited facts and confirming the authority of its sources. This article has been viewed 1,633,154 times.
Doing a presentation in class can be intimidating, but it does not have to be. This wikiHow will give you lots of pointers on how to do a presentation in class with minimal stress.
Planning the Presentation

- Write down keywords or main ideas. If you need to consult your index cards, you're only going to want to scan the index card for information, not read every last word.
- Most of the time, the act of putting information down on your index cards will help you remember the information. So, while you might not strictly need the note cards, it's a nice security blanket to have if you happen to forget what you were going to say.
- You don't want to be reading straight off your notecards during your presentation.

- Practice in front of your family or friends, or in front of the mirror, when you rehearse your presentation. It's probably better to do it in front of friends who you may not know well, as this will help you replicate the feeling of being in front of the class.
- Ask your friends for feedback after you finish your presentation. Was the presentation long enough? How was your eye contact? Did you stammer at all? Were all the points clearly made?
- Make a critique of your practice performance. Challenge yourself to work on all the things that you believe you can improve during the real presentation. When it comes time to deliver the real deal, you'll feel confident knowing that you've worked extra hard on what was toughest for you.

- Get quotes from reliable sources. Good quotes make a good presentation great. Taking what smart people have said and putting it into your presentation not only makes you look smart, it shows the teacher that you spent time thinking about what other people said.
- Make sure your sources are trustworthy. There's nothing that can quite break your confidence like a fact that turns out to not be a fact. Don't always trust the information you get off the Internet.
Delivering the Presentation

- Studies have shown that smiles are infectious; that means that once you smile, it's hard for everyone else not to smile. So if you want your presentation to go off without a hitch, force yourself to smile. That'll make everyone smile; and maybe those smiles will make you actually smile.

- Think about your intention before you talk to your audience. Do you want to educate, enlighten, or entertain this audience? What is the effect that you want to have on the listener?
- Visualize success before, during, and after your presentation. Be humble about what you do — no need for cockiness — but imagine a successful presentation at all times. Don't let the thought of failure creep into your mind.
- In many ways, your confidence is just as important as the information you're delivering. You don't want to spread misinformation, or skimp on doing your research, but a lot of what you'll be graded on — and what the other students come away with — is going to be your level of confidence. Also if you are confident, you will have a better time exchanging ideas with the class.
- If you need a confidence boost, think big picture. After 10 or 15 minutes, your presentation will be over. What will your presentation matter in the long run? Probably not very much. Try to do the best you can, but if you're getting nervous, remind yourself that there are much more important moments in your life to come.

- Have the goal of looking at every person in the classroom at least once. That way, everyone will feel like you've engaged with them. Plus, you'll look like you know what you're talking about.

- Inflection is the kind of movement that radio DJs put into their voice; it's the ramped-up pitch in your voice when it gets excited. You don't want to sound like you've just seen a lion, but you also don't want to sound like you've just seen a squirrel, either. Vary it up to make the presentation more interesting.

- Tell a story, maybe one with a personal note. Stories are great for history or English presentations. Maybe you can tie your presentation into a little anecdote about a famous historical person?
- Ask a provocative question. Ending with a question is a good way of getting your audience to think about your presentation in an interesting way. Is there a certain conclusion you want them to come to?

What Is The Best Way To Start a Presentation?
Community Q&A
- Have good posture. Don't cross or fold your arms, keep them open. Don't slouch and keep your back straight. [8] X Research source Thanks Helpful 0 Not Helpful 0
- Don't forget to look at everyone, not just the floor. Don't stare at anyone in particular but 'skim' the class. Thanks Helpful 1 Not Helpful 0
- Try not to argue with your audience. This detracts from your presentation. Just tell them they have an interesting point and that you'll check and get back to them. Thanks Helpful 1 Not Helpful 1

- Some people may be so tied up before a presentation that they feel faint and may pass out during their speech. If this describes you, make sure you prepare especially hard and keep your blood sugar up before you present. Thanks Helpful 14 Not Helpful 1
- Don't keep your mobile phone in your pocket or it will interfere with the microphone (if any). Thanks Helpful 13 Not Helpful 6
You Might Also Like

- ↑ https://www.gvsu.edu/ours/oral-presentation-tips-30.htm
- ↑ https://www.uwe.ac.uk/study/study-support/study-skills/presenting-and-working-with-others
- ↑ https://www.bbc.co.uk/bitesize/topics/zcfv4wx/articles/zdn3d6f
- ↑ https://homes.cs.washington.edu/~mernst/advice/giving-talk.html
About This Article

The best way to prepare for your class presentation is to practice in front of a friend or family member. When it’s time to present, make eye contact with your audience and use hand motions to illustrate your points. Don’t forget to smile! Finish strong with a final statistic or provocative question. If you’re still nervous, read on for more advice! Did this summary help you? Yes No
- Send fan mail to authors
Reader Success Stories
Did this article help you?
Jun 19, 2016
Aug 8, 2016
Mar 30, 2016

Featured Articles

Trending Articles

Watch Articles

- Terms of Use
- Privacy Policy
- Do Not Sell or Share My Info
- Not Selling Info
wikiHow Tech Help Pro:
Develop the tech skills you need for work and life
- About Katie
- Application Essays
- The Journal
- Join Thousands on My List

31 of the best class presentation tips for students
Katie September 20, 2022 communication , grades

By Katie Azevedo, M.Ed.
Giving class presentations is just part of the school experience. Some students dread presenting to their classmates, and others prefer class presentations to written assessments. If you’re new to this, or if you’re just looking for some ideas, I share my best class presentation tips for students in the post below.
Class presentations often involve a visual component, and an audio and delivery component. The tips in this post are for class presentations that involve SLIDES, such as Google Slides or PowerPoint. Therefore, I break down the class presentation tips for students into the following categories:
- text and content
- Audio and delivery class presentation tips
- Bonus class presentation tips to up-level your game
Class presentation tips for VISUALS
The following tips will enhance the visual component of your school presentation. The strategies are further categorized by format, text, and images.
Class presentation tips for slide FORMAT
The visual format of your presentation must be clear and easy to read.
1. Use a slide deck.
This class presentation tip is obvious, but I can’t leave it off the list. If you’re presenting to your fellow students, you will need some kind of visual representation of the information you’re delivering. Very rarely will you present to your class without slides. Google Slides and PowerPoint are the two primary products to make slides.
2. Use the right number of slides.
Class presentations in high school and college will likely be 5 minutes or less. Follow your teacher’s guidelines, of course, but generally, students will use 1-2 slides per minute. (That would be 5-10 slides for a 5-minute presentation.)
3. Use an appropriate slide template and theme.
PowerPoint and Google Slides come with default slide templates (themes). Most of the default templates are suitable for class presentations, and so you should be fine choosing one of those. You can also find templates on the free version of Canva. I like slidesgo.com for free templates (it’s not sketchy – I’ve personally used it. I also like SlidesCarnival.com but you have to import the templates into Canva first, and then export them from Canva into Google Slides or PowerPoint.
4. Use clear fonts.
Pick your font based on clarity, not creativity. Your audience should be able to read your text effortlessly and from the back of the classroom. Here are some rules:
- Avoid cursive / script fonts
- Avoid writing in all capital letters
- Avoid fonts that are entirely in italics (slanted)
5. Use a maximum of two fonts.
Stick to two fonts: one for headings and titles, and one for body text. More than two fonts make your slides hard to read.
6. Use 3-4 colors.
Stick to a basic color palette of no more than four colors. It’s fine to use images that are outside your color scheme, but besides images, avoid too many colors. Most default templates stick to four colors or less, so you’re safe if you use a pre-made template.
7. Use high-contrast text-on-background combinations.
Your text needs to stand out from the background color. Black font on a white background or white font on a black background provides the highest contrast and best readability. This website here provides excellent information and examples about color combinations.
Class presentation tips for slide TEXT and CONTENT
8. start with a simple title slide..
Your teacher will likely require a title slide in the syllabus. Even if it’s not required, make one anyway. A title slide should be simple: the name of the presentation, your name, and a simple graphic or image.
9. Include a roadmap slide.
A roadmap slide (I made up that term, but it works) is like a table of contents. It tells your classmates what they will learn from your presentation. Even if your presentation is only 6 slides long, a roadmap slide can be helpful. Below is an example.

10. Include enough white space.
White space is the blank space that doesn’t contain text or images. White space is very important for readability. In the image below, you can see the impact white space has on readability.

11. Use bullet points.
Whenever possible, use bullet points instead of complete sentences. Most slides should include no more than 5-6 bullet points. If you need to say more, continue the bullet points on another slide.
12. Leave some text off the slides.
Your slides should include minimal to moderate text that you will elaborate on during your class presentation. In other words, don’t cram the slides full of everything you want to share on the topic. The only exception to this rule is if you are not verbally presenting to the class, but are instead just sharing the slides with your classmates to view on their own.
13. Include examples.
Examples make most things clearer. When possible, include an example for all your main points.
14. Include statistics and other quantitative information.
Use numbers in place of text when you can. Numbers and statistics can be easier for your audience to process. Example below:
- Instead of saying this: There is one-third as many Giant Pandas living in 2020 as there were in 2014.
- Say this: Giant Panda population in 2140 = 1864 | Giant Panda population in 2020 = 600 [ source ]
15. Include a summary slide
Consider adding a final summary slide to your class presentation. This is an excellent strategy because it will increase your audience’s understanding of your main points. The text on this slide should be in bullet-point format. The information on this slide might align with the information on your roadmap slide.

Class presentation tips for slide IMAGES
16. include an image or graphical element on each slide..
Every slide should have some kind of graphical element to complement the text. Some slides might even have an image and no text. (You would explain the image in your verbal presentation to the class.) Note: be sure to cite all images.
17. Use images / graphics for illustration and emphasis, not decoration .
Avoid using images for decoration. Images and graphics should do one of the following:
- Add something valuable to the text
- Illustrate the idea on the slide
- Represent the idea on the slide
- Emphasize an element of the slide (such as underlines, stars, etc.)
18. Resize and reformat images.
Resize images and graphics to fit the scale of your slide. It should be big enough to see clearly, but still allow for plenty of white space (Class Presentation Tip #10). You can remove the background of an image using a mobile app, or something like the paid version of Canva or PicMonkey. Again, be sure to cite your images.
19. Use video when appropriate.
If your presentation calls for it, include short video clips. Only use video if it adds value.
20. Use icons for emphasis.
Use icons like stars, 3D shapes, speech bubbles, and arrows to emphasize important text. Keep these icons within your color scheme. You can find free icons within Google Slides and PowerPoint, or you can use Google Images or Canva.
21. Use graphs and charts.
Too much text is confusing. Too many images is boring. Solve this problem by using pie charts, bar graphs and other graphical ways of representing data.
Class presentation tips for SPEAKING
You might have the best slides in the class, but your presentation is not complete until you deliver it to your classmates. The following tips are for improving your audio and delivery.
22. Never read directly from the slides.
Use the slides as a reference, but don’t read word-for-word. How do you do this? First change to the next slide. Then look at it for cues. Next, speak directly to your classmates, making eye contact as your speak. It’s okay to glance back at the slide if you need to.
23. Face your audience.
Your body should always face the audience. Stand or sit either straight on, or at a 45-degree angle. Never have your body square to the presentation screen.
24. Explain the images.
When you present each slide, you should spend some time on the text and some time on the images. If your images add value (which they should), then this should be simple to do.
25. Speak slowly and clearly.
Speak slower than you naturally speak. Practice difficult words until they are smooth.
26. Use verbal transitions between topics.
When you change topics, use transition expressions such as “Next, we are going to look at …” or “Now, let’s move on to …”
27. Practice more than you want to.
Practicing your class presentation over and over improves your delivery and increases your confidence. Practice in front of the mirror, in front of others, or in front of your camera (to be watched later, of course).
Bonus class presentation tips for students: How to up-level your game
The following bonus tips are for students looking to take their class presentations to the next level. Keep in mind that some of the ideas below are best suited for college and university students.
28. Provide a printed note-catcher.
An engaged audience is the best audience. To increase your classmates’ active focus, provide each student a printed note-catcher they can use to follow along with your presentation. PowerPoint and Google Slides both have features that enable you to print out your presentation with the slides on the left and space to take notes on the right.
29. Ask questions and survey your classmates.
Another way to engage your audience is by asking them questions. You can build these questions into the slides themselves, or you can pause your presentation to ask questions before moving to a slide with the answers.
30. Use the Speaker Notes section .
The text on your slides should vary from the words you speak to your classmates during your presentation. Either you practice your presentation so much that you memorize it, or you use the Speaker Notes section on PowerPoint or Google Slides.
31. Open with a question, and close with an answer .
A great class presentation tip for students is to open with a question you pose to your classmates at the beginning, and then close with the answer. You could put the question on its own opening slide and then close with another slide that re-poses the question and features the answer.
For example, if you are presenting on Susan B. Anthony, your question could be Who was Susan B. Anthony? and the answer – which is the point of your presentation – could be Susan B. Anthony was one of America’s greatest champions for freedom and equality of women and slaves. College-level presentations would have more complex question-and-answer pairings than this example, but you get the idea.
Class presentation tips for students – summary notes
It’s important to follow your teacher’s requirements when creating your class presentation. Use these tips and strategies to maximize your grade, impression on the class, and your content delivery – but always consult your syllabus first.
And finally, the greatest tip of all is to PRACTICE. In Tip #27 I emphasize the importance of practicing more than you want to. Watch TED talks and other notable speakers to see how smooth they speak – these presenters have practiced the same presentation hundreds of times. Practice is the key.
More resources
- How to ask for help in school: 4 tips for self-advocacy
- What to do when you’re confused in class
- 5 life skills all students need to be functional adults
Subscribe to ReportCard Newsletter!
Get your FREE download of 25 School Habits and Hacks when you sign up for our monthly newsletter featuring awesome school tricks and tips
I will never give away, trade or sell your email address. You can unsubscribe at any time.
BibGuru Blog
Be more productive in school
- Citation Styles
How to do a class presentation (11 steps)

The best class presentations combine strong content and visuals with an engaging presentation style. This post offers 11 steps for creating memorable and high-performing class presentations.
1. Review assignment guidelines
Before you can strategize about how to start a class presentation, you need to be certain that you understand the assignment details. Consult materials that your instructor provided, like rubrics, to determine what your presentation needs to cover and what form it should take.
For instance, are you presenting individually or as part of a group? How long should the presentation be? Are you required to have visuals? Knowing these details will help you to plan a successful class presentation.
2. Make a presentation plan
Once you've reviewed the specific assignment details, it's time to make a presentation plan. You can start by making an outline of your talking points. Outlines for class presentations will look similar to those for papers, with sections and subsections that work through your main ideas. You'll want to be precise about what points are essential to communicate to your audience. Also, take some time to decide on a completion timeline to ensure that you're ready on presentation day. Remember to build in time for practice!
3. Choose your visuals
At this point, you'll also want to determine what kind of visual aid(s) you want to use: a handout or a digital presentation, or both? Keep in mind the assignment requirements, but also the audience and the presentation format. For example, are you presenting to a large audience? If so, a handout might not be efficient. Are you presenting in-person or online? If you're preparing an online presentation, a PowerPoint or Google slides presentation will help your audience follow along.
4. Fill out your outline and keep it simple
Now that you've developed a plan for completing your class presentation, you can begin to build out the actual content. If you've created a basic outline, fill it in with some substance. Remember to keep it simple. At around 10-15 minutes, the average in-class presentation can only effectively communicate around three main points. Avoid long quotes or monologues. Your audience may find it difficult to follow longer textual components.
5. Design your visuals with minimal text
Along similar lines, don't simply plop your outline or textual notes into your visuals. Visual aids should be just that: aids that allow your audience to better visualize the main points of your presentation. Large blocks of text on a PowerPoint can be hard to see, so work on creating a digital aid that is mostly comprised on images. When text is appropriate, use bullet points and active words that your audience can remember.
6. Allow time for revisions
Once you've compiled your notes and created your visuals, take some time away from the project. You'll return to your work with fresh eyes. Then, allow time for revision: be sure to proofread your notes, slides, and/or handouts and make sure your visuals are clear. Check to see if any images that you're using appear pixelated on a larger screen and make sure your text is readable from a distance.
7. Check your citations
Many in class presentations will require citations, especially if they are accompanying a paper or another class research project. You can use BibGuru's citation generator to create your citations and copy them to your slides or handout. Consult your assignment guidelines, or ask your instructor, to find out what citation style is required.
8. Practice...and practice again
Give yourself time to practice your presentation in front of an audience before the big day. Familiarize them with the assignment guidelines, as needed, and ask them to time you. You'll need to know if your presentation meets the time requirements. After the first run though, consider these questions:
- Is your presentation too long or too short?
- Are you hitting the main points in a logical sequence that your audience can follow?
- Are your visuals clear?
- Is your delivery fluid or are you pausing too often to look at your notes?
- Are you making eye contact with your audience?
Use your answers to these questions to determine what, if at all, you need to change and then schedule another practice. You should practice your presentation as many times as you need to in order to achieve a fluid delivery.
9. Prepare for technical difficulties
Since most class presentations will include a digital element, be prepared to troubleshoot if there are technical difficulties on presentation day. Always have a back-up plan and be sure to save your visuals in multiple places. Keep a copy of your notes and slides in your email, on a thumb drive, and/or on the cloud. Practice enough so that, in the event that you can't get your visual aid to work, you can still deliver your presentation.
10. Take the stage with confidence
If you've followed your plan, practiced thoroughly, and prepared for possible technical difficulties, you should be ready to take the stage with confidence. Nervousness is absolutely natural, but try your best to relax and breathe. A few shoulder rolls and deep breaths right before the presentation can go a long way to making you feel more focused and centered.
11. Connect with your audience
From the first moment of your presentation, you'll want to establish a strong connection with your audience. Smile, make eye contact, and modulate your voice appropriately. Remember, people exhibit all kinds of facial expressions when they are listening or concentrating, so try not to pay too much attention to individual faces.
Also, although your instructor will be the one grading you, don't simply present to them. Include the entire class in your gaze. Finally, be careful about pace. If you have a tendency to speed up your speech when you're nervous, make a conscious effort to slow down.
The bottom line
Following the tips above will enable you to confidently deliver a class presentation to your instructor and classmates, or to any audience. With solid preparation and ample practice, your next class presentation will be a memorable success.
Frequently Asked Questions about class presentations
The most successful presentations begin with a hook. This could be a short, yet compelling story, an eye-catching visual with brief analysis, or an inspiring quote or statistic. No matter how you begin, ensure that you can fluidly transition to the main substance of your presentation in a way that your audience can easily follow.
Regardless of the subject of your presentation, you can make it interesting for your audience by engaging them through consistent eye contact, a relaxed and confident delivery style, and interactivity. For instance, to keep your audience engaged, you might try including questions or brief activities in your presentation.
Wrap up your presentation by summarizing your key points. You can also end with a provocative question or thought. You should also thank your audience for listening.
Good presentations are well-organized, time-sensitive, clear, and delivered with confidence.
The most common presentation mistakes include: not engaging your audience, using visuals that are overloaded with text, and not practicing enough.

Make your life easier with our productivity and writing resources.
For students and teachers.
Want to create or adapt books like this? Learn more about how Pressbooks supports open publishing practices.
7.4 Public Speaking and Class Presentations
Learning objectives.
- Know how to overcome nervousness and anxiety associated with public speaking and giving class presentations.
- Effectively use the six-step process to prepare for and deliver a class presentation.
- Create effective visual aids for use in class presentations.
- Work with a group to successfully plan and deliver a class presentation.
Public speaking—giving an oral presentation before a class or another group of people—is a special form of interaction common in education. You will likely be asked to give a presentation in one of your classes at some point, and your future career may also involve public speaking. It’s important to develop skills for this form of communication.
Public speaking is like participating in class—sharing your thoughts, ideas, and questions with others in the group. In other ways, however, public speaking is very different. You stand in front of the class to speak, rather than from your usual seat—and for most students, that changes the psychology of the situation. You also have time outside of class to prepare your presentation, allowing you to plan it carefully—and, for many, giving more time to worry about it and experience even more anxiety!
Overcoming Anxiety
Although a few people seem to be natural public speakers, most of us feel some stage fright or anxiety about having to speak to a group, at least at first. This is completely normal. We feel like everyone is staring at us and seeing our every flaw, and we’re sure we’ll forget what we want to say or mess up. Take comfort from knowing that almost everyone else is dreading giving class presentations the same as you are! But you can learn to overcome your anxiety and prepare in a way that not only safely gets you through the experience but also leads to success in your presentation. The following are proven strategies for overcoming anxiety when speaking in public:
- Understand anxiety. Since stage fright is normal, don’t try to deny that you’re feeling anxious. A little anxiety can help motivate you to prepare and do your best. Accept this aspect of the process and work to overcome it. Anxiety is usually worst just before you begin and but eases up once you’ve begun.
- Understand that your audience actually wants you to succeed. They’re not looking for faults or hoping you’ll fail. Other students and your instructors are on your side, not your enemy. They likely won’t even see your anxiety.
- Reduce anxiety by preparing and practicing. The next section discusses the preparation process in more detail. The more fully you prepare and the more often you have practice, the more your anxiety will go away.
- Focus on what you’re saying, not how you’re saying it. Keep in mind that you have ideas to share, and this is what your classmates and instructors are interested in. Don’t obsess about speaking, but focus on the content of your presentation. Think, for example, of how easily you share your ideas with a friend or family member, as you naturally speak your mind. The same can work with public speaking if you focus on the ideas themselves.
- Develop self-confidence. As you prepare, you will make notes you can refer to during the presentation. You’re not going to forget what you want to say. The more you practice, the more confident you’ll become.
Guidelines for Presentations
Preparing and delivering a presentation in class (or in business or other settings) is a process very similar to the learning process discussed in Chapter 4 “Listening, Taking Notes, and Remembering” , Chapter 5 “Reading to Learn” , and Chapter 6 “Preparing for and Taking Tests” and the writing process discussed in Chapter 8 “Writing for Classes” . The process breaks down into these six basic steps:
- Analyze your audience and goals
- Plan, research, and organize your content
- Draft and revise the presentation
- Prepare speaking notes
- Practice the presentation
- Deliver the presentation
Step 1: Analyze Your Audience and Goals
Who will see and hear your presentation—and why? Obviously, other students and the instructor. But you still need to think about what they already know, and don’t know, about your topic. If your topic relates to subject matter in class lectures and readings, consider what background information they already have and be careful not to give a boring recap of things they already know. It may be important, however, to show how your specific topic fits in with subjects that have been discussed already in class, especially in the beginning of your presentation, but be sure to focus on your new topic.
New terms and concepts may become familiar to you while doing your research and preparation, but remember to define and explain them to other students. Consider how much explanation or examples will be needed for your audience to grasp your points. If your topic involves anything controversial or may provoke emotion, consider your audience’s attitudes and choose your words carefully. Thinking about your audience will help you find ways to get their attention and keep them interested.
Be sure you are clear about the goals for the presentation. Are you primarily presenting new information or arguing for a position? Are you giving an overview or a detailed report? Review the assignment and talk with the instructor if you’re unsure. Your goals guide everything in the presentation: what you say, how much you say, what order you say it in, what visual aids you use, whether you use humor or personal examples, and so forth.
Step 2: Plan, Research, and Organize Your Content
Starting with the assignment and your goals, brainstorm your topic. Jot notes on specific topics that seem important. Often you’ll do reading or research to gather more information. Take notes as you would with any reading. As you research the topic at this stage, don’t worry at first about how much content you are gathering. It’s better to know too much and then pick out the most important things to say than to rush ahead to drafting the presentation and then realize you don’t have enough material.
Organizing a presentation is similar to organizing topics in a class paper and uses the same principles. Introduce your topic and state your main idea (thesis), go into more detail about specific ideas, and conclude your presentation. Look for a logical order for the specifics in the middle. Some topics work best in chronological (time) order or with a compare-and-contrast organization. If your goal is to persuade the audience, build up to the strongest reason. Put similar ideas together and add transitions between different ideas.
While researching your topic and outlining your main points, think about visual aids that may help the presentation.
Also start thinking about how much time you have for the presentation, but don’t limit yourself yet in the outline stage.
Step 3: Draft and Revise the Presentation
Unless required by the assignment, you don’t need to actually write out the presentation in full sentences and paragraphs. How much you write depends on your own learning and speaking style. Some students speak well from brief phrases written in an outline, while other students find it easier to write sentences out completely. There’s nothing wrong with writing the presentation out fully like a script if that helps you be sure you will say what you intend to—just so you don’t actually get up and read from the script.
You can’t know for sure how long a presentation will last until you rehearse it later, but you can estimate the time while drafting it. On the average, it takes two to three minutes to speak what can be written on a standard double-spaced page—but with visual aids, pauses, and audience interaction, it may take longer. While this is only a rough guide, you can start out thinking of a ten-minute presentation as the equivalent of a three to four-page paper.
Never wait until the last minute to draft your presentation. Arrange your time to prepare the first draft and then come back to it a day or two later to ask these questions:
- Am I going on too long about minor points? Could the audience get bored?
- Do I have good explanations and reasons for my main points? Do I need more data or better examples? Where would visual aids be most effective?
- Am I using the best words for this topic and this audience? Should I be more or less informal in the way I talk?
- Does it all hold together and flow well from one point to the next? Do I need a better introduction or transition when I shift from one idea to another?
Visual Aids in Presentations
Except for very short informal presentations, most presentations gain from visuals—and visual aids are often expected. If encouraged or allowed to include visuals in your presentation, plan to do so. Consider all possible types:
- Charts or graphs
- Photos or other images
- Video clips
- Handouts (only when necessary—they can be distracting)
Use the available technology, whether it’s an overhead projector, PowerPoint slides, a flip chart, or posters. (Talk to your instructor about resources and software for designing your visuals.) Follow these guidelines:
Design your visuals carefully. Here are some basic rules:
- Use a simple, neutral background. A light-colored background with text in a dark color works best for words; a dark background used like matting works best for photos.
- Minimize the amount of text in visuals—more than eight words per slide is usually too much. Avoid simply presenting word outlines of what you are saying. Make sure text is large enough for the audience to read.
- Don’t use more than two pictures in a slide, and use two only to make a direct comparison. Montages are hard to focus on and distract the viewer from what you’re saying. Use images only when they support your presentation; don’t use clip art just as decoration.
- Don’t put a table of numbers in a visual aid. If you need to illustrate numerical data, use a graph. (Microsoft Excel can make them for you easily.)
- Don’t use sound effects. Use a very brief recording only if directly related to your main points.
- Don’t use visual special effects such as dissolves, spins, box-outs, or other transitions. They are distracting. Use animation sparingly and only if it helps make a point.
- Don’t use so many visuals or move through them so quickly that the audience gives all its attention to them rather than to you.
- Practice your presentation using your visual aids, because they affect your timing.
- Explain visuals when needed but not when they’re obvious.
- Keep your eyes on your audience, only briefly glancing at visuals to stay in synch with them.
- Don’t hand out a printout of your visuals. Your audience should keep their eyes on you instead of fiddling around with paper.
Step 4: Prepare Speaking Notes
As mentioned earlier, it’s not a good idea to read your presentation from a written page rather than deliver it. To keep your audience’s attention, it’s important to make eye contact with them and to use a normal speaking voice—and you can’t do this if you keep your eyes on a written script.
Speaking notes are a brief outline for your presentation. You might write them on index cards or sheets of paper. Include important facts and data as well as keywords for your main ideas, but don’t write too much. (If you forget things later when you start practicing, you can always add more to your outline then.) Be sure to number your cards or pages to prevent a last-minute mix-up.
Think especially about how to open and close your presentation, because these two moments have the most impact of the whole presentation. Use the opening to capture the audience’s attention, but be sure it is appropriate for your audience and the goals. Here are some possibilities for your opening:
- A striking fact or example (illustrating an issue or a problem)
- A brief interesting or humorous anecdote (historical, personal, or current event)
- A question to the audience
- An interesting quotation
Then relate the opening to your topic and your main point and move into the body of the presentation.
Your closing mirrors the opening. Transition from your last point to a brief summary that pulls your ideas together. You might end with a challenge to the audience, a strong statement about your topic, or a personal reflection on what you have been saying. Just make sure you have a final sentence planned so that you don’t end up uncomfortably fumbling around at the end (“Well, I guess that ends my presentation”).
Step 5: Practice the Presentation
Practice may be the most important step. It is also the best way to get over stage fright and gain confidence.
Practice first in an empty room where you imagine people sitting, so that you can move your eyes around the room to this “audience.” The first time through, focus on putting your outlined notes into full sentences in your natural speaking voice. Don’t read your notes aloud. Glance down at your notes only briefly and then look up immediately around the room. Practice two or three times just to find the right words to explain your points and feel more comfortable working with your notes. Time yourself, but don’t obsess over your presentation being the exact length required. If your presentation is much too long, however, adjust it now in your notes so that you don’t start memorizing things that you might accidentally still say later on even though you cut them from your notes.
Once you feel good speaking from your notes, practice to add some more polish to your delivery. You might want to record or videotape your presentation or ask a friend or roommate to watch your presentation. Pay attention to these aspects of how you speak:
- Try to speak in your natural voice, not in a monotone as if you were just reading aloud. If you will be presenting in a large room without a microphone, you will need to speak louder than usual, but still try to use a natural voice.
- In usual conversation, we speed up and slow down and vary the intensity of our words to show how we feel about what we’re saying. Practice changes in your delivery style to emphasize key points.
- Don’t keep looking at your notes. It’s fine if you use words that are different from those you wrote down—the more you rehearse without looking at your notes, the more natural sounding you will be.
- Be sure you can pronounce all new words and technical terms correctly. Practice saying them slowly and clearly to yourself until you can say them naturally.
- Don’t forget transitions. Listeners need a cue when you’re moving to a new idea. Practice phrases such as “ Another important reason for this is…” or “Now let’s move on to why this is so.…”
- Watch out for all those little “filler” words people use so often, such as “like,” “you know,” “well,” and “uh.” They’re very distracting to most audiences. Listen to or watch your tape to see if you are using these fillers or ask your friend to point it out.
- Pay attention to body language when practicing. Stand up straight and tall in every practice session so that you become used to it. Unless you have to stand at a podium to use a fixed microphone in your presentation, practice moving around while you speak; this helps keep the audience watching you. Use hand and arm gestures if they are natural for you, but don’t try to make up gestures for the presentation because they will look phony. Most important, keep your eyes moving over the audience. Practice smiling and pausing at key points.
- Finally, it’s a good idea to be ready in case of an accident. Most likely your presentation will go smoothly, you’ll stay on track with your notes, and your PowerPoint slides will work fine, but sometimes a mishap happens. Be ready to joke about it, rather than becoming flustered. If the computer fails and you lose your visuals, say something like, “Well, that’s a shame, I had some really great photos to show you!” If you drop your index cards or notes, or accidentally skip ahead in your presentation and then have to backtrack, make a joke: “Sorry about that, I was so excited to get to my next point that I’m afraid I lost control there for a moment!” Let your audience laugh with you—they’ll still be on your side, and you can defuse the incident and move on without becoming more nervous.
Step 6: Deliver the Presentation
Be sure to get enough sleep and eat a healthy breakfast. Don’t drink too much caffeine or else you’ll become hyper and nervous. Wear your favorite—and appropriate—clothing and comfortable shoes.

You may use computerized visual aids when you give a presentation to a class.
John Haynes Photography – OLPC – CC BY-ND 2.0.
Remember, your audience is on your side! If you’re still nervous before your turn, take a few deep breaths. Rehearse your opening lines in your mind. Smile as you move to the front of the room, looking at your audience. You’ll see some friendly faces smiling back encouragingly. As you start the presentation, move your eyes among those giving you a warm reception—and if you see some student looking bored or doing something else, just ignore them. But don’t focus on any one person in the audience for too long, which could make them nervous or cause them to look away.
Don’t keep looking at your watch or a clock: If your rehearsal times were close to your assigned time, your presentation will be also. If you do notice that you’re running behind schedule, it may be that you’re saying too much out of nervousness. Use your notes to get back on track and keep the pace moving. But it’s better to deliver your presentation naturally and fluidly and be a bit long or short than to try to change your words and end up sounding unnatural.
At the closing, deliver your last line with confidence, sweeping your eyes over the audience. If appropriate, ask if there are any questions. When you’re done, pause, smile, say “Thank you,” and walk back to your seat.
Later on, ask other students and your instructor for comments. Be open minded—don’t just ask for praise. If you hear a suggestion for improvement, file that in your memory for next time.
Group Presentations
You may be assigned to give a presentation in a small group. The six-step process discussed previously works for group presentations, too, although group dynamics often call for additional planning and shared responsibilities:
- Schedule a group meeting as soon as possible to get started. Don’t let another student put things off. Explain that you’re too busy and won’t have time at the last minute.
- Begin by analyzing your audience and your goals together as a group to make sure everyone understands the assignment the same. Discuss who should do what. While everyone should talk about what content to include, from here onward, you will take on specialized roles. One or more may begin research and gathering information. Others who are good writers may volunteer to draft the presentation, while one or more others may develop the visual aids. Those who have public speaking experience may volunteer to do all or most of the speaking (unless the assignment requires everyone to have a speaking role). You also need a team leader to keep everyone on schedule, organize meetings, and so on. The best team leader is an even-tempered student with good social skills, who can motivate everyone to cooperate.
- Steps 2 and 3 can likely be carried out individually with assigned tasks, but group members should stay in touch. For example, the person developing the visuals should be talking to those doing the researching and drafting to see what visuals are needed and get started finding or creating them.
- Before preparing notes in step 4, meet again to go over the content and plan for visuals. Everyone should be comfortable with the plan so far. Make final decisions about who will do each section of the presentation. Set the time for each segment. Then speakers should prepare their own speaking notes. Let someone with strong speaking skills open or close the presentation (or both), with others doing the other parts.
- The whole group should be present for practice sessions in step 5, even if not everyone is speaking. Those not speaking should take notes and give feedback. If one student is doing most of the presenting, an alternate should be chosen in case the first choice is sick on the scheduled day. The alternate also needs to practice.
- During the delivery, especially if using technology for visual aids, one student should manage the visuals while others do the presenting. If several students present different segments, plan the transition from one to another so that the presentation keeps flowing without pauses.
Additional Resources
For Class Presentations
Using PowerPoint. A step-by-step illustrated tutorial for learning how to create effective visual presentations with PowerPoint. https://www.baruch.cuny.edu/tutorials/powerpoint/
“How to Give a Bad Talk.” A humorous look (with some very good advice) on what not to do when preparing for and giving a class presentation. http://www.cs.berkeley.edu/~pattrsn/talks/BadTalk.pdf
Class presentations on YouTube. Search YouTube with the phrase “class presentation” and look for video examples of actual students giving class presentations. Observing and critiquing the presentations of other students are good ways to get started preparing your own and learning from others. Here’s a good example of a student group presentation on a topic we can all relate to (how body language works):
In this presentation, take note of
- how students make good eye contact with the audience;
- the first student’s natural speaking voice and tone, and how she did not have to use her note cards very often (obviously she practiced well);
- some differences among these students;
- the use of PowerPoint slides within the presentation (some better than others);
- the appropriate occasional use of humor;
- the division of presentation responsibilities within the student group;
- each presenter’s interaction with the audience.
Key Takeaways
- Public speaking skills are important because you will likely give presentations in class and perhaps in a future job.
- Overcome anxiety about public speaking by understanding your feelings, preparing well and practicing your delivery, and focusing on your subject.
Follow a six-step process to prepare and deliver a presentation:
- Deliver the presentation and seek feedback
- Use visual aids to support a presentation, creating visuals that are relevant, attractive, and powerful.
- The success of a group presentation depends on effective group meetings, successful division of roles, and repeated group practices.
Checkpoint Exercises
If you have given a class presentation in the past, what worked best for you? (If you have not given a presentation yet as a student, what aspect do you think will be most difficult for you?)
__________________________________________________________________
Name the two most important things you can do to reduce anxiety about a class presentation you will have to give.
For each of the following statements about class presentations, circle T for true or F for false:
Describe how best to use body language (facial expressions, eye movements, gestures, etc.) when giving a presentation.
If you were assigned along with three other students to give a group presentation in the class using this textbook, what would be your preferred role in the preparation stages? Your least preferred role? If you had to take your least preferred role, what single thing would you want to work hardest on to make the presentation successful?
College Success Copyright © 2015 by University of Minnesota is licensed under a Creative Commons Attribution-NonCommercial-ShareAlike 4.0 International License , except where otherwise noted.
How to Present a Presentation in Class? An Ultimate Guide
Link Copied
Share on Facebook
Share on Twitter
Share on LinkedIn

Got all eyes on me!
Ever faced the dreaded presentation day in college? Panic not! Mastering the art of presenting is like adding extra cheese to your academic pizza. In this guide, we'll sprinkle some wisdom on how to give a presentation in class without turning into a nervous noodle. Let's make your classmates go, "Wow!"
How to Give a Presentation in College
Ready to conquer the stage without tripping over your own words? Nail that presentation in college with a sprinkle of wit and a dash of confidence. Mastering how to give a presentation in college is about as tricky as herding caffeinated cats. But we have got you fully covered! Say goodbye to sweaty palms and hello to applause.
1. Pre-Presentation
Pre-presentation journey is like setting sail before the main event - it's where we plot our course, dodge the iceberg of nerves, and make sure our ship of wisdom is ready to set sail. Here are a few steps to understand the things required for how to present a presentation in class.
1. Prepare Well
Presenting in college isn't just about sharing information; it's an opportunity to connect with classmates. Successful presentations hinge on understanding your audience, aligning content with their interests, and setting clear goals. Thorough preparation and rehearsal boost confidence, making the experience enjoyable and potentially earning better grades. Remember, mastering how to do a presentation in class starts with solid preparation and good research.
A quick search on Google might help you find the answers to most of the questions that cross your mind, but what about the ones that haven’t been answered yet? Research helps with just that! Want to know how to do that correctly and fast? Here is a step-by-step guide for you to conduct research easily .
2. Visualize Yourself Giving the Speech
Imagine that you are confidently standing before your college peers, delivering a presentation that captivates and inspires. Visualizing yourself giving the speech is crucial when mastering how to present in class. It transforms nerves into charisma, answering your doubts on how to present a presentation in class.
3. Dress Properly
Presenting in college? Dressing appropriately is key! It's not just about looking good but about exuding confidence and professionalism. This is necessary for understanding how to present a presentation in class.
4. Arrive Early and Be Prepared
Want to know how to present a presentation in class? Arriving early sets and being prepared. It offers a chance to familiarize yourself with the environment and organize thoughts and materials confidently.
5. Rehearse Thoroughly
To ace your performance, meticulous rehearsal is a non-negotiable step. Unveiling the secrets of how to do a presentation in class involves more than just talking— it's about confidence, clarity, and captivating your audience.
Speaking in front of a crowd can be done in various situations or events and they all have one thing in common, a game of nerves and remembering what to say. While many can pull off public speaking, it is not easy for even more. But, worry not. Here are the best public speaking tips for you to ace that big game!
Practice your presentation skills in comfort in our student accommodation.
Book through amber today!
2. During Presentation
Now that you have a fair understanding of a good presentation, we’ll give you some tips on how to give a presentation in class that will help you make an impact and earn you the highest grade. Here are some tips on how to give a presentation in college which you can use before the big day.
1. Correct Posture
Maintaining the right posture while delivering a presentation is crucial for effective communication. So, when pondering how to give a good presentation in college, remember to stand tall, speak confidently, and let your posture amplify your words.
2. Manage Your Anxiety
Facing a class presentation can be nerve-wracking, but managing anxiety is key. Breathe deeply, focus on your message, and visualize success. Confidence transforms how you present in college.
Public speaking is one of the most common fears out there, right up there with clowns and spiders. But fear not, my friends - here are some of the top tips on how to calm down before a presentation .
3. Open Strong
How to start a presentation in university? Start strong! Capturing your audience's attention from the start is crucial when presenting in class or college. An open strong sets the tone, sparking curiosity and ensuring an engaging journey throughout your presentation.
4. Start With a Mind Map
If you are looking for how to give a presentation in class, begin with a mind map. It's your GPS, plotting the route through your ideas, ensuring a smooth and confident presentation journey.
5. Tell a Story
Sharing a compelling story in class presentations captivates your audience, making your content memorable. It humanizes information and enhances your ability to engage effectively.
6. Speak Slow and Clear
If you want to know how to do a presentation in class, speaking slowly and clearly is vital. It enhances understanding, captivates your audience, and boosts confidence.
7. Don't Read From the Slides
Engaging your audience is crucial when presenting in class or college. Speak naturally, connect with your audience, and make your presentation memorable.
8. Connect with Your Audience
Want to know how to do a presentation in class? Capturing your audience's attention is vital when presenting in class or college. Engage them by connecting on a personal level, making your content relatable and memorable.
9. Be Interactive
In class, mastering how to give a presentation is crucial. Be interactive! Engage your audience by asking questions, sharing anecdotes, and using visuals. It transforms a lecture into a conversation, making your college presentations memorable and impactful.
10. Look at the Audience While Talking
How to give a presentation in college? Maintaining eye contact with your audience is crucial when presenting in class or college. It builds a connection, shows confidence, and keeps them engaged.
11. Manage Your Time
Nobody likes long presentations. Manage your time wisely when giving a presentation in class or college. Keep it concise, engaging, and to the point for maximum impact.
12. Include Group Activities
Want to learn how to present a presentation in class? Boost your presentation prowess by incorporating group activities. Engage your audience with interactive elements. This will keep them entertained and enjoy your presentation more!
13. Address Key Points
Effectively addressing key points is crucial in presentations. It ensures clarity, engages your audience, and enhances understanding.
14. Conclude With a Strong Ending
Want to know how to do a presentation in class? Conclude with a strong ending to leave a lasting impression. Summarize key points, or say a strong quote!
Creative Presentation Ideas
Are you tired of the same old PowerPoint routine? Want to know how to give a PPT presentation in college? Here are some of the tips to innovate styles that breathe life into your class presentations.
1. Incorporate Universal Design Principles
Using large fonts and providing various formats ensure accessibility, while sign language interpreters and a barrier-free environment cater to diverse needs. Maintain clear communication through audible voices, well-lit rooms, and diverse multimedia. This inclusive approach transforms how presentations are given in college, making them accessible to all.
2. Limit Number of Slides and Texts
Crafting a captivating presentation for class involves a delicate balance. Limiting slides and text sparks creativity, ensuring ideas flow seamlessly. Keep it concise, let visuals speak, and ace your college presentations effortlessly!
3. Plan your Slide Layout
Crafting an effective presentation begins with thoughtful slide layout planning. Organized visuals enhance understanding, captivate attention, and make your ideas shine during class presentations.
4. Make your Presentation Interactive
Instead of lengthy lectures, facilitate discussions on real-life situations attendees have encountered. Encourage interactions among them, fostering a dynamic learning environment. Allocate ample time for questions, either addressing them within the presentation or guiding participants to relevant resources. Your presentation should be a collaborative journey, ensuring active participation and a lasting impact on how to give a presentation in college.
Presenting a PowerPoint presentation is as important as making it. It is an ally that lets you get your aims and ideas across to the audience. To help you out with a good PPT presentation, here are the best PowerPoint presentation tips for you.
That was our detailed guide on how to present a presentation in class. We know we’ve packed in a lot of information, but if you break everything down step by step, it's all incredibly simple. If you follow all our tips on how to do a presentation as a student, we can ensure that you’ll give a killer presentation!
Frequently Asked Questions
How to present a presentation in class, how to start a presentation in class, how do you end a presentation, what is the 10 second rule in presentation, how to do a presentation in class, what is the 666 rule in presentation, which text is best in presentation.
Your ideal student home & a flight ticket awaits
Follow us on :

Related Posts

8 Hardest Engineering Courses In the World In 2024

50 Best Finance Dissertation Topics For Research Students 2024
Discover 21 Best Study Websites for Students

amber © 2023. All rights reserved.
4.8/5 on Trustpilot
Rated as "Excellent" • 4700+ Reviews by Students

- Our Mission
8 Tips to Power-Up Your Classroom Presentations
Last month, I attended a Back to School Night for parents, sitting through presentation after presentation by teachers, some with slides that helped make their presentation a delight to listen to, and others . . . well, that's why I'm writing this blog post.
The goal of a classroom presentation is to aid you in effectively conveying information in a way that allows students (or their parents) to remember what you said. Unfortunately, for some, the presentation becomes a crutch, and they begin to rely on the slides to tell their story, rather than to help them tell the story.
I've been creating presentations using software like PowerPoint and KeyNote for 20 years, and I've learned a lot about how to most effectively communicate. Here's what I've found.
1. Use as Many Slides as You Need
It's a common myth that better presentations use fewer slides. This is simply not the case. I once sent an education conference presentation to the organizers so they could preview it in advance of my speaking. They wrote back, concerned that my 45-minute presentation had 116 slides. I looked it over and realized they were right! I revised it and sent a presentation with 135 slides back to them. I finished my talk with 5 minutes to spare -- just enough time to take questions -- and the presentation was a huge success.
The number of slides in your presentation is irrelevant. What matters is how well your slides communicate and how much time you spend talking about each slide. Spending five minutes on five slides will almost always be more engaging to your students than spending five minutes on a single slide, even when the information is exactly the same.
In the movie Amadeus , the Emperor of Austria complains to Mozart that his music has "too many notes." Mozart responds, "There are just as many notes as are required. Neither more nor less." Use as many slides as you need to make your point. No more. No less.
2. Minimize Verbosity
Your slides are there to support what you are saying, not to say it for you. Keep your word count low, and only place one main point on a slide, plus three to five sub-points if absolutely needed. Remember tip #1 above -- don't be afraid to use more slides. They're free! Also, the language in your slides doesn't need to be in complete sentences. Pare the text to as few words as possible, using what's there only to emphasize and reinforce -- not replace -- the words coming out of your mouth.

3. Maximize Visuals
Photos, figures and icons work as visual memory triggers. They help your students remember what it is you're saying. Any time you can add a visual that helps illustrate or reinforce the points you're making in your slides, you should use it. One great way to do this on the cheap is to use public domain or creative commons photos you can find on Flickr or Google .
4. Reduce Noise
Many teachers like to add banners, headers, footers, page numbers and more noise to their slides. Unless the information needs to be on every slide for a vital reason (which is rare), you should remove it. All these redundant elements do is create distractions from the content of your slides. I find this to be especially true of page numbers. Imagine if a movie included a time code at the bottom, constantly reminding you how long you had been watching. All this does is serve to take the viewer out of the moment. Page numbers in slides really don't provide any useful information -- they just remind your students how long they've been watching.
Pursuant to tips #1 and #2, you're not going to win awards by cramming the most content on the fewest slides. Make text and visuals as large as you can. Not only does this make them easier to see and read, but larger images and text make a greater impact to aid memory. There's nothing wrong with filling an entire slide with a photo, and then placing text right on top. You may have to use a transparent background immediately behind the text so that it's clearly readable, but the overall effect is almost always more memorable than just some text beside an image.

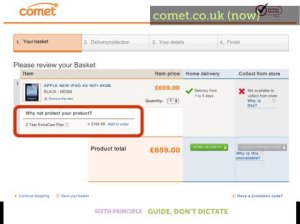
6. Highlight What You Are Talking About
While you are presenting, your students may be momentarily distracted taking notes, thinking about what you are saying, glancing out the window, possibly even daydreaming. When they refocus on your slides, though, they need to quickly pick back up where you are, or you risk losing them again.
- Use contrast or call-outs to clearly show the area of the slide you are talking about.
- Reveal bullet points or table rows one at a time so that the last one visible is the one you are talking about.
- Use arrows, circles or other pointers to show what you are referencing in specific parts of an illustration, photo or graph.
- Animate and reveal parts of illustrations and graphs (where possible) to build your story rather than showing everything at once.
- Use bold type or different colors to highlight the keywords in any lengthy text.
7. Transition Changes
Humans suffer from an affliction called change blindness -- we have a hard time seeing changes unless there is a clear transition between the states. This is especially a problem in presentations where slides may look very much alike. Most programs include transitions that can be used between slides or on elements in the slides themselves.
My favorite transition is the cross-dissolve -- where the first slide fades down while the next slide fades up -- but different transitions can help illustrate points in your presentation. Are you talking about combustion or the fire of London? Use a flame transition. Talking about photography or Hollywood movies? Use the flashbulb transition. Even "cheesy" transitions help overcome change blindness and aid student memory at the same time.
8. Repeat Yourself Redundantly
It’s OK to repeat the same slide more than once -- especially when using images -- if you are reminding students of an earlier point. Obviously, this is not a license to be monotonous. However, if you want to tie separate ideas together, emphasize a point or splash in a little comic relief, it's perfectly fine to repeat a slide.
Bonus Tip: Make it Funny!
There's little doubt that emotional responses can aid memory. While it can be difficult to apply this power in a classroom slide presentation, humor is easy enough, and adding a bit of levity to your presentations at the right points can work to give students vital memory hooks.
Remember, the point of presentation slides is not to replace you as the teacher, but to help your students understand and remember what you are teaching. Overwhelming them with too much information can be just as harmful as underwhelming them with too little.
20% OFF ALL FRAMES VALID TILL 4/18/24 PROMO CODE: SAVE20 (view details)
Enter SAVE20 at check-out 20% OFF. (view details)
Start Building My Frame
Suggestions:
- Try fewer words; use "Jefferson" instead of "Jefferson High School" or "Thomas" instead of "St. Thomas".
- If you are still not able to find your school or group, please contact Customer Service .
Please note : If your school or group has closed, you will not be able to locate it on our website.
2/28/2024 By University Frames
- 10 Effective Class Presentation Tips for College Students
Giving a presentation to your classmates can be a bit challenging, especially if you are new to visual or oral presentations or fear public speaking.
However, class presentations foster an excellent opportunity for students to enhance their public speaking skills while broadening their perception and understanding of a particular subject matter.
Also, the presentation provides a platform for students to connect with peers, professionals, and potential employers.
By showcasing their skills and knowledge, they can build relationships and establish themselves as a better performer in their field.
While presentation helps students to expand their horizons of knowledge and skills, beginners may be slightly concerned about where to start and how to master it.
Worry not! Here, we discuss the best presentation tips for students for a flawless delivery of the subject.
10 Handy Presentation Tips for College Students
Effective delivery of a presentation requires efficient presentation techniques and exceptional presentation abilities.
The following tips for presenting in class help students strengthen their public speaking skills, empowering them to effectively communicate their message or information to the audience.
1. Overcome Presentation Anxiety
While it is quite common to feel anxious before the presentation, it won’t allow you to deliver a presentation confidently.
There are several reasons why students fear public speaking, including, worrying about committing a mistake, lack of experience, losing control, or what if their audience dislikes their speech.
Nevertheless, don’t worry, as you can overcome your presentation anxieties with the following techniques:
- Prepare and practice your topic thoroughly.
- Just focus on the message you want to convey to your audience.
- Be open to feedback and criticism from others.
- Have a mindset that you are going to make it.
- Practice deep breathing to keep your mind calm and composed.
2. Learn the Art of Public Speaking
Learning and getting used to public speaking can help students feel more confident and comfortable in delivering their message to the audience.
Also, it helps them to structure their thoughts and use perfect language to convey their content crisp and clean while engaging their audience.
There are several ways for students to learn public speaking skills, including:
- Online platforms and courses
- Local resources (community clubs, associations, etc.)
- Public speaking workshops
- Watching experienced public speakers and observing their techniques
Also Read: 17 Best Advice for College Students from Experts .
3. Craft Compelling Content
A robust opening statement sets the tone for the entire student presentation, helping you grab your audience’s attention.
Ensure to develop a clear, concise, and thoughtful opening statement that talks about what the presentation is about and how it helps everyone out there.
Moving on, your body content is the heart of your presentation, and that is what is going to keep your audience in the loop while conveying your ideas and thoughts.
So, it should be well-structured, engaging, and easy to follow. Here’s how you can devise engaging content:
- Create a strong opening and ending statement with a powerful quote, thought-provoking question, or intriguing scenario.
- Clearly and precisely define your topic and its significance.
- Conduct in-depth research that is backed with statistical data or real-time stories.
- Organize your content with slides and images.
4. Add Engaging Visuals
Rather than constantly scrolling the loads of information, it is better to use visuals to engage your audience while helping them comprehend and retain complex matters and building emotional connections with them.
Tips for slideshow presentations:
- Use simple yet high-quality images.
- Add contrast and pleasing colors to make your slides look good.
- Incorporate snippets to support your visuals.
- Keep your slides consistent in terms of layout and design.
- Choose easy-to-follow fonts and numbers.
- Add data, icons, and infographics for illustration.
5. Balance Information and Entertainment
Adding humor to a presentation is a way to engage and connect with your audience more personally.
It can help relieve tension, break the silence/drowsy state of mind, and make complex or dry information more perceivable during class presentation.
Also, it helps keep your presentation memorable for a long time. Here is how you can add humor to your presentation:
- Know your audience and tailor your humor accordingly.
- Use humorous analogies, cartoons, catchphrases, or your own experiences.
- Try not to hurt others while using humor.
- You can make fun of everyday situations or activities, so people can relate with them.
6. Time Management in Class Presentation
Time management is one of the best tips for presenting in class. Starting and finishing your presentation in a predefined time frame is important.
It helps you to convey your message precisely and effectively without disrupting the flow of the presentation and making it difficult for the audience to follow along.
To manage your class presentation time, here are some presentation tips for students:
- Practice beforehand to know the required time.
- If you are going beyond the allotted time, cut short your content, delivering the most important points.
- Use visuals to quickly deliver messages.
- Use a timer to know that you are nearing the end.
7. Real-Life Examples
Listening to successful presentations helps you learn new techniques and gain insights on how to give better presentations. You can take note of key elements used, gestures followed, and eye contact made.
Also, you can study the agenda of the presentation, like how it is structured, what topics are discussed, how properly visuals and icons are used, etc.
Besides, you can pay attention to the language and tonality of the speaker to see how they used humor, stories, and emotional phrases to connect with audiences.
Considering these insights, you can prepare your topic and present it flawlessly.
8. Take Peer Review and Feedback
Feedback is a way to learn where you lag and how you can improve further to build your credibility, professional knowledge and image.
By receiving feedback from peers, you can identify blind spots, fragile areas, and how your content is perceived by others, enabling you to refine your work, address weaknesses, and develop new skills.
Moreover, this presentation tip can strengthen your relationships with your peers while helping you present better every time.
Also Read: Tips for Building Professional Relationships in College .
9. Stay Elegant and Attractive with Your Attire
What you wear and how you wear it matters when it comes to presenting in front of the public.
The clothes you wear can greatly impact how your audience perceives you and your message. So, ensure to present yourself properly and professionally to attract your audience.
Here is how to dress up for class presentations:
- Keep your outfits simple, comfortable, and elegant.
- Avoid flashy colors and designs.
- Choose outfits according to the environment and temperature.
- Get your outfits properly stitched with the right fit.
- Choose the right and soothing footwear.
10. Post-Presentation Reflection
Reviewing your past presentations can help drag strengths and areas for growth, which can help you make informed decisions and optimize your performance.
For example, by analyzing your performance, you can assess what works well and what doesn't. This involves identifying areas for improvement concerning the use of visuals, snippets, icons, infographics, etc.
Knowing these can help you make targeted improvements to enhance your future presentations.
Wrapping Up
A successful class presentation in college is vital for students’ academic and professional journey.
It helps students develop valuable skills that will serve them in their future careers and provides them with an opportunity to showcase their knowledge and ideas to a wider audience.
By mastering the art of presentation, students can set themselves apart from their peers and position themselves for success in their chosen careers.
So, use the above-mentioned presentation tips for students to speak more confidently, sharing your thoughts and ideas.
University Frames
Subscribe to our blog.
Enter your email address:
Latest Offers

Latest Posts
- 39 Trending Graduation Cap Ideas in 2024
- March Madness Sale: Save Big and Get 20% Off at University Frames
- Get Your Game On with University Frames this March Madness!
- Tips for Building Professional Relationships in College
Category: College Life Hack
Tags: Class Presentation Tips Class Presentation Tips for College Students college tips presentation tips
👀 Turn any prompt into captivating visuals in seconds with our AI-powered visual tool ✨ Try Piktochart AI!
- Piktochart Visual
- Video Editor
- Infographic Maker
- Banner Maker
- Brochure Maker
- Diagram Maker
- Flowchart Maker
- Flyer Maker
- Graph Maker
- Invitation Maker
- Pitch Deck Creator
- Poster Maker
- Presentation Maker
- Report Maker
- Resume Maker
- Social Media Graphic Maker
- Timeline Maker
- Venn Diagram Maker
- Screen Recorder
- Social Media Video Maker
- Video Cropper
- Video to Text Converter
- Video Views Calculator
- AI Flyer Generator
- AI Infographic
- AI Instagram Post Generator
- AI Newsletter Generator
- AI Report Generator
- AI Timeline Generator
- For Communications
- For Education
- For eLearning
- For Financial Services
- For Healthcare
- For Human Resources
- For Marketing
- For Nonprofits
- Brochure Templates
- Flyer Templates
- Infographic Templates
- Newsletter Templates
- Presentation Templates
- Resume Templates
- Business Infographics
- Business Proposals
- Education Templates
- Health Posters
- HR Templates
- Sales Presentations
- Community Template
- Explore all free templates on Piktochart
- The Business Storyteller Podcast
- User Stories
- Video Tutorials
- Visual Academy
- Need help? Check out our Help Center
- Earn money as a Piktochart Affiliate Partner
- Compare prices and features across Free, Pro, and Enterprise plans.
- For professionals and small teams looking for better brand management.
- For organizations seeking enterprise-grade onboarding, support, and SSO.
- Discounted plan for students, teachers, and education staff.
- Great causes deserve great pricing. Registered nonprofits pay less.
75 Unique School Presentation Ideas and Topics Plus Templates
Are you tired of seeing the same PowerPoints repeating overused and unoriginal school presentation ideas covering repeated topics in your classes?
You know what I’m talking about; we’ve all been there, and sat through yawn-worthy demonstrations, slides, or presentation videos covering everything from the solar system, someone’s favorite pet, past presidents of a country, to why E=mC squared.

From grade school to university, first graders to college students, we are obligated to create, perform, and observe academic presentations across a plethora of curriculums and classes, and not all of these public speaking opportunities fall into the category of an ‘interesting topic’.
Yet, have no fear! Here at Piktochart, we are here to help you and your classmates. From giving examples of creative and even interactive presentation ideas, providing presentation videos , and suggesting interactive activities to give your five minutes of fame the ‘wow’ factor that it deserves, this article is your guide!
Our massive collection of unique school and college presentation ideas and templates applies if you’re:
- A teacher looking to make your class more engaging and fun with student presentations.
- A student who wants to impress your teacher and the rest of the class with a thought-provoking, interesting topic.
A Curated List of Interesting Topics for School Presentations
Did you know that when it comes to presentations , the more students involved improves retention? The more you know! Yet sometimes, you need a little help to get the wheels moving in your head for your next school presentation .
The great thing about these ideas and topics is you can present them either in face-to-face classes or virtual learning sessions.
Each school presentation idea or topic below also comes with a template that you can use. Create a free Piktochart account to try our presentation maker and get access to the high-quality version of the templates. You can also check out our Piktochart for Education plan .
Want to watch this blog post in video format? The video below is for you!
The templates are further divided into the following categories covering the most popular and best presentation topics. Click the links below to skip to a specific section.
- Unique science presentation topics to cultivate curiosity in class
- Engaging culture and history presentation ideas to draw inspiration from
- Health class presentation topics to help students make healthy lifestyle decisions
- Data visualization ideas to help students present an overwhelming amount of data and information into clear, engaging visuals
- First day of school activity ideas to foster classroom camaraderie
- Communication and media topics to teach students the importance of effective communication
- Topics to help students prepare for life after school
We hope this list will inspire you and help you nail your next school presentation activity.
Unique Science Presentation Topics to Cultivate Curiosity in Class
Science is a broad field and it’s easy to feel overwhelmed with too many topics to choose for your next presentation.
Cultivate curiosity in the science classroom with the following unique and creative presentation ideas and topics:
1. Can life survive in space?

2. Do plants scream when they’re in pain?

3. What are the traits of successful inventors?

4. How vaccines work

5. Massive destruction of the Koala’s habitat in Australia

6. Left brain versus right brain

7. What are great sources of calcium?

Get access to high-quality, unique school presentation templates by Piktochart for Education.
Create and collaborate in the classroom using Piktochart’s customizable and printable templates for your school reports, presentations, and infographics.

8. Recycling facts you need to know

9. Do you have what it takes to be a NASA astronaut?

10. The rise of robots and AI: Should we be afraid of them?

11. How far down does the sea go?

12. The stages of sleep

13. Will Mars be our home in 2028?

14. A quick look at laboratory safety rules

15. The first person in history to break the sound barrier

Engaging Culture and History Presentation Ideas to Draw Inspiration From
History is filled with equally inspiring and terrifying stories, and there are lessons that students can learn from the events of the past. Meanwhile, interactive presentations about culture help students learn and embrace diversity.
16. Women in history: A conversation through time

17. The sweet story of chocolate

18. A history lesson with a twist

19. The history of basketball

20. The origin of the Halloween celebration

21. AI History

22. What you need to know about New Zealand

23. 1883 volcanic eruption of Krakatoa

24. Roman structures: 2000 years of strength

25. The most famous art heists in history

26. Elmo: The story behind a child icon

27. 10 things you should know before you visit South Korea

28. 8 things you didn’t know about these 8 countries

Health Class Presentation Topics to Help Students Make Healthy Lifestyle Decisions
Want to learn how to engage students with healthcare topic ideas? Then consider using these templates for your next interactive presentation.
According to the CDC , school-based health education contributes to the development of functional health knowledge among students. It also helps them adapt and maintain health-promoting behaviors throughout their lives.
Not only will your presentation help with keeping students engaged, but you’ll also increase class involvement with the right slides.
The following examples of health and wellness interactive presentations include fun ideas and topics that are a good start.
29. How to look after your mental health?

30. The eradication of Polio

31. How to have a healthy lifestyle

32. 10 handwashing facts

33. Myths and facts about depression

34. Hacks for making fresh food last longer

35. Ways to avoid spreading the coronavirus

36. Mask protection in 5 simple steps

37. Everything you need to know about the flu

38. All about stress: Prevention, tips, and how to cope

39. The importance of sleep

40. Is milk tea bad for you?

41. How to boost happiness in 10 minutes

42. How dirty are debit and credit cards

43. Why do you need sunscreen protection

Data Visualization Ideas to Help Students Present Overwhelming Amounts of Data in Creative Ways
Data visualization is all about using visuals to make sense of data. Students need to pull the main points from their extensive research, and present them by story telling while being mindful of their classmates’ collective attention span.
As far as student assignments go, storytelling with data is a daunting task for students and teachers alike. To keep your audience interested, consider using a non linear presentation that presents key concepts in creative ways.
Inspire your class to be master data storytellers with the following data visualization ideas:
44. Are we slowly losing the Borneo rainforest?

45. Skateboard deck design over the years

46. Food waste during the Super Bowl

47. The weight of the tallest building in the world

48. Infographic about data and statistics

49. Stats about cyberbullying

50. How whales combat climate change

First Day of School Interactive Activity Ideas to Foster Whole-class-Camaraderie
Calling all teachers! Welcome your new students and start the school year with the following back-to-school creative presentation ideas and relevant templates for first-day-of-school activities.
These interactive presentations grab the attention of your students and are remarkably easy to execute (which is the main educator’s goal after all)!
51. Meet the teacher

52. Example: all about me

53. Self-introduction

54. Tips on how to focus on schoolwork

55. Course plan and schedule

Give our class schedule maker a try to access more templates for free. You can also access our presentation-maker , poster-maker , timeline-maker , and more by simply signing up .
56. Interpreting a student’s report card (for parents)

57. Introduction of classroom rules

58. Assignment schedule

59. Daily planner

60. Course syllabus presentation

61. How to write a class presentation

Topics to Teach Students the Importance of Effective Communication
Visual media helps students retain more of the concepts taught in the classroom. The following media topics and infographic templates can help you showcase complex concepts in a short amount of time.
In addition, interactive presentation activities using these templates also encourage the development of a holistic learning process in the classroom because they help focus on the three domains of learning: cognitive, affective, and psychomotor.
62. Interactive presentation do’s and don’ts

63. How to create an infographic

Recommended reading : How to Make an Infographic in 30 Minutes
64. How to improve your internet security and privacy

65. What is design thinking?

66. What are your favorite software tools to use in the classroom?

Presentation Topic Ideas to Help Students Prepare for Life After School
One of the things that makes teaching a rewarding career is seeing your students take the learning and knowledge you’ve instilled in them, and become successful, productive adults.
From pitching a business idea to starting your podcast, the following topics are good starting points to prepare students for the challenges after graduation (aka adulting 101):
67. How to make a resume

68. How to start a startup

69. Credit card vs. debit card

70. Pros and cons of cryptocurrency

71. How to save on travel

72. How to do a SWOT analysis

73. How to pitch a business idea

74. Habits of successful people

75. Starting your own podcast: A checklist

Find out how a high school teacher like Jamie Barkin uses Piktochart to improve learning in the classroom for her students.
Pro tip: make your presentation as interactive as possible. Students have an attention span of two to three minutes per year of age. To keep minds from wandering off, include some interactive games or activities in the lesson. For example, if you conducted a lesson on the respiratory system, you could ask them to practice breathing techniques.
Maintain eye contact with your students, and you’ll get instant feedback on how interested they are in the interactive presentation.
Make School Presentation Visuals Without the Hassle of Making Them From Scratch
School presentations, when done right, can help teachers engage their classes and improve students’ education effectively by presenting information using the right presentation topic.
If you’re pressed for time and resources to make your school presentation visuals , choose a template from Piktochart’s template gallery . Aside from the easy customization options, you can also print and download these templates to your preferred format.
Piktochart also professional templates to create infographics , posters , brochures , reports , and more.
Creating school-focused, engaging, and interactive presentations can be tedious at first, but with a little bit of research and Piktochart’s handy templates, you’re going to do a great job!
The future of learning is interactivity and collaboration.
Foster interactive and collaborative learning using Piktochart for Education. Share your work, get feedback, and brainstorm on the fly. With Piktochart, everyone’s on the same page. Finally.

Kyjean Tomboc is an experienced content marketer for healthcare, design, and SaaS brands. She also manages content (like a digital librarian of sorts). She lives for mountain trips, lap swimming, books, and cats.
Other Posts

From Chaos to Clarity: Streamlining Your Student Life with a Schedule Builder

Resume with No Experience

15 Infographic Examples for Students (Plus Editable Templates)
Do you want to be part of these success stories, join more than 11 million who already use piktochart to craft visual stories that stick..

- school Campus Bookshelves
- menu_book Bookshelves
- perm_media Learning Objects
- login Login
- how_to_reg Request Instructor Account
- hub Instructor Commons
- Download Page (PDF)
- Download Full Book (PDF)
- Periodic Table
- Physics Constants
- Scientific Calculator
- Reference & Cite
- Tools expand_more
- Readability
selected template will load here
This action is not available.
7.4: Public Speaking and Class Presentations
- Last updated
- Save as PDF
- Page ID 20777
Learning Objectives
- Know how to overcome nervousness and anxiety associated with public speaking and giving class presentations.
- Effectively use the six-step process to prepare for and deliver a class presentation.
- Create effective visual aids for use in class presentations.
- Work with a group to successfully plan and deliver a class presentation.
Public speaking—giving an oral presentation before a class or another group of people—is a special form of interaction common in education. You will likely be asked to give a presentation in one of your classes at some point, and your future career may also involve public speaking. It’s important to develop skills for this form of communication.
Public speaking is like participating in class—sharing your thoughts, ideas, and questions with others in the group. In other ways, however, public speaking is very different. You stand in front of the class to speak, rather than from your usual seat—and for most students, that changes the psychology of the situation. You also have time outside of class to prepare your presentation, allowing you to plan it carefully—and, for many, giving more time to worry about it and experience even more anxiety!
Overcoming Anxiety
Although a few people seem to be natural public speakers, most of us feel some stage fright or anxiety about having to speak to a group, at least at first. This is completely normal. We feel like everyone is staring at us and seeing our every flaw, and we’re sure we’ll forget what we want to say or mess up. Take comfort from knowing that almost everyone else is dreading giving class presentations the same as you are! But you can learn to overcome your anxiety and prepare in a way that not only safely gets you through the experience but also leads to success in your presentation. The following are proven strategies for overcoming anxiety when speaking in public:
- Understand anxiety. Since stage fright is normal, don’t try to deny that you’re feeling anxious. A little anxiety can help motivate you to prepare and do your best. Accept this aspect of the process and work to overcome it. Anxiety is usually worst just before you begin and but eases up once you’ve begun.
- Understand that your audience actually wants you to succeed. They’re not looking for faults or hoping you’ll fail. Other students and your instructors are on your side, not your enemy. They likely won’t even see your anxiety.
- Reduce anxiety by preparing and practicing. The next section discusses the preparation process in more detail. The more fully you prepare and the more often you have practice, the more your anxiety will go away.
- Focus on what you’re saying, not how you’re saying it. Keep in mind that you have ideas to share, and this is what your classmates and instructors are interested in. Don’t obsess about speaking, but focus on the content of your presentation. Think, for example, of how easily you share your ideas with a friend or family member, as you naturally speak your mind. The same can work with public speaking if you focus on the ideas themselves.
- Develop self-confidence. As you prepare, you will make notes you can refer to during the presentation. You’re not going to forget what you want to say. The more you practice, the more confident you’ll become.
Guidelines for Presentations
Preparing and delivering a presentation in class (or in business or other settings) is a process very similar to the learning process discussed in Chapter 4 “Listening, Taking Notes, and Remembering”, Chapter 5 “Reading to Learn”, and Chapter 6 “Preparing for and Taking Tests” and the writing process discussed in Chapter 8 “Writing for Classes”. The process breaks down into these six basic steps:
- Analyze your audience and goals
- Plan, research, and organize your content
- Draft and revise the presentation
- Prepare speaking notes
- Practice the presentation
- Deliver the presentation
Step 1: Analyze Your Audience and Goals
Who will see and hear your presentation—and why? Obviously, other students and the instructor. But you still need to think about what they already know, and don’t know, about your topic. If your topic relates to subject matter in class lectures and readings, consider what background information they already have and be careful not to give a boring recap of things they already know. It may be important, however, to show how your specific topic fits in with subjects that have been discussed already in class, especially in the beginning of your presentation, but be sure to focus on your new topic.
New terms and concepts may become familiar to you while doing your research and preparation, but remember to define and explain them to other students. Consider how much explanation or examples will be needed for your audience to grasp your points. If your topic involves anything controversial or may provoke emotion, consider your audience’s attitudes and choose your words carefully. Thinking about your audience will help you find ways to get their attention and keep them interested.
Be sure you are clear about the goals for the presentation. Are you primarily presenting new information or arguing for a position? Are you giving an overview or a detailed report? Review the assignment and talk with the instructor if you’re unsure. Your goals guide everything in the presentation: what you say, how much you say, what order you say it in, what visual aids you use, whether you use humor or personal examples, and so forth.
Step 2: Plan, Research, and Organize Your Content
Starting with the assignment and your goals, brainstorm your topic. Jot notes on specific topics that seem important. Often you’ll do reading or research to gather more information. Take notes as you would with any reading. As you research the topic at this stage, don’t worry at first about how much content you are gathering. It’s better to know too much and then pick out the most important things to say than to rush ahead to drafting the presentation and then realize you don’t have enough material.
Organizing a presentation is similar to organizing topics in a class paper and uses the same principles. Introduce your topic and state your main idea (thesis), go into more detail about specific ideas, and conclude your presentation. Look for a logical order for the specifics in the middle. Some topics work best in chronological (time) order or with a compare-and-contrast organization. If your goal is to persuade the audience, build up to the strongest reason. Put similar ideas together and add transitions between different ideas.
While researching your topic and outlining your main points, think about visual aids that may help the presentation.
Also start thinking about how much time you have for the presentation, but don’t limit yourself yet in the outline stage.
Step 3: Draft and Revise the Presentation
Unless required by the assignment, you don’t need to actually write out the presentation in full sentences and paragraphs. How much you write depends on your own learning and speaking style. Some students speak well from brief phrases written in an outline, while other students find it easier to write sentences out completely. There’s nothing wrong with writing the presentation out fully like a script if that helps you be sure you will say what you intend to—just so you don’t actually get up and read from the script.
You can’t know for sure how long a presentation will last until you rehearse it later, but you can estimate the time while drafting it. On the average, it takes two to three minutes to speak what can be written on a standard double-spaced page—but with visual aids, pauses, and audience interaction, it may take longer. While this is only a rough guide, you can start out thinking of a ten-minute presentation as the equivalent of a three to four-page paper.
Never wait until the last minute to draft your presentation. Arrange your time to prepare the first draft and then come back to it a day or two later to ask these questions:
- Am I going on too long about minor points? Could the audience get bored?
- Do I have good explanations and reasons for my main points? Do I need more data or better examples? Where would visual aids be most effective?
- Am I using the best words for this topic and this audience? Should I be more or less informal in the way I talk?
- Does it all hold together and flow well from one point to the next? Do I need a better introduction or transition when I shift from one idea to another?
Visual Aids in Presentations
Except for very short informal presentations, most presentations gain from visuals—and visual aids are often expected. If encouraged or allowed to include visuals in your presentation, plan to do so. Consider all possible types:
- Charts or graphs
- Photos or other images
- Video clips
- Handouts (only when necessary—they can be distracting)
Use the available technology, whether it’s an overhead projector, PowerPoint slides, a flip chart, or posters. (Talk to your instructor about resources and software for designing your visuals.) Follow these guidelines:
Design your visuals carefully. Here are some basic rules:
- Use a simple, neutral background. A light-colored background with text in a dark color works best for words; a dark background used like matting works best for photos.
- Minimize the amount of text in visuals—more than eight words per slide is usually too much. Avoid simply presenting word outlines of what you are saying. Make sure text is large enough for the audience to read.
- Don’t use more than two pictures in a slide, and use two only to make a direct comparison. Montages are hard to focus on and distract the viewer from what you’re saying. Use images only when they support your presentation; don’t use clip art just as decoration.
- Don’t put a table of numbers in a visual aid. If you need to illustrate numerical data, use a graph. (Microsoft Excel can make them for you easily.)
- Don’t use sound effects. Use a very brief recording only if directly related to your main points.
- Don’t use visual special effects such as dissolves, spins, box-outs, or other transitions. They are distracting. Use animation sparingly and only if it helps make a point.
- Don’t use so many visuals or move through them so quickly that the audience gives all its attention to them rather than to you.
- Practice your presentation using your visual aids, because they affect your timing.
- Explain visuals when needed but not when they’re obvious.
- Keep your eyes on your audience, only briefly glancing at visuals to stay in synch with them.
- Don’t hand out a printout of your visuals. Your audience should keep their eyes on you instead of fiddling around with paper.
Step 4: Prepare Speaking Notes
As mentioned earlier, it’s not a good idea to read your presentation from a written page rather than deliver it. To keep your audience’s attention, it’s important to make eye contact with them and to use a normal speaking voice—and you can’t do this if you keep your eyes on a written script.
Speaking notes are a brief outline for your presentation. You might write them on index cards or sheets of paper. Include important facts and data as well as keywords for your main ideas, but don’t write too much. (If you forget things later when you start practicing, you can always add more to your outline then.) Be sure to number your cards or pages to prevent a last-minute mix-up.
Think especially about how to open and close your presentation, because these two moments have the most impact of the whole presentation. Use the opening to capture the audience’s attention, but be sure it is appropriate for your audience and the goals. Here are some possibilities for your opening:
- A striking fact or example (illustrating an issue or a problem)
- A brief interesting or humorous anecdote (historical, personal, or current event)
- A question to the audience
- An interesting quotation
Then relate the opening to your topic and your main point and move into the body of the presentation.
Your closing mirrors the opening. Transition from your last point to a brief summary that pulls your ideas together. You might end with a challenge to the audience, a strong statement about your topic, or a personal reflection on what you have been saying. Just make sure you have a final sentence planned so that you don’t end up uncomfortably fumbling around at the end (“Well, I guess that ends my presentation”).
Step 5: Practice the Presentation
Practice may be the most important step. It is also the best way to get over stage fright and gain confidence.
Practice first in an empty room where you imagine people sitting, so that you can move your eyes around the room to this “audience.” The first time through, focus on putting your outlined notes into full sentences in your natural speaking voice. Don’t read your notes aloud. Glance down at your notes only briefly and then look up immediately around the room. Practice two or three times just to find the right words to explain your points and feel more comfortable working with your notes. Time yourself, but don’t obsess over your presentation being the exact length required. If your presentation is much too long, however, adjust it now in your notes so that you don’t start memorizing things that you might accidentally still say later on even though you cut them from your notes.
Once you feel good speaking from your notes, practice to add some more polish to your delivery. You might want to record or videotape your presentation or ask a friend or roommate to watch your presentation. Pay attention to these aspects of how you speak:
- Try to speak in your natural voice, not in a monotone as if you were just reading aloud. If you will be presenting in a large room without a microphone, you will need to speak louder than usual, but still try to use a natural voice.
- In usual conversation, we speed up and slow down and vary the intensity of our words to show how we feel about what we’re saying. Practice changes in your delivery style to emphasize key points.
- Don’t keep looking at your notes. It’s fine if you use words that are different from those you wrote down—the more you rehearse without looking at your notes, the more natural sounding you will be.
- Be sure you can pronounce all new words and technical terms correctly. Practice saying them slowly and clearly to yourself until you can say them naturally.
- Don’t forget transitions. Listeners need a cue when you’re moving to a new idea. Practice phrases such as “ Another important reason for this is…” or “Now let’s move on to why this is so.…”
- Watch out for all those little “filler” words people use so often, such as “like,” “you know,” “well,” and “uh.” They’re very distracting to most audiences. Listen to or watch your tape to see if you are using these fillers or ask your friend to point it out.
- Pay attention to body language when practicing. Stand up straight and tall in every practice session so that you become used to it. Unless you have to stand at a podium to use a fixed microphone in your presentation, practice moving around while you speak; this helps keep the audience watching you. Use hand and arm gestures if they are natural for you, but don’t try to make up gestures for the presentation because they will look phony. Most important, keep your eyes moving over the audience. Practice smiling and pausing at key points.
- Finally, it’s a good idea to be ready in case of an accident. Most likely your presentation will go smoothly, you’ll stay on track with your notes, and your PowerPoint slides will work fine, but sometimes a mishap happens. Be ready to joke about it, rather than becoming flustered. If the computer fails and you lose your visuals, say something like, “Well, that’s a shame, I had some really great photos to show you!” If you drop your index cards or notes, or accidentally skip ahead in your presentation and then have to backtrack, make a joke: “Sorry about that, I was so excited to get to my next point that I’m afraid I lost control there for a moment!” Let your audience laugh with you—they’ll still be on your side, and you can defuse the incident and move on without becoming more nervous.
Step 6: Deliver the Presentation
Be sure to get enough sleep and eat a healthy breakfast. Don’t drink too much caffeine or else you’ll become hyper and nervous. Wear your favorite—and appropriate—clothing and comfortable shoes.

You may use computerized visual aids when you give a presentation to a class.
John Haynes Photography – OLPC – CC BY-ND 2.0.
Remember, your audience is on your side! If you’re still nervous before your turn, take a few deep breaths. Rehearse your opening lines in your mind. Smile as you move to the front of the room, looking at your audience. You’ll see some friendly faces smiling back encouragingly. As you start the presentation, move your eyes among those giving you a warm reception—and if you see some student looking bored or doing something else, just ignore them. But don’t focus on any one person in the audience for too long, which could make them nervous or cause them to look away.
Don’t keep looking at your watch or a clock: If your rehearsal times were close to your assigned time, your presentation will be also. If you do notice that you’re running behind schedule, it may be that you’re saying too much out of nervousness. Use your notes to get back on track and keep the pace moving. But it’s better to deliver your presentation naturally and fluidly and be a bit long or short than to try to change your words and end up sounding unnatural.
At the closing, deliver your last line with confidence, sweeping your eyes over the audience. If appropriate, ask if there are any questions. When you’re done, pause, smile, say “Thank you,” and walk back to your seat.
Later on, ask other students and your instructor for comments. Be open minded—don’t just ask for praise. If you hear a suggestion for improvement, file that in your memory for next time.
Group Presentations
You may be assigned to give a presentation in a small group. The six-step process discussed previously works for group presentations, too, although group dynamics often call for additional planning and shared responsibilities:
- Schedule a group meeting as soon as possible to get started. Don’t let another student put things off. Explain that you’re too busy and won’t have time at the last minute.
- Begin by analyzing your audience and your goals together as a group to make sure everyone understands the assignment the same. Discuss who should do what. While everyone should talk about what content to include, from here onward, you will take on specialized roles. One or more may begin research and gathering information. Others who are good writers may volunteer to draft the presentation, while one or more others may develop the visual aids. Those who have public speaking experience may volunteer to do all or most of the speaking (unless the assignment requires everyone to have a speaking role). You also need a team leader to keep everyone on schedule, organize meetings, and so on. The best team leader is an even-tempered student with good social skills, who can motivate everyone to cooperate.
- Steps 2 and 3 can likely be carried out individually with assigned tasks, but group members should stay in touch. For example, the person developing the visuals should be talking to those doing the researching and drafting to see what visuals are needed and get started finding or creating them.
- Before preparing notes in step 4, meet again to go over the content and plan for visuals. Everyone should be comfortable with the plan so far. Make final decisions about who will do each section of the presentation. Set the time for each segment. Then speakers should prepare their own speaking notes. Let someone with strong speaking skills open or close the presentation (or both), with others doing the other parts.
- The whole group should be present for practice sessions in step 5, even if not everyone is speaking. Those not speaking should take notes and give feedback. If one student is doing most of the presenting, an alternate should be chosen in case the first choice is sick on the scheduled day. The alternate also needs to practice.
- During the delivery, especially if using technology for visual aids, one student should manage the visuals while others do the presenting. If several students present different segments, plan the transition from one to another so that the presentation keeps flowing without pauses.
Additional Resources
For Class Presentations
Using PowerPoint. A step-by-step illustrated tutorial for learning how to create effective visual presentations with PowerPoint. https://www.baruch.cuny.edu/tutorials/powerpoint/
“How to Give a Bad Talk.” A humorous look (with some very good advice) on what not to do when preparing for and giving a class presentation. http://www.cs.berkeley.edu/~pattrsn/talks/BadTalk.pdf
Class presentations on YouTube. Search YouTube with the phrase “class presentation” and look for video examples of actual students giving class presentations. Observing and critiquing the presentations of other students are good ways to get started preparing your own and learning from others. Here’s a good example of a student group presentation on a topic we can all relate to (how body language works):
In this presentation, take note of
- how students make good eye contact with the audience;
- the first student’s natural speaking voice and tone, and how she did not have to use her note cards very often (obviously she practiced well);
- some differences among these students;
- the use of PowerPoint slides within the presentation (some better than others);
- the appropriate occasional use of humor;
- the division of presentation responsibilities within the student group;
- each presenter’s interaction with the audience.
Key Takeaways
- Public speaking skills are important because you will likely give presentations in class and perhaps in a future job.
- Overcome anxiety about public speaking by understanding your feelings, preparing well and practicing your delivery, and focusing on your subject.
Follow a six-step process to prepare and deliver a presentation:
- Deliver the presentation and seek feedback
- Use visual aids to support a presentation, creating visuals that are relevant, attractive, and powerful.
- The success of a group presentation depends on effective group meetings, successful division of roles, and repeated group practices.
Checkpoint Exercises
If you have given a class presentation in the past, what worked best for you? (If you have not given a presentation yet as a student, what aspect do you think will be most difficult for you?)
__________________________________________________________________
Name the two most important things you can do to reduce anxiety about a class presentation you will have to give.
For each of the following statements about class presentations, circle T for true or F for false:
Describe how best to use body language (facial expressions, eye movements, gestures, etc.) when giving a presentation.
If you were assigned along with three other students to give a group presentation in the class using this textbook, what would be your preferred role in the preparation stages? Your least preferred role? If you had to take your least preferred role, what single thing would you want to work hardest on to make the presentation successful?
- Google Classroom
- Google Workspace Admin
- Google Cloud
Get started with Google Slides
Learn how to use Google Slides to create engaging presentations, make fewer class copies, and more.
Find tips and tricks from teachers like you
Explore topics one-by-one.
- What is Google Slides
- Accessing Google Slides
- Creating a presentation in Google Slides
- Adding and editing content
- Presenting Google Slides
- Sharing Google Slides
Discover training lessons and related resources to accelerate your learning
Error loading content :( Please try again later
- {[ item.label ]}
{[ collectionContentCtrl.activeTopic.label ]} All resources ({[ collectionContentCtrl.totalItemsCount ]})
{[ item.eyebrow ]}
{[ item.name ]}
{[ item.description ]}
{[ item.featured_text ]}
No results matching your selection :( Clear filters to show all results
Begin your training with Google Slides
Get support from our help center, you're now viewing content for united states..
For content more relevant to your region, choose a different location:
Supercharge your teaching with PowerPoint.
Engage participants seamlessly with interactive quizzes, gamification, and more - all within PowerPoint.

Trusted by 20,000,000 educators, trainers, students.
✨ 1 out of 3 schools in Singapore are using ClassPoint. Read more →
All the tools you and your students will love, in PowerPoint.
You don't have to leave PowerPoint, ever.
Interactive quizzes
Ai quiz generator, gamification, presentation tools.
Real-time interactive quizzes for every occasion.
Craft exceptional interactive quizzes in PowerPoint effortlessly.
Multiple Choice
Fill in the blanks, short answer, video upload, image upload, slide drawing, audio record, ai-powered powerpoint quiz generator..
Let AI do the heavy-lifting of questions generation, so you can focus on what truly matters - teaching and engaging with your students.
Power up your presentations with gamification in PowerPoint.
Infuse elements such as earning stars, leveling up, and climbing the leaderboard to ignite passion for learning right inside PowerPoint.
Conveniently manage your classes right inside PowerPoint.
Instantly elevate classroom motivation by awarding stars.
Levels & Badges
Foster achievement with participant leveling and badge earning.
Leader Board
Ignite excitement with a dynamic podium and leaderboard.
Presentation Tools
Where PowerPoint meets possibilities
Turn your PowerPoint slides into interactive canvases even during slideshow mode, with a suite of powerful presentation, annotation and inking tools right within your grasp.
Emphasize key points, draw attention, and illustrate concepts in real-time.
Annotate on your slides with text boxes during slide show.
Keep your quizzes, activities and presentations on track and with finesse.
Illustrate your ideas with versatile shapes during presentation.
Make every participant active with a wheel of names in PowerPoint.
Instantly call out whiteboards to explain ideas during presentation.
Freely move around any presentation elements during slide show.
Embed any website to your PowerPoint slide shows.

All magic happens in PowerPoint.
ClassPoint is the #1 solution that builds deep integrations with Microsoft PowerPoint and extend the capabilities all presenters need.
- Native PowerPoint integration
- Minimum learning curve
- Reuse your slides
- All-in-one solution
- Seamless user experience
- Multi-language interface
Testimonials
Powered by lots of love.
“As a teacher, I often have to toggle between ppt slides and other applications (e.g. Mentimeter, Slido, Padlet, NearPod, Wheel of Names, etc.) With ClassPoint, I have all these features incorporated into my ppt slides. What a breeze! Besides, ClassPoint helps to turn students’ responses into new slides, saved me the time & efforts. Well Done!”

“This product is one of the most useful tools I used in my class. My students enjoyed the interactive activities I prepared using ClassPoint. It gave them the chance to participate in the lesson using different ways such as typing short answers, uploading images or creating word clouds. The best part is the competition mode which allows the students to answer the questions faster to be at the top of the leaderboard.”

“This software is really useful even for inexperienced teachers. It gives them chance to engage students in their teaching and learning.”

“The interactivity combined with the powerpoint integration allows me to direct student’s attention while sticking to a format (PowerPoint) that has a lot of pre-made material.”

“Excellent product as it increases my productivity. It is seamlessly integrated into PowerPoint, there is no need to toggle between two apps. It is very efficient for gathering ongoing assessment during lessons.”

“It’s great to use in quizzes, polling, Word Cloud, etc with my students. They love to receive real-time feedback on their learning and are much more engaged in the process. Learning is fun now!”

“ClassPoint allows me to create interactive presentations for students that keep them more engaged when learning. I also like that ClassPoint provides data for each student so that I can see what needs to be retaught.”

“My experience with ClassPoint is great: it has so many features I appreciate and I often use on my presentations: the digital annotation (with the whiteboards), the slide broadcasting and, my favorite, the interactive quizzes that are so much fun! I think this should be a software every PowerPoint user should use on their own presentations. Besides being fun and engaging, it also helps a lot on the making of the presentations theirself.”

“Before using the ClassPoint application I had problems observing students, namely when I was sharing the PowerPoint material screen, it was difficult for me to detect whether my students were listening or playing others using their cellphones or laptops. with the ClassPoint application my problem can be solved.”

“ClassPoint provided me with more than what I was looking for. I don’t have to ever leave PowerPoint, ever, to continue my lesson. I was able to save 5-8 minutes of transition time per 90-minute class period.”

“ClassPoint is a game changer when it comes to keeping a class engaging and maintaining the attentiveness of the students with its gamification centered features. I do like its wide range of assessment tools and interactive content.”

“The ClassPoint program made me very happy, and all my students are happy with it, as they can see their results all added to the PowerPoint, as well as the variety of different activities that I always use so that they do not feel bored. It is really a very special program in online and hybrid education as well.”

“ClassPoint is a life-saver! The variety of features to heighten student’s engagement at tertiary level especially the image upload feature.”

“This helps to keep the classroom engaged and on task. I can see which students are participating and which are off task. I can also see which students are struggling and need additional support as we go so I can assist easier.”

“Its been very good. How easy it was to set up and use. Super simple, excellent piece of software, great online help and videos. Excellent support from company staff, they can’t do enough for you.”

“With ClassPoint, I can have all the features I need incorporated into my PPT slides. What a breeze! Besides, ClassPoint helps turn students’ responses into new slides, saved me the time & effort. Well done!”

“ClassPoint make my job easier as a teacher. I could teach any lesson with it. The gamified part makes the student excited to answer. I dont have to leave the slide when I have to show the students videos of pictures from other website.lastly, students can easily use the app.”

Case studies
See how ClassPoint is transforming classrooms around the world.

How ClassPoint, A Powerful Classroom Response System Transforms Higher Ed

How Jeremy Gardner Replaced All Teacher Apps With One Using ClassPoint All In One Teaching Tool

Motivating Students: a ClassPoint School Case Study with Escola Profissional de Penafirme in Torres Vedras, Portugal
Frequently asked questions, supercharge your powerpoint. start today..
500,000+ people like you use ClassPoint to boost student engagement in PowerPoint presentations.
- Slidesgo School
- Presentation Tips
Create Engaging Presentations for Your Online Classroom

Teachers of the world, we are here to help you! Due to the coronavirus pandemic, schools worldwide are transitioning to a completely new model of education: in-person classes are out, distance learning is in. As schools adjust to this new normal, teachers everywhere are scrambling to find the resources they need. Slidesgo can help. Check out our free templates for education and create presentations that are effective , engaging and interactive. They are free, fully-customizable, available in Google Slides and PowerPoint formats and easy to integrate into platforms such as Google Classroom. Of course, creating engaging presentations can be a difficult and time-consuming process. So here are some tips for making more effective presentations for distance learning.
Find a great template that fits your age group and subject
Make one presentation per subject, don’t overload your slides with unnecessary text, enrich your presentations with audio and video, use mind maps, try more graphic organizers, make flashcards, make your presentations engaging and interactive, turn your presentations into stories.
Don’t start from scratch. Find a template! This one simple action will save you an enormous amount of time and effort. Once you have the right template, customize it to suit your needs. At Slidesgo we have made the searching process easy for you, allowing to search by keywords and filter your searches by topic, style, color and more
Online teachers are often overwhelmed by the sheer number of documents and messages that they have to deal with every day. But don’t overload yourself by creating a separate presentation for every class session or topic. The key here is simplicity. Try a different strategy: make just ONE presentation per school subject and add to it as you go. Share it with your students and update it as needed, so it serves as both a teaching tool and a record of what has been learned. And as your presentation gets longer, make it easy to navigate by adding a simple table of contents with links to individual slides or sections.
Using links to go to specific slides
Forget long sentences. Get straight to the point with concise sentences that express key concepts. This is a basic principle for all presentations but it’s even more important for distance learning, where visual learning is key. Students don’t pay attention to slides that are full of lengthy texts. Their attention goes straight to the images and the way the information is presented graphically. But be careful -- don’t overload your slides with images either, or else it will end up looking overcrowded and confusing. Great presentations focus on presenting key ideas with minimal text, concise messages and clear visual organization.

Reducing the text to concise messages
First-time presentation makers usually focus just on text and images. But slides have evolved and expert teachers take advantage of new features to enrich their presentations. Try using an animated gif instead of a still image and you’ll find that conveys your idea much better. Don’t be afraid to use super-short audio and video clips: they are just as easy to insert as a still image and they can add a whole new dimension to your presentations.

Using videos or images
Mind maps are a great way to organize and present content and concepts. They are great to use at the both beginning and end of a unit, when you’re introducing a topic and also when you’re summarizing what’s been learned. They give students an idea of the “big picture” and help them remember key ideas. Mind maps organize information into a logical hierarchy, allowing you to move from a general topic, to key concepts and then to examples. Finally, mind maps give a graphic representation of the relationships between ideas, which promotes deeper understanding. If you’ve never used mind maps before, check out the examples at Slidesgo and get started!

Adding a mind map to organize concepts
Graphic organizers are extremely powerful tools for online learning. If you are a beginner, start by inserting a simple table into your slides to organize information or label images. Next, try using an organizational chart or a graph. Get familiar with the tools from templates to add text fields, bubbles and arrows to connect the parts. You’re off and running! There’s such a wide range of graphic organizers, from flow charts to concept maps, timelines to Venn diagrams. There’s no end to the ways that you can present information visually. At Slidesgo you’ll find presentations and slides with special features for education to make it easier for you to add mind maps and other graphic organizers to your presentations.

Using graphic organizers
Now here’s a simple but effective idea. Flashcards are a great way to present information in bite-sized chunks for students to learn and study. Slide presentations are the perfect way to make flashcards, for any subject at any level. Why not use a slide presentation to make a glossary of new vocabulary? You can include the written word, a picture, audio, video or even have your students collaborate to make their own.

Adding flashcards as means of interaction
Remember that presentations are more than just presenting! To take your presentations to the next level, they should make your students think and encourage them to do something with the material. One simple way to do this is by using links. You can connect your presentation to external websites where your students can do online activities or games and practice what they are learning. Or link your presentation to another document where you test their learning. Finally, remember that your presentations are a great place for you to showcase your students’ work. They will love it if you incorporate what they have done into a presentation for the entire class.
We all love stories! When students feel that there is a story behind what they are learning, it gives them a narrative that connects the parts to the whole and makes their learning more personal and motivating. Include pictures of people in your presentations. Give them names and personalities and bring them to life by animating them. If you think this is impossible, try using Stories by Freepik to choose and animate personalized images. It will add a touch of storytelling to your presentations that your students will love.

Turning your presentation into an actual story
Distance learning places great demands on teachers and requires new tools and solutions. Slidesgo aims to help you by providing presentations that are free, customizable and easy to use. Teachers of the world, thank you!

Do you find this article useful?
Related tutorials.

7 tips to create a positive classroom culture
No matter if it's been ages since you last stepped into a classroom or just a long time ago―there’s probably a particular learning experience you often find yourself thinking about. Maybe it was a passionate teacher who kept the whole class engaged, or perhaps a classmate who lent you a hand with a tricky topic. Positive classroom experiences do leave a lasting mark on us, so it makes perfect sense that people leading a classroom aim to create the finest possible learning setting. In this article, we’ll share some tips to help you turn a regular classroom into a positive space.

How to create a word cloud in Google Slides
There are many ways to improve your Google Slides presentation. From choosing the right font to finding the right template, good presentations keep an audience engaged and convey a message in a clear way.Knowing how to visualize data in a slideshow is one of those actions that have a huge impact on the success of a presentation. At the end of the day, plain data fails to motivate decisions as effectively as clear insights do. This is when powerful visual tools like word clouds step in. Let us tell you all about them.

How to create a word cloud in PowerPoint
In the age of information, showing data has become as important as collecting it. Those who are able to turn big amounts of data into easy-to-understand ideas, are the ones pushing the game forward.At the end of the day, plain data fails to motivate decisions as much as clear insights do. That’s where powerful visual tools such as word clouds step in. We’re here to tell you all about them.

Welcome to Slidesgo Educator Community, Community Circle!
As educators, it's essential to support collaboration and professional development among peers. However, the demands of educating students can sometimes make it challenging to find the time to network with fellow educators. That's why we're excited to introduce our Slidesgo Educator Community, an innovative platform designed especially for educators. In this blog post, we'll dive deeper into why we created this community, what its key features are, and how it can benefit educators.

Structuring an Effective Class Session or Presentation
The way you structure and facilitate class sessions or other presentations can have a profound impact on learning. There are evidence-based approaches to designing the learning experience from start to finish to enhance engagement, understanding, and retention of information. This resource is valuable for anyone planning a synchronous (live) learning experience in a variety of contexts, including a class session, presentation, or workshop, in-person or remote.
How do I decide what to include in a class session or presentation?
Start planning by articulating the learning outcomes . What do you want the learner to know or be able to do by the end of that session? For a course, the learning outcomes for a specific class session should fit within the overarching course learning outcomes and help to move students towards achieving those. Use the learning outcomes to make intentional decisions about what content and activities to include in your class session or presentation by assessing their alignment.
As you make these decisions about which content to prioritize for synchronous time together, consider planning for flexibility. Which content is key to cover together, and which activities are vital to your learners’ experiences? Consider structuring your session such that the most vital content happens first to both prioritize it and ensure you have enough time to devote to it. Also plan for content that can be skipped over or moved to the next session in case activities go over time or learners have many questions.
How should I structure a class session or presentation to enhance learning?
When planning a class session or presentation, you should divide the time into segments, starting with an opening and ending with a closing. The main portion between opening and closing should be broken into periods of interactive lecture and individual or group activities, depending on your learning goals.
Starting a Session
The start should be welcoming and set the tone for an interactive learning experience. You might begin by playing music from a shared playlist, asking learners how they are feeling, encouraging them to check in with one another, or posing a lighthearted icebreaker question. Creating this welcoming atmosphere helps support learners’ social-emotional learning.
It is common to share outcome(s), purpose, goals, and/or an agenda at the start of a class session or presentation. In addition, set aside intentional time to “warm up” to the topic, establish context, and connect to learners’ prior knowledge and experiences . An interactive warm up also sets the expectation that the session will be collaborative and interactive. You can engage learners at the start by capturing their attention and curiosity with a “hook”, helping them make connections to prior experiences (academic or personal), or asking them to share beliefs and expectations about a topic. Some examples include:
- What do you know about [Topic]? What do you want to know?
- What do you think is going on in this picture?
- What are your personal thoughts about [topic]?
- What experience do you have with [topic]?
Interactive Content Delivery
Lecturing (i.e., direct oral presentation of information) is efficient and can be effective when the background information is not available or accessible, the facts or problems are conflicting or confusing, or your experience as the presenter will contribute to clarification. Be sure to ask yourself if the best way to understand the content is through oral presentation, or if the content could be explored some other way (e.g., small group exercises or individual reflection). Consider how much of your time will be devoted to lecture, which may depend on how much of the information you want to share will come from the lecture versus assigned course materials (e.g., readings, videos). Is the goal of lecture to supplement the information from course materials, highlight major points, or present separate information?
When designing a lecture-based class session, or any type of presentation, aiming for interaction and engagement will support deeper comprehension and greater retention of information. “We need not abandon the lecture because of its liabilities; rather, we need to find ways to make it work better” (Silver & Perini, 2010). Once you’ve determined what content is best presented through a lecture, there are many ways to improve the lecture presentation:
- “Chunk” the content, or break it up into smaller, focused sections. Aim to speak for no more than a few minutes straight without checking in, even if just with a rhetorical question for learners to ponder as they listen.
- Intersperse active learning activities such as informal discussion, think-pair-share, minute paper, polls, or quick quiz questions ensure that learners are actively processing the information as you present it.
- Use multimedia (e.g., images, audio, video, infographics) throughout your lecture to enhance comprehension and accessibility. However, keep in mind that your multimedia should be focused and related to the course content; avoid .gifs or overly illustrative materials, as these take learners’ focus away from the content and can contribute to extraneous cognitive load.
- Clarify for learners how they should approach taking notes, information they need to commit to memory, and how you expect them to apply the content in the future.
- Allow learners to ask questions at different points within a lecture. Pause periodically to ask, “What questions do you have?” or “What’s on your mind?” After you pose a question, allow “wait time” for a response, giving time for learners to formulate ideas. We may be used to asking, “Do you have any questions?” but students may feel that they are being intrusive or not paying attention if they do have a question. Asking “What questions do you have?” normalizes the fact that students are likely to have questions when learning new content.
Individual or Group Activities
Either before or after presenting content, provide opportunities for learners to interact with the content at a deeper level through individual or group activities. Individually, learners could engage in independent work time or reflection. In small or large groups, learners could discuss the topic in more detail or engage in peer review opportunities. Other ways to encourage reflection, critical thinking, and problem solving, which could be done individually or in groups, include case studies, debates, concepts maps, or game-based instruction.
Ending a Session
At the end of a class session or presentation, be sure to save time to tie everything together and assess learning. It is very common to run out of time and rush to conclude, but end-of-class reflection supports retaining information and helps to clarify what comes next. At the end of a session, you might summarize, or ask learners to summarize, key takeaways, especially in conjunction with revisiting the learning outcomes. Other options include asking learners to submit a written reflection on what they’ve learned, how they might apply what they’ve learned and/or what questions they still have or which concepts were unclear.
Lastly, if teaching a course, you can wrap up by previewing what’s to come, connecting the material to assignments or other work to be completed, or asking questions you want learners to think about before meeting again. You can also provide context on the homework assigned for next class, such as guiding questions for a reading or viewing, or leave time to answer student questions about an upcoming assignment.
How can I make sure my class session or presentation is accessible?
Overall, following the principles of Universal Design for Learning promotes flexibility and adaptation of the learning environment so that all learners can succeed and achieve the intended outcomes. As you consider the guidelines and session structure above, consider how you can provide multiple means of engagement, representation, and action and expression.
Regardless of the structure of your class session or presentation, we highly recommend you use slides or another visual means to communicate information and directions as you progress through the session. Even if your session involves minimal to no “content,” slides, or at least a written agenda, help to keep learners on track with what is being asked of them. If you use slides, decide how and when to make them available. The CTRL accessibility guide provides more detailed guidance for how to ensure slides and documents used in a session are accessible
AU's Center for Teaching, Research & Learning © A Unit of the Office of the Provost American University, Washington, DC
Get in touch!
Address: Hurst 214 Phone: 202-885-2117 Email: [email protected]
- What solution is best for me?
- Download the Government eBook

13 Interactive Presentation Ideas to Engage Students in Class
If you’re a teacher, you’ll know that there’s a lot to think about when you’re in class. It’s important to ensure that what you’re teaching the children is as educational and as interesting as possible - with the aim of engaging the students in the subject and hopefully even enabling them to enjoy learning!
This can be a very difficult balance to strike. However, it’s made easier by these interactive presentation ideas listed in this article, which can engage even the most distracted of students!
How to display presentations
The best classroom gadget to show these presentations on is an interactive display. These are large devices that are mounted to the wall and can connect seamlessly with any video collaboration applications. You can connect interactive displays to the internet and further use them as a powerful classroom teaching tool, to help students learn in a fully interactive and efficient way. We sell interactive displays for classrooms here at Avocor.
Interactive class presentation ideas
Ice breakers.
Many work-related presentations start with an icebreaker, and there’s no reason why a presentation to a class of students should be any different.
The icebreaker question will depend on the class and age of students, but could be something like the following:
- If you could be an animal, what would it be and why?
- What would be your dream place to go on holiday?
- If you could have dinner with three historical characters, who would they be and why?
- If you could make any kind of potion, what would it do?
Incorporating video is one of the best interactive presentation ideas for students. Even if the video is about the same topic as the presentation, the fact that it’s a different type of media will interest the class.
You can either find a suitable video on YouTube or another video software or, if you have a file saved, paste it directly into the presentation .

Questions and answers
Questions and answers are a great way to get the whole class involved. You could invite one student to ask a hypothetical question about the topic, and another could answer.
For example, if you’re learning about Henry VIII and his six wives , you could ask a student to ask a question about them. Their question could be “what was Henry VIII’s favourite food?” or something similar.
When another student answers, you could ask them to explain their answer - for example, if they say “meat and bread”, they might carry on to explain that that was the main diet for royalty at the time.
Songs are a good way to interest younger kids in a topic. You can find songs about all sorts of subjects on YouTube. For example, this seven continents song could be suitable for a Geography song.
Many songs on YouTube have lyrics, so you could encourage your class to practice their reading as they sing along.
Some presentations are made more interactive by external objects - and if you want to engage younger kids, bringing some props can really help the lesson to come alive.
For example, if you’re doing a history lesson about the Ancient Egyptians , you could bring some figures of Tutankhamun, the Sphinx and the ancient pyramids for everybody to see.
Class involvement
Asking for direct class involvement throughout the presentation is a good way to ensure that students stay engaged. For instance, if you’re doing a presentation about animals, you could ask students to make a noise every time you mention a certain animal.

You could ask them to roar each time you mention lions, or make a monkey noise each time you talk about monkeys. This is a great way to ensure that the students are paying attention!
Transitions and animations
A simple way to ensure that your students are paying attention is to use different transitions and animations throughout your presentation.
If you’re teaching older kids or teenagers, you might not want to have too many of these, but younger kids will love seeing every item bounce onto the screen. It’s a wonderful way to get them interested in technology in the classroom !
Quizzes are an effective way to engage students of any age. You can include these at the end of the presentation and they can include questions that you’ve covered in the session.
If your students know that there will be a quiz at the end of the class, they may be more likely to pay attention throughout it! You could also ensure maximum engagement by telling students that there will be prizes for the winner of the quiz - such as stickers or sweets.
Interactive games
Interactive games for class presentations are always a popular way to ensure that students stay engaged! Some examples include:
- noughts and crosses or tic tac toe
- pictionary
- hangman or an alternative like spaceman
- 21 questions
It’s best to make these games related to the subject. For example, the game “21 questions” involves you thinking of a character and students asking questions with a yes or no answer about what character you are.
If you’re teaching a history class, the character could be somebody from history (such as Florence Nightingale or Queen Victoria), or if you’re instructing a science lesson, the character could be a famous scientist (like Einstein or Steven Hawking).
Brainstorming
Brainstorming is another great way to get the class involved. You can use an interactive display to create the brainstorm diagram on. Students can take turns writing on the board, and it can securely connect to any external devices, so any remote class members can join in.
With an interactive display, you can also immediately share the diagram to the rest of the class once it’s finished, so they can keep it to refresh their knowledge of a topic.

For example, if you’re teaching your class about Australia in geography , you could ask their students what they may already know about Australia. They could come up with some items like the following:
- Sydney Opera House
- Aboriginal art
- outback
You could then create a spider diagram with different legs depending on the topic. For this list, there could be an “animals” leg for kangaroos and koalas, an “architecture” leg for the Sydney Opera House, a “landscapes” leg for the rainforest and outback, a “culture” leg for Aboriginal art and a “food” leg for BBQ.
Make a story
Making a story about the topics covered can encourage creativity around the topic. To do this, write down a couple of opening lines to a story related to the topic that you’re teaching.
For example, if you’re teaching students about the Ancient Roman Empire, you could start by saying “Ronald the Roman lived in the British City of Bath, where the Romans had arrived 20 years before. He spent most of his time at work, where he built houses for the rest of the Romans”.
Then, you could invite a student to continue the story, encouraging them to stay as on-topic as possible. You could even give out a prize to the student with the best part of the story. Depending on the size of the class, you could ask every student to contribute.
Stories also work well for English lessons. In these classes, the topic of the story doesn’t matter as much, but you could encourage students to use whatever language they’ve been learning.
For example, if your class has been focused on adjectives, you could ask students to put as many adjectives as possible in each part of their story.
Have a short play
You could take your stories to the next level by creating a short play on one of your slides. This could be based on whatever topic you’re learning about, and you could select a few students to come to the front of the class and read out the lines.
You may wish to create this personally, find a relevant play online or you could even turn a well-known story into a play!

Virtual field trip
One of the most creative interactive school presentation ideas is to take the class on a virtual field trip. This is particularly valuable for geography lessons, where you may learn about places that students might not be able to visit in person, like the Amazon rainforest or even under the sea!
You could link to Google maps, where you could use Google Earth to explore a particular area. Alternatively, there are some YouTube channels that specialise in virtual tours and field trips, such as this one which details all you need to know about rainforests .
If you have a classroom full of students and want to keep them as engaged as possible while teaching them new material, try some of these interactive games for classroom presentations and other ideas!
By incorporating some of these interactive ideas into your presentation, you’ll have the students’ full undivided attention and ensure that they not only enjoy the class but retain the information.
Related Articles
Elevate your space with avocor x series: the award-winning sleek solution for impactful displays, elevate organizational efficiency with avocor: integrating montage & rise vision, enhancing hybrid workspaces: microsoft teams meets avocor l series display, avocor: advances digital collaboration for the hybrid world with google workspace, bigger and better - the 21:9 display sector, get in touch, sign up for our newsletter.
Keep up to date with all the latest from Avocor and partners and get information on upcoming events and exciting product news.
Latest Updates
Useful links, ready to talk.
To provide the best experiences, we and our partners use technologies like cookies to store and/or access device information. Consenting to these technologies will allow us and our partners to process personal data such as browsing behavior or unique IDs on this site and show (non-) personalized ads. Not consenting or withdrawing consent, may adversely affect certain features and functions.
Click below to consent to the above or make granular choices. Your choices will be applied to this site only. You can change your settings at any time, including withdrawing your consent, by using the toggles on the Cookie Policy, or by clicking on the manage consent button at the bottom of the screen.
14 Fun & Interactive Presentation Games for Teams and Students

So you've got an audience to energize, students to engage, or a team that needs a little extra fun — playing an interactive presentation game is an easy way to do just that.
We've done the research and found the best of these games for you: we looked specifically for games that are simple to set up, fun to play, and flexible enough to be used with a variety of presentations and audiences. Most of these activities work virtually with Zoom/PowerPoint and can also be used in person.
Which of these 14 presentation games do you like best? Take a look and let us know your favorites:
1. Live Trivia Competition
A great way to ramp up the excitement and engagement is to enable a little bit of friendly competition. Trivia is an easy way to do this—plus, it can be whole-group inclusive and large-audience friendly (if you use the right tools).
Here's a great trivia game you can run with your team, students, or any large audience. It's already created for you with questions and scoring built in to make it even easier:
Here's how to play:
- Make a free account here: https://slideswith.com/
- Click the slide deck and copy it.
- Launch the trivia game by clicking "Start Event."
- Invite your group to join in and submit answers using their mobile devices (show the winners automatically).
- Interact and play during your presentation!
This trivia game has questions on many topics to keep your audience's attention and appeal to everyone. It only takes 10-15 minutes to play, so it's a great game for long discussions! Also, this interactive activity is free for up to ten participants and is totally customizable.
2. Sing and Swing
To really liven up your group, encourage your listeners to play Sing and Swing. This activity is best for long presentations because it boosts energy, creates a fun, light-hearted environment, and makes people laugh a lot.
Here's how to play:
- Before your presentation, pick a well-known song and rewrite the chorus (replace parts of it with words and phrases from your presentation)
- When you're ready to play, show the song on your screen.
- Invite your audience to sing it with you!
If you have a fun group or a class of energetic students, consider adding choreography to engage your audience even more.

3. 20 Questions
If you want a presentation game that requires your listeners to talk more than you, 20 Questions is the one to play! A classic and simple activity, this game immediately boosts engagement and gets people laughing.
Here's how to play: Have someone put an appropriate image or word on the screen behind you (this can be an audience member you trust or a colleague or co-presenter). To make things more fun, put on a blindfold so that everyone knows you can't cheat. From there, ask 20 "yes or no" questions to guess what's displayed on the screen. Your group should respond "yes" or "no" to guide you to the correct answer.
4. Scavenger Hunt Challenge
To get your audience out of their seats, a scavenger hunt challenge is one of the best interactive games for presentations. It'll immediately energize your audience , team, or students while giving them a fun way to learn.
There are tons of in-person and virtual scavenger hunt ideas you can use to dive deeper into your topic or help everyone learn about one another. But if you want a ready-to-play game that you can instantly launch without having any tech skills, here's a fun one to play:
- Use an email address and password to create a free account here: https://slideswith.com/ (a free account guarantees up to ten people can play at no charge).
- Click the game and press "Copy and use this slide deck."
- In the top right corner, click "Start Event."
- Ask listeners to join the game by using their mobile devices to scan the QR code. Players should continue using their mobile devices to submit answers to questions.
- Have everyone start hunting for items!
This activity is a particularly fun game because it's a photo-hunt, show-and-tell challenge! That means your audience will not only get out of their seats to find items, but they'll also get to take pictures and share and discuss photos of what they find. This conversational element will help engage your group!
5. Group Word Clouds
Whether you're speaking to team members, students, or conference-goers, this activity lets you ask questions and get your listeners' thoughts on specific topics.
This game is the perfect way to start your presentation, especially if you're discussing something with a wide range of opinions or are unsure how much your listeners know about a certain subject. Group Word Clouds is also beneficial if you want to do a quick meeting pulse or know how your listeners feel going into your presentation—understanding their energy levels and mood can help you adjust (if necessary) to get maximum engagement and excitement.
To enjoy this activity, keep things simple by using a tool that already offers a ready-to-play Group Word Clouds game. Here's a popular one you can launch immediately:
- Create a free account by entering an email and password here: https://slideswith.com/
- Click the game and then copy it (the button to do so is right underneath the slide deck).
- Press "Start Event" in the top right corner.
- Tell participants to play by scanning the QR code.
- Create word clouds and have fun!
This interactive game only takes 5-10 minutes to play, so it's a fast, fun way to engage your audience and feel out the room. Players can use their mobile devices to answer questions. This activity is also free for up to 10 people and is easy to personalize.
6. The Get to Know You Game
This activity is one of the best presentation games if you have a small group that doesn't really know each other. The Get to Know You Game is a creative way to do introductions, and it's really simple.
Here's how to play the game: Before the event, ask group members to bring a favorite song or item to the presentation (you can do this by emailing them). When you're ready to play, ask each person to introduce themself, present their song or item, and explain why they picked it. For those sharing a song, have them play it on their phones before they explain why it's their favorite.
7. Live Poll Questions
When you have a large group, it's not easy to find ways to boost engagement—but poll questions are the solutions, especially when they're live and interactive. With this unique setup, large groups engage by answering questions and seeing their answers displayed in a fun way.
Your job is to make sure you actually find a game that showcases responses uniquely to captivate your group. For a quick and great option, here's a popular icebreaker activity that promises to display responses using fun formats like word clouds, donut charts, live graphs, and per-player:
- Create an account for free to access the game: https://slideswith.com/
- Click the slide deck and press the button to copy it.
- Look in the top right corner of the deck and press "Start Event."
- Invite your group to play the game. They only need to use their mobile devices to scan the QR code.
- Start polling your audience!
This activity is one of those fun presentation games everyone will want to enjoy, so invite all of your team members and students to participate. This game can accommodate up to 250 players and takes 5-10 minutes to complete. Tell your group to use their mobile devices to submit their responses.
8. Assumptions
This interactive game is a great way to break up your presentation to see who's paying attention and who can answer questions pertaining to your topic.
- Ask your audience to stand up (for virtual presentations, make sure everyone's video is on).
- Show true or false statements on the screen one by one.
- Tell people to raise a hand if they think the statement is correct and sit down if they think it's incorrect.
- Continue until one person is left standing.
- Award the winner.
This activity can be as short and challenging as you want. Also, if your presentation is long, you can play multiple rounds to break up your speaking time and test your audience throughout your discussion.

9. Controversial Questions
Want to see where your audience, students, or team lands on controversial topics? Then, energize your presentation with a fun, creative game called Controversial Questions. This activity has prompts that inspire lively debates, so it's a great way to get your group excited and chatty.
However, to maintain a positive environment, make sure to find a tool that offers an office-friendly, classroom-friendly, and conference-friendly game. You don't want to sour the mood by creating uncomfortable division during your presentation. To make sure this game is fun and light-hearted, here's a popular one that's suitable for all audiences and ages:
- Sign up for a free account by inputting an email address and password here: https://slideswith.com/pricing
- Click the game and press the button that says, "Copy and use this deck."
- Press "Start Event" (the button is in the top right corner).
- Have participants join the fun by asking them to scan the QR code with their mobile devices.
- Get controversial and play!
This interactive game for presentations asks fun (but appropriate) questions like:
- Does pineapple belong on pizza?
- Does the person flying in the middle seat get both armrests?
- Should the toilet roll go over or under?
Players should use their mobile devices to submit answers. Up to ten people can play for free, and you can customize the game by updating the questions!
10. Word of the Day
With this activity, you can keep your audience, team, or students engaged throughout your entire presentation. This game requires listeners to be alert and recognize whenever you say the word of the day.
Here's how to play: At the beginning of your presentation, tell your group the word of the day (it can also be a phrase if you'd prefer). Say that you'll weave the word into your presentation and that your audience must shout it out whenever you mention it.
11. Mini Activity: Group Icebreaker
Whether you're doing an in-person or virtual presentation, you need to warm up your audience to get things started on a positive note. The best way to do that is with a quick icebreaker game.
However, make sure your questions are fun, positive, and engaging. You can easily do this by finding a game that already has the best icebreaker questions included. Here's one that's ready to play (and requiring no tech skills to launch):
- Input an email address and password to make a free account here: https://slideswith.com/
- Click the deck and copy it (press "Copy and use this deck).
- Click the button in the top right corner that says "Start Event."
- Invite participants to play by asking them to scan the QR code.
- Break the ice to warm up your audience!
Your group should use their mobile devices to submit responses to poll questions. Also, this game accommodates up to 250 players, but only ten people can join for free.
12. Process of Elimination
This activity is one of the best games for presentations because it's simple yet fun and great at helping listeners get to know each other. You can play it at the beginning of your presentation or in the middle to give your group a chance to stretch their legs.
- Before your event, create a list of "yes or no" questions.
- Once you're ready to play, tell your group to stand up (if you're doing a virtual presentation, make sure everyone's video is on).
- Ask each question one by one.
- Tell attendees to stand if their answer is "yes" and sit if their answer is "no."
The questions can relate to your topic or be totally random. Also, if you'd prefer to thin out the number of people standing, you can take a creative twist and ask your questions by saying something like this: "Stay standing if (insert scenario)." When phrasing each question this way, the game will end with one person standing. To acknowledge the winner, you can give them a round of applause or award them a prize.
13. Conference Opener Icebreaker
If you're speaking at a big conference, you need an interactive game for presentations that can get everyone involved and ensure every voice is heard. To achieve these goals, you should create an icebreaker game that works for large groups .
Using an easy, intuitive template is the best step to take. That way, you don't have to start from scratch or spend hours making your game. For a template that requires no code or tech-savviness to build on, here's the best option:
- Sign up by making a free account here: https://slideswith.com/
- Click on the game. On the next page, click the button to copy and use the deck.
- Customize the template using the instructions HERE .
- During your presentation, press "Start Event" in the top right corner.
- Ask the group to use their mobile devices to scan the QR code and join the fun. (Also, make sure participants use their mobile devices to submit answers.)
- Play and engage your audience!
This template has fun, interactive features built in to keep your large audience engaged. Those features include polls, word clouds, and ratings. Just make sure you sign up for a paid plan to accommodate the large number of people in your group—the free account only works for up to ten players.
14. Two Truths and a Lie
This classic game is a fun, energizing way to help your listeners get to know one another. It's perfect for small in-person or virtual groups and is an ideal activity for the beginning of your presentation.
Here's how to play: Pick any topic (for the purposes of this article, the topic will be "movies"). In no particular order, say two movies you've really watched and one you haven't watched. Ask your audience to guess which statement is the lie. The winner picks the next topic and says two truths and a lie.
Be Memorable With Presentation Games
Oftentimes, people forget presentations within a week or even days, and that's because the discussions are boring. But you don't work hard preparing a presentation for it to be forgotten. If you want your message to stick, all you have to do is make it enjoyable without being corny.
If you want to be remembered and actually get people engaged, you need to make your presentation fun and enjoyable, without coming off as corny or desperate to please. Ivan Dimitrijevic, 10 Secrets of Making Every Presentation Fun, Engaging, and Enjoyable
Luckily, the interactive presentation games in this article are unique and exciting—they're far from corny. So, use them for your upcoming presentations to make your messages compelling and memorable.
Subscribe for more articles like this
Try slides with friends for free.
The easiest way to host meetings your team will love
Engagement delivered to your inbox
We'll email you 1-2x per month with brand new, ready-to-run events and ideas. Subscribe to stay ahead of the curve and keep your lessons, meetings, and events fresh and engaging.
Student Class Project Presentation on GIS and Hazard Vulnerability on April 18

Students in GOV 1013: GIS Analysis of Hazard Vulnerability , led by Dr. Connie Chen, will be presenting their final projects in Room S003 at the CGIS South building (1730 Cambridge St., Cambridge) on Thursday, April 18th, from 3 to 5 pm.
The presentations will cover topics such as hazards, vulnerability, resilience, and communities. We welcome scholars interested in these topics and GIS to attend the event, and students will be available for questions and discussions with visitors.
- Study Guides
- Homework Questions
SS 320 Spring 2024 Presentation Assignment Prompt
- Health Science
12 Powerful Closing Lines for a Class Presentation
Hrideep barot.
- Presentation , Public Speaking

Powerful closing lines have been a part of some of the most crucial moments in history. They’re the last notes in a symphony, the final strokes on a masterpiece, and in the context of class presentations , they’re the unforgettable conclusion that leaves your classmates in awe.
In this comprehensive guide, we’re about to unveil the artistry behind crafting unforgettable closing lines for class presentations. Whether you’re a student stepping into the spotlight to deliver a class project or an educator determined to inspire and captivate your students, never underestimate the profound impact a closing statement can have. It’s the final brushstroke on the canvas, the last note in a symphony, the lingering taste of a delicious meal. The closing lines you choose can elevate your class presentation from the realm of the ordinary to the extraordinary.
Picture this: you’ve meticulously researched your topic, crafted a compelling narrative, and delivered your content with enthusiasm. Your audience is hanging onto your every word. Now, as you reach the crescendo of your presentation , it’s time for that final flourish, that memorable conclusion that leaves an indelible mark.
In the words that follow, we’ll delve into the art and science of crafting closing lines that resonate, leaving your audience both informed and inspired. We’ll explore 12 powerful closing lines, each with its unique charm and ability to transform your presentation’s impact.
So, get ready to embark on a journey through the world of impactful conclusions . Whether you’re a student striving for an A+ or an educator aiming to ignite curiosity and learning, our guide will equip you with the tools you need to conclude your class presentation with finesse.
Together, let’s dive right in and unlock the magic of memorable Conclusions!
1. the call to action.
Inspire your audience to take action or reflect on your presentation’s key message. Encourage them to join you on a journey of discovery or change. Example: “Now, let’s embark on this adventure together and make a difference in our world.”
2. The Thought-Provoking Quote
Close with a thought-provoking quote that encapsulates the essence of your presentation. It should leave your audience pondering its meaning. Example: “As Albert Einstein once said, ‘Imagination is more important than knowledge.’ Let’s keep imagining and learning together.”
3. The Challenge
Present a challenge to your audience, something they can take on or think about further. Example: “I challenge each of you to think beyond the ordinary, to question, to innovate, and to be the change you wish to see.”
4. The Visionary Statement
Paint a vivid picture of the future you’ve explored in your presentation. Give your audience a glimpse of what could be if they embrace the ideas presented. Example: “Imagine a world where every act of kindness ripples through society. That world is within our grasp.”
5. The Personal Anecdote
Share a personal anecdote or story that ties back to your presentation’s theme. It adds a human touch and makes your message relatable. Example: “I’ll never forget the day I realized the power of perseverance. Just like I did, we can all overcome challenges.”
6. The Call for Questions
Open the floor for questions, showing your willingness to engage with your audience further. It invites discussion and deeper exploration. Example: “I’m here to answer any questions or hear your thoughts. Who’d like to start?”
7. The Visual Recap
Display a visual summary of your key points on the screen. It reinforces your message and helps your audience remember the main takeaways. Example: “Before we conclude, let’s quickly recap the journey we’ve taken.”
8. The Emotional Appeal
Appeal to your audience’s emotions, expressing gratitude or highlighting shared values. Example: “Thank you for being a part of this journey. Together, we’ve shown that compassion and collaboration can drive change.”
9. The Future Collaboration
Suggest future collaboration or exploration of the topic together. It keeps the conversation going beyond the presentation. Example: “Let’s continue this conversation, explore new ideas, and make a difference together.”
10. The Bold Statement
Make a bold statement or prediction related to your topic. It should leave your audience excited about what lies ahead. Example: “The future of [topic] is bright, and together, we will shape it.”
11. The Call for Feedback
Encourage feedback from your audience, showing your commitment to improvement and continuous learning. Example: “Your feedback is invaluable. Please share your thoughts, suggestions, and ideas with me.”
12. The Acknowledgment of Gratitude
Express sincere gratitude to your audience for their time and attention. It’s a simple yet powerful way to wrap up. Example: “I’m truly grateful for your presence today. Thank you for being such an engaging audience.”
Examples of Powerful Closing Lines
Martin luther king jr.’s “i have a dream” speech (1963):.
In one of the most iconic speeches in history, Martin Luther King Jr. closed with the powerful words, “ Free at last! Free at last! Thank God Almighty, we are free at last! ”
This memorable closing statement from the March on Washington for Jobs and Freedom not only marked the culmination of his vision for racial equality but also became a symbol of hope and inspiration for civil rights movements worldwide. It continues to resonate today as a call for justice, freedom, and equality.
Neil Armstrong’s Words on the Moon (1969):
As Neil Armstrong took humanity’s first step onto the lunar surface, he uttered the famous words, “That’s one small step for [a] man, one giant leap for mankind.” This historic closing statement not only marked a momentous achievement in space exploration but also symbolized humanity’s indomitable spirit of exploration and discovery. It remains etched in history as a testament to human ingenuity and curiosity, inspiring generations of scientists, explorers, and dreamers.
These memorable closing statements from history serve as valuable lessons, urging us to adopt their qualities and incorporate them into our own lives.
Winston Churchill’s famous speech delivered at the end of World War II:
“ Now this is not the end. It is not even the beginning of the end. But it is, perhaps, the end of the beginning .”
Winston Churchill delivered this closing statement in his speech on November 10, 1942, following the Allied victory in the Second Battle of El Alamein during World War II. With these words, Churchill conveyed that while a significant victory had been achieved, the war was far from over. He provided hope for the future and the continued determination to prevail against Nazi Germany, acknowledging that the hardest battles were yet to come. This statement has since become emblematic of perseverance in the face of adversity.
John F. Kennedy’s Inaugural Address (1961):
John F. Kennedy’s inaugural address in 1961 is renowned for its call to civic duty and personal responsibility. Here’s a bit more context and the preceding lines leading up to the famous closing line:
“ And so, my fellow Americans, ask not what your country can do for you; ask what you can do for your country. “
This statement marked the culmination of Kennedy’s message of shared responsibility and unity as he assumed the presidency. In the address, he addressed the challenges and opportunities facing the nation at the height of the Cold War. Kennedy inspired hope and a sense of purpose, urging Americans to contribute actively to their country’s well-being.
How can we form Powerful Closing Statements :
1. the visionary challenge:.
- Example 1: “Together, let’s envision a world where every child has access to quality education, where poverty becomes a relic of the past, and where innovation knows no bounds. As we embark on this journey, remember that change begins with a single step, and each of us has the power to be that change.”
- Elaboration : This closing statement invites the audience to envision a better future while emphasizing individual agency in creating that change. It challenges listeners to become active participants in a collective vision.
2. The Invitation for Reflection:
- Example 2: “As we conclude today, I invite you to take a moment to reflect on the lessons learned, the connections forged, and the possibilities ahead. Remember that learning is a lifelong journey, and our experiences today are just the beginning of a greater adventure.”
- Elaboration : This closing statement encourages introspection and emphasizes the continuous nature of learning. It leaves the audience with a sense of ongoing growth and exploration.
These original examples of powerful closing statements are designed to inspire and leave a lasting impact on the audience, much like the historical examples mentioned earlier. They encourage forward-thinking, reflection, and a sense of shared purpose.
What is THE BEST way to end a presentation?
I. the surprise element:.
Leave your audience with a surprising fact or unexpected twist related to your topic. A well-placed surprise can make your presentation memorable.
Example of Topic: Environmental Conservation
Closing: “Did you know that a single recycled plastic bottle saves enough energy to power a laptop for 25 minutes? So, every time you toss one in the recycling bin, you’re literally fueling your own productivity!”
II. Visual Metaphor:
Use a visual metaphor or analogy to drive home your main message. An evocative image or comparison can linger in your audience’s mind.
Example of Topic: Teamwork and Collaboration
Closing: “Just like the gears in a well-oiled machine work together seamlessly, our teamwork can propel us to success. Let’s keep our projects running as smoothly as these gears.”
III. Personal Connection:
Share a brief personal anecdote or experience that ties into your presentation’s theme. Connecting on a personal level can create a stronger bond with your audience.
Example of Topic: Overcoming Challenges
Closing: “When I faced a similar obstacle during my internship last summer, I thought it was insurmountable. But I persisted, and it taught me that perseverance pays off. I hope my experience inspires you to push through your challenges as well.”
IV. Open-Ended Question:
Instead of a call to action, ask an open-ended question that encourages contemplation. This leaves your audience with something to ponder after your presentation.
Example of Topic: Ethics in Business
Closing: “As we conclude, I’d like to leave you with this question: What role do ethics play in shaping the future of business? I encourage you to reflect on this and share your thoughts in our discussion after the presentation.”
V. A Powerful Image:
Display a single striking image that encapsulates the essence of your message. Visual impact can sometimes convey more than words.
Example of Topic: History of Space Exploration
Closing: “This image of Earthrise taken from the Apollo 8 mission reminds us of our place in the cosmos and the importance of exploring the unknown. Let it inspire your curiosity and wonder about the universe.”
VI. Contrast and Resolution:
Highlight a before-and-after scenario related to your topic. Show how your presentation has provided a solution or resolution to a problem.
Example of Topic: Health and Fitness
Closing: “Remember the ‘before’ picture we saw at the beginning of this presentation? Today, we’ve explored the path to a healthier lifestyle. Let’s embrace this transformation and make positive changes together.”
VII. Provocative Statement:
Make a thought-provoking statement that challenges conventional thinking. Stimulating intellectual curiosity can leave a lasting impression.
Example of Topic: Artificial Intelligence
Closing: “In a world where machines are becoming increasingly intelligent, the real question is, ‘What does it mean to be human?’ Let’s keep pondering this as we navigate the age of AI.”
VIII. Audience Participation Challenge:
Challenge your audience to apply a concept or principle from your presentation in their daily lives. Encourage them to share their experiences later.
Example of Topic: Effective Study Techniques
Closing: “Now, I challenge each of you to implement one new study strategy from today’s presentation for the next week and share your experiences with the class. Let’s see how it impacts our learning.”
IX. Visual Progression:
Use a series of visual slides that depict progress or transformation. Show how your presentation has advanced the understanding of your topic.
Example of Topic: Scientific Discovery
Closing: “From the initial observations to the breakthrough experiments we discussed today, science continually evolves. Let’s continue to explore, learn, and advance our understanding of the natural world.”
What Is a Good Closing Sentence For a Thank You Note:
1. the reflecting farewell :.
Sometimes, sticking to the classics is the way to go. Example: “In conclusion, let’s remember that it’s through our collective efforts that we can make a positive difference. Thank you for being part of this journey.”
This option is compelling as it inspires a sense of unity and purpose, encouraging the audience to reflect on the speech’s message.
2. The Forward-Looking Finish Line:
Want to keep the connection alive? Try a closing like, “Looking forward to catching up soon!” It adds a hint of anticipation and suggests that your gratitude isn’t just a one-time thing; you’re excited about future encounters.
3. The Appreciative Gesture:
To infuse your closing with warmth, make your thank-you note feel like a heartfelt connection. Example: To sum it up, your presence here today has added immeasurable value to this occasion. Thank you for being a part of this memorable moment.”
This sentence is strong because it emphasizes the audience’s importance in the event, making them feel appreciated and valued.
4. The Purposeful Note :
This one is especially unique as it leaves a sense of purpose and responsibility behind, also a technique used by some of the greatest leaders ever.
Example: “To wrap things up, I’d like to extend my sincere thanks for your time and consideration. May the lessons shared today resonate in our hearts and guide us forward.”
This closing is powerful because it leaves the audience with a sense of purpose and reflection, reinforcing the speech’s key takeaways.
5. The Creating Impact :
Leaving the audience feeling important and validated is very important. By saying that they make a difference or that they can leave an impact gives them a sense of power and control.
Example: “In summary, your support means the world to me, and I’m grateful beyond words. Let’s continue to make a positive impact together.”
This closing is effective as it conveys deep appreciation and invites the audience to be part of ongoing positive endeavors.
6. The Grateful Signature:
If you want to emphasize your thankfulness one last time, end with, “With heartfelt thanks.” It’s a signature of gratitude, leaving no doubt about the sincerity of your appreciation.
Example: “In closing, I want to express my heartfelt gratitude once more for your presence today. Your support and attention have made this moment truly special.”
This closing sentence is effective because it reiterates gratitude, leaving a lasting impression of appreciation in the audience’s minds.
Let us use an example to get a better understanding:
I want to extend my heartfelt gratitude to all of you for being such an attentive and engaging audience during my recent speech. Your presence and active participation added depth and meaning to the discussion, and it was an absolute pleasure to share my thoughts with you.
Your support and enthusiasm are truly appreciated, and I hope the insights shared in my speech continue to resonate with you. If you have any further questions or thoughts, please don’t hesitate to reach out. Thank you once again for your time and attention.
How Can I End a Presentation Without Saying Thank You:
While expressing gratitude is a common way to conclude a presentation, there are moments when you might want to skip the traditional “thank you.” Here are some creative alternatives to wrap up your presentation effectively:
The Forward-Looking Statement:
Instead of looking back with gratitude, look forward with anticipation. Share your excitement about what lies ahead for your audience. For example, “I can’t wait to see the incredible impact we’ll make together.”
The Challenge Accepted:
Challenge your audience to take what they’ve learned and put it into action immediately. Encourage them to apply your insights and make a positive change. For instance, “I challenge each of you to implement one key takeaway from today’s presentation within the next week.”
The Future Vision:
Paint a compelling vision of the future that aligns with your presentation’s theme. Describe the possibilities and benefits that await if your audience embraces your ideas. Use vivid language to help them visualize this future.
The Open-Ended Question:
Pose a thought-provoking question that invites your audience to reflect and engage. This question should leave them pondering and encourage discussions beyond the presentation’s end.
The Inspiring Quote:
Share an inspiring quote that encapsulates the essence of your presentation. This can be a memorable way to conclude and leave your audience with a powerful message to remember.
The Call to Action:
If your presentation is focused on action, end with a clear call to action. Prompt your audience to do something meaningful based on your presentation’s content. It could be signing up for a workshop, joining a cause, or volunteering.
The Visual Surprise :
End with a visual surprise, such as revealing a compelling image or infographic that reinforces your message. Visuals can leave a strong impression and drive your point home.
The Personal Connection:
Share a personal anecdote or story that relates to your presentation. Make it relatable and memorable, leaving your audience with a connection to your message.
The Group Activity:
If your presentation allows, engage your audience in a brief group activity that reinforces your message or encourages collaboration and interaction.
The Poignant Pause:
Conclude with a moment of silence or reflection. Allow your audience to absorb the key takeaways and reflect on the impact of your presentation.
Remember, the choice of how to conclude your presentation without saying “thank you” should align with your overall message, purpose, and audience. It’s an opportunity to leave a lasting impression and guide your audience toward the desired action or mindset.
Conclusion:
Throughout this exploration of closing statements, we’ve journeyed from understanding the significance of powerful closings to uncovering various ways to leave a lasting impact. From memorable historical examples to creative alternatives, we’ve delved into the art of concluding with finesse.
Closing statements are not mere formalities; they are the key to resonating with your audience, leaving an indelible mark, and driving your message home. Whether you choose to inspire, challenge, or provoke thought, the closing is your final opportunity to connect deeply.
So, when you find yourself at the brink of a presentation’s conclusion, remember the artistry of the closing statement. Use it wisely, weave it skillfully, and watch as your words echo in the hearts and minds of your audience, carrying the essence of your message long after the final word is spoken.
To learn public speaking and how to communicate effectively at the workplace you can reach out to us here.

Enroll in our transformative 1:1 Coaching Program
Schedule a call with our expert communication coach to know if this program would be the right fit for you

How to Negotiate: The Art of Getting What You Want

10 Hand Gestures That Will Make You More Confident and Efficient

Interrupted while Speaking: 8 Ways to Prevent and Manage Interruptions
- [email protected]
- +91 98203 57888
Get our latest tips and tricks in your inbox always
Copyright © 2023 Frantically Speaking All rights reserved
Kindly drop your contact details so that we can arrange call back
Select Country Afghanistan Albania Algeria AmericanSamoa Andorra Angola Anguilla Antigua and Barbuda Argentina Armenia Aruba Australia Austria Azerbaijan Bahamas Bahrain Bangladesh Barbados Belarus Belgium Belize Benin Bermuda Bhutan Bosnia and Herzegovina Botswana Brazil British Indian Ocean Territory Bulgaria Burkina Faso Burundi Cambodia Cameroon Canada Cape Verde Cayman Islands Central African Republic Chad Chile China Christmas Island Colombia Comoros Congo Cook Islands Costa Rica Croatia Cuba Cyprus Czech Republic Denmark Djibouti Dominica Dominican Republic Ecuador Egypt El Salvador Equatorial Guinea Eritrea Estonia Ethiopia Faroe Islands Fiji Finland France French Guiana French Polynesia Gabon Gambia Georgia Germany Ghana Gibraltar Greece Greenland Grenada Guadeloupe Guam Guatemala Guinea Guinea-Bissau Guyana Haiti Honduras Hungary Iceland India Indonesia Iraq Ireland Israel Italy Jamaica Japan Jordan Kazakhstan Kenya Kiribati Kuwait Kyrgyzstan Latvia Lebanon Lesotho Liberia Liechtenstein Lithuania Luxembourg Madagascar Malawi Malaysia Maldives Mali Malta Marshall Islands Martinique Mauritania Mauritius Mayotte Mexico Monaco Mongolia Montenegro Montserrat Morocco Myanmar Namibia Nauru Nepal Netherlands Netherlands Antilles New Caledonia New Zealand Nicaragua Niger Nigeria Niue Norfolk Island Northern Mariana Islands Norway Oman Pakistan Palau Panama Papua New Guinea Paraguay Peru Philippines Poland Portugal Puerto Rico Qatar Romania Rwanda Samoa San Marino Saudi Arabia Senegal Serbia Seychelles Sierra Leone Singapore Slovakia Slovenia Solomon Islands South Africa South Georgia and the South Sandwich Islands Spain Sri Lanka Sudan Suriname Swaziland Sweden Switzerland Tajikistan Thailand Togo Tokelau Tonga Trinidad and Tobago Tunisia Turkey Turkmenistan Turks and Caicos Islands Tuvalu Uganda Ukraine United Arab Emirates United Kingdom United States Uruguay Uzbekistan Vanuatu Wallis and Futuna Yemen Zambia Zimbabwe land Islands Antarctica Bolivia, Plurinational State of Brunei Darussalam Cocos (Keeling) Islands Congo, The Democratic Republic of the Cote d'Ivoire Falkland Islands (Malvinas) Guernsey Holy See (Vatican City State) Hong Kong Iran, Islamic Republic of Isle of Man Jersey Korea, Democratic People's Republic of Korea, Republic of Lao People's Democratic Republic Libyan Arab Jamahiriya Macao Macedonia, The Former Yugoslav Republic of Micronesia, Federated States of Moldova, Republic of Mozambique Palestinian Territory, Occupied Pitcairn Réunion Russia Saint Barthélemy Saint Helena, Ascension and Tristan Da Cunha Saint Kitts and Nevis Saint Lucia Saint Martin Saint Pierre and Miquelon Saint Vincent and the Grenadines Sao Tome and Principe Somalia Svalbard and Jan Mayen Syrian Arab Republic Taiwan, Province of China Tanzania, United Republic of Timor-Leste Venezuela, Bolivarian Republic of Viet Nam Virgin Islands, British Virgin Islands, U.S.
Search Cornell

Class Roster
Section menu.
- Toggle Navigation
- Summer 2024
- Spring 2024
- Winter 2024
- Archived Rosters
Last Updated
- Schedule of Classes - April 12, 2024 7:34PM EDT
- Course Catalog - April 12, 2024 7:06PM EDT
CRP 5861 Graphic Communications
Course description.
Course information provided by the Courses of Study 2023-2024 . Courses of Study 2024-2025 is scheduled to publish mid-June.
This course focuses on the fundamentals of graphic communication and planning industry standard computer programs such as: Google Earth, Auto CAD, SketchUp, Illustrator, Photoshop and InDesign via exercises related to physical planning and urban design. Enhance your ability to compose images and text, utilize color pallets, fonts and create design layouts in order to deliver effective and successful presentations. This course is designed for mature undergraduate and graduate students in urban planning, landscape architecture, real estate and related fields, who desire to possess a competitive edge when applying for jobs and/or participate in multi-disciplinary design competitions, and/or wish to learn how to communicate ideas in a clear and appealing way to a diversity of audiences. The concepts learned in the course will be developed through laboratory work and evolved via the production of in class exercises, collective knowledge development assignments, and a final board presentation.
When Offered Fall.
View Enrollment Information
Regular Academic Session.
Credits and Grading Basis
3 Credits Stdnt Opt (Letter or S/U grades)
Class Number & Section Details
2975 CRP 5861 LAB 401
Meeting Pattern
- F 8:00am - 11:00am
- Aug 26 - Dec 9, 2024
Instructors
To be determined. There are currently no textbooks/materials listed, or no textbooks/materials required, for this section. Additional information may be found on the syllabus provided by your professor.
For the most current information about textbooks, including the timing and options for purchase, see the Cornell Store .
Additional Information
Instruction Mode: In Person
Or send this URL:
Available Syllabi
About the class roster.
The schedule of classes is maintained by the Office of the University Registrar . Current and future academic terms are updated daily . Additional detail on Cornell University's diverse academic programs and resources can be found in the Courses of Study . Visit The Cornell Store for textbook information .
Please contact [email protected] with questions or feedback.
If you have a disability and are having trouble accessing information on this website or need materials in an alternate format, contact [email protected] for assistance.
Cornell University ©2024
Smart. Open. Grounded. Inventive. Read our Ideas Made to Matter.
Which program is right for you?

Through intellectual rigor and experiential learning, this full-time, two-year MBA program develops leaders who make a difference in the world.
A rigorous, hands-on program that prepares adaptive problem solvers for premier finance careers.
A 12-month program focused on applying the tools of modern data science, optimization and machine learning to solve real-world business problems.
Earn your MBA and SM in engineering with this transformative two-year program.
Combine an international MBA with a deep dive into management science. A special opportunity for partner and affiliate schools only.
A doctoral program that produces outstanding scholars who are leading in their fields of research.
Bring a business perspective to your technical and quantitative expertise with a bachelor’s degree in management, business analytics, or finance.
A joint program for mid-career professionals that integrates engineering and systems thinking. Earn your master’s degree in engineering and management.
An interdisciplinary program that combines engineering, management, and design, leading to a master’s degree in engineering and management.
Executive Programs
A full-time MBA program for mid-career leaders eager to dedicate one year of discovery for a lifetime of impact.
This 20-month MBA program equips experienced executives to enhance their impact on their organizations and the world.
Non-degree programs for senior executives and high-potential managers.
A non-degree, customizable program for mid-career professionals.
Presentation and Fireside Chat with Bundesbank President Joachim Nagel
- Google Calendar
- iCal Calendar
- Outlook Calendar
On April 16 at 10:30 am, Dr. Joachim Nagel, President of the Deutsche Bundesbank , the central bank of Germany, will visit the MIT Media Lab and share insights on proposals to issue a digital currency for the euro area of the European Union entitled “Digital Euro: Vision, Advancements, and Challenges.”
See details on the MIT Golub Center for Finance and Policy event page .
Upcoming Events
Mba class visit program, africa innovate conference 2024, mit emba: business analytics panel, thursday, april 18, 2024 - hsi lunch seminar series with don rucker, md, ms chief strategy officer, 1uphealth & former national coordinator for health information technology (onc).
Bestiality references allegedly made during presentation at Renmark High School
Warning for readers: This article contains graphic language.
The South Australian Department for Education is investigating a presentation delivered to year 9 girls in a regional high school that allegedly referenced bestiality as being accepted by the LGBTQIA+ community.
Female students said teachers at Renmark High School told them to leave their lessons and attend a presentation in a separate classroom.
Students who attended the presentation on March 22 say two staff from the Headspace centre in the neighbouring town of Berri introduced a "third-party" presenter who facilitated an hour-long presentation focused on relationships.
Parents said they were not notified about the presentation, nor was it consented to.
Students said they were left unsupervised for the duration of the presentation.
Student Courtney White, 14, said she felt confused and blindsided by the presentation.
"We had a teacher that told us to grab a chair and sit in front of the board, and then the Headspace people came in and then [the teacher] left, so then we're sitting in front of a board alone with no teachers, just the Headspace people," she said.
"The first slide of the PowerPoint on the board was 'You can see queerly now' and 'No point hiding.'"
Girls felt 'really uncomfortable'
Fourteen-year-old Emelia Wundenberg said the presenter was graphic when referencing their own sexual preferences and spoke in sexually explicit terms about growing up and being confused about whether they idolised people of the same gender or wanted to be intimate with them.
Students say they were then given an explanation of the initialism LGBTQIA+, with each word and its meaning displayed on the screen.
"There was a slide for what the 'plus' means, and they just started randomly saying words that no-one knew, like bestiality," Emelia said.
"It was on the board when they were showing what the 'plus' meant."
The students said bestiality was then explained in detail and the presenter seemed to imply it was something practised by people who identified as LGBTQIA+.
"They said [the queer community] just accepts all of it, even though … isn't it illegal?" Emelia said.
As the talk went on multiple girls, including Courtney, began to feel uncomfortable and asked to leave the classroom to "go to the bathroom".
"We're all just sitting there like, 'What the hell? What are we doing here? Why are we learning about animals having sex with humans?'" she said.
"It was really disgusting, it was really uncomfortable."
Emelia said many of those who asked to leave the classroom did not return.
When the ABC sought comment from the presenter a response was sent on the person's behalf asking that reporters refrained from reaching out or naming them in its coverage.
'Normal procedure' not followed
Letters seen by the ABC that were sent to parents on behalf of Renmark High School principal Mat Evans stated that the presentation was meant to discuss "respectful relationships".
The letter acknowledged that the school's "normal procedure for notifying parents ahead of specific presentations was not followed".
Mr Evans said the third-party presenter had "been suspended from department schools while the department undertakes an investigation".
"We are undertaking an internal review to ensure that processes around such notifications and procedures with regard to third parties attending at our school are always met," he said.
The ABC contacted the Department for Education, which provided a similar statement and said the presentation was being investigated.
SA education department chief executive Martin Westwell said the presentation was "unacceptable" and "shouldn't have happened".
Speaking with ABC Radio Adelaide on Thursday, Professor Westwell said conversations about sexual health, societal norms, stereotypes and sexuality were normal parts of the Australian curriculum, but the presentation at Renmark High School was not.
"The core idea that students should understand sexuality and other sexualities is, I think, really important — but the way [the presenter] went about it was unacceptable," he said.
"The school has clearly made some mistakes.
"There should have been a teacher in the room when that occurred, but there wasn't and the principal has apologised for that.
"They hadn't reviewed the content.
"There was a few things that went wrong and it ended up with this inappropriate language and a few things being discussed in that session that were just not appropriate."
Support being provided to students
Headspace's national head of clinical leadership Nicola Palfrey said the organisation was aware of concerns raised by members of the Renmark community.
"We take all feedback very seriously and are reviewing how we can support and guide Headspace centres … to ensure presentations they facilitate or deliver are aligned with evidence and best practice and are safe and appropriate for young people," she said.
FocusOne Health Board chair Ian Gartley said the "focus at Headspace Berri, operated under licence by FocusOne Health, is on the mental health and wellbeing of young people".
"We are aware of concerns raised by local members of the Renmark community following a presentation delivered by a lived experience speaker that Headspace Berri facilitated at Renmark High School," he said.
"Our priority right now is ensuring that any young people and their families who may be experiencing distress receive the support they need."
All parties involved in the alleged incident declined to provide the presentation to the ABC.
Following the presentation, a follow-up letter seen by the ABC was sent to parents offering counselling services from the education department, which had arranged a social worker to attend the school to help support affected students.
Parents express shock and outrage
Parents of students who attended the presentation said it was a poor representation of the queer community and had raised many concerns about the school's protocols for third-party presentations.
"Who vetted this material? Who made sure it was safe for 14- and 15-year-old girls? Some of them are still 13," Emelia's mother Kristy Fyfe said.
"It has done a huge disservice to the [queer] community."
Following the presentation, Courtney's mother Nicki Gaylard removed her three children from Renmark High School.
"My kids are in limbo," she said.
"They're not in an education department at this point.
"I'm not putting them anywhere until I know this won't happen again.
"Under no circumstances should a child in that school ever feel trapped and unsafe without someone with their certificate, meaning a teacher."
The ABC has spoken to five other parents whose children attended the presentation.
They substantiated the two girls' claims.
LGBTQIA+ educators condemn 'slur'
Sexuality educators and LGBTQIA+ inclusion advocates Mel Brush and Eleonora Bertsa-Fuchs conduct consent and queer inclusion training for schools, parents and workplaces via their social enterprise Let's Talk About X.
Both are secondary teachers and Mx Bertsa-Fuchs said queer education was important but should be delivered in a safe and appropriate setting.
"The teachers are the people that these young people have a relationship with, that they are familiar with, that they're comfortable with," Mx Bertsa-Fuchs said.
"When you're in a vulnerable situation, like a respectful relationships workshop or seminar, there should be someone in the room that you are familiar with."
Mx Brush said the alleged use of the word bestiality in the presentation was damaging to the queer community.
"It's pretty shocking to think about that term being thrown around like that, especially given how loaded it is, and for a historical context of the way that it's been used as a slur and to discriminate against LGBT+ people," Mx Brush said.
ABC Riverland — local news in your inbox
- X (formerly Twitter)
- Relationships
- Renmark South
- Safety Education
- Secondary Schools
IMAGES
VIDEO
COMMENTS
1. Write note cards on index cards. Write main ideas on your index cards. Don't write details, or be stuck with the fate of looking down, staring at your note cards while reading. Put in some fun facts, interactive questions, and other interactive activities on the cards to share with the class. [1]
2. Use the right number of slides. Class presentations in high school and college will likely be 5 minutes or less. Follow your teacher's guidelines, of course, but generally, students will use 1-2 slides per minute. (That would be 5-10 slides for a 5-minute presentation.) 3.
The best class presentations combine strong content and visuals with an engaging presentation style. This post offers 11 steps for creating memorable and high-performing class presentations. 1. Review assignment guidelines. Before you can strategize about how to start a class presentation, you need to be certain that you understand the ...
Class presentations on YouTube. Search YouTube with the phrase "class presentation" and look for video examples of actual students giving class presentations. Observing and critiquing the presentations of other students are good ways to get started preparing your own and learning from others. Here's a good example of a student group ...
6. Speak Slow and Clear. If you want to know how to do a presentation in class, speaking slowly and clearly is vital. It enhances understanding, captivates your audience, and boosts confidence. 7. Don't Read From the Slides. Engaging your audience is crucial when presenting in class or college.
A class presentation could be a speech or a presentation in front of your class. It could be as simple as a subject-topic presentation. Or it could be a class presentation for your graduation. Presentations are a fun way of putting across a point, teaching, or expressing yourself.
4. Reduce Noise. Many teachers like to add banners, headers, footers, page numbers and more noise to their slides. Unless the information needs to be on every slide for a vital reason (which is rare), you should remove it. All these redundant elements do is create distractions from the content of your slides.
Try not to hurt others while using humor. You can make fun of everyday situations or activities, so people can relate with them. 6. Time Management in Class Presentation. Time management is one of the best tips for presenting in class. Starting and finishing your presentation in a predefined time frame is important.
Presentation skills are the abilities and qualities necessary for creating and delivering a compelling presentation that effectively communicates information and ideas. They encompass what you say, how you structure it, and the materials you include to support what you say, such as slides, videos, or images. You'll make presentations at various ...
Our massive collection of unique school and college presentation ideas and templates applies if you're: A teacher looking to make your class more engaging and fun with student presentations. A student who wants to impress your teacher and the rest of the class with a thought-provoking, interesting topic.
Tip 4: Make use of charts and graphs. We all love a good stat. Charts and graphs are a great way to present quantitative evidence and confirm the legitimacy of your claims. They make your presentation more visually appealing and make your data more memorable too. But don't delve too deep into the details.
Guidelines for Presentations. Preparing and delivering a presentation in class (or in business or other settings) is a process very similar to the learning process discussed in Chapter 4 "Listening, Taking Notes, and Remembering", Chapter 5 "Reading to Learn", and Chapter 6 "Preparing for and Taking Tests" and the writing process discussed in Chapter 8 "Writing for Classes".
Remember, opening a class presentation aims to captivate your students' interest, create a sense of excitement, and establish a strong connection to the topic. By incorporating these interactive elements, you'll set the stage for an engaging and memorable learning experience. 13. ADD SOME HUMOUR.
Learn how to use Google Slides to create engaging presentations, make fewer class copies, and more. Watch video. Getting Started Find tips and tricks from teachers like you Explore topics one-by-one. What is Google Slides; Accessing Google Slides; Creating a presentation in Google Slides;
500,000+ people like you use ClassPoint to boost student engagement in PowerPoint presentations. The #1 teaching and student engagement tool in PowerPoint. ClassPoint is an all-in-one teaching and student engagement tool integrated seamlessly with PowerPoint.
The Guess the Word game is a great way to recap content you've already covered in class. First, pick a mystery word. If your class has recently been learning about 3-D shapes, for instance, the mystery word could be: pyramid. Show students how many letters the word has with a slide showing dashes or empty squares.
Check out our free templates for education and create presentations that are effective, engaging and interactive. They are free, fully-customizable, available in Google Slides and PowerPoint formats and easy to integrate into platforms such as Google Classroom. Of course, creating engaging presentations can be a difficult and time-consuming ...
Creating this welcoming atmosphere helps support learners' social-emotional learning. It is common to share outcome (s), purpose, goals, and/or an agenda at the start of a class session or presentation. In addition, set aside intentional time to "warm up" to the topic, establish context, and connect to learners' prior knowledge and ...
Multimedia presentation tool features useful templates and 3D zoom. Bottom Line: With its zoom in and out capabilities, Prezi helps teachers and students go beyond traditional presentations to put important content front and center. Grades: 6-12. Price: Free to try.
This is a great way to get the audience's attention and make them think about your topic in a new way. For example: "The future of work is remote." or "Artificial intelligence will revolutionize every industry.". 9. "Today, I'm here to challenge how we think about [topic].". 10.
Interactive games. Interactive games for class presentations are always a popular way to ensure that students stay engaged! Some examples include: noughts and crosses or tic tac toe. pictionary. hangman or an alternative like spaceman. 21 questions. It's best to make these games related to the subject.
This activity is also free for up to 10 people and is easy to personalize. . 6. The Get to Know You Game. This activity is one of the best presentation games if you have a small group that doesn't really know each other. The Get to Know You Game is a creative way to do introductions, and it's really simple.
Unleash the power of organized learning with our Daily Class Agenda slideshow template, perfect for students aiming to streamline their academic day. Whether you're planning lessons, noting down assignment deadlines, or coordinating group projects, this template transforms your educational journey into a visually appealing and easy-to-follow ...
Students in GOV 1013: GIS Analysis of Hazard Vulnerability, led by Dr. Connie Chen, will be presenting their final projects in Room S003 at the CGIS South building (1730 Cambridge St., Cambridge) on Thursday, April 18th, from 3 to 5 pm. The presentations will cover topics such as hazards, vulnerability, resilience, and communities. We welcome...
Master Class Series on Economic Preservation Districts: Promoting the Economic Health of Latino Neighborhoods. Tuesday, April 9, 2024. 12:00 pm - 1:00 pm ET. Webinar is listen-only. For technical and content -related assistance: ... PowerPoint Presentation Author: The Aspen Institute
SS320 Presentation Assignment Prompt In Class Presentation Context This assignment is intended to apply the theories, ideas and examples you have been learning about in this course to the identity-based actor that you identified earlier in the semester. Background: During this semester, we've learned about a number of identity-based actors (individuals, political actions, campaigns and movements).
1. The Call to Action. Inspire your audience to take action or reflect on your presentation's key message. Encourage them to join you on a journey of discovery or change. Example: "Now, let's embark on this adventure together and make a difference in our world.". 2.
The concepts learned in the course will be developed through laboratory work and evolved via the production of in class exercises, collective knowledge development assignments, and a final board presentation. ... fonts and create design layouts in order to deliver effective and successful presentations. This course is designed for mature ...
facebook; X; linkedin; email; open share links close share links. On April 16 at 10:30 am, Dr. Joachim Nagel, President of the Deutsche Bundesbank, the central bank of Germany, will visit the MIT Media Lab and share insights on proposals to issue a digital currency for the euro area of the European Union entitled "Digital Euro: Vision, Advancements, and Challenges."
An investigation is underway into a presentation delivered to year 9 girls at Renmark High School.(ABC Riverland: Sophie Landau) In short: Year 9 girls at Renmark High School say they were given a ...