
How to Create Speech Bubbles in Photoshop: Detailed Tutorial
By Tata Rossi 22 days ago, Software Reviews
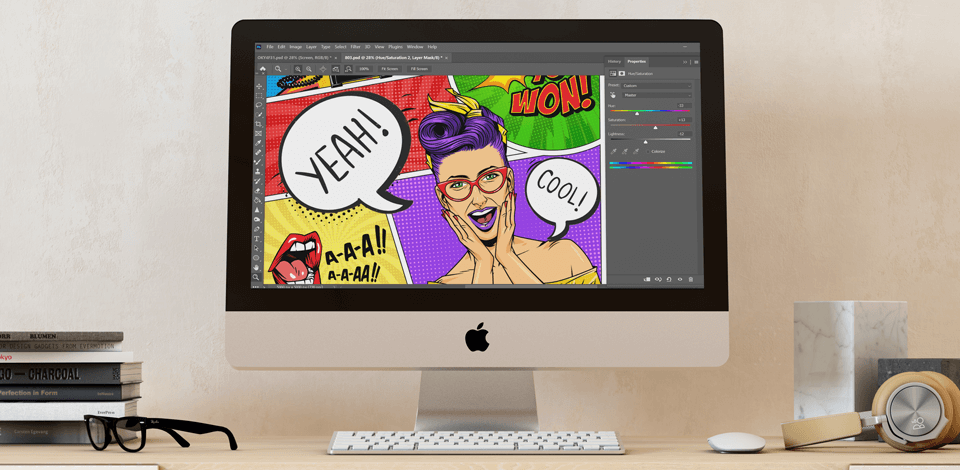
Speech bubbles come in handy in various designs. Whether you're working on a comic book, manga, pop art poster, or even a sticker design, it may be necessary to include word bubbles in your project.
STEP 1. Load Legacy Shapes
If you haven't uploaded legacy shapes yet, you should start with this step. Open the Shapes panel (Window > Shapes), hit the menu button in the upper side of the panel, and choose Legacy Shapes and More .
You'll find the Legacy Shapes and More folder at the bottom of the list in the Shapes panel. But keep in mind that this feature is only accessible if you're using the most recent version of Photoshop.
STEP 2. Create Speech Bubble Path
Click on the Custom Shape Tool (or hit U for instant access) in the toolbar on the left, and pick "Path" from the dropdown in the Options bar. After that, go for a speech bubble shape by navigating to the Options bar or the Shapes panel (Window > Shapes) under Legacy Shapes and More > All Legacy Default Shapes > Talk Bubbles.
Select the shape style that suits your picture content, depending on whether you want to create memes, make designs, or draw manga in Photoshop .
STEP 3. Place the Shape on the Canvas
After choosing your speech bubble shape, click and drag on the canvas to form the path for your speech bubble.
STEP 4. Add a Fill to the Path
When you add speech bubble to image, you first need to click the Create a New Layer icon at the bottom of the Layers panel. After that, double-click on the layer name and switch it up to Fill. Following that, choose either the Path Selection Tool (A) or the Direct Selection Tool (A), right-click on the canvas, and choose the Fill Path option.
While in the Fill Path dialog, choose Foreground Color . The color doesn’t matter much right now. We’ll guide you on how to modify it later. At this point, your speech bubble should be filled with the Foreground color.
STEP 5. Choose the Brush for Outline
Create a new layer and name it Outline. Open the Brushes panel (Window > Brushes) and choose the brush you want to use for outlining your speech bubble. If you're after something unique when you make a speech bubble in Photoshop, you can look for more brushes on the web. Once you find something suitable, you can install brushes in Photoshop .
If you want to tweak the brush size, head to the Brushes panel. It is possible to change even advanced brush settings within the Brush Settings panel.
STEP 6. Add an Outline to the Speech Bubble
Choose either the Path Selection Tool (A) or the Direct Selection Tool (A). Next, right-click on the canvas and select Stroke Path .
STEP 7. Check the Stroke Path Dialog
Make sure you've picked the Brush tool in the Stroke Path dialog. If everything is done properly, your speech bubble will have an outline.
STEP 8. Apply Styles to the Outline and Fill Layers
Now, apply styles to our layers. This way, we can easily switch up their looks whenever we want. Just double-click on the Fill layer for that.
STEP 9. Open the Layer Style Dialog
Make sure you've turned on Preview in the Layer Style dialog, and then select Color Overlay . Click on the color icon to choose a new color, and you'll see the fill color of the speech bubble change right at that moment.
When making word bubbles in Photoshop, it is also possible to add Color Overlay for the Outline layer to alter the color of the speech bubble's outline. Once the layer styles are applied, you can easily tweak them by double-clicking on a layer style in the Layers panel.
10. Add Text to the Bubble
Choose the Horizontal Type Tool (T), click outside the speech bubble shape, and type in your text. Turn on Free Transform (Ctrl/Cmd + T) to adjust the text size using the handles on the bounding box and move the text around by clicking and dragging. Hit Enter to accept the changes.
Feel free to customize the text further by making adjustments in the Character and Paragraph panels. You can also experiment with applying various Photoshop text effects .
Free Bonus Tools for Your Text
If you need to add text to your speech bubbles, these beautiful fonts can come in handy. Rather than just slapping on the first font you find, look for a proper font that will seamlessly complement your graphic design style.
- How to create speech bubbles
- Bonus tools

- Video Editing Services
- Virtual Staging Services
- Outsource Photo Editing
- Retouching Tips
- Photo Editing Freebies
- Free Raw Images for Retouching
- Free Photoshop Actions
- Free Lightroom Presets
- Affiliate Program
- Privacy Policy
- Cookie Policy

100s of free hints and tips to make the most of your Photoshop experience
Master the Art of Adding Speech Bubbles in Photoshop: A Step-by-Step Guide [with Statistics and Examples]
![how to make speech bubble in photoshop cs6 Master the Art of Adding Speech Bubbles in Photoshop: A Step-by-Step Guide [with Statistics and Examples]](https://essential-photoshop-elements.com/wp-content/uploads/2023/04/tamlier_unsplash_Master-the-Art-of-Adding-Speech-Bubbles-in-Photoshop-3A-A-Step-by-Step-Guide--5Bwith-Statistics-and-Examples-5D_1681666210.webp)
Short answer: Adding a speech bubble in Photoshop can be done using the Custom Shape Tool or creating a vector shape using the Pen Tool. Then, add text and a pointer to complete the speech bubble effect.
Walkthrough:
Master the Art of Adding Speech Bubbles in Photoshop
Frequently asked questions about adding speech bubbles in photoshop, 5 surprising facts about adding speech bubbles in photoshop, beginner’s guide: adding speech bubbles to your photos with photoshop, effortlessly add expression to your images with these tips for using speech bubbles in photoshop, making a statement: enhancing your graphics by including speech bubbles in adobe photoshop., table with useful data:, historical fact:.
Photoshop is an incredible software that enables you to do almost anything with a photo or image. One of the most popular uses of photoshop is adding speech bubbles. Speech bubbles can be seen everywhere these days, from social media posts and blogs to comics and memes; they are fun, engaging, and an effective way to convey messages in a creative way. However, creating speech bubbles in Photoshop requires skill and knowledge of the software.
If you’re looking forward to mastering this art, here’s a witty and clever guide on how you can add speech bubbles in Photoshop like a pro!
Step 1: Choose the Right Image
Before you start adding speech bubbles, choose the right image for your design. Make sure that the image has enough space surrounding it where you want to place your bubble.
Step 2: Decide on Your Bubble Shape
Now that you have your image ready, decide on what type of bubble shape you want to create – whether it be circular or rectangular. Next, select the “Custom Shape Tool” from the toolbar on the left-hand side of your screen.
Step 3: Drawing Your Bubble
Draw out your chosen shape for your bubble by clicking and dragging across the area where you want it placed on top of the photo. Holding down shift while drawing will keep proportions consistent.
Step 4: Add Text
Now we have our speech bubble! Select “T” too if it’s not already selected from left sidebar. Click inside of our newly created speech bubble canvas – this creates a text layer just inside our new shape!
Type in whatever message or text desired until satisfied.
To adjust size and/or font style its easy using some tools located right beside every editing screen once chosen everything correctly (size & font) then go ahead fill color field too which lies among other options like Bold/Italic – just beneath them.
Next aligning text again heading towards top toolbar people looking something quick could click Align Center, while advanced users may choose remaining options from the dropdown.
Step 5: Adjusting Text and Speech Bubble
Now that we’ve added text to our speech bubble, it’s time to adjust both by selecting them both at the same time (Click on Text or Shift + Click) now in order resize, drag each side/edge. Also add any further changes by using the keyboard shortcut “CTRL” and “T.”
Voila! You have created your own custom speech bubble in Photoshop.
Step 6: Save Your Work
Before concluding your work, make sure to save your project thoroughly in case if you want to alter anything later after once saving even you can convert these designs into different other formats.! Just click on ‘File’ menu option and select “Save As…”. Choose a suitable file format like JPG for easy sharing or PNG & others pertaining multiple purposes where transparency is required.
Conclusion:
Adding speech bubbles in Photoshop is an art that requires practice but with this witty guide, you’ll be able to master it quickly. Once you’ve learned how to create speech bubbles, congratulations! You will have opened up a whole new world of possibilities for creative expression. Use these tips to create amazing ideas like comics/memes/speeches etc. We hope this tutorial has been helpful; let us know what works best for you, share some pictures of what you’ve created with us!
Adding speech bubbles to images can add extra depth and context to a picture. Photoshop provides a creative platform for designers and social media experts to experiment with various designs, colours, and styles. However, before trying any method, you may have several questions in your mind.
Here are some frequently asked questions about adding speech bubbles in photoshop:
1) How to create a speech bubble in Photoshop?
Photoshop has many ways of creating speech bubbles. You can start by drawing a shape with the pen tool or using vector shapes. Then, you can use layer effects such as Bevel & Emboss, Stroke, and Drop Shadow effects to make the bubble look more natural.
2) Can I customize my Speech Bubble?
Yes! With different shapes and sizes available from custom designs or pre-designed templates online- Your imagination is your limit! You could also choose your font colours and backgrounds that best match your image design .
3) How do I get rid of tail end points from my bubble?
It’s quite easy! Use Pen Tool on Add Anchor Point mode (hold Alt / Option key ) at each point where it needs to be deleted- then delete using Delete Key/Trash Icon
4) Are there any pitfalls when adding Speech Bubbles?
Sometimes text size does not fit inside the bubble and becomes too large for it- resultantly making it less attractive! It would be best if you balanced the size of Text Bubble while keeping in mind how much space is left for images without crowding.
5) How do I insert text into my Speech Bubble?
Using Type Tool Keyboard shortcut T will give you access to add text[ Inside-Speech(The Round Part), Outside-Speech(Tail End)]. Once added- adjust font size according to Space available inside speech bubbles
6) How do I create 3D effect on Speech Bubbles?
In order to achieve a realistic look/depth perception – use a combination of Bevel & Emboss, Inner Shadow and Gradient effect – to achieve a raised 3D effect.
Adding speech bubbles in photoshop is a fun way to give your images more meaning and creativity. With the right tools and techniques, you can add professional-looking bubbles that perfectly fit into any design . It’s an opportunity to add your personal touch and customize it, so take advantage of it!
As a photo editing software, Adobe Photoshop is well-known for its comprehensive features and tools. One of the useful tools included in this respected program is the Speech Bubble feature. Most people think that adding speech bubbles to photos can only be done through specialized software or applications, but not with Photoshop.
With this incredible feature, you can make your images come alive by adding witty dialogue or thoughts via speech bubbles. Besides adding personality and pizzazz to your photos, here are five surprising facts about using speech bubble feature in Photoshop:
1. It’s easy to use
The first thing to love about this feature is that it’s straightforward to use. You don’t need any specialized skills since it’s just a matter of selecting the custom shape tool from the toolbar and choosing the bubble shape you want.
You can also select different styles like tail length, stroke width, color or personalized fonts depending on your preference . Once you click on an area where you want the bubble, Type Tool option will pop up then type whatever information or message you would like people to understand better.
2. Wide range of speech bubbles
When working with Photoshop’s speech bubbles tool, creativity gives existence limitless options when creating various looks for messages throughout pictures you may work with. There are different shapes and sizes available ranging from small circles to large rectangles which can all convey different meanings depending on how they’re used with text or images.
On top of that, there are numerous pre-made shapes suitable for different occasions – such as comic book-style conversation bubbles often used as part of slogans promoting specific products/services etc., giving endless freedom when it comes down styling out messages through image content assistance.
3. Perfect for branding Adding a logo within a speech bubble creates unique visual breaking points helps tremendously improving brand recognition across Marketing Strategies while reinforcing marketing campaigns repeat value awareness after sales offering.
4. Catchy headlines Using catchy headlines in bolded texts provides readers more pronounced understanding at a glance; the ability to hook potential readers of your work with anything from high-impact questions, play on words or statements that convey a sense of urgency, connecting them with deeper emotional connection & engaging taglines instantly.
5. Expressive tool The Speech Bubble feature in Photoshop offers tremendous flexibility to unleash your creativity while visually portraying emotions or information conveyed by people for effective communication. It’s a perfect way to add zest, humor and excitement to images when representing dialogue or storytelling through graphics .
In conclusion, these five facts highlight how the Speech Bubble feature in Photoshop could add an additional touch of finesse to your images . From straightforward shapes and sizes up to customizable bubbles that perfectly suit your style; this feature offers different ways you can connect with viewers in specific ways, so feel free to sit back and experiment using it as much as possible!
As photographs continue to dominate our social media feeds, it’s important to make them engaging and interactive. One way to do this is by adding speech bubbles to your photos! They can convey a message, add humor or emphasize sarcasm. The good news is that you don’t need any special software besides Adobe Photoshop and some basic knowledge on how to manipulate images.
Here’s a step-by-step guide on how to add speech bubbles:
Step 1: Choose the photo
The first step is selecting the photograph that you want to add a speech bubble in. Look for something appropriate that compliments the text you have in mind. Once chosen, open it Photoshop.
Step 2: Create a new layer
Creating a new layer allows you to work on your image without altering the original photo . Click on the “Layer” menu and select “New Layer”. You can also use the shortcut key Ctrl+Shift+N (Command+Shift+N for Mac users).
Step 3: Draw your Speech Bubble
Next up, select the Ellipse Tool. To draw an ellipse that matches the shape of a speech bubble, hold down Shift + Alt while dragging with Left Mouse Button pressed down. This will create an incomplete oval shape which you can drag into becoming the exact size of your preference but avoid making it too big or small lest it becomes comical.
Step 4: Add text into your Speech Bubble
After creating your desired oval outline for your speech bubble with its accompanying tail, select the Text Tool from Photoshop’s toolbar box located at either side or at top depending on layout preferences applied earlier.
Once selected from options bar where tool resides by default settings aligning around screen’s edges under File Menu > Edit > Preferences > Type (Ctrl/Cmd-K before accessing) if formatting edits needed beforehand such as Font Family/Size/Style etc., click directly on top of either edge inside bubble or outside tail endpoint so blinking vertical marker, which is your text cursor, appears. Type in your preferred message in the speech bubble.
Step 5: Style your Speech Bubble
To give prominence to the bubble and make it more stylish, use layer styles. Double click on the new layer you just created (Layer 1) to open up layer options then click “Layer Styles”. Changing the sub-attributes such as Gradient Overlay and Stroke on the same window can help customize bubbles depending on personal preference .
Step 6: Make some adjustments
Now that you’ve added your speech bubble to your photo, you may need to make some adjustments like repositioning or resizing. Using Move Tool and Free Transform command accessed via clicking menu bar Edit > Free Transform or pressing Ctrl+T (Cmd+T for Mac user), resize and fit as preferred.
Step 7: Save Your Work
Last but not least, save everything by clicking File > Save As. Choose a file type that supports transparency like PNG or PSD (Photoshop Document) so that when you place it over another image, there won’t be any unpleasant white box surrounding your speech bubble!
There you have it — an easy step-by-step guide on adding speech bubbles to your photos using Photoshop. Now start getting creative!
If a picture speaks a thousand words, then adding speech bubbles to your images can add character, personality and even narrative to them. Being able to convey emotion, dialogue or context with a simple speech bubble or thought bubble in Photoshop is not only useful for graphic designers or illustrators but also photographers who want to express their subject’s thoughts or feelings.
Here are some tips for using speech bubbles in Photoshop that will allow your images to speak without actually saying anything.
1. Choose the right font
The font you choose for your speech bubble is essential in setting the tone of communication within the image. A comic-style “Bang” probably wouldn’t work too well on an image of a business meeting, right? Use fonts like Comic Sans MS, Brush Script MT or even hand-written styles if looking for cartoon-like effects. However, if creating something more elegant, go for fonts like Helvetica Neue Light or Myriad Pro Regular as these give off a sleeker look giving it more sophistication.
2. Use colors wisely
Choosing the right color palette is another aspect of designing speech bubbles incorporating it into your overall image. Bolder colors make instant impacts; soft colors cater better in emotional situations and pastel tones when conveying stories with strong characters require subtlety. When picking color schemes always take into account the background elements and use contrasting colours so that they pop.
3. Placement of Speech Bubbles
Placement should be placed next to its corresponding speaker’s mouth so that the reader knows intuitively where each person’s dialogue comes from. Often seen as vertical bars next to text characters speaking indicates which direction it flows within panels left-to-right (for Western languages) horizontally-oriented flow while Japanese manga uses top-to-bottom panel flow because it follows traditional Japanese Scroll techniques drawing inspiration form calligraphy styles too. Place Thought bubbles further away than pointy/speech balloons down close enough so they don’t clutter up/interfere with other parts of the image . Adding arrows pointing to speakers and captions make sense of any changes in perspective or which character is speaking next.
4. Mimicking Facial Expressions, Voice Tone, Sound Effects
By adding in speech textures such as comic-style sound effects (like *BANG!* or *POW!*), facial expressions that compliment the words said inside the speech bubble gives off an overall impression of humour, drama or sarcastic expressions To further enhance this even more you can choose different shapes like waves depending on how loud they are or being whispered into each other’s ear with easier-to-read fonts using bold sizing for emphasis with a bit of flavour reflecting sounds within your images such water-bubbles depicting someone taking a bath.
5. Making sure size and spacing is kept appropriate
Keep text within balloons not too much area covered for too many words in order to allow visual cues point out whether it’s a question, statement, command or unsure of what to say. Balancing white space lets characters breathe continues flow thought conversation/monologue keeping panels sizes proportional consistently – keeps things looking neat tidy while allowing focal points directed singular characters if necessary.
In conclusion, speech bubbles are tools that help convey emotion and context visually without needing additional narration from text overlays. By following these tips and playing around with design elements on Adobe Photoshop software—fonts colours placement sound effects drawings—speech bubbles will be surel add interest increasing engagement level upon your visuals!
In today’s fast-paced digital world, it is becoming increasingly important for businesses and individuals to create engaging and visually appealing graphics that can capture the attention of their target audience. One of the most effective ways to do this is by incorporating speech bubbles into your designs.
Speech bubbles are a great way to add context and personality to your graphics, whether you are designing posters, social media visuals, or infographics. By adding a few words or phrases in a speech bubble, you can convey a message or an emotion in a simple yet creative way.
Fortunately, Adobe Photoshop offers powerful tools and techniques that can help you create stunning speech bubbles that will make your graphics stand out in the crowd.
Here are some tips on how to use Adobe Photoshop to enhance your graphics through speech bubbles:
1. Start with a Blank Canvas
Create a new document in Adobe Photoshop and set the dimensions as per your requirements. You can also choose from pre-set templates if you are not sure about the size of your design . Make sure that you have enough room for the speech bubble and other relevant elements.
2. Sketch Your Speech Bubble
Before diving into creating the actual speech bubble in Photoshop, it’s always helpful to sketch out your ideas on paper first. This will give you a clear idea of what type of shape and text layout would work best for your design .
3. Customize Your Shape
Using different shape tools like Ellipse Tool, Custom Shape Tool, etc., customize a shape that suits best with yours requirements for Speech Bubble.
4. Choose Your Text Style
Once you’ve created the shape of your speech bubble, it’s time to add text ! Selecting an appropriate font style for your text is crucial here as it impacts how well people will read and understand your message.
5.Add Some Creative Effects
To create an even better effect on speaking challenges on their images or logos etc., try experimenting with different effects such as gradients fills , drop shadows, outlines, and more.
6. Incorporate Your Speech Bubble
Now that you have created your perfect speech bubble design use the “Move” tool from the toolbar to drag and drop the bubble over the desired part of your graphic design.
By adding speech bubbles in Adobe Photoshop, not only can you convey a message, you can also add some humor or personality into your designs. It’s ultimately about selecting the right text material that will resonate with your target audience.
In summary, adding a speech bubble in Photoshop is an effective way to make a statement and enhance your graphics for all occasions. With these few simple steps, you can easily create unique bubble effect on images using Adobe Photoshop – it’s time to get creative!
Information from an expert: Adding speech bubbles in Photoshop is a great way to add more personality and context to your images. By using the shape tool and customizing it to your liking, you can create unique speech bubbles that match the style of your image. There are also various options for adding text within the bubble itself or as a separate layer . With practice, adding speech bubbles in Photoshop can be quick and easy, allowing you to elevate your images with dynamic dialogue.
The first version of Adobe Photoshop was released in 1988, and since then it has become the go-to software for photo editing and manipulation.

- Privacy Policy
- Terms And Conditions
Physical Address
304 North Cardinal St. Dorchester Center, MA 02124

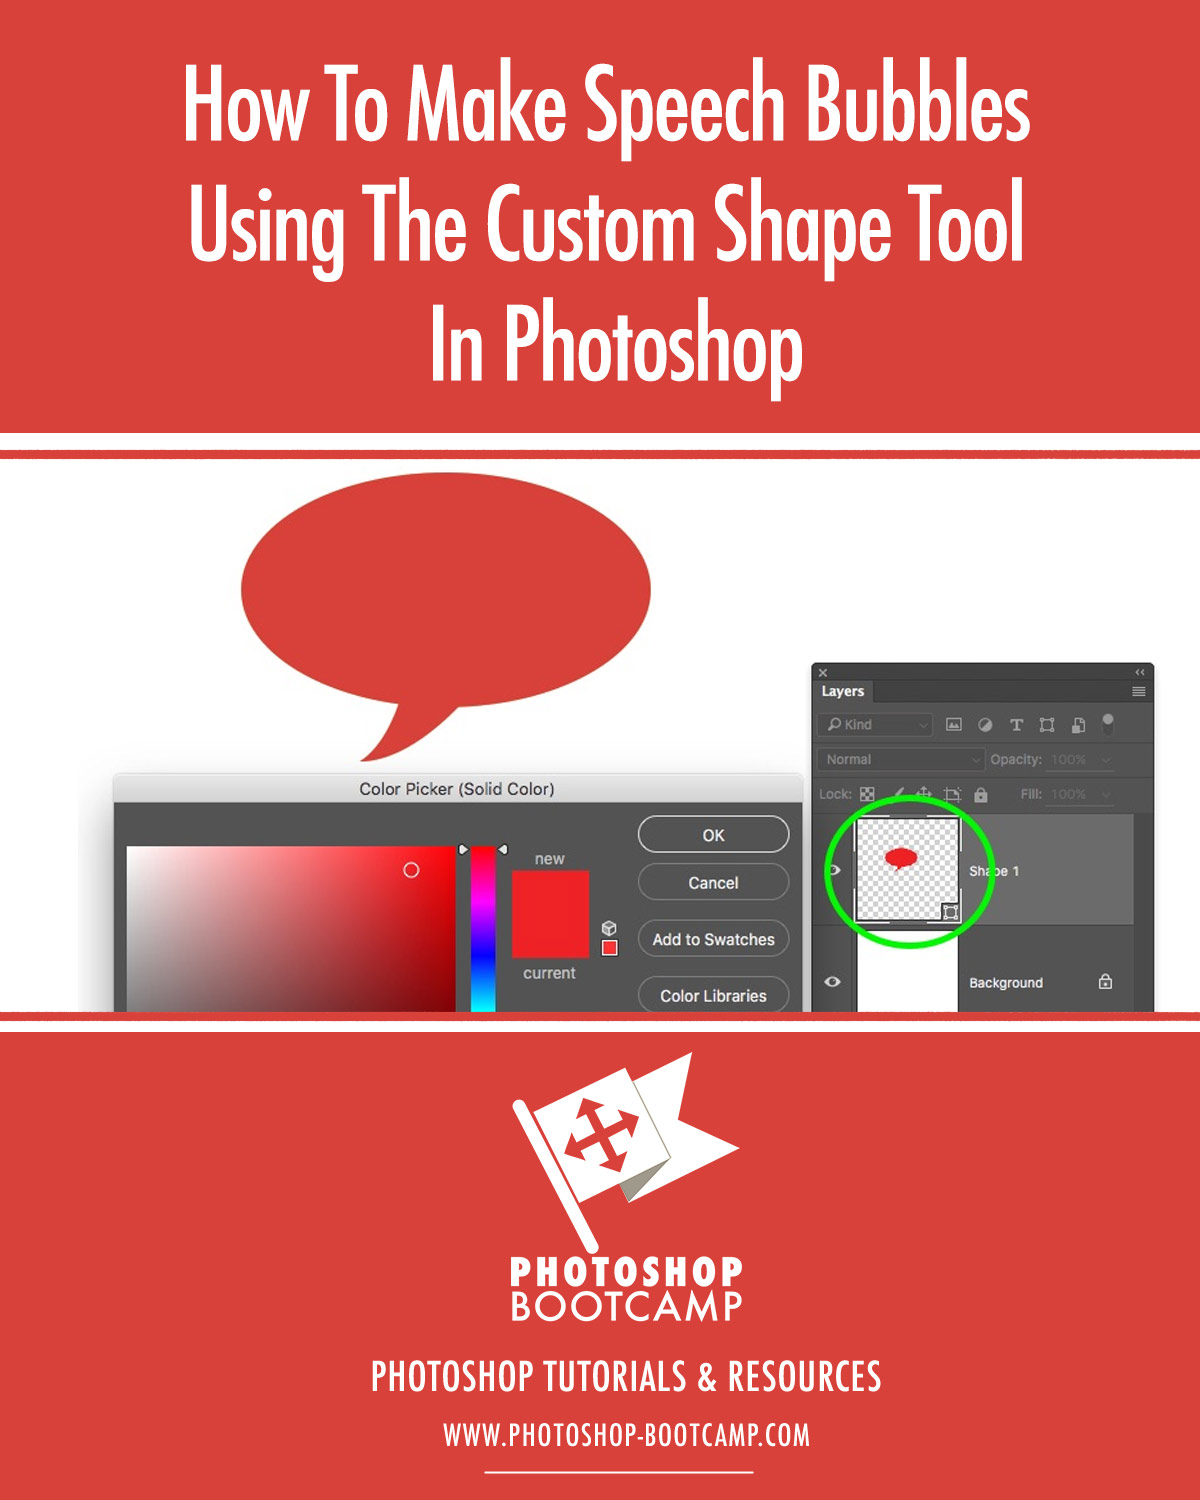
How To Make Speech Bubbles Using The Custom Shape Tool In Photoshop

How To : Create a speech bubble in Photoshop
In this Photoshop tutorial video from Tasktutorial, the host leads you through the process of creating a speech bubble in Photoshop. As you watch this video and follow along with the host, you will learn how to create a speech bubble, like they use in the comics. You will also learn how to add color and blur effects to it, to give it a more three dimensional feel, as well as how to use the stroke effect to give it that comic book outline when you're done.
Just updated your iPhone? You'll find new emoji, enhanced security, podcast transcripts, Apple Cash virtual numbers, and other useful features. There are even new additions hidden within Safari. Find out what's new and changed on your iPhone with the iOS 17.4 update.
Be the First to Comment
Share your thoughts, how to : design a car license plate in photoshop, how to : convert a photo into a line art drawing in photoshop, how to : change an object's color in photoshop using magic wand, how to : reshape facial structure with photoshop liquify, how to : create a wavy flag in photoshop, how to : soften skin, control color & tones in photoshop cs4, how to : create an old faded newspaper effect in photoshop, how to : look dead in photoshop, how to : create a glowing particle dust effect in photoshop, how to : make a gif animation on photoshop cs3, how to : remove hair roots from an image in photoshop, how to : create a basic cartoon effect in photoshop cs3, how to : use the auto-blend layers tool in adobe photoshop cs5, how to : remove glasses from a face in photoshop, how to : retouch old photos in photoshop cs2, how to : optimize and save a jpeg for the web in photoshop cs5, how to : create a shepard fairey "hope" poster in photoshop, how to : change lip color & shade in photoshop, how to : unclothe people in photoshop, how to : reproduce light effects in adobe photoshop cs4 or cs5.
- All Features
- All Hot Posts
Speech Bubble Shapes
Title: Speech Bubble Shapes
Category: Florals And Ornaments
filetype: CSH
file size: 9.6 kb
number of shapes: 42
author: graphicssoft.about
Rate: Speech Bubble Shapes 2.51 ( 38 votes) Report Link:
Tags: shape
Here is a huge collection of vector speech bubbles for Photoshop. The CSH file includes 42 speech bubbles and comic book shapes so plenty to choose from. This file also includes a layer style for easily formatting the text balloons.
See my tutorial on how to add speech balloons to your photos in Photoshop and Photoshop Elements for suggestions on how to use the speech balloon shapes. You are free to use any of the files here for personal or commercial designs, either in print or on the Web, excluding items for resale. You may not give away, sell, or redistribute the files in any way.
Do not post these files on any another Web site, electronically distribute them, or include them in any package for distribution. If you find these files useful, please include a credit line or a link back. If you are into comic book design, you should definitely check out this awesome Pop Art Photoshop tutorial.
One interesting effect you can create with these speech bubbles is if you use a curved text generator and add a curved text inside the bubbles. With these versatile shapes, your creative possibilities are endless. Get started by download ing them today and unlock a world of comic book design potential.
Don't forget to visit our blog post on comic strip template to see how these custom shapes can be used in various comic strip projects.
You may also like...
We offer all resources on this website for free for Personal and Commercial use WITH attribution . If you cannot provide attribution you can offer a small donation:
- Subscribers 0 RSS Email
Delivered by FeedBurner
Popular Tags
Free photoshop stuff.
Photoshop Tutorials
- Photoshop Supply
Photoshop Textures
Photoshop Actions
We have one of the largest collections of free Photoshop custom shapes on the Web.
We feature thousands of free custom shapes from hundreds of websites.
Photoshop Freebies
Heart Symbol List
Arrow Symbol List
357 custom shapes
101 Websites
1,275 Followers
RSS Readers
Email Newsletter
Adobe Community
- Global community
- 日本語コミュニティ Dedicated community for Japanese speakers
- 한국 커뮤니티 Dedicated community for Korean speakers
- Photoshop ecosystem
- Discussions
- Where has the speech bubble gone in Adobe Photosho...
Where has the speech bubble gone in Adobe Photoshop Version: 21.0.2
Copy link to clipboard

1 Correct answer

Explore related tutorials & articles

never-displayed
How to Create a Speech Bubble in Photoshop CS5
A common addition that you might need to make to an image in Photoshop is the addition on some text. You might even need to make it look like someone is saying that text. Therefore you may need to know how ot create a speech bubble in Adobe Photoshop.
While there are a lot of very talented artists that can draw and create almost anything in Photoshop, some of us just don’t have that gift to be able to freely draw on a computer screen. This can extend to even very basic shapes, like a speech bubble.
Every time that I have tried to manually draw a speech bubble, it either looks like a balloon or some weird cloud. Fortunately there is a custom shape tool in Photoshop CS5 that can help to solve this specific problem. So continue reading our brief tutorial below to learn how to create a speech bubble in Photoshop CS5.
As an Amazon affiliate, I earn from qualifying purchases.
How to Create a Speech Bubble in Adobe Photoshop
- Open your image.
- Right-click the Shape Tool and choose Custom Shape Tool .
- Choose the Shape dropdown and select the speech bubble.
- Click the Foreground Color box, choose a color, then click OK .
- Draw the speech bubble on the canvas.
- Select the Move tool and position the speech bubble.
- Click the Type Tool .
- Adjust the Font settings.
- Click inside the bubble and add your text.
Our article continues below with additional information on adding a speech bubble in Photoshop, including pictures of these steps.
Do you ever need to draw a line through email text? Our how to strikethrough in Outlook tutorial will show you how to accomplish that.
How to Make Photoshop CS5 Speech Bubbles (Guide with Pictures)
I am going to be writing this tutorial with the assumption that you want to create a white speech bubble with black text. If not, then you can simply choose a different foreground color for your speech bubble and a different text color for the words that you are putting inside of the speech bubble before you create each respective element.
If the text in the bubble is not in the right location, then you can use the instructions in our how to move text in Photoshop article to relocate it.
Step 1: Open the image to which you want to add a speech bubble.
Step 2: right-click the shape tool in the toolbox at the left side of the window, then click the custom shape tool option..
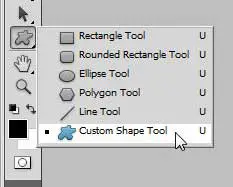
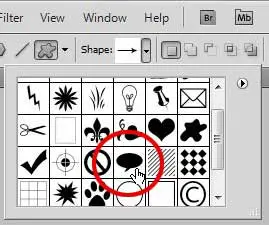
Step 3: Click the drop-down menu to the right of Shape in the toolbar at the top of the window, then click the Speech Bubble option.
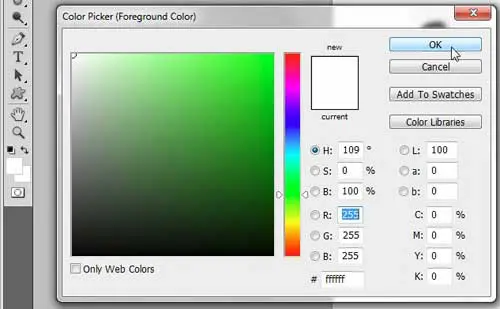
Step 4: Click the Foreground Color box in the toolbox at the left side of the window, click the top-left corner of the color picker to choose the color white, then click the OK button.
Step 5: Click near the location in your image where you want to insert the speech bubble, then drag your mouse to expand the size.
You don’t need to worry too much about being exact with your location, as Photoshop automatically creates the shape on its’ own layer, which allows you to freely move it.
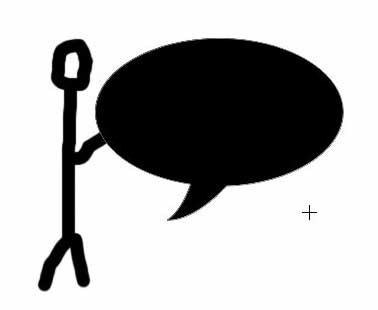
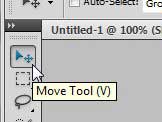
Step 6: Click the Move Tool icon at the top of the toolbox, the click your speech bubble and drag it to the desired location.
Step 7: Click the Type Tool in the toolbox.

Step 8: Choose your font settings using the options in the toolbar at the top of the window.

Step 9: Click inside the speech bubble, then type the text that you want to add.
Depending upon the shape and size of your speech bubble, you may need to add some line breaks and spaces to properly position your text. You can move to a new line by pressing Enter on your keyboard, and you can add spaces by pressing the spacebar .
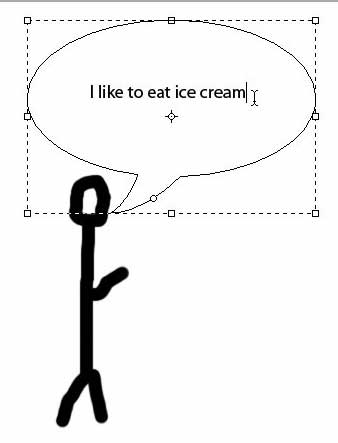
Be sure to save your image once you have finished customizing your speech bubble.
Are you having trouble figuring out how to go back and change the font on text that you have already created in Photoshop? The instructions in this tutorial can be helpful in pointing out the steps that you need to follow in order to edit and customize existing text layers.
Is your computer struggling to run Photoshop as smoothly as you would like? Maybe it’s time to upgrade to a new laptop. There are a number of options available that are both affordable and powerful, including this one available at Amazon.

Matthew Burleigh has been writing tech tutorials since 2008. His writing has appeared on dozens of different websites and been read over 50 million times.
After receiving his Bachelor’s and Master’s degrees in Computer Science he spent several years working in IT management for small businesses. However, he now works full time writing content online and creating websites.
His main writing topics include iPhones, Microsoft Office, Google Apps, Android, and Photoshop, but he has also written about many other tech topics as well.
Read his full bio here.
Share this:
Join our free newsletter.
Featured guides and deals
You may opt out at any time. Read our Privacy Policy
Related posts:
- How to Insert Text Box in Google Docs
- How to Move a Text Layer in Photoshop CS5
- How to Draw a Straight Line in Adobe Photoshop
- How to Draw in Microsoft Word 2013
- How to Rotate Text in Adobe Photoshop CS5
- Animated GIF in Photoshop CS5
- Photoshop Resize Layer Guide
- How to Flip Layer in Photoshop (An Easy 3 Step Guide)
- How to Fill a Background Layer in Photoshop CS5
- Change the Photoshop CS5 Background Screen Color
- How to Draw a Circle in Word 2010
- How to Draw an Arrow in Photoshop CS5
- How to Outline a Selection in Photoshop CS5
- How to Add Text in Photoshop CS5
- How to Rotate Layers in Photoshop CS5
- How to Make All Columns the Same Width in Excel 2013
- How to Change Font in Photoshop CS5
- How Do You Add Fonts to Photoshop CS5?
- Photoshop Rounded Rectangle – How to Make One in Photoshop CS5
- How to Reset Workspace in Photoshop CS5
Recent freebies
Speech bubbles photoshop shapes.
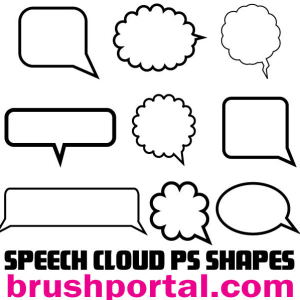
Speech bubbles photoshop shapes for designers in CSH format (16 vector speech bubble silhouettes in set). Download these free speech bubbles photoshop custom shapes to create amazing designs.
New to photoshop shapes? Read how to install custom shapes into Photoshop .
You May Also Like
Like Shapes4FREE? Tell your friends!
Create Bubble in Photoshop CS6 | TrickyPhotoshop
- Last updated: October 27, 2012
Hello guys I am Vaibhav and in this tutorial I am going to show you how to create your own bubble brush. Last time I discussed about Rectangular and Elliptical Marquee Tool in Photoshop which is a highly recommended tutorial for beginners. For this tutorial basically what I am going to do is create a custom shape and I will transform that custom shape to bubble. After that I will define that bubble as a brush and then I will use that brush to create various effects. I am going to use custom shapes, free transform tool, layers, brush, some filters etc.
Stock: Grunge Paper
Final Image
Create a new document by going to file>new or by pressing ctrl+N/cmd+N. To understand in deep about creating a new document, refer to this article which is written by me.
Set the width as 1600 pixels and height as 1200 pixels. Set the resolution as 72 pixel per inch. Make sure that background content is “transparent”.
Related Posts:
Contact Us to Edit Your Photos

No credit card or sign up required
Need help to edit your photo?
We'll edit your photo.

Choose your currency
You’ll be redirected to stripe.com
You’ll be redirected to paypal.com
Choose your currency below
[forminator_form id=”34945″]
[forminator_form id=”34964″]
[forminator_form id=”34965″]
[forminator_form id=”34966″]
[forminator_form id=”34967″]

COMMENTS
1.With the Custom Shape Tool selected, in the Options bar at the top of the Photoshop screen, click on the Shape drop down. Then click on the sub-menu (it looks like a cog wheel) and choose Talk Bubbles. 2. A dialog box will open asking if you want to Replace or Append the current set of Shapes.
In this video, you'll learn how to how to create a speech bubbles in Photoshop, how to stylize them, and how to add them to a nice illustration from Envato E...
Add a Fill to the Speech Bubble Path. First, click the Create a New Layer icon at the bottom of the Layers panel. Then double-click on the layer name and change it to Fill. Next, select either the Path Selection Tool (A) or Direct Selection Tool (A), right-click on the canvas, and choose Fill Path. In the Fill Path dialog, select Foreground ...
In this Comic Art Tutorial you'll learn how to create word balloons digitally, inside Photoshop. The best approach I've found is to get the dialogue for your...
Step 5. Focus on the Layers panel ( Window > Layers) and select the two shapes made so far. Right-click on one of these selected shapes and go to Merge Shapes. Drag this illustration inside your Photoshop document and place your Photoshop speech bubble roughly as shown in the second image.
STEP 3. Place the Shape on the Canvas. After choosing your speech bubble shape, click and drag on the canvas to form the path for your speech bubble. STEP 4. Add a Fill to the Path. When you add speech bubble to image, you first need to click the Create a New Layer icon at the bottom of the Layers panel.
Step Description; 1: Open Photoshop and select the image where you want to add a speech bubble.: 2: Select the "Custom Shape Tool" from the toolbar on the left side of the screen. 3: Choose a speech bubble shape from the "Shape" drop-down menu at the top of the screen.
Here comes the detailed steps. Step 1. Open the image you wish to add the speed bubbles. Right-click the Shape Tool and select Custom Shape Tool. Step 2. Select your preferred Shape at the drop-down menu and click the speech bubble. Click and select the "Foreground Color box," pick a color, and click OK. Step 3.
بالنسبة للارقام :Width : 851height : 85192:ResolutionBackground Contents : Transeparentارجو تكبير الفيديو للجودة
If you click through and make a purchase, there is absolutely no additional cost to you. I'll earn a small commission, which helps to keep this website going. Thanks! How To Open Files & Create New Documents In Photoshop. How To Open A File In Photoshop Using Adobe Bridge. Photoshop Workspace - A Quick Tour.
There are many ways you can add speech bubbles. One way is to draw your own using the shape tools; another way is importing an image of a standard empty bubble and adding your own text. Here is a detailed tutorial demonstrating one way you can create bubbles: Photoshop Speech Bubble Tutorial - Youtube. Hope it helps!
9/29/11 12:57 PM. In this Photoshop tutorial video from Tasktutorial, the host leads you through the process of creating a speech bubble in Photoshop. As you watch this video and follow along with the host, you will learn how to create a speech bubble, like they use in the comics. You will also learn how to add color and blur effects to it, to ...
Here is a huge collection of vector speech bubbles for Photoshop.The CSH file includes 42 speech bubbles and comic book shapes so plenty to choose from.This file also includes a layer style for easily formatting the text balloons. See my tutorial on how to add speech balloons to your photos in Photoshop and Photoshop Elements for suggestions on how to use the speech balloon shapes.
1 Correct answer. Adobe added the Shapes Palette in PS 2020 moved Shape management from the preset manager to the shapes palette. Shapes Palette supports groups of custom shapes and the ones you are looking for are in the legacy groups you may need to include form the Shapes Palette fly-out menu.
Open your image. Right-click the Shape Tool and choose Custom Shape Tool. Choose the Shape dropdown and select the speech bubble. Click the Foreground Color box, choose a color, then click OK. Draw the speech bubble on the canvas. Select the Move tool and position the speech bubble. Click the Type Tool. Adjust the Font settings.
I strongly advise you watch this video in HD. 720p is your friend, he will let you see everything clearly.I am testing the waters on making some more tutoria...
Download these free speech bubbles photoshop custom shapes to create amazing designs. New to photoshop shapes? Read how to install custom shapes into Photoshop. You May Also Like. 12 Pretty Chat Photoshop Shapes (CSH) 12 Grunge Radiation Symbol Vector Shapes; Calendar Icons: Sunday (Vector & Photoshop Shapes) 9 Photoshop Alarm Clock Shapes
Step 12. Move to the orange shape. Select it, go to the Appearance panel and click on the Add New Fill button (the little white square icon). Select this new fill, make it white, lower its opacity to 40% and change the blending mode to Overlay then go to Effect > Path > Offset Path. Enter a -1px Offset and click OK.
بانسبة للارقام Width : 851Height : 851Resolution : 92Background Contents : Tarnsparent
After that I will define that bubble as a brush and then I will use that brush to create various effects. I am going to use custom shapes, free transform tool, layers, brush, some filters etc. Stock: Grunge Paper. Final Image. STEP 1. Create a new document by going to file>new or by pressing ctrl+N/cmd+N.
Use any of these Free High Res Sketchy Thought Bubble Brushes, courtesy of , to highlight text in a fun, comic-style way. The hand drawn lines of these brushes will give your next project a unique look like nothing else. The 4 brushes in this free mini-pack and all other Premium files are designed by professionals and are royalty-free.
About Press Copyright Contact us Creators Advertise Developers Terms Privacy Policy & Safety How YouTube works Test new features NFL Sunday Ticket Press Copyright ...
How to make word balloons (or speech bubbles) in Photoshop CS4 using paths, rather than drawing them with the brush tool. Not everyone can afford Photoshop A...