How to Record a Presentation with Webcam, Narration, and More

Everyone has, at some point, put a load of time and effort into creating the perfect PowerPoint presentation, only to use it once or twice. But isn’t it a shame for all that hard work to be discarded so quickly? Is every slide deck destined for deletion after just a couple of uses?
Isn’t there a better way to make the most out of your presentations? Well, yes. Yes, there is.
Rather than simply creating and presenting your work once or twice, recording your presentations can give them a new lease of life. Whether it’s a data report or a self-recorded PowerPoint, you can record a presentation in real-time, or in advance to make it available on-demand.
In this guide, we’ll explore two distinct ways of recording your presentation. First, we’ll discuss how to record a presentation from PowerPoint with audio and webcam, and then we’ll look at how to turn your .ppt slides into a video.

Benefits of Recording a Presentation
As well as there being many different ways to record a presentation, there are also many benefits of recording them. So, before we show you the ‘how,’ let’s talk about the ‘why.’
- Encouraging asynchronous communication : One key benefit is fostering asynchronous communication . By recording presentations, you’re letting your audience engage with the content in their own time, breaking the constraints of time zones and scheduling conflicts. This also ensures your viewers can absorb information at their own pace, and revisit it as needed.
- Boosting SEO : You can use your presentation to create a YouTube video and share it on your website to increase your online visibility and attract prospective customers. This can be a great way to expand your audience, increase web traffic, and establish yourself as an expert in your field.
- Perfecting your presentation : Whether it’s in-person or over Zoom, you don’t get second chances with live presentations. However, a pre-recorded keynote lets you perfect the content and the narration before anyone sees it. This is a great way to combat stage fright while honing your presentation skills and building confidence.
With this in mind, turning your slides into a video is a no-brainer. It’s an easy way to grow your audience and make the information you’re sharing more accessible and easier to digest.
Record your presentation today!
Download a free trial of Snagit to quickly and easily record your presentation.
How to record your presentation (with Snagit)
Depending on your audience and the type of presentation you need to deliver, TechSmith’s Snagit could just be the perfect tool for recording your PowerPoint. With its user-friendly interface and advanced features, Snagit is ideal for capturing top-notch presentation videos, in just a few clicks.
Now, there’s no denying that presentations are better when you can see the presenter… Fortunately, Snagit lets you capture your screen and webcam at the same time to create a Picture-in-Picture video.
In this section, we’ll guide you through the steps to record your presentation and webcam with Snagit.
Step 1: Open video capture
First, open Snagit and navigate to the Capture window. Select the Video tab, and start by clicking the big red Capture button.
Step 2: Select a recording area
Next, you’ll be prompted to choose which parts of your screen you want to record. Use Snagit’s orange crosshairs to select a specific region, window, or your entire screen.
Step 3: Configure recording settings
With the Video Recording toolbar, you can set options like Cursor Capture and Effects, System Audio, and Webcam.
If your webcam isn’t showing, click on the webcam icon. If you have an external webcam, select the one you want to use by clicking the dropdown arrow next to the webcam icon.
Step 4: Adjust your webcam
Next, adjust your webcam options to ensure your Picture-in-Picture recording looks how you want it. Here you can change the Picture-in-Picture placement as well as the shape and size of your webcam recording. You can even toggle between Picture-in-Picture and fullscreen webcam modes as you like.
The best part? You can make these adjustments even while recording.
Step 5: Manage recording
When you’re ready to roll, hit the Record button and click the Stop button when you’re finished. It’s that simple!
And remember, if there’s an interruption (like an unexpected visit from the mailman), just hit Pause. It’s okay to take a break — your video won’t be ruined by a little interruption.
Step 6: Edit your video
Once you’ve finished recording, Snagit will automatically open your video in the Snagit Editor, which is super easy to use. From here, you can make light edits to the footage as needed.
For example, if you need to cut or trim your footage , you can! Here’s how:
- Set Start Point : Drag the Start handle (green) on the timeline to your desired starting point.
- Set End Point : Similarly, drag the End handle (red) to where you want to end the cut.
- Review the Segment : Before making any cuts, you can review the segment by dragging the Playhead (white) left and right across the timeline. This ensures you’re only cutting the footage you intend to.
- Make the Cut : Once you’re satisfied with the selection, click the Cut button, which will pop up once you’ve made a selection.
And that’s all there is to it! If you want to go the extra mile, you can also use Snagit to save individual frames of your video as images , which can be used to create a thumbnail for your video .
How to record a presentation from PowerPoint with audio and webcam
Now, Snagit is great for recording less formal videos in a flash, but if your presentation is intended for a particularly large or important audience, you might be looking to create something more polished. This is where TechSmith’s Camtasia comes in.
Camtasia is one of the smartest and most intuitive pieces of editing software out there, but it also makes for a pretty nifty screen recorder too. Camtasia is great for recording presentations when you need more control and editing powers over the final product.
But best of all, Camtasia streamlines the process by letting you record your presentation and voice over directly within PowerPoint.
Step 1: Set up your presentation video recording
If you’re a Windows user, you’ll have the option to include a PowerPoint Add-in Toolbar when you install Camtasia. While this feature isn’t currently available on MacOS, the Camtasia Add-in Toolbar allows you to start, stop, and control your recordings from within PowerPoint — so you don’t need to switch between applications.

Just open the presentation you want to record and locate the Add-in toolbar under the Add-ins tab.
Don’t see the add-in toolbar? Go to File > Options > Add-ins, to enable it. Click on the Manage drop-down, select Disabled Items, then click Go. If the Camtasia Add-in is listed, select it, and click Enable.
If you’re an Apple user, don’t panic! You can still record your screen (with audio) on a Mac using Camtasia, and it’s just as easy. Alternatively, you can skip ahead to the next section and import your slides directly into Camtasia.
Step 2: Customize your recording options
Now let’s walk through each of the options on the toolbar before we begin recording.

Record audio
The microphone button controls whether or not audio is recorded as part of your presentation. When you enable it, you’ll be able to record your narration using a microphone.
If you are planning to record audio, this is where you’ll select your microphone. If you want to record great audio , we suggest using an external microphone, rather than the one that’s built into your laptop.
Some of the best microphones for recording video are likely to be less expensive than you think. But, if you’re on a shoestring budget, even the mic that’s built into your headphones could produce better audio than your laptop.
Once you’re set up, be sure to test the mic and adjust the volume slider as needed. You’ll also need to decide whether or not to record your system audio, which is any sound that comes out of your speakers, such as email notifications.
Record webcam
If you have a webcam, you can also record your camera during the presentation to create a Picture-in-Picture clip — just as you can with Snagit!

To customize even more of the recording settings, click the Recording Options button. Here you’ll find settings that let you record with a watermark and adjust your video frame rate . There are a few more options too, but the default settings should work just fine.
When you’re ready, click OK to close this window and save any changes made.
Step 3: Record your presentation
The final step is as simple as clicking the Record button in the toolbar. This will launch your slides into the Presentation Mode and start recording.
When you exit Presentation Mode or reach the end of your slideshow, you can either continue recording your screen, or stop recording and save your file. Pretty easy right?
Before you get started, let us show you another way to turn your presentation into a video, without recording your desktop .
How to turn your PowerPoint presentation slides into a video
Another way to create a video from your presentation is to import your PowerPoint slides into Camtasia. This way you can adjust how long each slide appears on screen, as well as add Behaviors and Annotations to personalize your presentation and highlight important information.
By importing your slides into Camtasia, and recording your voice over separately, you get a lot more flexibility with the editing process, which means you have more control over the finished article.
If you do decide to record your audio separately, you might want to take a look at TechSmith’s Audiate . This advanced audio recorder will transcribe your voice over in real-time and let you edit the audio file as if it were a text-based document. We don’t want to brag, but it’s probably the best way to add a voice over to a PowerPoint .
Regardless of how you decide to narrate your PowerPoint, here’s how to turn your presentation into a video:
1. Import your PowerPoint slides
First, start by importing your PowerPoint slides directly into Camtasia. Once your media is imported, you can edit it by dragging your slides into the Editing Toolbar.

You can now add the images to the Timeline, and edit them like any other media in a Project.

If you drag your slides to the Timeline, the slides will be placed in the order of the presentation, each with a default 5-second duration.

With your presentation on the timeline, use Ripple Move to create space in between slides to adjust the timing of each one. To do this, hold shift, then click and drag.

Once you’ve imported your slides and adjusted the duration of each one to correlate with your voice over, it’s time to start editing.
How to edit a presentation video (in Camtasia)
Add behaviors.
Firstly, add some visual interest with Camtasia Behaviors . A Behavior is an animation that brings movement to your slides, making them stand out on screen. This is a great way to bring parts of your presentation to life and take it from ordinary to extraordinary — because nobody likes a boring presentation .
To add a Behavior, click and drag the Behavior you wish to use onto the slide you want to animate. Once added, you can adjust the Behavior using the Properties tab.
Add annotations
Another good way to grab and direct your audience’s attention is to add some Annotations, which are great for highlighting important information.
To insert an Annotation, click the Annotation tab on the left side of the screen and drag it into the designated slide. You can then re-position and edit the Annotation in the Properties tab as needed.
Recording a PowerPoint Presentation, the FAQs
Absolutely! Both Snagit and Camtasia are excellent choices for recording a professional and polished presentation. Snagit is perfect for no-fuss recording and editing. If you require more sophisticated editing capabilities, Camtasia is the ideal choice, offering the added convenience of recording your slideshow and voice over directly within PowerPoint.
Click the Record button in the toolbar to launch your slides into the Presentation Mode and start recording. When you exit Presentation Mode or reach the end of your slideshow, you can either continue recording your screen or stop and save your file.
If you’re planning to record audio, select your microphone in the recording options. The microphone button controls whether or not audio is recorded as part of your presentation. If you have a webcam attached to your computer, you can also record your camera to create a Picture-in-Picture clip, perfect for showing the presenter during the presentation.
With Snagit, you can conveniently record your voice over as you go through your presentation, capturing both the audio and visuals in one go. If you’re looking for more advanced recording and editing options, you might also consider using Camtasia, which allows you to record your voice over while presenting. For even more control, use Audiate to record your audio separately and then import it into Camtasia for fine-tuning.

Justin Simon
Global Content Strategy Manager at TechSmith. I play a lot of golf and watch a lot of football.
- How To Rotate a Video
- How to Write A Shot List That Will Transform Your Video
- YouTube vs. Vimeo: What’s the Difference?
Subscribe to TechSmith’s Newsletter
Join over 200,000 people who get actionable tips and expert advice every month in the TechSmith Newsletter.
How to Record a PowerPoint Presentation with Narration
Can be helpful in creating a dramatic narrative
Microsoft PowerPoint has a built-in recording tool that allows you to narrate your presentations using recorded audio. You can export and share recorded presentations as video files.
This tutorial covers everything about recording PowerPoint presentations on Windows and Mac computers.

Record PowerPoint Presentation with Narration
Open the PowerPoint file/presentation you want to record and follow the steps below.
Record PowerPoint Presentation on Windows
- Select the slide you want to start recording from on the slide thumbnail pane.

- Head to the Record tab on the ribbon and select the Record button to start recording from the current/selected slide.

To record from the first slide, select the down-facing arrow icon below the Record button and select From Beginning .

You can also record a presentation from the Slide Show tab. Select Slide Show on the ribbon and select Record , From Current Slide , or From Beginning .

That’ll open PowerPoint’s presentation recorder in a fullscreen window.
- Select the Record icon and start speaking after the three seconds countdown.

PowerPoint records the presentation window and captures your voice and webcam feed as you navigate the slides. Select the left-facing and right-facing arrows to move to the previous and next slides in the presentation.
Record PowerPoint Presentation in macOS
- Open the Slide Show tab and select Record Slide Show .

- Select the Record button on the toolbar to start recording your narration.

Use your keyboard arrow keys to move back and forth between slides. Press N or Space Bar to move to the next slide or animation in the presentation. Press P or Backspace to return to the previous slide or animation.
Select Tips in the top-left corner for more keyboard shortcuts and other presentation tips .

Note: The narration tool doesn’t record slide transitions. When moving between slides, wait for the destination slide to appear on the screen before speaking.
PowerPoint Recorder Control/Settings
You’ll find a handful of controls and options on the recording tool. We’ll show you how to use these controls to include voiceovers or audio recordings in your presentation.

Using Presentation Pointer Tools
PowerPoint provides several tools to mark up your slides when narrating your presentation. There’s a pen tool, eraser, laser pointer, and highlighter.
With the Pen tool, you can draw on slides during narration/recording. Press Ctrl + P (Windows) or Command + P (Mac) to use the pen tool. You can also select the Pen icon to convert the pointer to a pen.

The Laser pointer tool converts your cursor to an onscreen laser. Use the laser pointer to draw attention to something on a slide/presentation.
Press Ctrl + L (Windows) or Command + L (Mac) to use the laser pointer. There’s also a Laser pointer icon on the toolbar.

Pressing Ctrl + I (or selecting the Highlighter tool ) converts your cursor to a highlighter.

Use the Eraser tool to remove inks and highlight from slides. Select the Eraser icon or press Ctrl + E and select the ink to erase.

On macOS, select the Erase Pen icon (or press E ) to erase all drawings and highlights on the slide.

You can change the pointer tools ink from the color selection boxes. However, one major limitation is that you can’t change the size of these pointer tools.
Pause and Resume Your Recording
In Windows, press I on your keyboard or select the Pause button in the top-left corner to pause your recording.

Press I again or select the Record icon to resume the recording.

If you use a Mac, select the Pause icon in the top toolbar to pause the recording.

Unmute or Mute Microphone
Check that your microphone is unmuted before recording. Select the microphone icon in the bottom-right corner to mute or unmute your mic.

PowerPoint for Windows allows you to mute and unmute your microphone in real time while recording video/audio narrations. The macOS version of PowerPoint only lets you configure your camera and microphone settings before recording.
Switch Microphone or Camera
Want to record your presentation with an external microphone or camera? Press Ctrl + M or select the audio/camera settings icon in the top-right corner and choose your preferred microphone/camera.

In macOS, select the microphone icon to mute or unmute your microphone. Select the arrow-down icon next to the microphone or camcorder icons to switch input devices.

Enable and Disable Camera
The recorder displays your camera or webcam feed in the bottom-right corner of the presentation slides.
Select the camcorder icon to remove your webcam feed from the recording. Select the icon again to display your webcam feed in the presentation.

You can also use the Ctrl + K keyboard shortcut on Windows computers to enable or disable your camera.
On Mac computers, you’ll find the video control icon on the top toolbar.

Note: The recording tool greys out the camcorder icon if your microphone is turned off.
Enable or Disable Camera Preview
PowerPoint allows you to disable the camera preview without turning off your camera or webcam.
Press Ctrl + J (Windows) or select the Camera Preview icon in the bottom-right corner to disable or enable the camera preview.

End a Recording
Press S on your Windows keyboard or select the Stop icon to end the recording.

Replay or Preview Your Recording
When you end a narration, press V on your keyboard or select Replay to preview or watch the recording.

The recorded narration will include all pen inks, highlights, and laser pointer gestures made during the presentation.
You can also preview/replay the narration outside the recording tool. Open the Slide Show tab and choose to watch the playback From Beginning or From Current Slide .

PowerPoint allows you to preview the playback on individual slides. A speaker/audio icon appears in the bottom-right of PowerPoint slides with narrations.
Choose the slide you want to preview, hover your cursor on the speaker icon in the bottom-right corner, and select Play .

Delete Current Narration/Recording
Did you spot an error when previewing your presentation? Want to delete the current narration and start from scratch?
Select the Clear existing recordings icon and choose whether to Clear Recordings on Current Slide or Clear Recordings on All Slides .

On Mac, select the Bin icon to delete the entire narration/recording.

Close the Narration Tool
Select the X icon on the title bar to close the presentation narration tool and return to Powerpoint.

Select End Show in the top-left corner to close the recording tool on a Mac computer.

Delete Narrations from Slides
Want to delete the narration or timing on an individual slide or the entire presentation? Select the slide with the narration you want to delete and follow the steps below.
- Open the Record tab and select the down-facing arrow below the Record icon.
- Select Clear and choose to clear timing or narration on current or all slides.

Export Recorded or Narrated Presentation
You can export a narrated PowerPoint presentation as a video file. The video output includes ink strokes, recorded audio/video, laser pointer gestures, and webcam/camera recording.
- Open the Record tab and select Export to Video .

Alternatively, open the File menu, select Export on the sidebar, and select Create a Video .

- Choose the quality of the video export in the first drop-down box—Ultra HD (4K), Full HD (1080p), HD (720p), Standard (480p).

- Choose Use Recorded Timings and Narrations in the next drop-down box and select Create Video .

- Give the recorded presentation a file name and select Save .

Narrate Your PowerPoint Presentations
The Microsoft PowerPoint web app doesn’t have a recording tool. As a result, you can only record presentations with narrations using PowerPoint for Windows or Mac.
You might meet issues recording a slide show if you use an outdated version of PowerPoint. Also, the recording tool on older versions of PowerPoint has a different interface and lacks some controls. Update PowerPoint and restart your computer if you cannot record a slide show.

Sodiq has written thousands of tutorials, guides, and explainers over the past 4 years to help people solve problems with Android, iOS, Mac, and Windows devices. He also enjoys reviewing consumer tech products (smartphones, smart home devices, accessories, etc.) and binge-watching comedy series in his spare time. Read Sodiq's Full Bio
Read More Posts:

Leave a Reply
Your email address will not be published. Required fields are marked *
How to Record A PowerPoint Presentation [2022 User Guide]
- Share on Facebook
- Share on Twitter
By Nikolay Kaloyanov
in How-To Tutorials
2 years ago
Viewed 524 times
Spread the word about this article:

If knowing how to record a PowerPoint presentation wasn’t necessary a decade ago, this isn’t how things stand today. The pandemic taught us a valuable lesson – if we don’t catch up with technology, we will fall short.
Fortunately, Microsoft’s app is the global leader in presentation software and provides you with all the required tools to create an excellent presentation you can show in front of your audience. But how to record a presentation on PowerPoint, and is it easy to do so?
Article overview: 1. What are the benefits of recording PowerPoint presentations? 2. How to record a PowerPoint presentation? 3. How to live stream a PowerPoint presentation? 4. Frequently asked questions
1. What are the benefits of recording PowerPoint presentations?
I am are pretty sure that if recording presentations weren’t helpful, PowerPoint wouldn’t offer it to its users. Well, we all know that’s not the case. Recording your PowerPoint slides can bring a ton of benefits. Let’s see which they are:
- Save time – regardless if you’re a lecturer or present in front of colleagues, having a video of your recording will save you many hours. Imagine speaking in front of your marketing team, but 2 members are on summer holidays. It’s fine. They’ll catch up later when they watch your PowerPoint recording.
- Focus on the presentation – usually, if you’re presenting in front of an audience, it’s typical to get asked many questions that you need to answer promptly. But that is a good reason to get distracted from your core information. Thus, it makes sense to record your presentation beforehand.
- Practice before presenting – the best way to carry out a great presentation is to spend some time at home, focusing on key details. When you record your PowerPoint slides, you can find areas of improvement and work on them.
2. How to record a PowerPoint presentation?
There are many tools that you can use to record a PowerPoint presentation. From Loom and Panopto, and even Apple’s basic Quicktime and Windows’ own recording tool. But here we will discuss none of the other options. Why? The answer is simple: PowerPoint has its own in-built, robust recording tool.
Unlike other options, PowerPoint’s recording feature enables you to record slide by slide. This effectively means you can create as many recordings as you like, until you like the playback version, and move on to the next slide.
Pro tip : PowerPoint doesn’t record slide transitions. You need to start recording each slide when it is opened and finish the recording before you move on to the next one.
Let’s see how to record a PowerPoint presentation with video and audio in just a few steps.
Step #1: Open your PowerPoint presentation
The first step is to open the PowerPoint presentation you wish to record. Ensure you have all the necessary slides and information on them. While this seems logical, there aren’t one or two cases when presenters have recorded wrong or unfinished slides, which leads to a disappointing outcome.
Step #2: Prepare your video and audio devices
Before you start the recording, you should check your camera and microphone. Try to make a sound check and see if your camera works properly.
Step #3: Select the slides you wish to record
PowerPoint gives you the option to record a presentation right from the beginning, or from a specifically selected slide.
- Pick “ From Beginning ” (1) from the Record tab of the Ribbon if you wish to start from the first slide.
- Pick “ From Current Slide ” (2) from the same tab in case you would like to start from a selected slide (which isn’t the first one).
- Click the Record button (3) which is positioned in the top right corner, between the Comments and Share buttons. It starts the recording from the slide you have currently selected.

Step #4: Start the recording
Once you click on one of the options, you are ready to start narrating your PowerPoint presentation. You will see a countdown timer, after which you can start narrating slides.

Step #5: Manage your PowerPoint recording
You have probably seen a couple of other options aside from the recording one. Let’s see which they are:
- Timer with a grey/red light – if you are recording your narration, you will see a timer and a small circle with a red light that indicates you are recording. If you pause, the small circle indicator will become grey again and the timer will stop counting.
- Refresh icon – right next to the timer there is a refresh-like icon but it serves a different purpose – to re-take the recording. You have the option to record again the current slide or all slides.
- Start/Stop button – the big red button serves as a start/stop button for your recordings. Only stop the recording when you want to move on to the next slide.
- Pause button – if you would like to stop the slide recording, in order to drink some water or read your speaker notes, you can use the Pause button, and then resume the recording. Bear in mind you cannot pause and move to the next slide. You have to stop the recording, to indicate you have finished with the current slide.
- Camera button – clicking the camera button will work as a toggle on/off.
- Microphone Button – clicking the microphone button will work as a toggle on/off.
- Ellipsis – this is the place where you can select camera and microphone settings, as well as erase recordings from the current slide or all slides.

Step #6: Export your PowerPoint video recording
The last button from the menu is the Export setting. You can export your narration as an mp4 file in Full HD size by default. However, you can customize your export and get your narration in 4 sizes – 480p, 720p (HD), 1080p (Full HD – standard), and 4K. We don’t recommend Ultra HD exports.
Pro Tip : Exporting 4K PowerPoint presentation recordings doesn’t necessarily mean you will get better quality (unless you have 4K resources within your presentation) but it does guarantee a significantly larger file size – up to 4 times more than on standard Full HD recordings.

3. How to live stream a PowerPoint presentation?
If you have already honed your skills and would like to stream your PowerPoint slides directly to your audience, there are many ways to do so. We are going to cover two of them.
3.1. How to stream a PowerPoint presentation from OneDrive?
Microsoft has invested a lot of resources to make OneDrive a powerful cloud service, and so far they have been quite successful. Let’s see how to record a PowerPoint presentation in front of live audiences.
Step 1 – save your PowerPoint presentation in OneDrive.

Step 2 – open your PowerPoint slides from PowerPoint online.

Step 3 – go to Present Live from the Slideshow Ribbon tab.

Step 4 – share a live link with your audience.

3.2. Stream your PowerPoint presentation in Zoom

Zoom is one of the most popular conference call apps which has plenty of tools, including live streaming presentations. Since PowerPoint is the leading presentation program in the world, Zoom developers have created some amazing things, like PowerPoint presentation recording with a web camera on a transparent background. If you’re interested, you can check our guide on how to record a Zoom presentation .
Does PowerPoint have a screen recording?
PowerPoint has a screen recording window and you can select the area you would like to be recorded. Go to Record (from the Ribbon), then select Screen Recording , choose the area and start recording.
Can I view speaker notes while recording narration?
You are able to access your speaker notes if you have created them beforehand. To insert speaker notes, you have to go to View -> Notes Page and you will have a text box that you can utilize for speaker notes.
What format does PowerPoint use for video?
PowerPoint records videos in mp4 format. The default resolution is 1080p (Full HD).
Recording your PowerPoint presentations can make the difference between a successful and smooth speech and a bad narration. Being able to record each slide means you can get the best narration possible for your whole presentation.
And if you would like to stream your presentation live, there are more than enough options to do so – both via the online version of PowerPoint or via third-party apps like Zoom.
If you found this article helpful, you can also check some of our other PowerPoint tutorials:
- Add Audio to PowerPoint: The Quick Step-by-Step Guide
- Insert GIFs into PowerPoint – a 2022 Pocket Guide
- How to Convert Your PowerPoint Presentation into Google Slides ?

Add some character to your visuals
Cartoon Characters, Design Bundles, Illustrations, Backgrounds and more...
Like us on Facebook
Subscribe to our newsletter
Be the first to know what’s new in the world of graphic design and illustrations.
- [email protected]
Browse High Quality Vector Graphics
E.g.: businessman, lion, girl…
Related Articles
Character animator tutorials part 4: rigging and tools, how to make an infographic in powerpoint: the beginners’ guide, 22 coreldraw tutorials for beginners to start design, 15 keynote tutorials to make sublime presentations [2022], how to design graphics for social media like a guru: tutorials & tips, enjoyed this article.
Don’t forget to share!
- Comments (0)
Nikolay Kaloyanov
Nikolay is a copywriter with vast experience in Technology, Marketing, and Design. When he isn't playing with words and crafting texts, he watches sports and asks questions. He is a funny person...until you put him on a diet.

Thousands of vector graphics for your projects.
Hey! You made it all the way to the bottom!
Here are some other articles we think you may like:

How-To Tutorials
25+ wonderful cartoon character design tutorials.
by Iveta Pavlova

20 Sketch Tutorials To Master the UX Design Software
by Nikolay Kaloyanov

How to Write Scannable Content? Step-by-Step Guide
by Bilyana Nikolaeva
Looking for Design Bundles or Cartoon Characters?
A source of high-quality vector graphics offering a huge variety of premade character designs, graphic design bundles, Adobe Character Animator puppets, and more.
AWZ Screen Recorder
Record every detail on your screen
- Create quality recordings to capture best moments and sound;
- Tweak video and audio with easy tools to polish perfection;
- Share your footages on social media to boost subscription.

3 Methods to Record PowerPoint Presentation with Audio and Video

Microsoft introduced a native screen recording feature in PowerPoint. You can also record on PowerPoint with a specialized screen recorder for a more effective and quality experience. Master how to record a PowerPoint presentation with audio and a video in the three best ways from this AWZware post.
Record PowerPoint Presentation with Audio and Video Using AWZ Screen Recorder
AWZ Screen Recorder lets you screen record PowerPoint with audio and webcam overlay in high quality with just a few clicks. This lightweight and handy screen recorder allows you to blur or remove the background of the facecam. It offers a wide selection of video resolutions and formats.
Using the steps below, you can record PowerPoint presentations with audio and video on Windows or Mac.
Step 1: Choose the Record Screen Mode
Launch the downloaded and installed software, and click the Record Screen icon in the left sidebar.

Step 2: Select Recording Region
Click the Full Screen button in the capture window, choose Select Region , and draw the area you want to record.

Step 3: Set Audio and Webcam Recording
Turn on the System Sound , Microphone , and Webcam options. Connect your external camera if there is one.
Step 4: Record PowerPoint Presentation with Audio and Video
When everything is ready, hit the REC button and wait for the countdown to start your presentation recording. When you finished, click the Stop button.

The recorded videos are by default saved to the AWZ Screen Recorder file folder and accessible from the Recording List in the software app. With its user-friendly interface and comprehensive features, AWZ Screen Recorder is the best way to record a presentation and edit the recording feature easily.
Download the software to record your PowerPoint presentation with audio and video for free now.
Other useful features:
- Draw and add annotations on the screen while recording to make your presentation more compelling
- Schedule recordings that can start and stop automatically at a specific time
- Reduce the noise of the videos
- Compress and trim a video to keep only the necessary part
Record PowerPoint Presentation with Audio and Video Using Inbuilt Feature
PowerPoint for Microsoft 365 improved the older recording feature, and the new option's name was Record. It allows you to record PowerPoint presentations with audio and video together more efficiently and export recordings seamlessly. You can play the recordings without leaving PowerPoint and save them as a video file.
Here, we guide you through the steps to record a PowerPoint presentation with video and audio so the audience can see your presentation with your passion.
Step 1: Open your presentation file in PowerPoint;
Step 2: Click the Record tab, select the Record button, and choose From Beginning or From Current Slide ;

Step 3: Hit the SETTINGS button and configure the microphone and camera device;

Step 4: Use the Start recording button on the top left corner to record a video of the PowerPoint presentation with audio and yourself;
Step 5: Tap the STOP button and close the recording view window.
If you use PowerPoint to record a video and audio over a PowerPoint presentation this way, the video will be embedded into each slide automatically. You can save the recording as a show or video file through Save as Show and Export to Video options.
How to Record on PowerPoint with Snagit
Snagit is another compact tool for video and screenshot capture on computers . The screen recording software provides a 15-day free trial, during which you can record PowerPoint presentations with audio and video for free. A simplified UI allows you to customize keyboard shortcuts for quick recording.
Let’s showcase how to record video and audio in PowerPoint so you can see the presenter in the video and make a picture-in-picture video.
Step 1: With your presentation file open, start the screen recorder for PowerPoint;
Step 2: Choose Video and set the recording options such as Capture Cursor and Record Webcam ;
Step 3: When all is fine, click the Capture button and use the crosshair to select the recording portion;
Step 4: Turn on or off the microphone, system audio, and camera option from the toolbar, and set them as needed;
Step 5: Record audio and video on PowerPoint by tapping the Record button, then use the Stop button to end the work.

PowerPoint Video Recording Won't Record Audio?
There are many possible reasons why you record a video in PowerPoint without audio. Here are several workarounds to fix that audio issue.
Completely Close PowerPoint and Restart It
When you record PowerPoint presentations with audio and video, a one-off glitch with PowerPoint can make audio recording unsuccessful. Try opening the task manager to close the PowerPoint program by ending the task and then launching it again.
Check the Microphone Recording Permission Setting
You should turn on the microphone option on your computer for other applications to access. Go to Settings > Privacy > Microphone, and toggle on the access permission option.
Use Audio Troubleshooter
Using the Audio Troubleshooter tool, you can find and solve the problem of PowerPoint failing to record audio. Go to Settings > Update & Security > Troubleshoot > Additional troubleshooters, click Recording Audio > Run the troubleshooter and follow the on-screen instructions.
Update PowerPoint
The outdated PowerPoint version may also be the cause. If the above methods don’t work for you, update the software to the latest to see.
Connection Problem
After you record audio and video on PowerPoint, play the video on another device and test whether there is a connection problem between the projector and the computer.
Turn off Defender Protection
The security software on your PC may stop you from accessing audio and webcam. Disable the protection.
Start Free PowerPoint Recording with AWZ Screen Recorder for Mac
Attaching audio and a video of yourself in a presentation delivers a real-time-like experience, attracting audiences’ attention greatly. While the native screen recorder in PowerPoint can help with that, it might fall short in high-quality and flexible outputs.
If you wish to record PowerPoint presentations with audio and video with customizable options like the webcam background and audio quality and make instant edits to the recording, look no further than AWZ Screen Recorder.
Charlotte has been in the software industry for 8+ years. She works for AWZWARE now as a passionate writer. She is good at providing simple guides to use various video, office and entertainment software. Charlotte also recommends many other useful tools to make your work and life easier. A food lover too.
Related Articles

How to Record Screen and Webcam At the Same Time | 4 Ways

QuickTime Record Screen with Audio Guide | 2024 Updated

Extract Audio from Video Using VLC on PC & Mac | 2024 Guide
- SwifDoo PDF
- Screen Recorder
- Online PDF Converter
- Screen Recording Tips
- Refund Policy

Select a payment method
Billing information.
How-To Geek
How to make a microsoft powerpoint presentation into a video.
Share your presentations with anyone, even if they don't have PowerPoint!
Quick Links
Why convert a powerpoint to video, convert a powerpoint presentation to a video.
Microsoft PowerPoint presentations are great, but they are not as easily accessible as videos. Luckily, you can convert your presentations to videos with a built-in option. We'll show you how.
There are many reasons to turn a presentation into a video. Maybe you want to send someone a presentation but they don't have PowerPoint installed. Or, maybe you want to upload your presentation to a site that only accepts videos.
PowerPoint has a built-in option to convert presentations to videos. When you perform this conversion, all your original animations, transitions, and media items are preserved. Your resulting video also includes all recorded timings , narrations , ink strokes, and laser pointer gestures (though you can choose not to include these if you want).
Related: How to Burn Your PowerPoint to DVD
To turn a PowerPoint presentation into a video, first, open your presentation with the PowerPoint app on your Windows or Mac computer.
In the top-left corner of PowerPoint, click the "File" option.
From the sidebar that opens after clicking the "File" option, select "Export."
In the "Export" menu, click "Create a Video."
To the right of the "Export" menu, you will now see a "Create a Video" section. In this section, you will define the options for your video file.
First, choose the quality for your video by clicking the "Full HD" option.
You will see multiple video quality options. Select the one that you think works the best for you. Know that the higher the quality you select, the larger the file size of your video will be.
To include the recorded timings and narrations in your video, then beneath the video quality menu, click the "Don't Use Recorded Timings and Narrations" option.
Select the "Use Recorded Timings and Narrations" option. If this option is grayed out, that's because you don't have any recorded timings or narrations in your presentation.
You will now specify how long each slide appears in the video. Click the "Seconds Spent on Each Slide" box and enter the duration in seconds. By default, this duration is set to 5 seconds.
Finally, at the bottom of the "Create a Video" section, click "Create Video" to start making your video.
Your computer's standard "save" window will open. Here, select the folder to save your video in, type a name for your video, and click "Save."
PowerPoint will take you back to the main interface. At the bottom of this interface, you will see the progress of the conversion.
When your video is made, you will find it in the specified folder on your computer.
And that's how you make your presentations available to a wider audience by converting them to a video format!
Need your video in another format? Use VLC to convert your video to other formats.
Related: How to Convert a Video or Audio File Using VLC

How to Record in a PowerPoint presentation Audio & Video.
Recording audio and video in a PowerPoint presentation can improve the overall effectiveness and impact of your presentation because it can make it more interesting and keep your audience engaged.
Microsoft PowerPoint 2013 and later versions allow you to record your presentation with audio and video, so you can enhance your slides with voice narration or by recording yourself during the narration via the camera.
In this guide we show, how you can record your voice or yourself while presenting a Microsoft PowerPoint Presentation and how to insert an audio or video file to a Presentation. You will also learn how to save the presentation as a video file or as a PowerPoint Show after you have finished recording audio/video.
How to Record or Insert Audio or Video in a PowerPoint Presentation.
There are two ways to include audio and video in your PowerPoint presentation: record a slide show with audio from your microphone and video from your camera, or add external audio and video to your presentation from a file.
* Note: As mentioned above, to add sound and video to a PowerPoint presentation you should have Microsoft PowerPoint 2013, 2016, 2019 or PowerPoint for Office 365.
1. Record your Audio & Video to PowerPoint.
2. Insert External Audio or Video files to PowerPoint.
Method 1. Record your Sound and Video to a PowerPoint Presentation.
To record your voice narration and/or yourself while presenting the slides in a presentation:
Step 1. Configure Microphone & Camera Settings.
Before recording your audio/video to a PowerPoint presentation, make sure that your microphone and camera settings are properly configured.
To adjust your microphone and camera settings for optimal quality:
1. Press Windows + I keys to open Windows Settings.
2 . Go to System > Sound and under Input Settings select your microphone device and make sure the input volume is set to at least 80%

3. When done, go to Bluetooth & devices > Cameras > Connected Cameras and ensure that your camera is recognized by the system.

Step 2. Record Audio and Video to PowerPoint Slideshow.
Before you start recording audio/video in a presentation, it's important to know that audio cannot be recorded during animations and slide transitions. So, to avoid interruptions of your speech during the presentation, remember to leave a brief pause of 1-2 seconds in your narration at the beginning and end of each slide.
1. Open the PowerPoint presentation in which you want to record audio and video.
2. From the Slide Show tab (or the Recording tab), click the Record Slide Show button and choose either Record from Current slide or Record from Beginning, depending on which point you want to add audio/video.

3. The presentation will open in a recording window in full-screen mode.

4. Click the SETTINGS button at the top-right corner and ensure the correct microphone and camera devices are selected.

5. Use the Microsoft and Camera icons in the bottom right corner of the screen to turn off the input of the Microphone or Camera device if it is not needed during the presentation.

6. When you are ready, click the RECORD button to start recording your voice and/or camera input and present your slides.

7. Use the arrow keys to navigate through slides (forward only). Remember that you cannot go back or forward to a slide that already has a recording. This is to prevent accidentally recording over an existing recording.

8. If there are videos in your slides, click on them to start or stop the playback.

9. Use the Pen , Highlighter , or Laser icons from the bottom right corner to annotate your slides.
![clip_image026[3]](https://www.wintips.org/wp-content/uploads/2023/06/clip_image0263_thumb.png "clip_image026[3]")
10. Look at the bottom left corner to find out the time counts for the current slide and the entire presentation.
![clip_image028[3]](https://www.wintips.org/wp-content/uploads/2023/06/clip_image0283_thumb.png "clip_image028[3]")
11. If a slide already contains a recording, you will see a video preview or a speaker icon displayed at the bottom right corner.
- To re-record audio/video to a slide, click CLEAR and select Clear Recording on Current Slides .
- To delete all recordings, click CLEAR and select Clear Recordings on All Slides .
![clip_image030[3]](https://www.wintips.org/wp-content/uploads/2023/06/clip_image0303_thumb.png "clip_image030[3]")
12. To pause or stop recording using the Pause and Stop buttons.
![clip_image032[3]](https://www.wintips.org/wp-content/uploads/2023/06/clip_image0323_thumb.png "clip_image032[3]")
13. When finished Close the recording window (or right-click and select End Show ).
![clip_image034[3]](https://www.wintips.org/wp-content/uploads/2023/06/clip_image0343_thumb.png "clip_image034[3]")
Step 3. Preview your Recordings on the Presentation.
After completing the recording, it is crucial to review the recordings of each slide before exporting the file as a PowerPoint show or video. To preview your recordings in your PowerPoint presentation:
1. Go to the Slide Show tab and click either From Beginning or From Current Slide to start playback.

2. Make sure each slide has a record and timing by changing the View to Slide Sorter .
![clip_image038[3]](https://www.wintips.org/wp-content/uploads/2023/06/clip_image0383_thumb.png "clip_image038[3]")
3. On each slide where audio has been recorded you will see an audio icon along with the time/duration of the recording.

4. When you are satisfied with your recordings, you can move on to the next steps and export the entire presentation, including your audio and videos, either as a PowerPoint Show as a video file.
Step 4. Save the Presentation as a PowerPoint Show.
If you want to export your Presentation as a PowerPoint Show (.ppsx), which is useful if you want your presentation to be viewed even on computers that don't have the Microsoft PowerPoint app installed, do the following:
1. Click on File and select Save As .

2. Choose the location where you want to save the file and select PowerPoint Show (*.ppsx) format from the Save as type drop-down menu.
![clip_image044[3]](https://www.wintips.org/wp-content/uploads/2023/06/clip_image0443_thumb.png "clip_image044[3]")
3. Then, click Save to save the file as a PowerPoint Show.
![clip_image046[3]](https://www.wintips.org/wp-content/uploads/2023/06/clip_image0463_thumb.png "clip_image046[3]")
Step 5. Save Presentation to Video.
If you prefer to export your PowerPoint SlideShow as a video file, follow these steps:
1. Click on File and select Export .

2. Then Click the Create a Video option and select the preferred video quality from the first drop-down menu (e.g., Full HD 1080p ).

3. Then select the Use Recorded Timings and Narrations option in the next drop-down menu.

4. Then adjust the Seconds spent on each slide for the slides without recordings.
![clip_image054[3]](https://www.wintips.org/wp-content/uploads/2023/06/clip_image0543_thumb.png "clip_image054[3]")
5. Finally, click the Create Video button and select the location to save the video.

6. Now wait for the PowerPoint to finish creating the video, as it may take some time depending on the performance of your computer.
7. Once the video is created, you can play it using any video player of your choice.
Method 2. Add External Audio and/or Video to a PowerPoint Presentation.
Instead of directly capturing audio and video within PowerPoint, you can insert an external audio or video file in your presentation.
Step 1. Adding an audio archive to a PowerPoint presentation.
To insert an audio file from your computer (such as pre-recorded narration, background music), to a slide:
1. Open your PowerPoint presentation and navigate to the specific slide where you want to add the audio.
2. Then, go to the Recording tab, click on the Audio button, and select the Audio on My PC option.

3. Then, choose the desired audio file from your device and click Insert .

4. The added audio file will appear as a small speaker icon in your presentation.
![clip_image062[3]](https://www.wintips.org/wp-content/uploads/2023/06/clip_image0623_thumb.png "clip_image062[3]")
5. When you click on the speaker icon, the Playback tab will appear in the Ribbon. Move to the Playback tab and click the Play in Background option if you want the audio to play across all slides.
![clip_image064[3]](https://www.wintips.org/wp-content/uploads/2023/06/clip_image0643_thumb.png "clip_image064[3]")
Step 2. Adding a Video file to a PowerPoint Presentation.
If you want to insert a video file from your PC, inside a Presentation.
1. Open the presentation and navigate to the specific slide where you want to add the audio.
2. Switch to the Recording tab and click on the Video button.
![clip_image066[3]](https://www.wintips.org/wp-content/uploads/2023/06/clip_image0663_thumb.png "clip_image066[3]")
3. Then, select the video file that you want to add in the slide and click Insert .
![clip_image068[3]](https://www.wintips.org/wp-content/uploads/2023/06/clip_image0683_thumb.png "clip_image068[3]")
4. Resize the video window as needed, and then customize the Playback settings from the Playback tab.
![clip_image070[3]](https://www.wintips.org/wp-content/uploads/2023/06/clip_image0703_thumb.png "clip_image070[3]")
Step 3. Exporting or Saving the Presentation.
Once the audio and video files are inserted, you can export the presentation to a video file or save it as a PowerPoint show. To do that:
1. Select the Recording tab:
- Select Save as Show to save the file as a PowerPoint show, or…
- Export to Video to export the file as a video.
![clip_image072[3]](https://www.wintips.org/wp-content/uploads/2023/06/clip_image0723_thumb.png "clip_image072[3]")
That's it! Let me know if this guide has helped you by leaving your comment about your experience. Please like and share this guide to help others.
We're hiring
We're looking for part-time or full-time technical writers to join our team! It's about a remote position that qualified tech writers from anywhere in the world can apply. Click here for more details.
- Recent Posts

- How to Upgrade Windows 10 to Windows 11. - April 3, 2024
- FIX: Windows 11 File Explorer is slow, lags and freezes. - April 1, 2024
- FIX: Windows Security Not Working in Windows 11. - March 28, 2024

Konstantinos Tsoukalas
Related posts.

How to , Tutotial , Windows , Windows 10 , Windows 11
How to Upgrade Windows 10 to Windows 11.

FIX: Windows 11 File Explorer is slow, lags and freezes.

FIX: Windows Security Not Working in Windows 11.
Leave a reply cancel reply.
Your email address will not be published. Required fields are marked *
- Start the presentation and see your notes in Presenter view Article
- Add speaker notes to your slides Article
- Rehearse and time the delivery of a presentation Article
- Record a slide show with narration and slide timings Article
- Print your PowerPoint slides, handouts, or notes Article
- Create a self-running presentation Article

Record a slide show with narration and slide timings
You can record your PowerPoint presentation—or a single slide—and capture voice, ink gestures, and your video presence. When completed, it’s like any other presentation. You can play it for your audience in a Slide Show or you can save the presentation as a video file. So, instead of just “handing the deck” to someone, people can see your presentation with the passion and personality intact.
A new feature for Microsoft 365 was rolled out in early 2022. Exactly when your business has this feature is also based on when your admin distributes new features in Microsoft 365.
This article contains procedures for both the new experience and the classic experience:
New experience
Classic experience

All recording tools are in the Record tab in the ribbon, but you can start by selecting the Record button.

You can also record by selecting one of the options in the Record section of the Record tab.

If you have notes in your presentation, they’re turned into text at the top of the screen so you can use them like a teleprompter as you record.
Tip: Use the auto-scroll feature in teleprompter and set it to scroll at your preferred speed.

There are several options you can use when you record a presentation. You can turn your camera and microphone on or off by selecting the icons at the top. There are several options you can use when you record a presentation. You can turn your camera and microphone on or off by selecting the icons at the top. To change your camera or microphone, choose the Select more options <···> icon. You can even add a customizable camera that can be resized, repositioned, and formatted to go with your slide content. Select Edit , then select Cameo . Adjust the formatting for the camera, then select Record again to return to the recording environment.
In the Select the camera mode menu, you can select Show Background or Blur Background .

You can also change the layout in the Views menu to switch between Teleprompter , Presenter View , or Slide View .

When you’re ready, select Start recording and a countdown will begin.
Use the onscreen laser, colored pens, or highlighters in the tray below markup slides and it’ll record as well.
To record narration for a specific slide, use the previous or next arrows.
Note: Narration won’t record during slide transitions so let those play first before you start speaking.
Pause the recording as needed or select Stop if you’re done.
To review the video, select the Play button.
To quickly delete and re-record your video on current slide or on all slides, select Delete . While Clear will delete the recorded narration, Reset to Cameo additionally replaces the recorded narration with the camera feed for an easy retake.

When you’re done, select Export > Export Video .
After you successfully export the video, you can view the video by selecting View and share video .

At any time, you can return to your document by selecting the Edit button.
Want more?
About Record in PowerPoint
Create a self-running presentation
Export or turn your presentation into a video
Classic experience
Turn on the Recording tab of the ribbon: On the File tab of the ribbon, click Options . In the Options dialog box, click the Customize Ribbon tab on the left. Then, in the right-hand box that lists the available ribbon tabs, select the Recording check box. Click OK .

To get ready to record, select Record on either the Recording tab or the Slide Show tab of the ribbon.
Clicking the upper half of the button starts you on the current slide.
Clicking the lower half of the button gives you the option to start from the beginning or from the current slide.

(The Clear command deletes narrations or timings, so be careful when you use it. Clear is grayed out unless you have previously recorded some slides.)
The slide show opens in the Recording window (which looks similar to Presenter view), with buttons at the top left for starting, pausing, and stopping the recording. Click the round, red button (or press R on your keyboard) when you are ready to start the recording. A three-second countdown ensues, then the recording begins.

The current slide is shown in the main pane of the Recording window.
You can stop the recording any time by pressing Alt + S on your keyboard.
Navigation arrows on either side of the current slide allow you to move to the previous and next slides.
PowerPoint for Microsoft 365 automatically records the time you spend on each slide, including any Animate text or objects steps that occur, and the use of any triggers on each slide.
You can record audio or video narration as you run through your presentation. The buttons at the lower-right corner of the window allow you to toggle on or off the microphone, camera, and camera preview:

If you use the pen, highlighter, or eraser, PowerPoint records those actions for playback also.

If you re-record your narration (including audio and ink), PowerPoint erases your previously recorded narration (including audio and ink) before you start recording again on the same slide.
You can also re-record by going to Slide Show > Record .
You can pick a pointer tool (pen, eraser, or highlighter) from the array of tools just below the current slide. There are also color selection boxes for changing the color of the ink. ( Eraser is grayed out unless you have previously added ink to some slides.)
To end your recording, select the square Stop button (or press S on your keyboard).
When you finish recording your narration, a small picture appears in the lower-right corner of the recorded slides. The picture is an audio icon, or, if the web camera was on during the recording, a still image from the webcam.

The recorded slide show timing is automatically saved. (In Slide Sorter view, the timings are listed beneath each slide.)
In this process, what you record is embedded in each slide, and the recording can be played back in Slide Show. A video file is not created by this recording process. However, if you need one, you can save your presentation as a video with a few extra steps.
Preview the recorded slide show
On the Slide Show tab, click From Beginning or From Current Slide .
During playback, your animations, inking actions, audio and video will play in sync.

Preview the recorded sound
In the Recording window, the triangular Play button near the top left corner lets you preview the recording of the slide that currently has the focus in that window.

In Normal view, click the sound icon or picture in the lower-right corner of the slide, and then click Play . (When you preview individual audio in this way, you won't see recorded animation or inking.)

You can pause playback while previewing the audio.
Set the slide timings manually
PowerPoint for Microsoft 365 automatically records your slide timings when you add narrations, or you can manually set the slide timings to accompany your narrations.
In Normal view, click the slide that you want to set the timing for.
On the Transitions tab, in the Timing group, under Advance Slide , select the After check box, and then enter the number of seconds that you want the slide to appear on the screen. Repeat the process for each slide that you want to set the timing for.
If you want the next slide to appear either when you click the mouse or automatically after the number of seconds that you enter—whichever comes first—select both the On Mouse Click and the After check boxes.
You can use manual slide timings to the trim the end of a recorded slide segment. For example, if the end of a slide segment concludes with two seconds of unnecessary audio, simply set the timing for advancing to the next slide so that it happens before the unnecessary audio. That way you don't have to re-record the audio for that slide.
Delete timings or narration
The Clear command is for deleting timings or narration from your recording that you don't want or that you want to replace.
In the Recording window, the Clear command in the top margin of the window allows you to:
Clear recordings on the current slide
Clear recordings on all slides
In Normal view, there are four different Clear commands that allow you to:
Delete the timings on the currently selected slide
Delete the timings on all slides at once
Delete the narration on the currently selected slide
Delete the narration on all slides at once
If you do not want to delete all the timings or narration in your presentation, open a specific slide that has a timing or narration that you do want to delete.
On the Recording tab of the PowerPoint for Microsoft 365 ribbon, on the Record Slide Show button, click the down arrow, point to Clear , and then choose the appropriate Clear command for your situation.

Turn off timings or turn off narrations, and ink
After you've recorded your PowerPoint for Microsoft 365 presentation, any timings, gestures, and audio you performed are saved on the individual slides. But you can turn them all off if you want to view the slide show without them:
To turn off recorded slide timings: On the Slide Show tab, clear the Use Timings box.
To turn off recorded narrations and ink: On the Slide Show tab, clear the Play Narrations box.
Publish the recording to share it with others
Once you've edited the recording to your satisfaction, you can make it available to others by publishing to Microsoft Stream.
With the presentation open, on the Recording tab, select Publish to Stream .
Type a title and a description for the video.
Set other options, including whether you want others in your organization to have permission to see the video.
Select the Publish button.
The upload process can take several minutes, depending on the length of the video. A status bar at the bottom of the PowerPoint window tracks the progress, and PowerPoint shows a message when the upload is finished:

Click the message to go directly to the video playback page on Microsoft Stream.
Create closed captions
To make your video more accessible by including closed captions, choose from these options, which are described in separate Help articles:
Manually write a closed caption file yourself
Get a closed-caption file automatically generated by Microsoft Stream
Once you have a closed-caption file, you can add it to your video file by using PowerPoint .
Record a slide show
With your presentation open, on the Slide Show tab, click Record Slide Show .
(The Clear command deletes narrations or timings, so be careful when you use it. Clear is grayed out unless you have previously recorded some slides.)
In the Record Slide Show box, check or clear the boxes for your recording, and click Start Recording .

More about these options:
Slide and animation timings : PowerPoint automatically records the time you spend on each slide, including any animation steps that occur, and the use of any triggers on each slide.
Narrations, ink, and laser pointer: Record your voice as you run through your presentation. If you use the pen, highlighter, eraser, or laser pointer, PowerPoint records those for playback as well.
Important: Pen, highlighter, and eraser recording are available only if you have the February 16, 2015 update for PowerPoint 2013 or a later version of PowerPoint installed. In earlier versions of PowerPoint, pen and highlighter strokes are saved as ink annotation shapes.
At the top left corner of the window is the Recording toolbar, which you can use to:

If you re-record your narration (including audio, ink, and laser pointer), PowerPoint erases your previously recorded narration (including audio, ink, and laser pointer) when you start recording again on the same slide.
You can also re-record by going to Slide Show > Record Slide Show .
To use ink, eraser, or the laser pointer in your recording, right-click the slide, click Pointer options , and pick your tool:
Laser Pointer
Highlighter
Eraser (This option is grayed out unless you have previously added ink to some slides.)
To change the color of the ink, click Ink Color .
To end your recording, right-click the final slide, and click End Show .
Tip: When you finish recording your narration, a sound icon appears in the lower-right corner of each slide that has narration.
The recorded slide show timings are automatically saved. Timings are shown in Slide Sorter view just beneath each slide.
In this process, what you record is embedded in each slide, and the recording can be played back in Slide Show. A video file is not created by this recording process. However, if you want a video file, you can save your presentation as a video with a few extra steps.
On the Slide Show tab, click From Beginning or From Current Slide.
During playback, your animations, inking actions, laser pointer, audio and video play in sync.
Preview the recorded audio
In Normal view, click the sound icon in the lower-right corner of the slide, and then click Play.
PowerPoint automatically records your slide timings when you add narrations, or you can manually set the slide timings to accompany your narrations.
On the Transitions tab, in the Timing group, under Advance Slide , select the After check box, and then enter the number of seconds indicating how long the slide should appear on the screen. Repeat the process for each slide that you want to set the timing for.
Tip: If you want the next slide to appear either when you click the mouse or automatically after the number of seconds that you enter—whichever comes first—select both the On Mouse Click and the After check boxes.
The Clear command is for deleting timings or narration from your recording that you don't want or that you want to replace. There are four different Clear commands that allow you to:
On the Slide Show tab of the PowerPoint ribbon, on the Record Slide Show button, click the down arrow, point to Clear, and then choose the appropriate Clear command for your situation.
Turn off timings or turn off narrations, ink, and laser pointer
After you've recorded your PowerPoint presentation, any timings, gestures, and audio you performed are saved on the individual slides. But you can turn them all off if you want to view the slide show without them:
To turn off recorded narrations, ink, and the laser pointer: On the Slide Show tab, clear the Play Narrations box.
Turn your mouse into a laser pointer
Animate text or objects
Turn your presentation into a video
Create a self-running presentation
Record your presentation

Toggle video and audio options in the options dropdowns in the recording toolbar.

Note: Your video will be re-recorded just as you had styled.
After you exit Recording Studio with the Esc key (or by clicking End show ) you will see narration (audio/video) applied to your slide along with the proper slide timings and ink animations.
Tip: Audio, video, and inking elements can all be resized and moved in edit view after recording.

Reset to Cameo
To delete your recording and retain your camera style, do the following:
On the Record tab, select Reset to Cameo .

Clear timings or narration
On the Record tab, select Clear Recording

Keyboard shortcuts during the recording process
Related information.
Present with Cameo
Save a presentation as a movie file or MP4
Record audio in PowerPoint for Mac
Add or delete audio in your presentation
Prepare to record
To begin, open the presentation you want and click the Slide Show tab.
Tip: If your presentation has a lot of slides, you might find it more convenient to work in Slide Sorter view. Click View > Slide Sorter to try it out.
Here are some things to check before you begin recording:
If you want to record only part of your slide deck, do one of the following before you begin:
Select the slides you don't want to include, and click Hide Slide .
Click Custom Show > Custom Slide Show > + (add).

Use the Rehearse button to change the timing between slides without affecting the narration or gestures you've already recorded.

Make sure your microphone is set up correctly. On the Mac, go to System Preferences > Sound .
Record your slide show
If you want to add narration or commentary to the slide show, make sure your microphone is set up and working.
To start recording:
Click the Slide Show tab, select the slide where you want the recording to begin, and then click Record Slide Show .

During recording, use Ctrl+click to access the recording commands that let you navigate through the slides, change cursors, or trigger screen blackouts or whiteouts.

Click End Show to stop recording.
A Save dialog box appears. Click Yes to save your recording, or No if you want to record it again.
Saving overwrites anything you've previously recorded. If you want to record another slide show with the same set of slides, save your presentation file with a different name.
Click Play from Start to preview your recording.
You may want to print this list of keyboard shortcuts to refer to while you're recording:
Set playback options
When you've finished recording and are ready to distribute the presentation, click Set up Slide Show and choose the options that are right for your audience.

Show type Show full screen or windowed.
Show options Turn off narration or animations.
Slides Choose a subset of slides, or a Custom show if you've set one up.
Advance slides Set up this version of the slide show so someone can page through it manually.
Add, change, or remove transitions between slides
Start the presentation and see your notes in Presenter view
We're sorry. PowerPoint for the web doesn't support recording a slide show.

Need more help?
Want more options.
Explore subscription benefits, browse training courses, learn how to secure your device, and more.

Microsoft 365 subscription benefits

Microsoft 365 training

Microsoft security

Accessibility center
Communities help you ask and answer questions, give feedback, and hear from experts with rich knowledge.

Ask the Microsoft Community

Microsoft Tech Community

Windows Insiders
Microsoft 365 Insiders
Was this information helpful?
Thank you for your feedback.

How to Record Audio in PowerPoint for Narration or Voice-Over | Step-by-Step
I’ve scrolled through a lot of slideshows and, let’s face it, they’re not always the easiest to follow or understand what’s going on. I’m sure you have felt this too.
Have you ever thought, it would be great if the slides came with audio so that the presenter could explain and talk through each slide?
In this article, we’re going to show you how to record audio in PowerPoint as a narration or voice-over so your audience can feel as if you are presenting live and in person.
All you have to do is record yourself talking through each slide and PowerPoint will take care of the rest!
Related topic : If you are only looking to insert or add an audio that does not advance or move a slideshow in time and in synch your voice, this article: Adding Music to PowerPoint Slideshow explains how.
How to record audio as a voice-over or narration in PowerPoint – Quick Guide
- In PowerPoint, choose a slide.
- From Slide Show menu > click lower part Record Slide Show button
- Select a slide to Record from Current Slide, or Record from Beginning from the sub-menu
- NOTE: PowerPoint versions 2013-2016 only: A “Slide Show Settings” dialog box will appear for animation timings etc. You can leave both checked.
- PowerPoint will then open into full-screen Recording Mode
- NOTE: Microsoft Office PowerPoint versions 2013-2016 and Microsoft for Mac 365 will start recording immediately.
- In Recording Mode > click the Record button in the top left to start recording countdown.
- You are now ready to talk through your presentation and record your voice.
- To Stop or Pause recording > click Pause button or Stop / End Show (x) button.
- Jump to the full step-by-step tutorial below
Why use narrations or voice-overs in PowerPoint Presentation?
Adding a narration or voice-over into a presentation will enable your slideshow to be played and move forward in time or sync with your voice.
Recording audio for your slideshow is a widely used feature and has many benefits. For example:
- It’s useful in situations when a speaker is not available and when people want to view presentations on their own and at their leisure.
- It is also an effective way for speakers to rehearse and time specific slides or the entire presentations before they happen.
- And you may have watched many instructional videos or online courses with a recorded voice over, just because it makes the content easier to understand, is more engaging and lively than just written words alone.
After you finish the audio recording you can share or export your presentation by converting or exporting your PowerPoint (.ppt) file into a video (.mp4 or .mov file) which will have both your audio and visuals contained in one file.
Before recording your narration or voice-over – tips.
Make sure your microphone works..
An important step to take before recording your audio is to ensure your microphone is set up correctly and your voice can be played back clearly. The video below runs through how to set up an external mic for your Windows or Mac .
First, plug in your headset or microphone to your computer if you are not using the inbuilt mic. Or if you are using a Bluetooth headset, make sure it’s paired/connected properly.
To make sure everything is working OK, access the audio device settings on your computer as shown in the video above. While you are in the device settings menu, select your microphone and set it as default.
You can test the playback quality by using the free software tools on your machine:
- Windows 10 – Use Voice Recorder (previously called Sound Recorder)
- Mac – Use Voice Memos
- Chromebook – New in 2021 from OS 88. Use Screen Capture to test your audio recording by pressing the Ctrl, Shift, and Overview keys to bring up the capture bar. ( You may need to enable by entering chrome://flags in the URL address bar and search for “capture” in the search bar or by entering chrome://flags/#screen-capture in the URL address bar.)
Note – In PowerPoint 2016, you cannot change which microphone device you want to record in screen recording mode (so do it first!), however in 2019/Office 365 it is possible to do so, by using the settings link in the full-screen recording mode.
How to Record Audio in PowerPoint Step-by-Step Instructions.
Versions Covered: PowerPoint 2013, 2016, 2019, 2020, Office 365, PowerPoint for PC / Windows, PowerPoint for macOS and Chromebook.
- Start by opening the PowerPoint presentation in which you want to record your audio.

- Stop Recording. To end the slideshow recording, click the Stop (square button) at the top left. Or keyboard shortcut – Press Alt+S. You’re done recording your captivating and engaging PowerPoint slideshow with a voice-over / narration!
- Exit full screen recording window. Click the (x) button int the corner. To save your slide timings, click “yes” if prompted. When you return to your slide view, a small icon of a microphone appears on the bottom right corner of each slide. Click this icon to hear your voice over for any particular slide.
Advanced PowerPoint Audio Recording Options.
Add annotations to your recorded powerpoint slide show..
Adding annotations to your PowerPoint presentation is an optional step and can help your presentation stand out. But, what are annotations, and how should you use them when recording your voice-over?
If you want to draw a user’s attention to a specific area or to add some interactivity; using annotations is the way to do it. It is basically a virtual marker you can use to highlight elements in your presentation slides e.g by circling a word or picture, underlining a phrase, writing additional notes on-screen, or pointing to specific items.
To use the Annotation Tool in PowerPoint: Scroll to the bottom of the full screen recording view (as shown in the image below). Then, select any of the tools available (the laser pointer, highlighter or pen) and annotate your slide, by drawing with them using any mouse or other pointing device.
Note, this will not make a permanent change to your slides, it’s only visible in the recorded playback!

Using the Timings Function to Adjust Recording Speed.
As you record your narration, you will be able to see a clock in the bottom left corner showing how much time you spend on each slide, against the total amount of time recorded so far.
While this is very helpful for rehearsing your presentation, it’s quite common to have issues with timings with your recorded slideshow. For example when you have switched to the next slide too quickly.
To Change the Timings of Your Recording: Navigate to the Slide Show tab in the top ribbon > (Next to the Record Slide Show icon, we used before) > click the Rehearse Timings icon. The presentation will now once again go to full-screen mode, and you can use your arrow keys to change the slides and set new timings.
Clearing or Deleting your narration and / or timings
If you are not happy with your voice-over on a slide or wish to start the recording from the beginning, PowerPoint gives you some easy options to do so.
To Delete a Narration or Timings: Navigate to the Slide Show tab in the top ribbon OR the Recording Tab. Select the down arrow on the “ Record Slide Show ” button > from the menu choose “ Clear ” > Select the appropriate timings and/or narration option.
Save and Distribute the Presentation with Audio as a Movie / Video file.
Now that you are finished recording your PowerPoint presentation, your voice audio will be attached to the same file and it’s time to distribute it by exporting your PowerPoint (PPT file) into a video (.mp4 or .wmv) .
To Export your Presentation as a video: In PowerPoint navigate to File Menu > Export > Select your preferred options. (E.g.) File Format: MP4 . Quality Width 1,920 Height 1,080
Recording Audio Tips and Tricks
Macos 2019 – powerpoint audio recording tip.
To give PowerPoint access to record your screen in macOS you need to set up the right security and privacy permissions:
- Open System Preferences
- Select Security & Privacy
- Select Privacy tab.
- In the left panel scroll to Screen Recording > click “ +” icon .
- In the “Applications” window select PowerPoint

Microsoft 365, 2016, 2019 for Windows PC – Recording tab in PowerPoint
Microsoft 365 subscribers with the Click-to-Run version of Microsoft 365 for Windows PC can use the Recording tab .
The Recording tab shows the recorded video , screenshots, and screen recording options in a single menu for easy access. To turn on the Recording tab of the ribbon in PowerPoint 365 Windows PC
- Select the File menu > click Options .
- In the PowerPoint Options dialog box > click Customize Ribbon
- In the right-panel > select the Recording check box.
- Click OK .

If you click the button on the bottom of the “Record Slide Show” button, you can start from the beginning of the slideshow or from where you are.

Knowing the basics of recording audio in PowerPoint is a powerful tool for anyone who wants to make a downloadable slideshow, create an internet streamed webinar, upload a video for YouTube, Vimeo, or any other digital platform such as your website or other digital platforms.
You may also like: How to Turn a PowerPoint Into a Video

Related Posts
How to add music to powerpoint slideshow and find free music, [solved] how to upload powerpoint to google drive, 10s method: how to add bullet points in powerpoint.
You’re using an older browser version. Update to the latest version of Google Chrome , Safari , Mozilla Firefox , or Microsoft Edge for the best site experience.
- eLearning Blog
- eLearning Basics
- Instructional Design
- Corporate Training
- Course Selling
- Manufacturing
- Products iSpring Suite iSpring Learn
- Use Cases Onboarding Compliance Training Induction Training Product Training Channel Partner Training Sales Training Microlearning Mobile Learning
- Company About Us Case Studies Customers Partnership Course Development Contact Us Academy Blog Webinars Guides
- Community Academy Blog Webinars Guides Experts on iSpring
- Language EN English Français Deutsch Español Italiano Nederlands Português Polski 中文 日本語 العربية Indonesia
- Shopping Cart
Free Online eLearning Conference | May 2nd–3rd
iSPRING DAYS 2024
Seize the human-centric future of learning
How To Record a PowerPoint Presentation With Audio

Table of Contents

3. Select Record from Beginning if you want to start right from the beginning of a presentation. Select Record from Current Slide if you want to record from a specific slide or wish to re-record a particular slide.

4. By default, PowerPoint records both video and audio. If you don’t need a video in your presentation, turn it off by clicking on the camera button. That way, the tool will only record your microphone along with the presentation file.

5. Click on the Record button to begin recording. PowerPoint will count down 3 seconds in the recording window to allow you to get ready, then you can start speaking.

6. Record your narration for a particular slide or the entire presentation. Use the directional arrow buttons to switch slides. You might want to make a one-second break when you go to the next slide, so that nothing will get cut out. Click on Pause if you want to stop and then resume speaking. When you finish, click on Stop in the recording window.

7. Save the file as a PowerPoint presentation. Then go to the File menu and click on Export . Select Create a Video .
For Mac users : You will be directed to the settings menu right after you click Export .

8. Set the desired video quality. Select Use Recorded Timings and Narrations to maintain slide timings for all of the slides. Then, click Create Video .
For Mac users : You can select the desired video format at this point. Once you’ve set the parameters, click Export .

9. Select the video format and the PC location where you want to save your video presentation with narration. Then, click Save .

Congratulations! Once the export process is complete, your video with the complete presentation will be ready.
How to add an existing audio recording to a PowerPoint presentation
Follow these steps if you have an existing audio file with narration that you’d like to add to your presentation.
1. On the main menu, click on the Insert tab.
2. On the sub-menu, select Audio .

3. Choose Audio on My PC .
4. Then, browse your audio files, select the narration, and click Insert .
How to Record PPT Presentations with Narration in iSpring Suite Max
MS PowerPoint allows you to export presentations with narration in a video format. However, PowerPoint does not offer any audio editing options, so it can be challenging to get good-quality sound and a clear recording without unnecessary breaks, volume differences, and other problems.
If you don’t have time to re-record your audio narration and want great quality with minimal efforts, you might need a more advanced tool like iSpring Suite Max. It works as a PowerPoint add-in and is extremely easy to use. iSpring Suite Max offers many audio recording and editing options for your slide show.
For example, you can synchronize narration with slide animations, remove background noise, and improve slide transitions in your PowerPoint file. You can even create voice-overs without ever recording your own voice by converting text to lifelike AI-generated speech.
Here’s a step-by-step guide on how to record presentations with narration in iSpring Suite Max:
Step 1. Install iSpring Suite Max
Download a free 14-day iSpring Suite Max trial and install it on your computer.
Step 2. Choose your presentation
Open your PowerPoint presentation and go to the iSpring Suite tab.

Step 3. Record slide show with audio narration
The next step will vary depending on your needs. iSpring Suite offers 3 recording options:
- Create a simple recording with preset parameters like noise removal and volume options
- Record audio that synchronizes with the PowerPoint slide and animation timings
Convert text to speech
Let’s look at each of these options.
Record audio with preset parameters
Follow this approach if you don’t have any animations or effects in your presentation and just want to add high-quality narration to your presentation.
1. Click on Record Audio in the top left corner of the menu.

2. Use the intuitive menu and record your narration.
Please note that you can apply some settings before recording. For example, you can set noise removal and volume, which will make your narration more comprehensible and easier to edit. Click on Options to set the desired parameters.

3. Once your recording is ready, click OK to save it.
Synchronize audio with animations
Use this approach if you have animations in your presentations and want them to appear at specific points during your speech.
1. Click Manage Narration.

2. Click Record Audio .

3. Now, you can start recording, save, or cancel the changes you’ve made, and preview your presentation. When you click Start Record , that button will change to Next Slide or Next Animation , offering you an easy transition between slides – as though you were delivering the lecture live using a projector. Each of your live clicks will automatically preserve those specific timings for slides and animations.

4. Click Save & Close to save your recording.
Use this approach if you don’t want to record your own voice or that of a voice-over artist, but need to record and play narrations for your presentations.
1. Click Manage Narration on the iSpring Suite Max toolbar.
2. Click the Audio button and choose Text to Speech .

3. Select the language, speaker, and type of voice.

4. Add the text that you wish to convert, and click the Insert button. Then you’ll be able to choose when to start playing narration: right after you open the slide or later.

5. Click Save & Close to save your recording.
Step 4. Save and export your presentation with audio narration
No matter which option you had selected earlier, you now have an audio file. Your next step is to export your presentation. Click Publish on the iSpring Suite toolbar.

Step 5. Publish your presentation
Select where you want to publish your presentation and in which format. You can either publish it as a video or in one of the different online formats. Select:
- Video – if you want to upload your presentation to YouTube.
- SCORM or xAPI – if you want to upload your presentation to an LMS and track learner progress as they study your presentation.
- HTML5 – if you want to upload your presentation to a website.
Then click Publish .

Congratulations! Your presentation with narration is ready.
Useful resources
We’ve selected some tutorials that can make you a more effective PowerPoint user.
- How to Record a Voice-Over for PowerPoint Presentations
- How to Create a Video Lecture
- How to Add Narration to a PowerPoint Presentation
- How to Create a Video Presentation
- How to Insert a YouTube Video into a PowerPoint Presentation
- How to Convert a PowerPoint Presentation to an MP4 Video on Windows and macOS
- The Ultimate Guide to Lecture Capture
Fast eLearning authoring toolkit
Have you ever searched for a way to create a course but found the tools and resources too complex to use? What if you could design and produce courses in a familiar environment like PowerPoint with full audio or video narration?
The eLearning authoring toolkit by iSpring allows you to create courses from within PowerPoint with just a few clicks. You can also convert your Word and PDF documents into interactive e-books.
Some of the other features include:
- Content Library
- Adaptive player
- Extensive LMS compatibility
- Video Editor
- Interactive assessments
- Screen recordings
- Conversion of PowerPoint slides into mobile-ready courses
- Combination of videos with slides
- Course localization in 42 languages with text-to-speech capabilities
There’s so much more you can do with the iSpring Suite 11 fast eLearning authoring toolkit.
Takeaways
Recording PowerPoint presentations with narration and audio is pretty easy if you follow our guide. And your recordings will sound great and synchronize with your animations perfectly when you use iSpring Suite Max.
The tool also allows you to:
- Create complex online courses
- Build engaging online quizzes
- Create interactive dialogue simulations
- Record video lectures
- Collaborate with your colleagues on simple courses and quizzes right in a browser
- Use over 81,000 ready-made eLearning assets (templates, backgrounds, characters, and icons)
Download a free 14-day iSpring Suite Max trial and start designing engaging learning content right away!
Fast course authoring toolkit
Create online courses and assessments in record time.

Content creator:
Helen Colman
She enjoys combining in-depth research with expert knowledge of the industry. If you have eLearning insights that you’d like to share, please get in touch .
You might also like this

Subscribe to our blog
Stay tuned to get our latest eLearning tips and tricks!
By clicking “Subscribe”, you agree to our Privacy Policy . All emails include an unsubscribe link, so that you can opt-out at any time.
We use cookies to give you the best possible experience on our website and also for analytics and marketing purposes. You can enable or disable optional cookies as desired. See our Cookie Policy for more details.
Manage your cookies
Essential cookies are always on. You can turn off other cookies if you wish.
Essential cookies
Analytics cookies
Social media cookies
How to Record PowerPoint Presentation with Audio and Video
Sometimes it is necessary to record not only the sound of the speaker over presentation slides but also their face via a web camera. Learn how to easily do it!

How to record yourself presenting a PowerPoint
The more people work from home, the more online meetings happen. Teams discuss work on projects, put forward their ideas, and share presentations containing essential information. However, problems with the latter can sometimes arise – watching a presentation only might be pretty boring. But this is not the case when the user adds a video recording of them presenting as well.
If you were in such a situation, you may have wondered how to record yourself presenting a PowerPoint slideshow. Actually, with the help of our editing tool, it's not that hard at all! Using it, you can record a web camera video and PowerPoint presentation at the same time on Windows 10 and 11, as well as Mac.
For the rest of the process, follow the steps below:
Start the project
Open Clideo’s Online Video Editor and click "Get started".

To record a presentation and video of yourself at the same time, scroll down the navigation sidebar, click "Record", then "Screen & Camera". If prompted, allow your browser to access your camera and microphone.

You can select a specific camera and microphone and turn them on/off in the next pop-up window via the "Gear" icon at the bottom right.

Record the screen
Check that you look fine in the webcam, click the red circle to start a recording session, and select a window with your PPT in the pop-up screen. Then, click "Share" to start presenting.

Go to the tab with your presentation and do your best. If you return to the Clideo tab, you will see that you cannot move the video window from your camera now, but you can do that while editing your video later.

While recording your presentation, you can at any moment go to the Clideo tab and click the "Pause" button to pause the process, then click it again and go back to the presentation screen to continue the demonstration. To redo the recording and discard the current one, click the "Retake" button to the left.

When you are ready to stop and save the recordings, in the Clideo tab, click the "Stop" button or hit the "Stop sharing" button on your presentation screen.
In the next pop-up window, you can review, rename, redo, and add the files to your project timeline or "Uploads". Both cases will add the screen and camera recordings as separate files.

After every file is manually or automatically placed on the timeline, you can edit each one by one – just click them and adjust the available settings. Resize the camera recording if necessary, cut out the sections you do not need, or add captions.

When you finish editing, click "Export" at the top right and choose your preferred option.

Save the result
When the video is processed, watch the playback to see how it looks. If you like the result, click "Download" to save the screen recording to your device or cloud storage.

If you need more information about the latest state of video editor options and features, you can find details in our Help Center .
Interesting articles
Upgrade your account, get unlimited storage time and create projects without watermarks.
PowerPoint Recorder
Record your PowerPoint presentations online
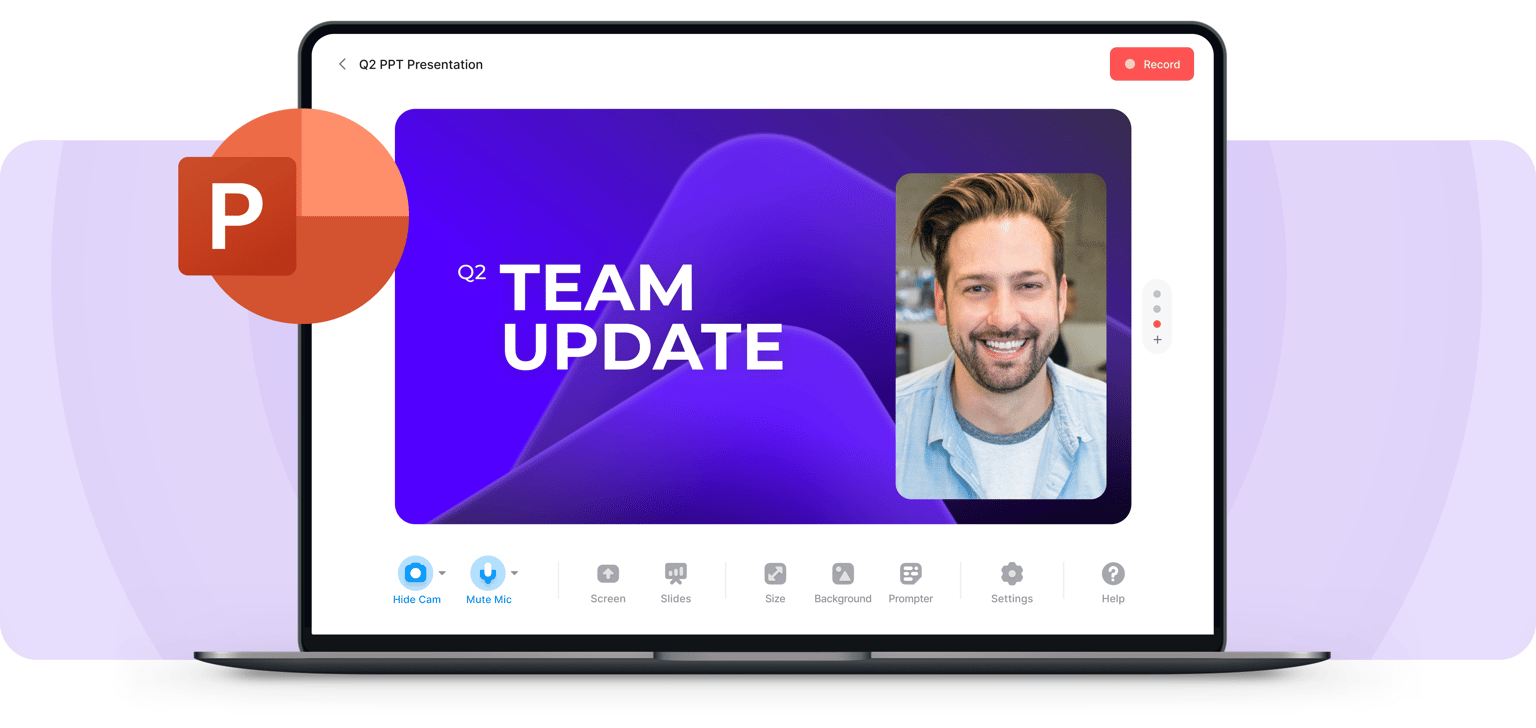
Powerful Online PowerPoint Recorder
Make your presentations look professional using VEED’s online PowerPoint recorder. It’s fast, easy to use, and gives you access to video editing tools to make your presentation stand out. You can upload your slides or record your screen while you are presenting. Add yourself to the scene by recording your webcam and audio as well.
No need to install software. Open your browser and start recording! Choose from different layouts and customize your video after you record. You can also edit your recording using our professional video editor.
How to Record Your PowerPoint Presentation:
1 upload slides and select a layout.
Select from our list of layouts (you may need to click to ‘Allow’ permission to access your screen, camera, or microphone). You can record just your screen, your webcam, or both at the same time! You can either upload your slides or record while you’re presenting.
2 Start recording
Click the red button to start recording! You'll see a countdown before the recording starts. Don't worry if you mess up. You have unlimited time and unlimited retakes. You can navigate to other pages, and don't worry, you are still recording.
3 Review, edit, and export
You can playback your recording to review it, click ‘Share’ to share with friends and colleagues, or ‘Edit’ to edit your video (perfect for adding text, subtitles, and professional touches to your screen recording)

‘PowerPoint Recorder’ Tutorial

Highly customizable PPT recording software
VEED lets you easily customize your Microsoft PowerPoint presentation recordings. Select from different layouts and backgrounds. You can record your screen, webcam, audio, and upload your PowerPoint slides to present while recording. If you choose to record your entire desktop, you can easily switch the view between your presentation slides and other windows. When you’re finished, edit your video using our free video editor, where you can also add royalty-free music from our Stock Library.
All the things you need in a screen recorder
Our video capture software is packed with features that will help you create professional-looking recordings. When you press record, the countdown timer will appear to prompt you when your recording starts. To make sure that your audio is being picked up, check the little microphone icon on the bottom of your screen. It should be animated to indicate that your audio is being recorded. It only takes a few clicks. It’s the best app to record your Microsoft PowerPoint presentations.
Fast, free, and easy-to-use screen recorder software
Our screen recorder and video editor are free to use and beginner-friendly. However, if you need to record longer videos, you may need to subscribe to our premium plans. Check out our Pricing Page to see which plan suits your needs. It is super easy to use. It only takes a few clicks!
Frequently Asked Questions
Microsoft does allow you to record your presentation as well as your voice or audio. But you might be limited because you can’t switch screens. Use VEED to record your entire desktop and switch between windows.
With VEED, you can record your audio, webcam, screen, and presentation slides all at the same time!
To add yourself or your camera to the recording, select the layout that includes “webcam.” Choose the size and positioning of your camera feed and start recording!
Although there are many screen recorders out there, VEED is your best choice when it comes to recording your PC screen! It’s free and online. No need to install software. Plus you can use our free video editor to enhance your recording even more.
What they say about VEED
Veed is a great piece of browser software with the best team I've ever seen. Veed allows for subtitling, editing, effect/text encoding, and many more advanced features that other editors just can't compete with. The free version is wonderful, but the Pro version is beyond perfect. Keep in mind that this a browser editor we're talking about and the level of quality that Veed allows is stunning and a complete game changer at worst.
I love using VEED as the speech to subtitles transcription is the most accurate I've seen on the market. It has enabled me to edit my videos in just a few minutes and bring my video content to the next level
Laura Haleydt - Brand Marketing Manager, Carlsberg Importers
The Best & Most Easy to Use Simple Video Editing Software! I had tried tons of other online editors on the market and been disappointed. With VEED I haven't experienced any issues with the videos I create on there. It has everything I need in one place such as the progress bar for my 1-minute clips, auto transcriptions for all my video content, and custom fonts for consistency in my visual branding.
Diana B - Social Media Strategist, Self Employed
More than a PowerPoint recorder
VEED is a complete browser-based tool that lets you do so much more than just record and share your Microsoft PowerPoint presentations. You can annotate your videos to make your presentation more informative. Edit your recording to add images, subtitles, and more. It is a professional all-in-one video-creation and editing software that’s great for beginners and pros alike. Create professional-looking videos in just a few clicks. You don’t need any video editing experience. Create stunning videos that you can share on social media in just minutes. Try VEED to create professional PowerPoint recordings today!


How to Record Customized Camera Feeds With Cameo in PowerPoint
T he widespread adoption of remote work and virtual meetings has led many people and organizations to realize they don't have to be physically present in the same conference room to make presentations. In fact, you don't even need to conduct them live.
However, recording your PowerPoint slides with your face on them requires technical know-how and third-party apps like OBS. This makes recording presentations a bit difficult and discourages people from doing it.
Thankfully, Microsoft has addressed this issue in PowerPoint 365 with the Cameo feature. Here's what it is and how to use it.
What Is Cameo in PowerPoint?
Cameo is a PowerPoint feature that lets you add your webcam or any other camera feed into your presentation. This makes it easier to present virtually, as your audience can see you from within your slides.
Previously, you needed a third-party app like OBS to overlay yourself on your presentation. You can also use a green screen overlay in Capcut or other similar apps to achieve the same effect. However, this takes a lot of effort and know-how.
But with this feature, you can do it from inside PowerPoint with just a few clicks. Here's how to insert a cameo into your slides.
- Go to Insert > Cameo .
- After clicking on Cameo, PowerPoint will insert a placeholder object on your current slide and open the Camera Format tab.
- You can edit the object as you wish, much like any other shape on PowerPoint. You can also click on the options in the Designer pane on the right side of the screen to help you work faster.
- Once you're happy with its placement on your slide, click on the Preview button to see your live video.
With that, you can start presenting your PowerPoint slides via screen sharing while still keeping yourself on the screen.
How to Record Your PowerPoint Presentation With Cameo
You can also insert a cameo from Record > Cameo . Clicking on this will bring you to the same menu tab and insert a placeholder object for your video. However, even if you didn't set up Cameo beforehand, you can insert it directly while recording your presentation. Here's how:
- Go to Record > From Beginning or Record > From Current Slide .
- In the recording screen, click on the Camera icon at the top. This will insert a round object containing your video in your slides' lower-right-hand section.
- Click on the Red icon to start recording your presentation.
- Go through your presentation as usual. For more information, check out our guide on turning your presentations into videos .
- Once you've finished, click the Red icon again to stop recording.
- Click Export to go to the Export to video screen .
- Change the File Name as needed, then click Browse to select the location where you will save your recorded video.
- Once done, click Export Video .
With that, you don't have to spend much effort to add your video feed to your PowerPoint presentation recording. However, the app only places your video at one location across every slide; it might cover some of your content. That's why it's better to use the Cameo feature when you're building or editing your PowerPoint presentation.
If you're unhappy with your recording, press the Retake Video on the left of the record icon. You can pick between On Current Slide or On All Slides .
What You Need to Record Customized Camera Feeds
You need a webcam and a Microsoft 365 account to record your customized camera feed. Furthermore, you cannot use Cameo or record presentations in the PowerPoint web app. You need to download and install it on your computer to use these features.
The Cameo feature is already available on Microsoft PowerPoint 365 in Windows and Mac. However, recording your presentation with Cameo is only available on Windows. As of the time of writing, this feature isn't available for the main PowerPoint 365 for Mac version.
If you're running macOS, you must be a Microsoft 365 Insider to get this feature. However, since the Cameo recording feature is already announced in the Microsoft 365 Insider blog , we hope it will be available in the mainstream PowerPoint for Mac version in a few months.
Recording Your Presentations Is Now Much Easier
The Cameo feature has made presenting PowerPoint slides in video calls easier. And with the recording function, you no longer need a third-party app to put your video over your presentation.
You can integrate it into each slide, allowing you to control where you are on your screen. And you also save a lot of time and effort, as you can record and save your presentation as a video from within Microsoft PowerPoint.

- Search the community and support articles
- Microsoft 365 and Office
- Search Community member
Ask a new question
Screen-recorded video with Powerpoint has no audio even though audio button is turned on.
I used Office 365 Powerpoint screen recording feature to screen record my online lectures, only intent is so that I can refer back to the lecture at my own pace. I connected my bluetooth earpiece to my laptop and listened to my lecture with my bluetooth earpiece, to minimize being distracted by background noises in my house. I had screen recorded my lecture before without connecting my bluetooth earpiece to my laptop, and the audio was recorded in the screen recorded video. However, when I connected my bluetooth earpiece to my laptop, powerpoint failed to record the audio which was projected via my bluetooth earpiece. I had turned on the record audio feature. I do not get why audio was not recorded, or is it powerpoint cannot record audio that is played through earpiece? would appreciate any help I can get to revive the audio in my screen-recorded video as it is very important to me. The entire video was about 2.5 hours long.

Report abuse
Replies (12) .
* Please try a lower page number.
* Please enter only numbers.
- Microsoft Agent |
Hi HaymieJ, Sorry for the inconvenience it may have caused. To troubleshoot the issue, there’re some suggestions you may take: 1. Update Office to the latest version . With Office updated, some issues would get resolved. So it’s a good idea to keep Office up to date.
2. Open PowerPoint in safe mode to exclude the issue is related to some third-party add-ins. Then check the result.
And in case the issue related to the Bluetooth earpiece: 1. Try to use another one if possible and check the result. 2. If you have a wired microphone, try to have a test with it. 3. In PowerPoint, click on Insert > Audio to see if recording audio works correctly. If issue persists, to further check it, we would like to collect your Office version. You can find it by clicking on File > Account after starting PowerPoint. Please take a screenshot of the Product Information part and share it with us. Appreciate your understanding. Best regards, Madoc
1 person found this reply helpful
Was this reply helpful? Yes No
Sorry this didn't help.
Great! Thanks for your feedback.
How satisfied are you with this reply?
Thanks for your feedback, it helps us improve the site.
Thanks for your feedback.
I have updated and repaired my office. I am unable to open Powerpoint in safe mode. (no available option to do so) And in case the issue related to the Bluetooth earpiece: 1. Try to use another one if possible and check the result. I was using my right bluetooth earpiece during the actual recording. I tried with my left bluetooth earpiece. unable to screen record with audio with bluetooth earpiece connected. 2. If you have a wired microphone, try to have a test with it. surprsingly, audio could be recorded with my wired microphone for both screen and audio recording. 3. In PowerPoint, click on Insert > Audio to see if recording audio works correctly. it works, same issue with screen recording, can only record audio when no bluetooth earpiece is connected. when I used my bluetooth earpiece to record, no audio was recorded. works with my wired earpiece.
I have attached a screenshot of my Product information. Meanwhile I will stick to using my wired earpiece for the time being.
meanwhile is there any way that I can retrieve back my audio in my recorded video?

I don't own any other third-party software.
I tried to screen record using Windows feature (windows key + G) to screen record with my bluetooth earpice.
Audio was successfully recorded.
I am unsure if audio was successfully recorded for my case, as I was very certain that I had turned on the audio feature when I did my screen recording, and I did hear audio from my online lecture. ("video" had sound while I did the recording.) I don't get why audio was not recorded when I used my bluetooth earpiece. Felt really disappointed by this as the online lecture recorded is meaningless without any audio.
I did a quick test with your suggestion to select my bluetooth device as my output channel. I tried to screen-record with powerpoint again. This time, audio from the screen itself was not recorded at all. Instead, audio from my surroundings in real life was recorded instead.
I am really baffled over this. There is really no way to recover my audio from the video?
Hi HaymieJ, Sorry that the issue persists. In this case, we sincerely suggest you submit feedback to Office PowerPoint development team directly by clicking File > Feedback within the PowerPoint client. This is the quickest route to get your comments to our developers’ ears. And if you want to, you can even tell them your email address in case they need to contact you for clarification. They read all feedback. Highly appreciate your time and patience. Best regards, Madoc
2 people found this reply helpful
Question Info
- Norsk Bokmål
- Ελληνικά
- Русский
- עברית
- العربية
- ไทย
- 한국어
- 中文(简体)
- 中文(繁體)
- 日本語
IMAGES
VIDEO
COMMENTS
You can record your PowerPoint presentation—or just a single slide—and capture voice, ink gestures, and your video presence. The completed recording is like any other presentation. You can play it for your audience in Slide Show or you can export it as a video file. So instead of just handing the deck to someone, people can see your ...
Learn how to record a PowerPoint Presentation with audio and video simply by using the build-in PowerPoint functionalities and tools. You will learn how to...
1. Add audio to a PowerPoint presentation. Go to the Recording tab, click the Audio button select Audio on My PC…. You could also select the Record Sound option to record your narration to add it to the slide. Then, select the audio file from your device and then click Insert.
Step 3: Configure recording settings. With the Video Recording toolbar, you can set options like Cursor Capture and Effects, System Audio, and Webcam. If your webcam isn't showing, click on the webcam icon. If you have an external webcam, select the one you want to use by clicking the dropdown arrow next to the webcam icon.
Open the Slide Show tab and select Record Slide Show . Select the Record button on the toolbar to start recording your narration. Use your keyboard arrow keys to move back and forth between slides. Press N or Space Bar to move to the next slide or animation in the presentation.
Let's see how to record a PowerPoint presentation in front of live audiences. Step 1 - save your PowerPoint presentation in OneDrive. Step 2 - open your PowerPoint slides from PowerPoint online. Step 3 - go to Present Live from the Slideshow Ribbon tab. Step 4 - share a live link with your audience.
Step 2: Click the Record tab, select the Record button, and choose From Beginning or From Current Slide; Step 3: Hit the SETTINGS button and configure the microphone and camera device; Step 4: Use the Start recording button on the top left corner to record a video of the PowerPoint presentation with audio and yourself;
To turn a PowerPoint presentation into a video, first, open your presentation with the PowerPoint app on your Windows or Mac computer. In the top-left corner of PowerPoint, click the "File" option. From the sidebar that opens after clicking the "File" option, select "Export." In the "Export" menu, click "Create a Video."
1. Open the PowerPoint presentation in which you want to record audio and video. 2. From the Slide Show tab (or the Recording tab), click the Record Slide Show button and choose either Record from Current slide or Record from Beginning, depending on which point you want to add audio/video. 3.
Record narration and timings for your presentation in Microsoft PowerPoint to give it a professional and polished feel. Record narration and timings:1. Selec...
A video file is not created by this recording process. However, if you want a video file, you can save your presentation as a video with a few extra steps. Preview the recorded slide show. On the Slide Show tab, click From Beginning or From Current Slide. During playback, your animations, inking actions, laser pointer, audio and video play in sync.
From Slide Show menu > click lower part Record Slide Show button. Select a slide to Record from Current Slide, or Record from Beginning from the sub-menu. NOTE: PowerPoint versions 2013-2016 only: A "Slide Show Settings" dialog box will appear for animation timings etc. You can leave both checked.
Get all my courses for USD 5.99/Month - https://bit.ly/all-courses-subscriptionIn this PowerPoint tutorial video, we will learn how to record PowerPoint pres...
1. Open your PowerPoint presentation. 2. Go to the Slide Show tab and click the Record Slide Show box. 3. Select Record from Beginning if you want to start right from the beginning of a presentation. Select Record from Current Slide if you want to record from a specific slide or wish to re-record a particular slide. 4.
Start the project. Open Clideo's Online Video Editor and click "Get started". To record a presentation and video of yourself at the same time, scroll down the navigation sidebar, click "Record", then "Screen & Camera". If prompted, allow your browser to access your camera and microphone. You can select a specific camera and microphone and ...
More than a PowerPoint recorder. VEED is a complete browser-based tool that lets you do so much more than just record and share your Microsoft PowerPoint presentations. You can annotate your videos to make your presentation more informative. Edit your recording to add images, subtitles, and more. It is a professional all-in-one video-creation ...
This setting is controlled by the Mute button, found on the left side of the menu bar. Press Record to begin audio and video recording of your PowerPoint deck in Zoom. To record your PowerPoint in Zoom, click Record. From this point on, anything you share on-screen or say aloud will be captured in your recording.
Here's how: Go to Record > From Beginning or Record > From Current Slide. In the recording screen, click on the Camera icon at the top. This will insert a round object containing your video in ...
You can add audio, such as music, narration, or sound bites, to your PowerPoint presentation. To record and hear any audio, your computer must be equipped wi...
Welcome to Microsoft Community. We went through your post carefully and it seems like your demand is to record PowerPoint presentation with yourself. However, the main issue is that now it is not showing the Record button in PowerPoint application on your Mac, which made you unable to record. If my understanding is correct, we would like to ...
1. Try to use another one if possible and check the result. 2. If you have a wired microphone, try to have a test with it. 3. In PowerPoint, click on Insert > Audio to see if recording audio works correctly. If issue persists, to further check it, we would like to collect your Office version.