

Free Cover Page templates
Create impressive cover pages for your assignments and projects online in just a click. choose from hundreds of free templates and customize them with edit.org..
Create impressive cover pages in a few minutes with Edit.org, and give your projects and assignments a professional and unique touch. A well-designed title page or project front page can positively impact your professor's opinion of your homework, which can improve your final grade!

Create a personalized report cover page
After writing the whole report, dissertation, or paper, which is the hardest part, you should now create a cover page that suits the rest of the project. Part of the grade for your work depends on the first impression of the teacher who corrects it.
We know not everyone is a professional designer, and that's why Edit.org wants to help you. Having a professional title page can give the impression you've put a great deal of time and effort into your assignment, as well as the impression you take the subject very seriously. Thanks to Edit.org, everyone can become a professional designer. This way, you'll only have to worry about doing a great job on your assignment.
On the editor, you will also find free resume templates and other educational and professional designs.

Customize an essay cover page with Edit.org
- Go to formats on the home page and choose Cover pages.
- Choose the template that best suits the project.
- You can add your images or change the template background color.
- Add your report information and change the font type and colors if needed.
- Save and download it. The cover page is ready to make your work shine!

Free editable templates for title pages
As you can see, it's simple to create cover pages for schoolwork and it won’t take much time. We recommend using the same colors on the cover as the ones you used for your essay titles to create a cohesive design. It’s also crucial to add the name and logo of the institution for which you are doing the essay. A visually attractive project is likely to be graded very well, so taking care of the small details will make your work look professional.
On Edit.org, you can also reuse all your designs and adapt them to different projects. Thanks to the users' internal memory, you can access and edit old templates anytime and anywhere.

Take a look at other options we propose on the site. Edit.org helps design flyers, business cards, and other designs useful in the workplace. The platform was created so you don't need to have previous design knowledge to achieve a spectacular cover page! Start your cover page design now.
Create online Cover Pages for printing
You can enter our free graphic editor from your phone, tablet or computer. The process is 100% online, fun and intuitive. Just click on what you want to modify. Customize your cover page quickly and easily. You don't need any design skills. No Photoshop skills. Just choose a template from this article or from the final waterfall and customize it to your liking. Writing first and last names, numbers, additional information or texts will be as easy as writing in a Word document.
Free templates for assignment cover page design

Tumblr Banners

Album Covers

Magazine Covers

Book & eBook Covers
Word & Excel Templates
Printable Word and Excel Templates

Assignment Cover Pages
Assignment cover page is the first page of an assignment. When you hold an assignment, the first page that you will see is the cover page. It is also called the title page. An assignment cover page includes the name of the institution, the title of the assignment, the name of the student and student’s ID. The assignment cover page is helpful in identifying what the assignment is about and which student submitted it.
Many students submit assignments to instructors, and instructors are usually teaching more than one subject. Therefore, without an assignment cover page, it would be difficult for the instructor to manage and sort out different assignments.
When there is an assignment cover page, instructors can easily sort out the assignments and grade them. Even the students submitting multiple assignments on the same day could end up submitting the wrong assignment if the assignments didn’t have a cover page.
Another important reason for having assignment cover pages is that this is part of training students to submit work professionally. An assignment cover page shows professionalism in submitting work. When students are trained for professional work, they are better equipped at succeeding in their jobs. Thus, professors and instructors usually ask students to create cover pages for their assignments so that the students develop this habit early in their academic life.
The assignment cover page usually includes the name of the institution, title of the assignment, name of the student, student id, date of submission. In some cases, the title page may also mention the instructor name. Usually, the title page is not page numbered.
Some courses might also require the students to format the assignment cover pages using popular referencing styles. For example, there is a particular format to make an assignment cover page using APA or MLA referencing styles. In some cases, professors may also issue detailed instructions on how to format an assignment cover page. These instructions may include font style, font size, text color, page borders, and the information that must be stated on the cover page along with a particular order.
Cover pages are required in several situations:
- When submitting a project report
- When submitting a research proposal
- When submitting a dissertation
- When making a report that is longer than 2-3 pages
- When the assignment instructions require an assignment cover page
- When the professor is handling more than one subject and assignments may be erroneously sorted
Assignment cover pages are very useful and can be created in MS Word or Adobe. MS Word software allows pictures and text to be used on the cover page. Students may also use headers and footers, page borders and other features in MS Word to create a nice cover page. You can even use the popular heading styles given in MS Word.
If you do not have the time or energy to create a cover page, you may use cover pages available on our website. We offer editable cover page templates that you can easily download and customize. Browse through our specially designed assignment cover pages and save your time and effort.
MS Word Cover Page Templates
Download, personalize & print, assignment front page designs.
Posted By: admin 25/01/2019
What is an assignment front page?
The immediate page that can be seen right after the cover page is known as a front page. The front page is also known as a title page. It is as important as the cover page. An assignment can be submitted without a cover page h owever , the assignment front page can never be skipped.
Why is assignment front page important?
An assignment front page provides information about the student who has created the assignment. This page is considered to be important because it enables the teacher to know about the student who has submitted the assignment. Many students also forget to add their name to the assignment that results in zero marks. The use of front page in the assignment never lets the student forget to add the name.
How to write a front page of assignment?
It should be kept in mind that there is no specific format to be followed when it comes to making the assignment front page. However, it should always be ensured that you include all the necessary details to the front page needed by the teacher to identify your assignment. The main details that should be added to the assignment front page are:
- Title of the subject
- Topic of assignment
- Name of teacher
- Name and roll number of students
- The registration number of students
- Department in which the student is enrolled
The assignment front page should be made with great care. It should be ensured that the details added to it are more than enough for your teacher.
Guidelines for making assignment front page:
It is important to make a front page that can impress your teacher. Here are a few guidelines that you can follow in order to make a professional looking front page.
- Keep the cover page precise. Never overcrowd the front page with a lot of details as it does not look good.
- The front page should be decent and catchy. The color combination for a colored front page should be appropriate since your assignment is the representative of your own mind.
- Make the design of the front page attractive and catchy. It should be able to grab the attention of the teacher. If you are not good at designing the front page, you can use a template
Assignment front page template:
For those who want to save their time and efforts, readymade templates for the front page of an assignment is available here.
There are lots of assignment front page samples that you can see and choose the one that you like. The likeness of the design varies from person to person. Therefore, different samples from the prospective of different people have been given here.
The assignment front page samples are designed in MS Word mostly. The samples have been designed by the experts. Since they are readymade, all you need to do is to add the details specific to you and print the template. You can also bring changes to them according to your likes.
Business Report Cover Pages
MS Word Report Cover Pages
Printable Cover Pages
Professional Cover Pages
Book Cover Page Templates
Book Title Page Templates
Computer Assignment Cover Pages
Engineering Assignments Cover Pages
Physics Assignment Cover Pages
Chemistry Assignment Cover Pages
Biology Assignment Cover Pages
University Assignment Cover Pages
Mathematics Assignment Cover Pages
English Assignment Cover Pages
Social Study Assignment Cover Pages
Be the first to comment on "Assignment Front Page Designs"
Leave a comment cancel reply.
Your email address will not be published.
Save my name, email, and website in this browser for the next time I comment.
What is the Assignments Index Page?
- Last modification date Updated On August 19, 2022
- Categories: Assignments , Canvas , New Quizzes , Quizzes

When you click Assignments from Course Navigation , you are taken to the Assignment Index Page . This page is where you can find all types of activities ( Assignments , Quizzes , New Quizzes , and Discussions ) from your course organized in one place. Any existing activities are sorted here by Assignment Group .
At the top of the Assignment Index Page you can find a box labelled Search for Assignment . You can use this box to search for activities within the page. You can also find + Group and + Assignment buttons for adding Assignment Groups and Assignments. Finally, there is the Options icon for weighting assignment groups.
Lower on the page you can add assignments directly to assignment groups by clicking the + button associated with each group. You can change assignment group settings by clicking the Options icon associated with each group.
You can also reorder the assignment groups by clicking the associated handles and expand or collapse each assignment group as well.

Subscribe By Email
Get a weekly email of all new posts.
Your Email Leave this field blank
This form is protected by reCAPTCHA and the Google Privacy Policy and Terms of Service apply.
Free Front Page Design
Free Front Page Designs For Assignments And Projects [Download MS Word Templates]
A good front page design is important in a project because it makes a strong first impression. A well-designed cover page or front page can create a positive initial impression on the reader and set the tone for the rest of the project. It Conveys professionalism. A professional looking cover page demonstrates to the reader that the project has been completed with care and attention to detail.
The cover page should clearly communicate the title, author(s), and date of the project, as well as any other important information that the reader needs to know.
A well-designed cover page should reflect the content and tone of the project, helping to build a connection between the reader and the project’s contents.
In short, the cover page is a crucial component of a project and can have a significant impact on how the project is perceived and received by the reader.
Front Page Design Template Samples
Benefits of using a good front page design on your project
- Establish a visual identity: A consistent and recognizable design on the cover page can help to establish a visual identity for the project and make it easier for the reader to identify it in the future.
- Differentiate the project: A unique and eye-catching cover page design can help to distinguish the project from others and make it stand out.
- Create a sense of unity: A well-designed cover page can provide a sense of unity to the entire project and reinforce the idea that all of the elements of the project are part of a cohesive whole.
- Provide context: The cover page design can provide context and information about the purpose, audience, and goals of the project, helping the reader to better understand and engage with the content.
- Improving organization: A well-designed cover page can help to organize the contents of the project and make it easier for the reader to navigate.
- Facilitating access: A clear and well-designed cover page can make it easier for the reader to access the contents of the project, and quickly find the information they are looking for.
- Enhancing accessibility: For projects that are shared electronically, a well-designed cover page can enhance accessibility for users with disabilities, such as those using screen readers.
Overall, a good cover page design is not just a cosmetic detail, but an important aspect of the project that can influence the reader’s perception and understanding of the content.
A well-designed front page can set the tone for the entire project and make it stand out from the rest. In this blog, we’ll take a look at some sample front page designs, best practices and tips to help you create a stunning front page design for your next project.
Front Page Designs Of Assignment
Front page designs for assignments [free ms word template download].

Creative Front Page Design For Assignment [Free MS Word Template Download]

MORE ASSIGNMENT TEMPLATES
Tips for Stunning Front Page Design Of Assignment
While it’s important to keep the front page design simple, that doesn’t mean it can’t be creative. You can still add a touch of personality to your design while making sure it’s organized and professional.
Here are a few ideas to get you started:
- Use a unique font or color scheme
- Incorporate illustrations or graphics related to your project topic
- Experiment with different layout options
Science Project Front Page Design [Free MS Word Template Download]
When it comes to designing the front page for a science project, the design should reflect the topic and make the project stand out. You can include images or graphics related to the topic, and use a font that is easy to read.
Front Page Design For Physics Project

Front Page Design For Chemistry Project

Front Page Design Tips For Chemistry Project
To design a cover page for a Chemistry project, you could try the following design concept:
- Use a light blue or green gradient to represent the chemical elements in a test tube.
- Use a bold sans-serif font, such as Arial or Verdana, to write the title of the project in white or yellow. Make the title the focal point of the page.
- Use a smaller sans-serif font, also in white or yellow, to write a brief description of the project, such as “An investigation into the properties of chemical reactions.”
- Use a smaller sans-serif font in black to write your name, class, and date of submission, positioned in the bottom right or left corner of the page.
- Add the logo of your school or university in the top right or left corner of the page.
- Include a relevant image or illustration of a chemical reaction, periodic table, or other scientific concept to reinforce the subject of Chemistry.
- Consider adding a simple white border around the entire page to give it structure and definition.
- This design concept incorporates elements of the subject of Chemistry, while also keeping it simple, clean, and professional.
Front Page Design For Biology Project

Front Page Design Tips For Biology Project
For a biology project cover page, you can consider incorporating the following elements:
- Title: A descriptive and concise title that accurately reflects the content of the project.
- Author(s): The name(s) of the person(s) who completed the project, usually in a prominent position on the page.
- Date: The date the project was completed, which is typically included in the header or footer of the page.
- School or organization: The name of the school, institution, or organization that the project was completed for, if applicable.
- Relevant images or graphics: Images or graphics related to the biology topic being studied, such as diagrams, charts, or photos of specimens.
- Project description: A brief summary or description of the project, including the purpose, methodology, and key findings.
- Aesthetics: A clean and professional design with a color palette that reflects the biology topic being studied. For example, green and blue might be appropriate for an aquatic biology project, while warm oranges and yellows might be appropriate for a botany project.
It’s important to note that the specific requirements for a biology project cover page can vary based on the guidelines provided by the teacher or institution. However, these elements can serve as a starting point for creating a visually appealing and effective design for a biology project cover page.
Border Front Page Design For Project [Free MS Word Template Download]
Adding a border to your front page design can help make it look more polished and professional. You can choose a border that reflects the topic of your project, or use a simple border in a neutral color.

Front Page Design For English Project [Free MS Word Template Download]

Front Page Design Tips For English Project
To design a cover page for an English project, you can consider the following steps:
- Choose a theme that aligns with the project topic and make it visually appealing.
- Add a title that clearly represents the project, it should be big and legible.
- Add your name, class, and date in a clear and concise manner.
- If required, include the name of your instructor and school/university.
- Add any relevant graphics, images, or logos that reinforce the theme of your project.
- Make sure to use a font that is easy to read and aesthetically pleasing.
- Consider adding a border or design element that ties everything together.
Note: The design should be professional and align with any guidelines provided by the instructor.
School Project Front Page Design

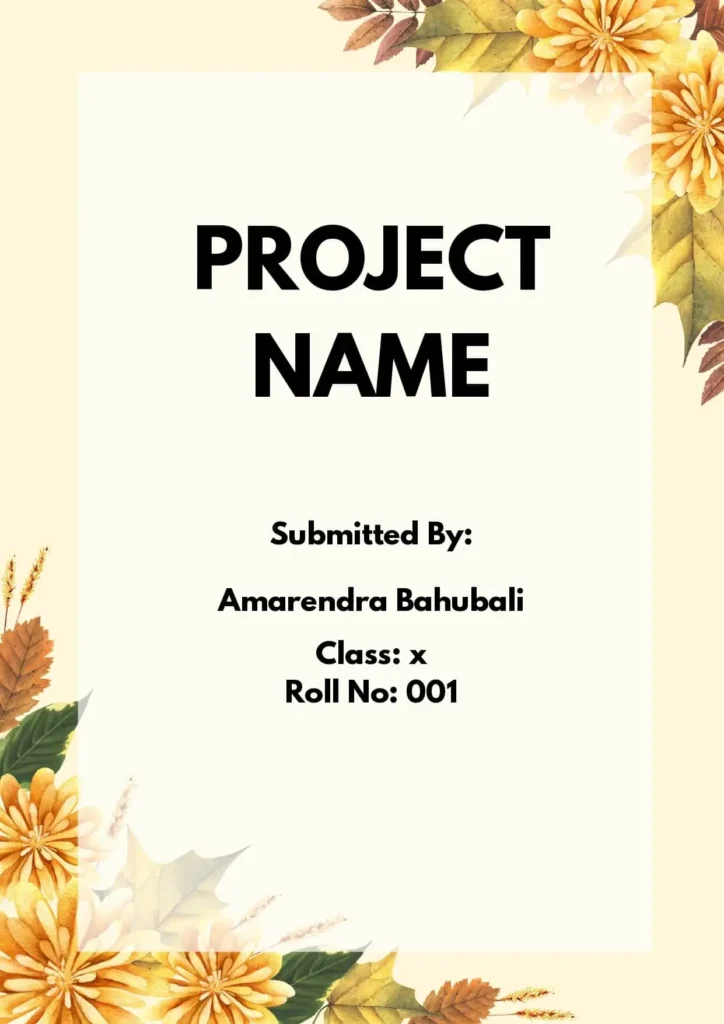
Floral Front Page Design For School Project

Whether or not it’s a good idea to use a floral front page design for a school project depends on the context of the project and the guidelines provided by the teacher or instructor. If the project is related to a subject such as art, design, or gardening, then a floral design may be appropriate. However, if the project is focused on a more technical or scientific subject, a more straightforward design may be more suitable. It’s important to consider the purpose and audience of the project and to ensure that the design effectively communicates the information you want to convey.
Cute Front Page Design For Project

Simple Front Page Designs For Project

Front Page Designs For Math Project

Front Page Designs For Music Project

Handmade Front Page Design For Project
Tips to make your handmade front page designs more appealing .
A handmade cover page design can add a personal touch to your assignment and make it stand out. Here are some elements you could consider incorporating into your design:
- Hand-drawn illustrations or graphics: Use hand-drawn illustrations or graphics that are relevant to the subject matter of the assignment.
- Handwritten typography: Incorporate hand-written typography into your design to add a personal touch. Consider using a calligraphy pen or brush to create unique, hand-lettered text.
- Collage: Create a collage using different materials, such as paper, fabric, or photographs, to create a unique and visually interesting cover page design.
- Watercolor: Use watercolor to create a painted cover page design. Consider using colors that are consistent with the subject matter of the assignment.
By incorporating these elements, you can create a handmade cover page design that is both personal and professional. Keep in mind that a handmade design may take longer to create than a digital design, so be sure to allow enough time to complete it.
What are the best tools to create a beautiful Front Page Design for a project ?
There are many tools you can use to create a beautiful front page design for a project, including:
Here’s How You Can Create a Beautiful Front Page Design in MS Word:
- Choose a page size and orientation that suits your design. Go to Page Layout > Page Setup.
- Select a theme or color scheme. Go to Design > Colors.
- Add a header or footer for branding. Go to Insert > Header & Footer.
- Insert a title text box and customize its font, size, and color. Go to Insert > Text Box.
- Add an image to the background. Go to Insert > Picture.
- Add other design elements such as shapes, lines, or text boxes to create visual interest. Go to Insert > Shapes.
- Align and arrange elements as desired. Go to Home > Align.
- Apply styles to text, such as bold or italic, to make the page look more polished. Go to Home > Styles.
- Preview the page to check its appearance. Go to View > Print Layout.
- Save the document as a template to use as a starting point for future projects. Go to File > Save As > Word Template.
A good looking front page design for a school or assignment project or a science project is important because it reflects the attention and effort put into the project, and can impact the grade or evaluation received. A well-designed front page can also effectively convey the topic and purpose of the project, making it easier for the teacher or evaluator to understand and appreciate the content. A visually appealing and organized design can also make the project stand out, showing initiative and creativity, and can help the student effectively communicate their ideas and findings. In science projects, a clear and effective front page design can also help emphasize the significance and potential impact of the research. Ultimately, a good looking front page design can enhance the overall presentation and impact of the project.
What is the downloaded file format?
.doc (MS Word file extension)
How to edit the downloaded template?
Open it in MS Word and make changes according to your need.
What is the size of the template?
It is A4 size template.
Leave a Comment Cancel reply
Save my name, email, and website in this browser for the next time I comment.

You're signed out
Sign in to ask questions, follow content, and engage with the Community
- Canvas Instructor
- Instructor Guide
How do I use the Assignments Index Page?
- Subscribe to RSS Feed
- Printer Friendly Page
- Report Inappropriate Content
in Instructor Guide
Note: You can only embed guides in Canvas courses. Embedding on other sites is not supported.
Community Help
View our top guides and resources:.
To participate in the Instructurer Community, you need to sign up or log in:
All Formats
- Microsoft Office
Word Templates
44+ table of contents – pdf, doc, google docs.
A templates of table of contents acts as an index page design in the document and acts as a practical guide when navigating through. You can use a table of contents for employee handbooks, research papers, classmate portfolios, PowerPoint Presentations, science notebooks/journals templates. There are several ways to develop a table of contents and the exact procedure to use will usually vary depending on the specific application.

Table of Contents Template

- Google Docs
Table of Contents Word Template Free Download

- Apple Pages
Index Template Word Free Download

Table of Contents Format

- Apple Numbers
Table of Content Template Word

Table of Contents Template Google Docs

- MS Publisher
Index Page Download PDF

Table of Contents Sample

Blank Table of Contents Template

Table of Contents Template Download

File Index Template

Recipe Table Of Contents Template

Thesis Table Of Contents Template

Creative Table Of Contents Template

Photo Table Of Contents Template

Colorful Table of Contents Template

Portfolio Table of Contents Template

Proposal Table of Contents Template

Fashion Table Of Contents Template

Sample Presentation Table Of Contents Template

Printable Yearbook Table of Contents Template

Kids Table Of Contents Template

Student Honors Thesis Table Of Content Template

Free Classmate Portfolio Table Of Content Template

Free Creating A Manual Table Of Content Quickly In Word

Thesis & Dissertation Employee Handbook Table Of Content Example

Free Science Notebook Table Of Content Doc Format Example

Marketing Plan Table Of Content Template Doc Format

Doc Format Table Of Content Template Download

Research Paper Grant Table Of Content Doc Template

Fillable Essay Table Of Content Doc Format Template

Free Printable Assignment Table Of Content Template

Word APA Format Table of Contents with Chapter

Practical Table of Contents Template in PDF Format

Free Word Table of Content Free Example Download

Free Download Doc Format Table of Contents Example

Project File Table of Contents Template Word 2010

Professional Table of Contents Template Download

Simple Word Format Table of Contents Download

Table of Content Report Example

SOP Table of Content Example

Table of Contents with Cute Index Page Design Template

Interactive PDF Colorful Table of Content Example

Magazine Table of Contents Template

General FAQs:
1. what is a table of contents, 2. why is the table of contents important, 3. what does a table of contents do, 4. what should be in a table of content, 5. how to write a table of contents.
- Start a new page after the title page
- List out the headings of the document in simple order
- Add subheadings if needed
- Write the page numbers for each heading without fail
- Put the content in the table
- Title the page “Table of Contents.”
More in Word Templates
Chalkboard christmas menu template, bridal shower food menu template, online food menu template, food menu for mac template, style food menu template, lunch food menu template, editable food menu template, grocery menu template, school lunch menu template, menu for mac template.
- 28+ Blank Check Template – DOC, PSD, PDF & Vector Formats
- 39+ Funeral Program Templates in PDF | MS Word | Pages | Google Docs | AI | InDesign | Publishertest
- 55+ Download Flyer Templates – Word, PSD, Publisher
- 44+ Blank Bookmark Templates
- 51+ Meeting Agenda Templates – PDF, DOC
- 12+ Landscaping Estimate Templates – DOC, PDF, Excel
- 50+ Incident Report Templates – PDF, Docs, Apple Pages
- 23+ Word Procedure Templates
- 35+ Fact Sheet Templates – PDF, DOC, Apple Pages, Google Docs
- 40+ Blank Voucher Templates – Illustrator | InDesign | MS Word | Pages | Photoshop | Publisher | PDF
- Annual Report Template – 57+ Free Word, Excel, PDF, PPT, PSD
- 27+ T-Shirt Order Form Templates – PDF, DOC
- 29+ Outline Templates – PDF, DOC
- 32+ Blank Family Tree Templates
- 15+ MS Word Table of Contents
File Formats
Google docs templates, excel templates, powerpoint templates, google sheets templates, google slides templates, pdf templates, publisher templates, psd templates, indesign templates, illustrator templates, pages templates, keynote templates, numbers templates, outlook templates.
- The making of an Office Legend
- Choose what you pay
- Free Training
- Computers for the Terrified!
- Beginners Word Bootcamp
- Word Mastery
- Beginners Excel Bootcamp
- Excel Mastery
- PowerPoint Mastery
- Outlook Mastery
- Publisher Mastery
- Office Legends Academy
- Member Login
Reading Time: minutes remaining
2 Ways to Build a Dynamic Microsoft Word Index Page

by Jason Morrell May 5, 2020
In this post, I'll share how to build a dynamic Microsoft Word index (i.e. one you can update automatically without having to rebuild it) using 2 methods - the Mark and Index method and using a concordance file.
A Word Index (example shown below) provides a very useful reference for the reader.
Unlike a structured table of contents where the reader scans a general list of topics until they find a one of interest), a Word index allows the reader to search for a specific word or phrase , normally in alphabetical order and go straight to the relevant page (or pages).
RELATED POST :
How to create a table of contents in Word that updates itself
How to set up multilevel numbering that works perfectly first time

1. Creating a Word Index using Mark & Index
There are two steps for generating an index. Firstly, you must work through your document and ‘ mark ’ anything that you would like to include in the index. Then, you compile the index, using the marked entries.
Each time you mark an entry, an XE field code is inserted into the document, like this:
{ XE “index entry text” }
XE stands for Index Entry .
Word switches hidden formatting on as soon as you mark an entry so it doesn't take long before your document starts to look messy. But don't worry - when you print your document, field codes are not printed.

But don't worry - when you print your document, the field codes are not printed.
As your Word index grows, It can sometimes be quite hard to locate and isolate a particular index entry to modify or remove it.
For this reason, many editors use a concordance file , which is a table in a separate document that lists everything to be indexed. This file can then be used to compile the index, leaving the original file squeaky clean and making maintenance easy.
(a) Marking a main entry
To mark an entry:
1. Highlight the text that should appear in the index.
2. In Word, select the References tab.
3. Click the Mark Entry icon in the Index group

The Mark Index Entry dialog box is displayed. The text that you highlighted is displayed in the Main Entry box. This is the text that will appear in the index. You can modify it if you wish.

It’s worth learning the keyboard shortcut for marking entries, as you will probably use it a lot when working with large documents. To display the Mark Index Entry dialog box, press ALT + SHIFT + X
4. Click the Mark button to mark only this occurrence of the word or phrase Click the Mark All button to flag every occurrence of the word or phrase within the document.
5. Rinse and repeat for each word or phrase you want to include in the index. To save time, you can leave the Mark Index Entry dialog box open – you don’t need to close it for every entry you select a new entry. An XE field code is inserted into the document
{ XE “index entry text” }
The text within the quotation marks is what appears in the index. It does not have to be the same as the text in the document so you can edit it if you wish.
* Guidelines for marking index entries in Word *
- Spell out abbreviations, e.g. CPU (Central Processing Unit).
- Simplify words or phrases, e.g. change ‘legalities’ to ‘law’.
- Avoid multiple entries of the same keyword, e.g. installing, installations, install procedures. Instead, use one entry – “Install” and list the others as sub-entries (discussed shortly).
- Avoid starting an entry with a vague or ambiguous word, e.g. ‘using’ or ‘to’ or an adjective, e.g. use ‘contact’ rather than ‘multiple contacts’.
- Indexing is case sensitive
(b) Marking a subentry
Subentries are a powerful way of grouping similar items in an index. Let’s say we wanted to index various sub-entries around the main word Console:
- 3DS console
- Switch console
- Game Boy console
If the reader searches the index for Console, they can be redirected to the page(s) for the specific console they are interested in.
In this example, the Main Entry is Console and the 3 subentries are 3DS , Switch and Game Boy .
1. Find the word 3DS in the text and select it.
2. Press Alt + Shift + X
3. Enter ' Console ' into the Main Entry and ' 3DS ' into the Subentry . Entries will appear in the index exactly as you type them so take care not to misspell anything and be consistent with upper case and lower case.

4. Click the Mark or Mark A ll buttons.
(c) Cross-referencing another indexed item
Cross-references are used to direct someone who is searching for one thing to another. For example, if someone searches for Music , the index could say See Audio , or if someone searches for Food , the index could point them towards Nutrition .
Index cross-references should not be confused with the standard Word cross-reference feature which can be found on the Insert menu.
To create an index cross-reference:
1. Select the text to be marked.
2. Press ALT + SHIFT + X
3. Confirm the text in the Main Entry box.
4. Select the Cross-Reference radio button.
5. After “ See ” type the synonymous text item.

(d) Compile the Word Index
Now that all the entries have been marked it is time to create the index itself.
1. Select the References tab.
2. Click the Insert Index icon in the Index group. The Index dialog is displayed.

3. Choose a Format from the drop-down list. Be aware that different formats select, deselect or change some of the other options in the dialog. The safest approach is to start at the bottom left and work upwards, then to the right.
4. Ensure that Right-align page numbers is selected.
5. Select a tab leader (the tab leader fills the gap between the end of the item and the page number - dots work best).
6. Choose whether to use Run-In or Indent (watch the preview).
7. Choose how many columns to display in the index.
8. Click OK
(e) Update the index (whenever needed)
1. MIn the document, mark any new text you wish to include in the index and remove any existing XE field codes that you no longer require.
2. Click anywhere on the index to show grey shading.

3. Press F9 to refresh the index. Alternatively, right-click and choose Update Field from the context menu or click the Update Index button on the References ribbon).
2. How to remove all field codes from a document
Ideally, a document should be finished before creating an index, but if significant changes have occurred you may want to clear any XE field codes throughout the document and start from scratch. Here's a simple process to get that job done.
1. Press CTRL H to display the Replace dialog. Alternatively, click the Find & Select icon on the far-right side of the Home ribbon, then choose Replace .
2. In the Find box, type ^d (press SHIFT 6 to get ^).
3. Leave the Replace box empty.
4. Click Replace All (or Find then Replace to process one by one).
Using ^d will remove every field in the document, not just the XE field codes. It is a special character that finds braces (curly brackets) that enclose field codes.
To remove just the XE field codes, use ^d XE .

3. How to create a Word index using a concordance file
Many editors use a concordance file to generate an index for a document. A concordance file is a two-column table that is created in a separate document.
- The left column contains the entries to be marked in the document.
- The right column defines what appears in the index.
- If a text item is separated with a colon then the first part is the main entry and the second part is a sub entry (as pictured in the blue section below).
- Concordance entries are case sensitive, so if a word appears capitalised and not capitalised at various points through the document, create two entries, one for each case variation in the left-hand column, and a common variation in the right-hand column (as pictured in the yellow section below).
- The concordance also provides a good opportunity to handle singles, duplicates and other word variations. Place all the variations in the left column and a common entry for each in the right column (as pictured in the grey section below).

(a) Mark entries within a Word document using the pre-prepared concordance file
1. Select the References tab.
2. Click the Insert Index icon in the Index group.
3. Click the AutoMark.. button.

4. Locate and select the concordance file and click OK . All entries are now marked.
(b) Create the index
1. Select References | Insert Index again.
2. Set your index preferences as discussed in Step 2: Compiling the index (above).
3. Click OK .
(c) Update the concordance and/or index
1. Open the concordance file, make your changes and save the file.
2. Clear the current XE codes in the main document (as described previously).
3. Select References | Insert Index | Automark .
4. Click on the existing index to display the grey shading.
5. Press F9 to refresh the index. Alternatively, right-click and choose Update Field from the context menu or click the Update Index button on the References ribbon).
4. Key Takeaways
- To create a back-of-book index, text entries should first be marked . The index is then built from the list of marked entries. The index tools are located in the Index group on the References ribbon.
- Entries may be marked once or every time they appear in the document.
- Marked entries have a field code, e.g. { XE "Text to appear in index" } inserted directly after them.
- Field codes are only visible while displaying hidden formatting. They are not printed.
- Press Alt + Shift + X to display the Mark Index Entry dialog box.
- The Mark Index Entry dialog can be left open allowing you to switch between it and the document to mark multiple entries.
- A main index entry may have a number of sub entries .
- An index entry may cross-reference another index entry, if it is a similar item.
- An index may also be created using a concordance file, which is accessed by clicking the AutoMark... button in the Mark Index Entry dialog box.
And that, my friend, is how you build an index page in Word.
I hope you found plenty of value in this post. I'd love to hear your biggest takeaway in the comments below together with any questions you may have. Have a fantastic day.

About the author
Jason Morrell
Jason Morrell is a professional trainer, consultant and course creator who lives on the glorious Gold Coast in Queensland, Australia.
He helps people of all levels unleash and leverage the power contained within Microsoft Office by delivering training, troubleshooting services and taking on client projects. He loves to simplify tricky concepts and provide helpful, proven, actionable advice that can be implemented for quick results.
Purely for amusement he sometimes talks about himself in the third person.
Word Pro Tips
Multilevel numbering in Word that works perfectly, first time
Excel Formulas
Excel Formulas Quick Start Guide: Get started today!
JOIN THE DISCUSSION
Thank you! You sure made it easier.
Thank you Rupila.
This has been a very useful tutorial. One thing I still don’t know – it’s normal in book indexes to show the list of pages like this: 3, 6, 8-11, 14, 22. rather than 3,6,8,9,10,11,14,22 How do I get word to index like this?
1. In the document, select the full range of text across each page in the range that you want to appear in the index (e.g all the text on pages 9-11). 2. On the Insert ribbon, click the Bookmark icon, type a valid name for the bookmark and click Add. 3. [Anywhere in the document] Press Alt Shift X to display the Mark Index Entry dialog. 4. Type a name for the index item. 5. Select the Page Range option and select your bookmark from the dropdown list. 6. Click Mark. You should see something like { XE “Index item” \r “Bookmark_Name” }. 7. Generate or refresh your index. The index should show something like Index item …………. 9-11. 8. For situations where an indexed item appears on pages 1-3 and 9-11, select all the text in the second page range and add a bookmark with the same name. When you refresh the index, BOTH page ranges appear in the index.
I hope that helps (and sorry for the late reply).
Session expired
Please log in again. The login page will open in a new tab. After logging in you can close it and return to this page.
Best Table of Contents Template Examples for Microsoft Word
A good-looking table of contents template will give your documents a professional look. We have the best examples around.
A Table of Contents (ToC) is used extensively in a variety of documents. There are different styles of templates available online. If you work primarily with Microsoft Word, you can download templates from the Microsoft online store or other websites.
Whether you are a student, a corporate employee, or a creative person, there are many templates for you to choose from. This article summarizes some best-looking templates for Microsoft Word.
Creative Table of Contents Word Templates
The table of contents of your document sets the stage for the rest of the document. The style you choose depends on the kind of document you're creating.
- If it's an informational pamphlet your company is handing out to potential customers, something in between formal and casual can work well.
- If it's a table of contents for a school event or a non-profit organization, something a little more creative and fun is a good choice.
The following templates are best suited for those creative or informal projects.
1. Blue Background
This table of contents template is modern and easy to read. You can customize the following aspects of the template:
- Change the font style and size
- Modify the background-color
- Resize the boxes
This Microsoft Word table of contents template also works well for an event, business informational booklet, or anything that doesn't require many pages.
You can download this template in Microsoft Word, Google Docs, Apple Pages, and PDF. It's free to download, but you'll need to provide your email address first.
2. Clean and Simple
If you're looking for a table of contents template that is easy to create and looks professional, this template is a good choice.
It includes a date column, topic, and page number. These features make it an ideal template for a journal or a logbook. There are 26 entries available per page. If you need a more extended table of contents, create another page from the existing template.
You can download this template in Word, Google Docs, Apple Pages, and PDF formats. It's also available in Mac Numbers format. You can provide your email address and download it for free.
3. Creative Table of Contents
If you're putting together a document for an event, this playful table of contents is ideal. You can change the main graphic and the text. The numbers and individual blocks for the text are also editable. You can double-click each field and change it to anything you like.
This template can be downloaded in Microsoft Word, PDF, and Microsoft PPT.
4. Landscape Table of Contents
This landscape template is a refreshing change if you're tired of the same old portrait-style table of contents. It's ideal for a document that's in landscape format already.
This template can be used for a document with a lot of images. It has two TOCs, one for the text and the other for images. You can place the text at the beginning of the document, followed by images in the second half. You can edit this template in Microsoft Word, Apple Pages, and Google Docs.
5. Book-Style Table of Contents
This Microsoft Word table of contents template is a delicate balance between creative and formal. It is ideal for a book. The name of the book and tagline is on the top of the template. The header size differentiates the main chapter from the subchapters. There is a vertical graphic, and all the elements are editable.
The format is very clean and suitable for a small book that you may be writing for school or work. The outline is very organized and easy to follow with just a quick scan. This ToC template can be viewed in Microsoft Word, PPT, or PDF.
If these templates don't align with your needs, you can create a Word template from scratch .
Formal Table of Contents Word Templates
If your project is too formal for the templates listed above, there are lots of free templates available that are more professional. A well-formatted table of contents can make all the difference for a college dissertation or a formal white paper.
The following templates are a great selection that works as a table of contents for any project you may be working on.
6. Indented Table of Contents
This table of contents template is laid out for something like a research paper. It includes a preface, a list of tables, figures, and schemes, and a section of indented chapters. It's ideal for educational use.
The ToC you download includes highlighted text that you can replace with your sections. The first sections start with Roman numeral numbering and then switch to decimal numbering starting with the chapters.
You can keep this format or tailor it to your own needs. You can download the table of contents template in DOC or PDF formats.
7. Academic Table of Contents
If you're working on a dissertation or any other formal academic paper, this is a perfect Microsoft template for the start of your document.
It's presented in a standard outline format that works well for a very long paper. Each significant section is in bold, and every subsection is numbered below those headers.
The table of contents is a simple way to view the entire contents of your paper without too much effort. If any section needs to move, it's easy to shift a selection down or up and renumber it. You can download it in Microsoft Word or PDF format.
RELATED: How to Make a Custom Cover Page in Microsoft Word
8. Formatted Table of Contents
If you're looking for a well-formatted table of contents template with a distinctive design, this one from Microsoft Word is a real gem. Along with a nice header, the entire outline is cleanly formatted. It has indented sub-chapters and further indented sections as well.
Download the template in Word format and customize it to the contents of your document.
9. Project Table of Contents
If you're working on a school project or any paper, you need to organize it clearly; this table of contents template is perfect. The template is more advanced, with text form fields for name, project title, and page numbers.
The template is divided into the standard sections of an academic research paper. So if that's what you're working on, then this table of contents template will save you a lot of time.
It is available as a free download only in Microsoft Word format.
10. Research Grant Table of Contents
This template for Microsoft Word is a detailed table of contents built specifically for a research grant. If you are responsible for writing one, this template will save a lot of time.
It's a highly functional template for other purposes as well. It includes an introductory section that serves as the paper's preface, and the numbered section outlining all areas of the main document.
Likewise, it has a professional appearance that is bound to impress anyone who comes across it.
Techniques for Formatting Table of Contents
Once you've found a template that you're happy with, all you need to do is open the template in Microsoft Word to insert your section titles and page numbers.
However, you might find that spending a bit more time perfecting your table of contents is worth the effort for a superior finished product.
RELATED: Essential Microsoft Word Routines You Have to Know
Styling Your Table of Contents
You can make visual tweaks in the same way you would in any other Microsoft Word document. But be careful because minor changes can create an undesired effect on the overall formatting.
When you start typing in your text, the problem is that the dots used to space each entry are set up as text rather than a dot leader.
If this is a case with the template you want to use, here's the fix:
- First, use the horizontal rule to set the desired tab stop.
- Click on the Home tab and click the dialog box launcher on the Paragraph section.
- Click Tabs , then choose the type of Leader that you want to use in your table of contents.
The spacing should now correct itself to look uniform, regardless of the length of the text string.
Keeping Your Table of Contents Accurate
If you're continually working on a document, you may find that further edits throw off your page numbers. To avoid this situation, you can use Microsoft Word's built-in table of contents functionality to keep things updated.
Head to the References tab and use the Table of Contents dropdown to access the different options available.
This method lends some significant advantages to navigability, despite giving you less control over how your table of contents is styled. When viewed on a computer, your table of contents will be hyperlinked to individual sections, and the page numbers will be accurate.
Exploring Other Templates by Microsoft
Now that you know about different types of templates, you can download them and add them to your next report or dissertation. If you love these templates and ideas, you can check templates for creating business requirements documents.
Don't forget the templates for writing business requirements documents that can make the task much more manageable.
Purdue Online Writing Lab Purdue OWL® College of Liberal Arts
APA Sample Paper

Welcome to the Purdue OWL
This page is brought to you by the OWL at Purdue University. When printing this page, you must include the entire legal notice.
Copyright ©1995-2018 by The Writing Lab & The OWL at Purdue and Purdue University. All rights reserved. This material may not be published, reproduced, broadcast, rewritten, or redistributed without permission. Use of this site constitutes acceptance of our terms and conditions of fair use.
Note: This page reflects the latest version of the APA Publication Manual (i.e., APA 7), which released in October 2019. The equivalent resource for the older APA 6 style can be found here .
Media Files: APA Sample Student Paper , APA Sample Professional Paper
This resource is enhanced by Acrobat PDF files. Download the free Acrobat Reader
Note: The APA Publication Manual, 7 th Edition specifies different formatting conventions for student and professional papers (i.e., papers written for credit in a course and papers intended for scholarly publication). These differences mostly extend to the title page and running head. Crucially, citation practices do not differ between the two styles of paper.
However, for your convenience, we have provided two versions of our APA 7 sample paper below: one in student style and one in professional style.
Note: For accessibility purposes, we have used "Track Changes" to make comments along the margins of these samples. Those authored by [AF] denote explanations of formatting and [AWC] denote directions for writing and citing in APA 7.
APA 7 Student Paper:
Apa 7 professional paper:.
- PRO Courses Guides New Tech Help Pro Expert Videos About wikiHow Pro Upgrade Sign In
- EDIT Edit this Article
- EXPLORE Tech Help Pro About Us Random Article Quizzes Request a New Article Community Dashboard This Or That Game Popular Categories Arts and Entertainment Artwork Books Movies Computers and Electronics Computers Phone Skills Technology Hacks Health Men's Health Mental Health Women's Health Relationships Dating Love Relationship Issues Hobbies and Crafts Crafts Drawing Games Education & Communication Communication Skills Personal Development Studying Personal Care and Style Fashion Hair Care Personal Hygiene Youth Personal Care School Stuff Dating All Categories Arts and Entertainment Finance and Business Home and Garden Relationship Quizzes Cars & Other Vehicles Food and Entertaining Personal Care and Style Sports and Fitness Computers and Electronics Health Pets and Animals Travel Education & Communication Hobbies and Crafts Philosophy and Religion Work World Family Life Holidays and Traditions Relationships Youth
- Browse Articles
- Learn Something New
- Quizzes Hot
- This Or That Game New
- Train Your Brain
- Explore More
- Support wikiHow
- About wikiHow
- Log in / Sign up
- Education and Communications
- Technical Writing
How to Write an Index
Last Updated: January 25, 2024 Fact Checked
This article was co-authored by Christopher Taylor, PhD and by wikiHow staff writer, Jennifer Mueller, JD . Christopher Taylor is an Adjunct Assistant Professor of English at Austin Community College in Texas. He received his PhD in English Literature and Medieval Studies from the University of Texas at Austin in 2014. This article has been fact-checked, ensuring the accuracy of any cited facts and confirming the authority of its sources. This article has been viewed 2,000,031 times.
An index is an alphabetical list of keywords contained in the text of a book or other lengthy writing project. It includes pointers to where those keywords or concepts are mentioned in the book—typically page numbers, but sometimes footnote numbers, chapters, or sections. The index can be found at the end of the work, and makes a longer nonfiction work more accessible for readers, since they can turn directly to the information they need. Typically you'll start indexing after you've completed the main writing and research. [1] X Research source
Preparing Your Index

- Typically, if you index from a hard copy you'll have to transfer your work to a digital file. If the work is particularly long, try to work straight from the computer so you can skip this extra step.

- If footnotes or endnotes are merely source citations, they don't need to be included in the index.
- Generally, you don't need to index glossaries, bibliographies, acknowledgements, or illustrative items such as charts and graphs.
- If you're not sure whether something should be indexed, ask yourself if it contributes something substantial to the text. If it doesn't, it typically doesn't need to be indexed.

- In most cases, if you have a "works cited" section appearing at the end of your text you won't need to index authors. You would still include their names in the general index, however, if you discussed them in the text rather than simply citing their work.

- For example, if you're writing a book on bicycle maintenance, you might have index cards for "gears," "wheels," and "chain."
- Put yourself in your reader's shoes, and ask yourself why they would pick up your book and what information they would likely be looking for. Chapter or section headings can help guide you as well.

- For example, a dessert cookbook that included several types of ice cream might have one entry for "ice cream," followed by subentries for "strawberry," "chocolate," and "vanilla."
- Treat proper nouns as a single unit. For example, "United States Senate" and "United States House of Representatives" would be separate entries, rather than subentries under the entry "United States."

- Stick to nouns and brief phrases for subentries, avoiding any unnecessary words.
- For example, suppose you are writing a book about comic books that discusses Wonder Woman's influence on the feminist movement. You might include a subentry under "Wonder Woman" that says "influence on feminism."

- For example, if you were writing a dessert cookbook, you might have entries for "ice cream" and "sorbet." Since these frozen treats are similar, they would make good cross references of each other.
Formatting Entries and Subentries

- The style guide provides specifics for you in terms of spacing, alignment, and punctuation of your entries and subentries.

- For example, an entry in the index of a political science book might read: "capitalism: 21st century, 164; American free trade, 112; backlash against, 654; expansion of, 42; Russia, 7; and television, 3; treaties, 87."
- If an entry contains no subentries, simply follow the entry with a comma and list the page numbers.

- People's names typically are listed alphabetically by their last name. Put a comma after the last name and add the person's first name.
- Noun phrases typically are inverted. For example, "adjusting-height saddle" would be listed in an index as "saddle, adjusting-height." [8] X Research source

- Avoid repeating words in the entry in the subentries. If several subentries repeat the same word, add it as a separate entry, with a cross reference back to the original entry. For example, in a dessert cookbook you might have entries for "ice cream, flavors" and "ice cream, toppings."
- Subentries typically are listed alphabetically as well. If subentry terms have symbols, hyphens, slashes, or numbers, you can usually ignore them.

- If a proper name, such as the name of a book or song, includes a word such as "a" or "the" at the beginning of the title, you can either omit it or include it after a comma ("Importance of Being Earnest, The"). Check your style guide for the proper rule that applies to your index, and be consistent.

- When listing a series of pages, if the first page number is 1-99 or a multiple of 100, you also use all of the digits. For example, "ice cream: vanilla, 100-109."
- For other numbers, you generally only have to list the digits that changed for subsequent page numbers. For example, "ice cream: vanilla, 112-18."
- Use the word passim if references are scattered over a range of pages. For example, "ice cream: vanilla, 45-68 passim . Only use this if there are a large number of references within that range of pages.

- Place a period after the last page number in the entry, then type See also in italics, with the word "see" capitalized. Then include the name of the similar entry you want to use.
- For example, an entry in an index for a dessert cookbook might contain the following entry: "ice cream: chocolate, 4, 17, 24; strawberry, 9, 37; vanilla, 18, 25, 32-35. See also sorbet."

- For example, a beginning cyclist may be looking in a manual for "tire patches," which are called "boots" in cycling terms. If you're writing a bicycle manual aimed at beginners, you might include a "see" cross reference: "tire patches, see boots."
Editing Your Index

- You'll also want to search for related terms, especially if you talk about a general concept in the text without necessarily mentioning it by name.

- If you have any entries that are too complex or that might confuse your readers, you might want to simplify them or add a cross reference.
- For example, a bicycle maintenance text might discuss "derailleurs," but a novice would more likely look for terms such as "gearshift" or "shifter" and might not recognize that term.

- For example, you might include an entry in a dessert cookbook index that read "ice cream, varieties of: chocolate, 54; strawberry, 55; vanilla, 32, 37, 56. See also sorbet."

- Generally, an entry should occur on two or three page numbers. If it's only found in one place, you may not need to include it at all. If you decide it is necessary, see if you can include it as a subentry under a different entry.
- For example, suppose you are indexing a dessert cookbook, and it has ice cream on two pages and sorbet on one page. You might consider putting these together under a larger heading, such as "frozen treats."

- You may want to run searches again to make sure the index is comprehensive and includes as many pointers as possible to help guide your readers.

- Make sure any cross references match the exact wording of the entry or entries they reference.

- Indexes are typically set in 2 columns, using a smaller font than that used in the main text. Entries begin on the first space of the line, with the subsequent lines of the same entry indented.
Expert Q&A

- If creating an index seems like too large of a task for you to complete on your own by the publisher's deadline, you may be able to hire a professional indexer to do the work for you. Look for someone who has some knowledge and understanding about the subject matter of your work. Thanks Helpful 0 Not Helpful 0
- Make the index as clear and simple as you can. Readers don't like looking through a messy, hard-to-read index. Thanks Helpful 0 Not Helpful 0

- If you're using a word processing app that has an indexing function, avoid relying on it too much. It will index all of the words in your text, which will be less than helpful to readers. [15] X Research source Thanks Helpful 0 Not Helpful 0
You Might Also Like

- ↑ https://ugapress.org/resources/for-authors/indexing-guidelines/
- ↑ https://www.hup.harvard.edu/resources/authors/pdf/hup-author-guidelines-indexing.pdf
- ↑ https://www.press.uchicago.edu/Misc/Chicago/CHIIndexingComplete.pdf
- ↑ https://edinburghuniversitypress.com/publish-with-us/from-manuscript-to-finished-book/preparing-your-index
About This Article

An index is an alphabetical list of keywords found in a book or other lengthy writing project. It will have the chapters or page numbers where readers can find that keyword and more information about it. Typically, you’ll write your index after you’ve completed the main writing and research. In general, you’ll want to index items that are nouns, like ideas, concepts, and things, that add to the subject of the text. For example, a dessert cookbook might have an entry for “ice cream” followed by subentries for “strawberry,” “chocolate,” and “vanilla.” To learn how to format your index entries, keep reading! Did this summary help you? Yes No
- Send fan mail to authors
Reader Success Stories
Lisa Nielsen
May 30, 2017
Did this article help you?

Oct 25, 2016
Caroline Mckillop
Oct 16, 2019
Maureen Leonard
Jul 5, 2016
Graham Lidiard
Aug 3, 2016

Featured Articles

Trending Articles

Watch Articles

- Terms of Use
- Privacy Policy
- Do Not Sell or Share My Info
- Not Selling Info
wikiHow Tech Help Pro:
Level up your tech skills and stay ahead of the curve
COMMENTS
Download Free Cover Page Templates. Explore our collection of 23 beautifully designed cover page templates in Microsoft Word format. These templates feature captivating colors and layouts that are sure to make a lasting impression. Simply click on the preview image of each template and download it for free.
Step 4: Click the arrow that is next to the TOC icon and select Custom Table of Contents. Here, select the level of heading that you would like to include in your table and also make the necessary adjustments to each level by clicking the modify button. Click on Custom table of contents.
Put Together a Practical Table of Contents by Incorporating a Blank Sample in DOC, PDF, and More. Use a Free Download Example to Create an Index Format Content Page for a Report, Project, etc. Download Now and Create an Index Page Using Google Docs, MS Word, or Other Applications.
Title Page Elements • The affiliation consists of the department of the course and the name of the university. • Write the course number and name and instructor name as shown on course materials. • Use the date format used in your country for the assignment due date. • Page number 1 appears in the top right of the page in the page header.
Create the index. Click where you want to add the index. On the References tab, in the Index group, click Insert Index. In the Index dialog box, you can choose the format for text entries, page numbers, tabs, and leader characters. You can change the overall look of the index by choosing from the Formats dropdown menu.
Generating the table of contents. Now you can generate your table of contents. First write the title "Contents" (in the style of a level 1 heading). Then place your cursor two lines below this and go to the References tab. Click on Table of Contents and select Custom Table of Contents…. In the popup window, select how many levels of ...
Create online Cover Pages for printing. You can enter our free graphic editor from your phone, tablet or computer. The process is 100% online, fun and intuitive. Just click on what you want to modify. Customize your cover page quickly and easily. You don't need any design skills.
Assignment cover pages are very useful and can be created in MS Word or Adobe. MS Word software allows pictures and text to be used on the cover page. Students may also use headers and footers, page borders and other features in MS Word to create a nice cover page. You can even use the popular heading styles given in MS Word.
Your project report front page or assignment first page design play an important role like first impression is last impression. If you impress your processor or teacher then you will score good mark. See More: General Topics for Presentation
However, it should always be ensured that you include all the necessary details to the front page needed by the teacher to identify your assignment. The main details that should be added to the assignment front page are: Title of the subject. Topic of assignment. Name of teacher. Name and roll number of students.
Assignments, Canvas, New Quizzes, Quizzes. When you click Assignments from Course Navigation, you are taken to the Assignment Index Page. This page is where you can find all types of activities ( Assignments, Quizzes, New Quizzes, and Discussions) from your course organized in one place. Any existing activities are sorted here by Assignment Group.
Mostly you will do this at the end of your document. Press "Control + End" to go to the end of your document and place the cursor there. Go to "References" menu and click on "Insert Index". Insert Index. You will see "Index" dialog box like below. First, choose the control field "Right align page numbers".
Front Page Design Tips For Biology Project . For a biology project cover page, you can consider incorporating the following elements: Title: A descriptive and concise title that accurately reflects the content of the project. Author(s): The name(s) of the person(s) who completed the project, usually in a prominent position on the page. Date: The date the project was completed, which is ...
The Assignments Index page is designed with global settings at the top of the page [1], followed by the Assignment groups [2]. Individual assignments are nested within each Assignment group [3]. Note: The Assignments Index page supports keyboard shortcuts. To view a window with a list of keyboard navigation shortcuts, press the Shift+Question ...
Size: 7.6 KB. Download Now. The Word Table of Contents is a great example cum outline template for your book, journal, thesis, or simple report. The format of headings, subheadings, and page number layouts are professional and can be customized as per the needs of the user.
MS Word is equally as useful, but creating a table of contents in Google Docs is a really straightforward process. Choose your preferred location for your table of contents on the document. Click 'Insert' and choose 'Table of contents.'. Decide on your chosen table of contents format.
A Word Index (example shown below) provides a very useful reference for the reader. Unlike a structured table of contents where the reader scans a general list of topics until they find a one of interest), a Word index allows the reader to search for a specific word or phrase , normally in alphabetical order and go straight to the relevant page ...
If it's a table of contents for a school event or a non-profit organization, something a little more creative and fun is a good choice. The following templates are best suited for those creative or informal projects. 1. Blue Background. This table of contents template is modern and easy to read.
This is another example of a template with a numbered list design. This table of contents page uses a multicolored background, making the visuals and design elements stand out. It features the logo and title at the top and an image right at the center of the page. The numbered list is written in small beautiful fonts, right under the image.
Media Files: APA Sample Student Paper , APA Sample Professional Paper This resource is enhanced by Acrobat PDF files. Download the free Acrobat Reader. Note: The APA Publication Manual, 7 th Edition specifies different formatting conventions for student and professional papers (i.e., papers written for credit in a course and papers intended for scholarly publication).
6. Include all page numbers for each entry or subentry. You'll copy the page numbers from your index cards, formatting them according to the rules laid out in your style guide. Generally, you'll include all the digits of the page numbers if they are nonconsecutive numbers.
On the APA reference page, you list all the sources that you've cited in your paper. The list starts on a new page right after the body text. Follow these instructions to set up your APA reference page: Place the section label "References" in bold at the top of the page (centered). Order the references alphabetically. Double-space all text.
Note: Generally the index page define or provide by the college or institute. We are providing the general index format for project. ... See More: Assignment Front Page Design. Interesting Presentation Topics (Updated January 2023) MBA Specializations In Pune University and their Affiliated Colleges. Search for: Recent Posts. Top Article ...