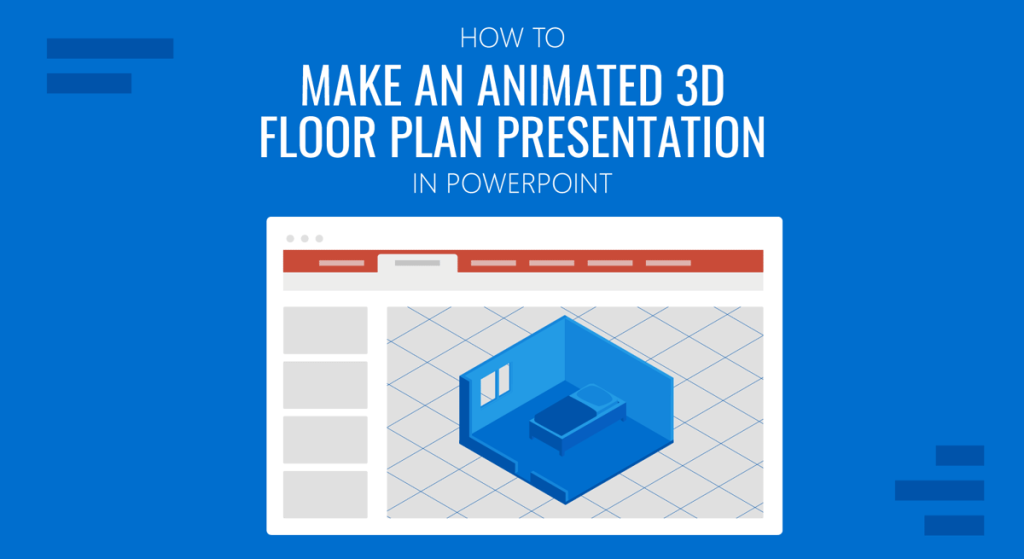
Home Blog PowerPoint Tutorials How to Make an Animated 3D Floor Plan Presentation in PowerPoint

How to Make an Animated 3D Floor Plan Presentation in PowerPoint
Presentation skills and aesthetics can make or cut business deals and significantly impact other industries like Real Estate, Architecture, Interior Design, or Construction. How do professionals in these industries prepare to share their insights and ideas with prospective buyers? Is it through drawings, real-time 3D imaging, or with presentation slides showcasing images of the said project?
In this article, we want to share an entirely different approach for Architects, Realtors, Interior Designers, and Contractors – we will learn how to create a professional-quality PowerPoint presentation that features an animated 3D floor plan, also known as isometric 3D view or axonometric 3D view, how to craft custom infographics from it, and how to deliver engaging presentations in a refreshing format.
Table of Contents
Why Should Professionals Make a 3D PowerPoint Presentation?
Isometric vs. axonometric view – are they the same thing, potential use case scenarios of animated 3d floor plan presentations in powerpoint, assets required to make a 3d floor plan presentation in powerpoint, preparing your floor plan for powerpoint, exporting the .obj file from 3d software, importing the .obj file into powerpoint, duplicating slides + animating or rotating 3d objects, creating infographics from 3d floor plan views in powerpoint, exporting the 3d presentation to hd video format, case study: presenting a housing project for real estate, case study: kitchen renovation project presentation.
Although some concepts can be easily explained with words or simple 2D graphics, speaking about spatial design, understanding the relationships between elements in spaces that shall be cohabited for – maybe – simultaneous functions is not an easy feat.
To simplify this, let’s say you buy a house, a house you intend to be your home, and your office where you plan to meet with customers. Maybe in 2D dimensions, you can get an idea of what the spaces would look like, but only after furniture is arranged into that space can you get a clear picture of how “livable” that ambient would become.
3D graphics and their usage in architecture signified a before and after for professionals, as they can bring a closer experience to their customers of what their projects would look like after they are completed. For this reason, hyperrealism is a sought-after technique many interior designers and contractors apply to attract customers into buying their services. But where does this stand in terms of PowerPoint presentations?
Experience tells us the fancier the graphics, the higher the customer retention rate, and such a statement fits to a T to Real Estate Marketing . Since it is not easy to show 3D images of buildings in live time (mostly due to hardware requirements), professionals sought methods that can create presentations using those 3D graphics and be repurposed as many times as required. PowerPoint bridges as a convenient tool for this adventure, as we can curate the content into impactful presentation slides or help ourselves using Real Estate PowerPoint templates. A 3D PowerPoint template can be streamed on any device, becoming a simplified resource for professionals on the go or as a shareable document between team members working on the same project.
During the introduction, we mentioned two terms: Isometric and Axonometric View . Although the terms are often used interchangeably, we must clarify this difference before creating our 3D models.
Both Isometric and Axonometric Views are terms to define 3D representations of objects in perspective. An Isometric View is a representation method that showcases an object in the three spatial axes (X, Y, and Z, respectively) at equal angles. The angles between axonometric axes sum 120 degrees, which means each view is made at a 30-degree angle. As a result, we get an image without any kind of deformity in terms of size but limited to depicting depth. In real-case usage, it is the simplest 3D view we can get and the preferred choice in technical drawings and 3D view aerial images.
On the other hand, an Axonometric View is a broader category that encompasses different methods of representing three-dimensional objects in 2D mediums. Since the degrees between axes can vary, this signifies the differentiated depth quality of those 3D views. The types of axonometric views are:
- Dimetric Projection
- Trimetric Projection
- Oblique Projection

Define which view style suits your interests best before creating a 3D model. Although professional-quality software will allow you to present the image in any projection format you desire, that’s not always the case with free 3D tooling.
Presenters can benefit from animated 3D floor plan views when customers must understand the spatial relationship between elements.
Say you are a contractor hired by a family that wants to renew their 20-year-old kitchen. You can put into words the area requirements or a percentage of how much space they will gain if a wall is moved to turn an old kitchen layout into a contemporary open-space concept. Still, it generally doesn’t bring a sense of “completeness” to the consumer. However, presenting an animation where the family can turn the model and visualize how the furniture will fit into the area, how much light will enter the room, or how that kitchen interacts with other rooms in the same house can make consumers much more receptive to hiring the services of that contractor. And no, no 2D plan can make people without a technical background understand the actual livable space of that project. That’s just the way our brain is wired to comprehend spatial relationships.
Another set of viable scenarios are architecture or interior design students who are required to present their projects at university, architectural contests, and Real Estate projects where you want to sell an unbuilt housing unit to a prospective buyer – that same concept also applies to other usages like commercial buildings, factories, etc.
The main asset required is a 3D house plan model, which can be built using free 3D software like Blender, a web-based application such as Sweet Home 3D, or professional tools such as AutoCAD, 3ds Max, Revit, SketchUp, Rhino, Cinema4D, etc. Hand-drawn floor plans can be scanned to help us build the 3D model, or you can work from scratch on any of those 3D modeling tools.
Remember that Microsoft PowerPoint can support *.obj format for 3D objects.
Once you have built your 3D Floor Plan, you need to consider these three aspects:
- Which viewing mode do you plan to use: Isometric or Axonometric.
- Detailing of your 3D model.
- Which views are modeled for your project.
We would like to emphasize that final one since PowerPoint allows us to have pre-established views of 3D objects using Top, Bottom, Left, Right, Front, and Back views. If any of those views isn’t modeled and we want to use the view, it would be either non-existent or incomplete, and we cannot go back and forth integrating the 3D model with the presentation file as it doesn’t sync changes in live time.

How to Integrate 3D Floor Plans into PowerPoint
To simplify our process, we will use Sweet Home 3D to create the 3D model for this presentation. Instructions on how to export a 3D model to obj format may vary depending on the software used.
In Sweet Home 3D, go to 3D View > Export to OBJ format . Select the location to save your 3D model and file name, then click Save .

Blender exports to OBJ by going to File > Export > Wavefront (.obj) .
SketchUp works by going to File > Export > 3D Model – then you select .obj as the file format.
BIM software like Revit can also export high-detailed 3D models to obj format. Go to your desired 3D view, File tab > Export > CAD Formats > OBJ.
Open your presentation slide and switch to the Insert tab. Then, on the Ribbon, locate Insert 3D Model From > This Device.

Check our article on how to insert 3D objects in PowerPoint for further information on 3D object handling in PowerPoint.
Depending on what you want to present, you must duplicate slides to create multiple animation effects or infographics for your project.
A 3D gizmo allows us to rotate the 3D floor plan to any desired point. We can select the object and upscale its size if it doesn’t look pixelated.

There are multiple animation effects you can use to present the 3D model:
- Morph Transition
- Motion Paths
Infographics can be built out of 3D floor plan views as we can extrude elements to create new graphics or displace parts of our 3D model, then use visual aids in PowerPoint to create meaningful slides that help our audience understand the concept we want to convey.
Any of these processes require creating a spare copy of the 3D model , applying the required changes to create the 3D infographic, and then saving it with another name (so there are no file conflicts when importing the second 3D model into the presentation). Typical applications of this technique are:
- Showing the material structure of a wall, floor, or window.
- Moving partition walls to present new enhanced spaces.
- Replacing finishing material.
- Adding/removing furniture to a space.
After completing the presentation design, we can play the presentation as a slideshow, or we can use it to create a high-quality video output. This helps us connect with prospective customers via social media or as a shareable that customers can check as many times as they like.
Go to File > Export > Create a Video to export the presentation to a video format . Select the required definition for your video, and remember to assign it to include Use Recorded Timings and Narrations if you added notes or voiceover to your PowerPoint presentation.

We highly recommend you check our guide on how to convert PowerPoint to video for further information.
For this initial case study, we will showcase a presentation for a housing project in Real Estate. The target audience is investors who are interested in purchasing a property in a new beachside private neighborhood. The presenter must highlight the importance of connecting with nature, infrastructure services (high-speed optic fiber internet, grocery stores, party room, laundry, kindergarten, and gym), private security, and distance from nearby cities. Also, the presenter wants to introduce their prototype units, the different configurations available, and the required investment while retaining a highly visual format that removes friction from the buying process.
Our presentation designer selected a template to deliver this presentation and worked with a 3D housing model made in Sweet Home 3D. The title slide contains a rendering made out of the 3D model – an exterior view.

After introducing the agenda slide , relevant data for the project, and speaking about the location, the presenter now shows the 3D floor plan infographic view in a series of slides. First, speaking about selected views from the kitchen area.

Next, the speaker discusses how the living room can serve as a multi-purpose area and also as a spare bedroom. It is possible for the audience to understand these concepts as the 3D furniture gives clear hints about the total livable area.

Finally, the slide discusses the exterior finishing material options since the housing units are customizable.

We can also appreciate the full impact of this presentation in this animated GIF shown below.
For our second case study, we will take from the abovementioned idea: a contractor delivering a kitchen renovation project to a married couple who purchased an old home. The couple wants to move in ASAP, but the house requires a full kitchen renovation, which involves tearing down a partition wall separating the kitchen from the living room to create an open space concept and renewing material finishes, furniture, and appliances.
As the contractor acknowledges the importance of remaining within budget for this young couple, he meets with his customers. He delivers a presentation on what the project is going to be about. The first slide in this presentation is a breakdown of the tasks required to complete the kitchen renewal process.
Then, a Gantt Chart is shown so the couple can see whether the delivery date aligns with their moving plans and when payments should be made to complete each renovation phase.
Finally, the presenter delivers the core slide: a 3D floor plan view of the kitchen’s appearance once finished. This visual element amazes the couple as they can move inside the space and “live” the project they envisioned. Using the 3D images for PowerPoint helped this contractor secure the deal in contrast with another, lower-pricing option the couple also contacted.
As we’ve seen, using 3D models in construction or architectural presentations is vital, as presenters can put visuals into what they envisioned rather than confusing customers with tons of irrelevant data.
Working with the methodology presented in this article simplifies the process of presenting properties or projects, which used to involve creating animated 3D renderings that took countless hours to craft. Animated 3D floor plan presentations can be handled using a tablet and a projector, two resources presenters have at bay, and not lose quality in the process. Pairing that 3D model with a professional-quality Real Estate presentation template is your ticket to success.
We hope this guide can trigger some ideas on how to build your 3D floor plan presentation. See you next time!
1. Real Estate Listing Template for Floor Plan Presentation

Get ready to introduce any real estate listing using 3D floor plan views with the help of this template. Using rhomboid tiles, the title slide allows you to use multiple views of your 3D model or use 3D renderings crafted out of those views. Presenters can introduce their team, showcase the project’s main amenities, expose the pricing evolution in a pre-defined time, and more.
Use This Template
2. Real Estate Project Presentation Slide Deck

Housing projects that require input from investors require more than fancy icons to convince people to acquire a property. To further complement your 3D floor plan presentation, we invite you to use this Real Estate slide deck that includes tools intended to present an executive summary of the project, investment planning, opportunities linked to the project, factors that may affect its value, and a series of customizable informative slides. Pair this real estate template with your 3D floor plan model for maximum customer engagement!
3. Residential Real Estate Slides for 3D Floor Plan Presentation

Get your hands on real estate vendors made out of high-quality vector graphics to further enhance your 3D model presentation in PowerPoint. In blue and green layout, this fully customizable template allows you to place any 3D model with ease, illustrating its views from different angles. The titles and subheadings are ideal for discussing the project’s core features while presenting your pitch to prospective sellers.
4. House for Sale Listing Template for PowerPoint

Real Estate agents can benefit from using 3D floor plan views in their listing ads by pairing this template with their model. Introduce images from exterior facades, full aerial 3D floor plan, pricing, main features, and contact data. Ideal to grab the interest of prospective customers with a creative approach.
5. Property Development Real Estate Slide Deck for PowerPoint

3D views and hyperrealistic renderings are among the preferred assets of Real Estate professionals to attract investors to unbuilt projects. You can give them a detailed living experience of your project using an axonometric 3D view of the project and, simultaneously, lay critical information about the company behind the project, team members, a competitive analysis of the sector, a SWOT analysis, etc.

Like this article? Please share
Design, Microsoft PowerPoint, Presentation Ideas Filed under PowerPoint Tutorials , Presentation Ideas
Related Articles

Filed under Design • April 23rd, 2024
How to Create the Perfect Handouts for a Presentation
Learn how to create effective handouts for presentations and the recommended structure for handouts with this guide.

Filed under Google Slides Tutorials • April 23rd, 2024
How to Align Objects in Google Slides
Optimize your layouts by learning how to align objects in Google Slides presentations. Step-by-step guide with screenshots.

Filed under Google Slides Tutorials , PowerPoint Tutorials • April 17th, 2024
Google Slides vs. PowerPoint: A Detailed Comparison
Contrast and pick with presentation software suits your best. Check our guide on how the Google Slides vs. PowerPoint eternal debate.
Leave a Reply
Explore bundle set for homeowner & designer
Home » Blog » How to Design a Floor Plan in PowerPoint: A Step-by-Step Guide
This step-by-step guide will show you how to design a floor plan by using PowerPoint.

Whether you're a homeowner looking to renovate your space or an aspiring designer, this guide will show you how to leverage PowerPoint's features to design your floor plan.
This tutorial is tailored for homeowners who have an existing floor plan and are seeking to update or renovate their houses or apartments.
Step 1: Setting Up and Importing Floor Plan
In this first step, we will begin by setting up PowerPoint and importing the floor plan into PowerPoint.
- Convert floor plan to image file format: Begin by ensuring that your floor plan is in JPEG or PNG format. If it’s in PDF, convert it to an image file format. You can easily convert the floor plan to JPEG or PNG online .
- Configuring to your preferred measurement system: Ensure your preferred measurement system is used in PowerPoint. Check the measurement system in your current setup by navigating to the Size tab (under Picture Tools and Format tab in Windows, under Picture Format tab in Mac. Make sure that you selected any picture, shapes, or text box). If the measurement system needs adjustment, modify it in the Control Panel (for Windows users) or System Preferences (for Mac users) accordingly .
- Setting up slide size: Open PowerPoint and navigate to the Design tab. Select Slide Size and adjust it to 20cm x 20cm, a suitable size for most floor plans.
- Drawing scale: We will assume that the drawing scale is 1:100, for example, 1 cm in PowerPoint equals 100 cm in the floor plan.
- Import or insert the floor plan: Insert your floor plan by clicking Insert > Pictures > Photo from File and locating your floor plan image.

Step 2: Scaling the Floor Plan
In this step, we’ll guide you through the process of accurately scaling your floor plan to 1:100 in PowerPoint. This step is crucial for ensuring that your floor plan is accurately represented in the scaled drawing. We will scale the floor plan by creating a ruler with a rectangle shape.
- Find a dimension reference on your imported floor plan: Choose a whole number dimension on your floor plan (e.g. 3000mm) as a reference.
- Creating ruler with rectangle shape: Insert a rectangle shape and adjust one side to be 3cm, representing the 3000mm at a 1:100 scale.
- Resize the floor plan to scale: Position the rectangle shape to align with the dimension reference on your floor plan. Resize the floor plan so that the 3000mm in the floor plan matches the 3cm side of rectangle shape, achieving a 1:100 scale.
- Avoid stretching the floor plan: Always use the corner handle to resize to avoid stretching the floor plan.

Step 3: Clean Up the Floor Plan
This step shows you how to remove any unnecessary elements such as dimensions, text, or furniture overlays from your floor plan. Thus allowing you to work with a clean and clutter-free floor plan.
- Create white filled shapes: Insect new rectangle shape and adjust the fill and outline color of the shape to white color.
- Cover unwanted elements with white filled shapes: Use the created white filled shapes to cover dimensions, text, or furniture overlays on the imported floor plan. Copy (Ctrl + c) and paste (Ctrl + v) to duplicate shape.
- Save as new image: Once you’ve covered the unwanted elements, save the floor plan along with the shapes as a new image file. Drag from the top right to bottom left to select all the white filled shapes and the floor plan on the Canvas. Right click and select Save as Picture…
- Reinsert the clean floor plan: Reinsert the newly saved image back into your slide. This step prevents accidental changes to your floor plan while you continue working on it.

Step 4: Designing the floor plan
This step shows you how to begin drawing furniture or walls using shapes in PowerPoint and begin designing floor plan.
- Inserting Shape to represent furniture: We can insert a rectangle shape to represent a dining table
- Adjusting shape size to represent real wall dimensions: As the drawing is scaled to 1:100, adjust the shape sizes to represent real-world dimensions accurately. For example, adjust the shape size to be 2cm x 0.8cm to represent a 200cm x 80cm dining table
- Creating Wall Partition: Insert rectangle shape to represent the wall partition
- Use Union function to join the walls : A. When you have two walls join at right angle, you can join two walls with the Union function. B. Select both walls by pressing ‘Shift’ Key. C. Select ‘Union’ under Merge Shapes button D. Two walls are successfully joined at right angle.

Introducing our Ultimate Floor Planning Tool

Drawing out the furniture in PowerPoint can be challenging. That’s why we’ve created the Ultimate Floor Planning Tool , available for download from our store at an affordable price. This comprehensive tool includes over 300 professionally crafted stencils for your living room, dining room, bedroom, bathroom, kitchen, study, and even a home gym. These stencils are accurately sized and imported into PowerPoint for easy use.

With this tool, you can quickly add furniture to your floor plan by copying and pasting the stencils. This saves you time and helps you get started on designing your floor plan design right away.
Additionally, the tool features a Grid canvas and Ruler, ensuring that your floor plan is accurately scaled without any confusion.
It is also compatible on Google Slide and Keynote for added flexibility.
Next, we will show you step-by-step guide on how to begin designing floor plan with our Ultimate Floor Planning Tool.
Step 1: Insert Floor Plan
To get started, simply insert your floor plan into PowerPoint by clicking Insert > Pictures > Photo from File and selecting your floor plan image.
Unlike traditional drawing apps, our tool eliminates the need for manual tracing, reducing the risk of inaccuracies, especially for non-professionals.
Step 2: Easy Scaling with Ruler
Our tool streamlines the process of scaling your floor plan. With its Canvas and Ruler features, you can simply insert your floor plan and adjust the scale using the provided ruler. This makes scaling your floor plan quick and effortless.

Step 3: Explore Design Ideas with 300+ Stencils
Save time and effort by using our tool’s library of pre-drawn furniture stencils. These stencils accurately represent furniture sizes commonly found in the market.
Now you can experiment with different layouts and furniture arrangements directly in your floor plan, allowing you to visualise how different pieces fit together before making any costly purchases.
By copying and pasting these furniture stencils into your floor plan, you can easily test various design ideas without the need for manual drawing or measurement.

Advanced Features
We recommend using PowerPoint’s Selection Pane feature, which allows you to view and arrange elements easily. All stencils are neatly named in the Selection Pane, enhancing your workflow.

Creating a floor plan in PowerPoint is a versatile and straightforward process that allows for easy exploration and design. Whether you’re planning your home layout or designing for clients, Ultimate Floor Planning Tool can be a valuable tool.
With the skills gained from this tutorial, we are sure you can confidently create detailed floor plans to guide your renovation or design projects in PowerPoint.
For the full tutorial, watch the 10-minute video or follow the link to learn more about the Ultimate Floor Planning tool in PowerPoint .
Design your layout effortlessly with this tool!

Ultimate Floor Planning Tool in PowerPoint | Color | Metric
Color | metric.

Ultimate Floor Planning Tool in PowerPoint
Leave a reply cancel reply, related post.

4 Layout Ideas for 4-Room HDB or BTO Layout (Household Shelter in the middle)
Unique 4-room layout ideas for those looking to break away from the conventional, march 16, 2024.

4 Layout Ideas for a 5-room HDB or BTO for Couples to Families
Learn how the layout can evolve as your family grows from two to seven, january 26, 2024.

4 Ways to Recreate a 4-Room HDB or BTO Layout for Maximum Flexibility
From young couples to growing families, these layouts have you covered, january 20, 2024.

Step-by-step Guide To Designing a Home Layout
A 3-step design approach from zoning, circulation to furniture planning for a hdb home., june 20, 2023, explore our products.

Bundle Set for Solo Designer
Metric & imperial.

Bundle Set for Homeowner

Office Layout Planner
Hvac planner, lighting & ceiling planner.

- Houzz Pro Learn
- Business Management
How to Create a Winning Interior Design Presentation in Four Steps
Read on to learn the four can’t-miss steps of creating better interior design presentations, including tips on project presentation, design process integration, and visual presentation tools such as mood boards or a floor plan.

Introduction
The interior design presentation is a defining moment for any design project. Done well, the client presentation shows a homeowner in stunning and vivid detail that the designer gets them, their style, their budget and how they want their space transformed.
Designers who make an impactful and professional interior design presentation that perfectly aligns their vision with their client’s expectations are more likely to get a ‘yes’ more swiftly than other designers who have focused less on mastering the skill. We've broken down the art of client presentations into 4 main steps with real examples and tips to help you level up your presentation game.
Step 1: Preparing For Your Interior Design Presentation
Think of this step in the interior design process as if you were painting a room: The time spent cleaning, taping and spackling the space is rewarded with the clean lines and smooth strokes that make for a successful conclusion to the project. Similarly, it may take some time to adequately prepare for a design presentation, but this crucial foundational work sets the direction and basis for the entire project journey ahead.
Where to Start
Client meeting.
- The first step to learning about the needs of a client is to meet with them to gain a full understanding of their design preferences, lifestyle, budget, and the space challenges they are seeking to solve.
- Perhaps they have already filled out an initial questionnaire which you can review with them in more detail. Walk the rooms with them if possible, learn about their preferred colors and materials and their vision for the space. And, of course, ask plenty of clarifying questions along the way.
Define an Early Concept
- With the information from your initial meeting at hand, along with accurate measurements of the space and other important details such as a room’s square footage or other exact dimensions, now is the time to define an initial concept and design direction.
- The overarching concept you come up with will inform the next steps of the design process. At this early stage, you may even pull out a journal or notebook to sketch out a rough idea to use as the basis of a more detailed, digital version later.
Design Development: Crafting a Narrative
- Along with a drawing, write a description of the concept and list the goals to help steer the plan according to your client’s vision and ensure you are on the same page.
Develop Your Design Ideas
Once the rough idea has been determined, it’s time to start moving forward with translating the multiple concepts and design ideas into a project presentation. This is one of the areas that interior designers most enjoy because it gets the creative juices flowing! Many interior designers find inspiration in past projects, from their product library, and through other favorite design sources.
For a professional interior design presentation, choose design elements and different materials that best fit the initial design concept, like color scheme, floor materials, and other specific details such as fabric swatches. Add in the architectural details and supporting elements such as the furniture plan. Demonstrate the spatial relationships within the space and block out the furniture arrangements.

Step 2: Visual Ideas For Building a Professional Presentation
Now that you’ve worked through the early stages of the process, it’s time to learn how to make an interior design presentation as visually compelling as possible. Putting together an effective interior design presentation requires considering how you will organize your ideas to effectively convey them visually.
Most designers find that pulling all of these design concepts together into a visual presentation helps create a full design picture to aid in the project moving forward. Clients more readily understand what they can see; therefore it’s important to carefully select which interior design presentation tools you’ll use to clearly communicate the concepts and ideas. Here are some factors to consider when choosing client presentation tools.
Physical vs. Digital Design Boards
In today’s reality, not all meetings are held in person. Knowing in advance whether the presentation will be physical or virtual can inform the visualization tool choices. Digital design mockups, floor plans and renderings will save the day for making every detail come alive to bridge the internet divide. Using these digital tools is far less clumsy and awkward than trying to hold up a photo album or mockup board to the camera without bumping the mute button.
There’s more flexibility of choice when presenting face-to-face. More often than not, homeowners expect a design firm to make the best use of the sophisticated digital tools that provide life-like representations of what their future space will look like. Designers presenting in person have the advantage of going hybrid. They may, for example, complement these tech methods with fabric swatches and other design board materials that tap into senses beyond the visual.
Most Common Types of Tangible Client Presentation Boards
physical design boards.
- Some designers rely on physical mood boards to convey their concepts. Many designers opt for a simple foam board to tack on photographs and other images as well as physical samples and swatches to demonstrate textures and relate their vision.
Material Samples
- Flipping through paint colors, caressing furniture fabrics and squaring up tiles can be a delightful part of the home renovation process. Most clients are grateful to be able to touch, feel and see these physical elements for better visualization. Using a sample board to incorporate tangible textures into your interior design presentation can give you an advantage in winning them over.
Digital Presentation Tools
Interior designers are fortunate to have a host of easy-to-use, effective digital interior design presentation tools available to create presentations that wow.
Mood Boards
- Room designs can be physically conveyed as we discussed above, but virtual mood boards are an impressive tool that inspire clients with visuals and life-like examples. Designers use software to present mood boards to their clients that are easily shared and simple to rearrange with a keystroke.
- Designers source material samples and the actual lamp, sofa, rug or table they envision for the space from their digital product library and preferred vendors. Learn more about How to Make an Interior Design Mood Board to dive deeper.
Floor Plans
- A key part of any presentation is the floor plan, whether it is on paper or a screen. They help show architectural details such as the location of windows, doors, and walls, as well as fully furnish the space with furniture pieces, appliances and fixtures.
- Flat, 2D floor plans and blueprints can do the job, but 3D presentations are worth a thousand words, as they are more powerful for first impressions and help more clients see the entire project design in its best light. Designers who use software to make 3D floor plans incorporate all the details of a room into a compelling, life-like rendering that makes it easy for clients to envision the space. See How To Make Stunning Interior Design 3D Floor Plans for more details.
Photographs
- One of the best ways to help clients believe you can create the transformation they are seeking is through utilize the power of imagery. Presenting photorealistic 3D renderings of the proposed project, or example photos from past projects, will help illustrate your skill and boost their confidence in your interior design business’s work.
- Bonus tip: whenever possible, choose images of the interior design projects most similar to the work they are seeking, whether in scope, budget bracket, type of room or design approach. Check out our piece on How to Make an Interior Design Portfolio to learn more about this complementary presentation skill.

Step 3: Presenting the Vision: How to Impress Design Clients
Now that you have worked through the concepts, gathered all your materials and picked the tools to best convey the design plan, it’s time to tie everything together for an impressive delivery. Consider these interior design presentation tips and strategies to fine tune your delivery.
Tailor Your Presentation
- The scope and content of your presentation will differ depending on your audience. When presenting for the first time to a new client, other designers find it valuable to spend extra time helping them get acquainted with you and the professional design services offered. Cover details of your company values, design approach, makeup of your team, typical scope of projects and any other relevant information.
- For repeat clients, you can start with a brief reminder of these details, as well as draw upon the past work completed for them, being sure to include any references or relation to the requested new project.
Showcase Multiple Concepts
- One size may not fit all. Be prepared with more than one design possibility if you find your first one falling flat, or if your clients express a desire to adjust project scope or compare more options.
- The same holds true for the ways you deliver these concepts. Use multiple methods to help the homeowner visualize and understand the design plan.
Communication Tips
- As the leader of the meeting, set the stage immediately to put clients at ease. Briefly explain the agenda, including at what points you will be seeking feedback. One method that will reassure the homeowner is to pause periodically to ask if they have comments or questions.
- At the same time, avoid getting too bogged down on a single point to ensure there is sufficient time to get through the entire presentation.
The Power of Self-Confidence
- Being self-assured and projecting confidence without talking down to clients signals to them that you are more than qualified for the job, whether you run your own interior design business or represent a larger design firm. Use your communication style to further convey how excited you are about working on their home.
- Dress professionally, but avoid attire that is uncomfortable or inauthentic to who you are - your choice of clothing can have a direct impact on how confident you feel.
Avoiding Game Day Jitters
- While it’s certainly effective to review your agenda one final time prior to your meeting, most designers would recommend allowing yourself a few minutes to clear your head beforehand.
- If you are a caffeine fan, resist the temptation to overload on it - you want to project innate confidence and your natural grounded energy, without being overshadowed by artificial energy or the infamous caffeine jitters.
- And one final interior design presentation tip: shake off any residual nerves by standing up and stretching beforehand, and consider adopting a power stance or two to prime your presentation confidence, especially if you are going to be sitting down throughout the presentation.

Step 4: Enhancing Your Interior Design Presentation: Advanced Tips and Practices
Successful interior design presentations create a memorable first impression that will stay with clients long after you close your laptop and pack your swatches away for the drive home. Effective presenters forge a connection with homeowners on multiple levels through effective use of detail, visualization, lighting and more. Here are some more tips for making your design meeting an impactful one:
Demonstrate Attention to Detail
- Make your presentation accurate and detailed. Show your clients that you have considered every aspect of the project, both big and small. Little details like including the exact dimensions of a project space can help demonstrate your sharpness.
Consider your Client
- Pick moments during the presentation to show your clients that you have thoughtfully considered their feedback. For example, if a homeowner prefers a kitchen island with a sink built in, make note of that as you are highlighting the feature.
- The same goes for places where you chose a less expensive option to be cognizant of their budget constraints: clients love to know that they have been listened to.
Leverage Your Expertise
- Look for opportunities to mention your past experience and skills in a particular area - this is another opportunity to leverage your design portfolio if relevant.
Fine Tune Along the Way
- Have alternative ideas in your back pocket that you can pull out as examples in cases where a client balks at a particular paint color or room layout, for example. This demonstrates both your versatility and flexibility as a design pro.
Remember Ambiance
- Clients will better connect emotionally to a design concept when visualizations include effects such as lighting or even sound. Tap all the senses you can, including the tactile features discussed above.
Let’s Get Visual
- The more you can show and not tell, the more connected your clients will be to the presentation. Visualization is not only entertaining, it helps homeowners better understand the concepts and vision.
Imprint Your Brand
- Presentations which are consistent with incorporating logos, company colors and other branding details are more pleasing on the eye, and also leave clients with a lasting impression.

Next Steps: Client Follow up
Before tying a bow on the interior design presentation, set the agenda for what happens next. This may include noting methods for receiving additional feedback and setting a timeline for project signoff. If the clients suggested any major changes during the presentation, let them know when they will receive a revised plan.
Depending on the project, more measurements and additional details may be needed to determine a final budget. And, make it as easy as possible for clients to approve the plans by providing them a way to sign off with an e-signature.
Making effective interior design presentations is one of the best routes toward achieving client satisfaction, securing new clients and keeping current ones coming back for more. Impactful presentations are highly visual, pay close attention to the homeowner’s desires and budget, and provide clients a compelling glimpse of what their space will look like at the project’s end. As a result, mood boards play a central role in every interior designer presentation; if you’re ready to step up your presentation game, try Houzz Pro’s mood board software for the most effortless experience in crafting professional mood boards .
Houzz Pro is the all-in-one tool for marketing, project and client management built specifically for remodeling, build, and design professionals.
Join the conversation by commenting or asking a question below. The Houzz team reads every single comment, and we’ll get back to you by email if you need us!

Want advice delivered to your inbox?
Unlock industry insights and updates for contractors and design pros
By signing up, I agree to the Houzz Terms of Use and Privacy Policy and that Houzz may use my information to contact me about relevant content, products, and services.
More From Houzz Pro Learn
BUSINESS MANAGEMENT
How to Price Your Interior Design Services
HOUZZ PRO NEWS
5 Houzz Pro Enhancements Designers Love
PRO SUCCESS STORIES
Jennifer Messina’s Top Tips On Building Trustworthy Client-Designer Relationships for the Best Possible Outcome

Get the industry-specific content you really want sent directly to your inbox—just sign up below!
How to Make a Floor Plan in PowerPoint
Edraw content team, do you want to make your floor plan.
EdrawMax specializes in diagramming and visualizing. Learn from this article to know everything about how to make your floor plan in PowerPoint and easier way. Just try it free now!
In architecture studies, every aspiring student is taught how to make a floor plan that resonates with their client's requirements. Architects and builders create floor plans to help their clients know how their dream house or commercial complex will look post-construction. Clients often require a detailed presentation of the floor plan if there are multiple floors in the building. In such cases, one should know how to make a floor plan in PowerPoint or other similar presentation formats.
In this detailed floor plan guide, we will help you understand the primary steps you need to take if you make the floor plan in PowerPoint . Simultaneously, we will walk you through EdrawMax's floor plan symbols and templates that let you create a floor plan in PPT format in just a few minutes.

1. How to Create a Floor Plan in PowerPoint
PowerPoint is a great presentation tool, and now we will show you how you can use it to create a floor plan.
- Launch the application and open a blank PowerPoint slide :
First, open the application. Go to the bottom left corner of your screen and click on the Start button and click the option for PowerPoint to open up, or you can click on the application shortcut icon on your taskbar or desktop. Go to the File tab, click on new to select maps and floor plans icon from the list of available templates, and select 'Create' to get started.

- Create exterior and interior wall structures :
In the PowerPoint templates, there is a massive assortment of room outlines. Drag one of the outlines to lay out rooms on the drawing page.
Resize the rooms by taking advantage of the dynamic dimension to gain the desired size of the individual room. Drag exterior wall shapes onto the drawing slides and resizes walls by dragging an endpoint of one wall to another. When the walls are affixed, the endpoints turn red. In the case of creating interior wall structures, follow the same method. Drag the wall shapes and position them inside the exterior wall structures. The outcome is a PowerPoint slide that is perfect for a floor plan.
- Add structural elements :
Add doors and windows by dragging them on the top of the walls. They rotate automatically to align with the walls and glue neatly to the wall. Add stairs, columns, and more onto the drawing slide from the vast array of structural elements. Then from the electrical stencil, add a wall switch, outlet, and wall fixtures on the wall shapes. You can even drag ceiling fixture shapes, such as ceiling fans, on the slide.

- Dimension lines for walls :
To adjust the size and position of the drawing area, right-click a wall. After that, click on Size and Position, select the dimension shape and type the measurements. Finally, click away from the dimension shape. Drag the control handle, and reposition the same.

- Save the file :
Now, you know how to make a floor plan in PowerPoint . The final step is to save the drawing slide. Go to the File tab, select Save As option and insert the file name and desired location. Click on the Save button option, and your professional floor plan is available with a single click.
- Launch the application and open a blank PowerPoint slide;
- Create exterior and interior wall structures;
- Add structural elements;
- Dimension lines for walls;
- Save the file.
2. How to Create a Floor Plan in EdrawMax
Now that you have seen the complicated steps, let us show you the easiest way of creating a floor plan in EdrawMax.
Step1 Open EdrawMax & Login
The first step in creating a floor plan is downloading and installing this 2D floor plan maker in your system. Head to https://www.edrawsoft.com/edraw-max/ to download the system file as per your operating system. We offer different versions for Windows, macOS, and Linux. Register to the EdrawMax dashboard if you are using it for the first time; else, log in to the system using your email address.

Step2 Template Selection
EdrawMax comes with over 3,000 free templates for different drawings. Go to the 'Template'section on the left side of this floor plan software and look for 'Floor Plan'. EdrawMax will present all the user-generated templates you can instantly import to customize. Some of the most common templates are Basement Floor Plan, Open Floor Plan, Laboratory Floor Plan, and Floor Plan Blueprint.

Step3 Create From Scratch
If you are technically equipped and possess the skills required to create floor plans, head to the Building Plan section and click on the '+'sign. You will be navigated to the EdrawMax dashboard, which offers built-in features like dimension, scale, metric system, and more. Make desired changes and start working on the floor plan outline.

Step4 Select Symbols
On the toolbar, you will see 'Predefined Symbols'. Click on 'Floor Plan'to import all the relevant symbols of the floor plan design. Once they are imported, you can start placing them in the floor plan outline you have just created in Step #3.

Step5 Add Components
After creating the outline and adding bedroom walls and windows, you can start adding the basic components of the floor plan, like Slide Door Left, Slide Door Right, Fire Break Glass, Emergency Ambulance, and Emergency Access.

Step6 Export & Share
After creating the floor plan, you can export it into PPT formats and other important formats, like JPG, PNG, Docs, and more. This 2D floor plan also lets you share your floor plan design on different social media platforms, like Twitter, Facebook, LinkedIn, and Line. In addition to this, you can present the floor plan right from the dashboard.

Basically, it is simple to draw an floor plan in EdrawMax, just grab a template and keep customizing, drag and drop professinal symbols to make your plan better. If you are still confusing about how to create a floor plan in EdrawMax, just check this floor plan drawing guide , or check the video below.
3. EdrawMax vs. PowerPoint
Some of the most common differences between EdrawMax and PowerPoint are:
- PowerPoint comes with Microsoft Suite, with an annual renewal price starting at $69.99. Most students or beginners cannot pay this hefty amount every year. However, EdrawMax offers free support for all users, and if you need to access all the amazing features, like a personalized cloud, thousands of templates, and more, you will need to pay a one-time nominal fee and get the updates for life.
- PowerPoint is predominantly a presentation tool that has several great features for creating presentations. The same cannot be said when it comes to designing floor plans or other building plans in PowerPoint. EdrawMax is designed to work on complex floor plans. The 2D floor plan software offers a wide range of features that help in creating and sharing floor plans.
- PowerPoint is an offline tool, and you cannot invite your remote team members to get together and collaborate in real-time. To access such features, you might have to share a screen using other tools like Google Meet or Zoom. EdrawMax comes with a free online version that easily lets you collaborate with your remote team.
EdrawMax is the best resources for creating a floor plan, you can find hundreds of floor plan symbols and templates here. Just drag and drop, you can create floor plan easily.
All-in-One Diagram Software
- Superior file compatibility: Import and export drawings to various file formats, such as Visio
- Cross-platform supported (Windows, Mac, Linux, Web)
Unlike other tools, EdrawMax has a vast collection of symbols. From basic outlines to complex structures, you will find over 50,000 shapes and icons in EdrawMax. While creating a floor plan, you will require some of the most basic floor plan symbols , like:
- Dimensioning : Horizontal, Align Even, Vertical, Aligned Uneven, Radius Outside.
- Electrical & Telecom : Electrical Switch Box, Single Pole Switch, 2DP Switch, Electrical Panel.
- Fire & Emergency : Slide Door Left, Slide Door Right, Fire Break Glass, Emergency Ambulance, Emergency Access.
- Sofas : Sofa, L-Shaped Sofa, Round Sofa, Curved Sofa, Sectional Sofa With Arms, One Seat Sofa, Two Seat Sofa, Three Seat Sofa.
- Plumbing : Boiler, Heat Exchanges, Heater/Cooler, Heater/Cooler Horizontal, Bath (Side).
EdrawMax has global users who are constantly updating the template community . Head to the template section if you are connected to the Internet and look for Floor Plan. The system will generate floor plan templates that are created by our professional users. Some of the most common templates that you will find in the vast template community are Basement Floor Plan, Open Floor Plan, Laboratory Floor Plan, Floor Plan Blueprint, etc.
Create a Floor Plan in PowerPoint:
The floor plan in PowerPoint will not be editable. Nevertheless, the files exported in the EDDX format from EdrawMax are fully editable.
PowerPoint files usually have a large file size, making them difficult to share online.
PowerPoint files cannot be modified unless one uses paid versions of Acrobat Reader or other online tools that put your file at risk.
Create a Floor Plan in EdrawMax:
With built-in templates, you can create the evcuation plan in just a couple of minutes.
You do not have to worry about finding the relative symbols, there are over 26,000 symbols for every field and more resoucres to empower your design.
EdrawMax supports to export file into multiple formats, you can create floor plans in EdrawMax, and export as Word, PPT, Excel, and more to meet your needs.
4. Free Floor Plan Software
EdrawMax is one such tool that is created by professionals, keeping beginners and amateur designers in mind. Some of the most amazing features of having this free floor plan software are:
- You can create a floor plan, blueprint, elevation plan, HVAC plan, reflected ceiling plan, garden plan, and kitchen plan all in one single dashboard.
- This free floor plan software offers an in-built architect's scale that helps create perfect dimensions and scale for the floor plans.
- With the help of EdrawMax, a user can create vector-enabled diagrams, which means they can print them in any size as they wish without compromising the formatting and layout of the floor plan.
- EdrawMax Online offers real-time remote collaboration.
- This free floor plan software comes with over 3,000 user-generated templates and 50,000 vector-enabled symbols and lets you create over 280 different types of diagrams.
5. Final Thoughts
Creating a floor plan might look like a very complicated task if you use a tool that has design limitations. Most students use PowerPoint only for presentation purposes, and even if they have to make a floor plan in PowerPoint , they might end up installing third-party add-ons.
Instead of going this way, we highly recommend that you use EdrawMax . This free floor plan software comes with thousands of symbols and has a variety of pre-built templates. Now you do not have to rely on third-party tools as EdrawMax is a power-packed software well equipped to handle all of your diagramming needs. EdrawMax also has an online version, allowing you to present your designs. So, what are you waiting for? Download EdrawMax tools and start making professional-looking floor plans.

Floor Plan Complete Guide
Check this complete guide to know everything about floor plan, like floor plan types, floor plan symbols, and how to make a floor plan.
You May Also Like
How to make a floor plan in word, how to make a floor plan in pdf, how to make a blueprint in word, how to make a blueprint in excel, how to create a wardrobe in word, how to create a wardrobe in excel.
How to create a floor plan in PowerPoint

Creating a floor plan in PowerPoint is a great way to quickly and easily plan out the layout of a room or building. With PowerPoint, you can easily create a simple floor plan and customize it to your needs. You can add different shapes, colors, and lines to your floor plan to make it look more professional and attractive. You can also add text and labels to your floor plan to make it easier to understand and visualize. In this guide, we will show you how to create a simple floor plan in PowerPoint and how to customize it to your needs.
Can I draw a floor plan in PowerPoint?
While PowerPoint is primarily designed for creating presentations, it is also a useful tool for creating basic diagrams and graphics.
To create a floor plan in PowerPoint, you can use the built-in shapes and tools to draw walls, doors, windows, and other architectural elements. Here are some steps to get you started:
- Open PowerPoint and create a new slide.
- Go to the “Insert” tab and select “Shapes” to access the shape library.
- Select the “Rectangle” shape and draw the outline of the walls of your floor plan.
- Use the “Line” shape to draw any internal walls or partitions.
- Use the “Door” and “Window” shapes to add these features to your floor plan.
- Use the “Text Box” shape to add labels and dimensions.
- Adjust the size and position of each shape as needed.
- Use the “Fill” and “Line” options to customize the colors and borders of each shape.
While PowerPoint can be a useful tool for creating basic floor plans, it may not have all the advanced features that specialized software offers. If you need to create a more detailed or precise floor plan, you may want to consider using dedicated architectural software.
Can I draw to scale in PowerPoint?
You can draw to scale in PowerPoint, but it requires some additional steps to set up your slide and shapes properly. Here are the steps to draw to scale in PowerPoint:
- Create a new PowerPoint slide and select the “Design” tab.
- In the “Page Setup” group, click on the “Slide Size” button and choose “Custom Slide Size”.
- In the “Slide Size” dialog box, set the dimensions of your slide to match the scale you want to use. For example, if you want to draw at a 1:50 scale, you can set the slide size to 50 inches by 50 inches.
- Click “OK” to save the new slide size.
- Draw a rectangle on the slide to represent the walls of your floor plan. Use the “Shape Fill” and “Shape Outline” options to customize the color and thickness of the lines.
- Set the dimensions of the rectangle to match the actual dimensions of the room or space you are designing. To do this, right-click on the rectangle and choose “Size and Position”. In the “Size and Position” dialog box, enter the actual dimensions of the room in inches or centimeters.
- Draw other shapes such as doors, windows, furniture, and fixtures, using the same process as step 5 and 6.
- Use the “Gridlines” and “Snap to Grid” options to help you align shapes and draw more accurately.
By setting up your slide to match a specific scale, you can draw to scale in PowerPoint and create a more accurate representation of your floor plan. However, keep in mind that PowerPoint is not a professional architectural or design software, so it may not have all the advanced features that dedicated software offers.

How do I create a custom layout?
To create a custom layout in PowerPoint, follow these steps:
- Open PowerPoint and create a new presentation.
- Click on the “View” tab and select “Slide Master”.
- In the Slide Master view, you’ll see a range of built-in slide layouts. To create a custom layout, select the layout that’s closest to what you want to achieve, or choose a blank layout.
- Customize the layout by adding or removing placeholders, changing their size or position, or modifying the design of the slide. You can add new text boxes, picture placeholders, or other shapes, and adjust their formatting and alignment.
- To add a new placeholder, go to the “Insert” tab, select “Shapes”, and choose the type of shape you want to add. Then, drag the shape onto the slide and resize it to the appropriate size.
- To remove a placeholder, click on it to select it and then press the “Delete” key on your keyboard.
- Once you’ve made all the changes you want to the layout, click on the “Close Master View” button in the Slide Master tab to return to the normal view.
- Create a new slide using your custom layout. To do this, go to the “Home” tab, click on the “New Slide” button, and choose “Layout”. Then, select your custom layout from the list of available layouts.
- Customize the content of the slide as needed, such as adding text, images, charts, or other visual elements.
By creating a custom layout, you can design a slide that’s tailored to your specific needs and preferences, and use it throughout your presentation to ensure consistency and professionalism. You can also save your custom layout as a template and reuse it for future presentations.
Who designs the floor plans?
The floor plan of a house is one of the most important aspects of the home design process. After all, the floor plan will determine how the rooms are laid out and how the space will be used. But who designs the floor plans?
There are actually a few different people who may be involved in the floor plan design process. The first is the architect. The architect is responsible for the overall design of the house and will often create a floor plan as part of the design process. The builder may also be involved in the floor plan design. The builder will often have a say in how the floor plan is laid out, especially if they are custom building the home.
Another person who may be involved in the floor plan design is the interior designer. The interior designer will work with the architect and builder to create a floor plan that meets the needs of the homeowners. They will take into account the way the rooms will be used and the flow of traffic throughout the house.
Ultimately, it is up to the homeowners to decide on the floor plan. They will work with the architect, builder, and interior designer to come up with a plan that meets their needs and their budget. Once the floor plan is finalized, the construction process can begin.
Can I draw my own house plans?
Are you thinking of designing and drawing your own house plans? It’s an exciting prospect, but before you get started, there are a few things you need to know.
The first thing to consider is whether you have the time and the skills to do it yourself. Drawing up house plans is a time-consuming process, and it requires a good understanding of architecture and construction. If you’re not confident in your ability to produce accurate and detailed plans, it’s probably best to leave it to the professionals.
Another important factor to consider is the cost. Professional architects and draftsmen will charge for their services, and the cost can vary depending on the size and complexity of the project. If you’re on a tight budget, DIY might not be the best option.
Before you start drawing up your plans, it’s a good idea to do some research and collect some inspiration. Look at existing house plans and try to identify the features you like and dislike. Think about how you want your own home to look and feel, and what kind of layout would suit your needs. Once you have a clear idea of what you want, you can start putting your plans together.
When you’re ready to start drawing, there are a few software programs that can make the process easier. Home Designer Suite is a popular option, and there are also many free and low-cost programs available online. Whichever software you choose, make sure you read the instructions carefully before you start, so that you know how to use all the features.
Once you’ve drawn up your plans, it’s important to get feedback from someone with experience in construction. They can help you spot any potential problems and make sure your plans are feasible. Once you’ve made any necessary revisions, your plans are ready to be sent to a builder or contractor.
Drawing your own house plans can be a fun and rewarding experience. Just make sure you do your research first, and don’t bite off more than you can chew. With a little effort, you can end up with plans that will make your dream home a reality.
What makes a good floor plan?
This is a question that architects and interior designers often ask themselves. There are many factors to consider when creating a floor plan, and the perfect floor plan for one home might not be ideal for another. Here are a few things to keep in mind when creating a floor plan:
- The layout should be functional. The floor plan should be designed with function in mind. It should flow well and make sense for the way you live.
- The layout should be comfortable. The floor plan should be comfortable to move around in. There should be enough space to move comfortably from one room to another.
- The layout should be aesthetically pleasing. The floor plan should be pleasing to the eye. It should be well proportioned and balanced.
- The layout should be flexible. The floor plan should be flexible so that it can be easily changed if needed.
Related Posts

- Floor plans
How to make 3D floor plan
- Violeta Garcia
- 15 February 2023
Creating a 3D floor plan is an important part of designing a home or other […]

How to design a basement floor plan
Such a room as a basement is an indispensable thing for a private home, because […]

Basic home plans
The design of the house is based on the application of building and layout standards. […]

How to make a floor plan in Excel
Excel in Office 365 is a very versatile application. Excel’s built-in features make it a […]
Floor Plans :5 Ways to represent (Different styles of presentation)
")
Unlike sculptors and painters who work directly on the final product of their creative endeavor, the architectural practice requires a distinct medium that can translate ideas from conceptualization to realization, and architectural representation itself becomes a work of architecture . The floor plans serve as a means of exploration within the body of an architect’s practice and at the same time, it is the record of work that communicates with others.
The evolution of architectural representation is analogous with the evolution of architecture itself that from the purist paintings to virtual reality ; architects devised diverse kinds of representation modes according to the complexity and objectives of their design. Hence, despite the myriad of digital tools, no representation technique could be considered obsolete and architects have to carefully choose their representation style to enhance their design translation.
Here are five creative ways of representing a floor plan in architecture:
1. Federico Babina’s Archiplan Illustration | Floor Plans
Floor plans are abstracted into simplified geometric elements with walls extruded from the base surface. Even though abstracted, the archiplans speak multitudes about the building such as the spatial volume, configuration of built mass, degree of intimacy, and exposure of spaces, quality of light and shades, etc., due to the added third dimension.
Moreover, it is emblematic of the architects’ artistic and aesthetic approach to the particular building, even in its minimal abstracted form. Representation of floor plans using this technique is most apt for depicting the projects which involve a play of volumes and geometry of spaces.

2. Artist Book
The Artist book is a medium of expression that creatively utilizes the features of the book as a physical object or induces ‘bookness’ in presenting an architectural design . Each page of the book is considered as a site on which spaces are crafted by manipulating the paper using different techniques such as laser cutting, embossing, etching, etc. The drawings are endowed with a conceptual character and a page becomes a three-dimensional space.
These pages could be related through creative formats and its cumulation offers a codex-based sequence of not pages but spaces, thus documenting time and movement as well. It can be three-dimensional to accommodate the volume of spaces, acting even as a folded model. The tactility of turning the pages makes the representation a narrative experience by inviting, disclosing, and imbibing textural qualities to the presentation . Artist books are most adaptable for architectural documentation.

3. Axonometric drawings
Axonometric drawings serve as a technique to explore, express, and investigate complex architectural concepts. It is a type of orthographic projection in which the object is rotated about one or more of its axes to reveal multiple sides and dimensions. This type of representation provides scope to appreciate the volume, facades, and context of the building along with it. Depicting architectural elements beyond the foreground suggests a revelation of the dynamics of the neighborhood, thus accentuating the response of the building to its surrounding.
The exploded axonometric representation of the floor plan has an unparalleled quality to present the spatial volume and organization of floors at multiple levels, their relationship, connectivity, and layers of the spaces within the building. These are extremely useful to depict the components of the building, materials , construction, and joinery details. Axonometric representation has both conceptual and technical quality.

4. Representing Plan as GIF Images
Graphics Interchange Format (GIF) images support animation in presentation, thus, helping to incorporate movement. This format allows for the presentation of floor plans from its evolving stage to the finished phase, therefore, extending the functionality and meaning of the plan by presenting the process of the genesis of the building. GIF format for plans could also be used to present exploded views out of floor plans. Moreover, the time sequence of the GIF enables to make the representations lucid by presenting each of the components of a space turn by turn.

5. Virtual Reality and Augmented Reality | Floor Plans
With the evolution of architecture into more complex forms and geometry, the plans have turned into a game of multiple relationships among the connected surfaces of the forms. Hence, to understand the quality and functionality of spaces, conventional orthographic projections cannot succeed to communicate the complexity inherent in those kinds of spaces. Presenting a floor plan as a virtual 3D model enables the users to physically engage with space the same way as he does with the real world. This advanced technological aid helps one to change, reform, and reorganize it, and also to rethink any design moves.
In augmented reality and hologram, virtual reality invades the material world, bringing both them closer and converting it into a hybrid space where both realities exist in the same environment. These are preludes to the future opportunities for architects and clients to device a man-to-space relationship, in which space evolves in front of them with the intended accurate forms, textures, and environment.

A student architect who is deeply interested in architectural journalism, research and education. She is a classical dancer along with a profound passion for music and literature. This ardent reader firmly believes in ones karma and strives to forge a self identity in her mastering domains.

What Indian sitcoms teache us about domestic architecture?

10 Ways to increase productivity in your office
Related posts.

Building Connections: The Integral Role of Architecture in Human Existence and Community

Algae – In the field of Bio-Architecture

Architectural theory from a non-european perspective

Visionary Horizons: A Girl’s Journey through the Future of Architecture in 2060

Business Guideline for Architects

Shopping Malls Get a Sustainable Makeover: Where Shopping Meets Eco-Conscious Design
- Architectural Community
- Architectural Facts
- RTF Architectural Reviews
- Architectural styles
- City and Architecture
- Fun & Architecture
- History of Architecture
- Design Studio Portfolios
- Designing for typologies
- RTF Design Inspiration
- Architecture News
- Career Advice
- Case Studies
- Construction & Materials
- Covid and Architecture
- Interior Design
- Know Your Architects
- Landscape Architecture
- Materials & Construction
- Product Design
- RTF Fresh Perspectives
- Sustainable Architecture
- Top Architects
- Travel and Architecture
- Rethinking The Future Awards 2022
- RTF Awards 2021 | Results
- GADA 2021 | Results
- RTF Awards 2020 | Results
- ACD Awards 2020 | Results
- GADA 2019 | Results
- ACD Awards 2018 | Results
- GADA 2018 | Results
- RTF Awards 2017 | Results
- RTF Sustainability Awards 2017 | Results
- RTF Sustainability Awards 2016 | Results
- RTF Sustainability Awards 2015 | Results
- RTF Awards 2014 | Results
- RTF Architectural Visualization Competition 2020 – Results
- Architectural Photography Competition 2020 – Results
- Designer’s Days of Quarantine Contest – Results
- Urban Sketching Competition May 2020 – Results
- RTF Essay Writing Competition April 2020 – Results
- Architectural Photography Competition 2019 – Finalists
- The Ultimate Thesis Guide
- Introduction to Landscape Architecture
- Perfect Guide to Architecting Your Career
- How to Design Architecture Portfolio
- How to Design Streets
- Introduction to Urban Design
- Introduction to Product Design
- Complete Guide to Dissertation Writing
- Introduction to Skyscraper Design
- Educational
- Hospitality
- Institutional
- Office Buildings
- Public Building
- Residential
- Sports & Recreation
- Temporary Structure
- Commercial Interior Design
- Corporate Interior Design
- Healthcare Interior Design
- Hospitality Interior Design
- Residential Interior Design
- Sustainability
- Transportation
- Urban Design
- Host your Course with RTF
- Architectural Writing Training Programme | WFH
- Editorial Internship | In-office
- Graphic Design Internship
- Research Internship | WFH
- Research Internship | New Delhi
- RTF | About RTF
- Submit Your Story
Looking for Job/ Internship?
Rtf will connect you with right design studios.

Researched by Consultants from Top-Tier Management Companies

Powerpoint Templates
Icon Bundle
Kpi Dashboard
Professional
Business Plans
Swot Analysis
Gantt Chart
Business Proposal
Marketing Plan
Project Management
Business Case
Business Model
Cyber Security
Business PPT
Digital Marketing
Digital Transformation
Human Resources
Product Management
Artificial Intelligence
Company Profile
Acknowledgement PPT
PPT Presentation
Reports Brochures
One Page Pitch
Interview PPT
All Categories
Top 10 Floor Plan Templates To Share the Essence of Your Property

Naveen Kumar
In crime thrillers like Ocean’s Eleven, The Bank Job, and Fast Five, characters hunched over a piece of blue paper is a familiar trailer scene. Ever wondered what was contained in the document that has people so interested?
That paper with some straight lines and dimensions is the floor plan of a building and forms the keystone of the crime that each set of crooks planned and executed in that place.
A floor plan is a technical or engineering drawing to scale or form a relationship between features like rooms, spaces, furniture, and more at one level of structure. It shows the view of the arrangement from above (4 ft or 1.2 m floor height). Designing a detailed floor plan is the initial stage of a real estate project development.
Other than planning a robbery, floor plans will help you visualize and organize the structure. These are helpful in the construction and renovation of buildings. It will help you in walking the visitors through the galleries of your real estate project. Using a floor plan, you can discuss a housing project — intended space, interior design, and potential challenges — with clients. A good and accurate floor plan is a cost-efficient way to actually see if the building can be used the way it was planned.
Steps to Draft a Floor Plan
Whether you are designing a floor plan for new construction or renovation, go through this short list to help you take the right steps:
- Requirements: Ask clients about the requirements. What is the purpose of the project, how much space is required, and what type of divisions, etc.
- Measure and locate: Evaluate boundaries, walls, and internal structures. Locate permanent structures, built-in features, shelves, fireplaces, and divisions. Check floor-to-ceiling height, windows and doorways positions, electrical connections, objects like tables, beds, and every other detail you want to include in the floor plan.
- Choose a scale: Define a scale (¼ inch = 1 foot) for all your measurements in the floor plan. Use that scale for boundaries, objects, and other structures.
- Work on details : Which feature makes more sense for your intent? Doors, windows, furniture, lights, or divisions? Highlight details.
- Design the floor plan: Keeping all these details in mind, draw an accurate floor plan.
- Evaluate and redesign: Check accessibility, space, privacy, and more in the plan that you wish to propose. Go through the requirements list once again and evaluate, if more needs to be done to align the two to a greater degree of accuracy
- Share the final floor plan with your clients, project managers, and other collaborators to take their suggestions. This will also work as a review of your work.
Our floor plan templates will help you in each step of this project planning process. These high-quality slides are easy to design and redesign. You can save and share these PPT graphics in PDF, JPEG, PNG, and other formats. Let’s explore some tailor-made, customizable floor plan samples .
Template 1: Floor Plan PowerPoint Presentation Template

This presentation deck will help you put forward your real estate project ideas. It includes high-quality slides for the presentation of commercial and residential construction plans . Use the space in these graphics to write key points about the project or design. Download it now!
Download this template
Template 2: Floor Plan Template of a House on Square Shape Paper

Employ this PowerPoint layout to draft a space-allocation design for residential compartments. This simple floor plan template will help you share the arrangement with the audience in an attractive way. The Color theme of this PPT set is calm and soothing for the eyes. Get it now!
Template 3: Fitness Studio Startup Proposal Floor Plan Template

Were you looking to start your fitness studio? This PowerPoint set is the perfect way to get your business proposal started. Use this slide to draft a detailed floor plan for your fitness studio. This preset is easy to use and edit. It can be tailored to your specific needs. Get your business off the ground today!
Template 4: Floor Plan Sketch on Black Board PowerPoint Slide

Deploy the creative PPT design of floor plan sketch to teach students the concepts of engineering and drawing. You will be able to share the use of floor plans with the audience using the adjacent space in this slide. Grab it now!
Template 5: House Design Depicting Floor Plan for Real Estate Project PPT Slide

Are you looking for a sleek and professional PowerPoint template for your next real estate project? Look no further than this house design depicting a floor plan template! It's perfect for presentations, pitches, and proposals. This stylish template features a house design depicting a floor plan, making it ideal for real estate projects. The clean and modern layout is easy to read and follow. Plus, all the elements are editable, so you can customize the template to suit your needs. Download it now!
Template 6: Sauna Spa and Cardio Center Proposal Floor Plan PowerPoint Slide

With this PowerPoint template, you will get expert tips on designing and constructing your sauna or spa, including what type of flooring is best and how to layout your benches and stone heaters. You will be able to make a polished and professional presentation that will impress your audience. Don't wait any longer; download this template now and get started!
Template 7: Physical Fitness Gym Centre Floor Plan Template

This PowerPoint graphic is perfect for anyone giving a presentation on fitness, gym facilities, or floor plans. It features a clean and modern design with easy-to-edit text and graphics. This PPT slide is designed for health-conscious people and comes packed with features that will help you present your information in an appealing manner. Grab it now!
Template 8: Gym Startup Business Plan Proposal Floor Plan PPT Template

A gym must provide ample acreage for fitness enthusiasts to carry out their workout routine. This comprehensive Gym floor plan template makes space planning easy. You will show potential investors and clients what your gym offers and how you plan on making it a success. Get it now!
Template 9: Office Building Floor Plan PowerPoint Design

We are introducing this office building floor plan template to help you present that in a clear and concise way. This PPT layout is perfect for real estate professionals, architects, and anyone who needs to present an office building floor plan. Grab it now!
Template 10: Fitness Center Floor Plan PPT Layout

When it comes to creating a fitness center floor plan, accuracy is key. That's why our floor plan template includes precise measurements and detailed illustrations. Using this PowerPoint graphic, you will be confident that your audience understands your plan. Download it now!
If you are in the business of managing properties or involved in any form of architectural project, you know the importance of a clear and concise floor plan. It provides a blueprint for the layout of a space and can help managers and builders stay on track for delivery. Our templates are designed to create a quick and easy floor plan. Simply download them, fill in your information, and you’re ready to go.
What are you waiting for? Download these templates now and see how easy it is to get started on your next project!
P.S. Want to know how to manage your construction site with ease? Then, don’t miss this guide flush with the best templates.
Related posts:
- Top 10 Construction Estimate Templates To Help Real Estate Professionals With Project Finance!
- Top 11 Templates to Create a Concise One-Page Stock Pitch [Free PDF Attached]
- 10 Elements of A Successful Corporate Sponsorship Proposal (With Presentation Templates)
- Top 10 Templates To Control Revenue Expenditure; Earn More With Less
Liked this blog? Please recommend us

Top 25 Real Estate PowerPoint Templates for Realtors and Agencies

Top 10 One Page Real Estate PowerPoint Templates for Boosting Your Business!

10 Best Real Estate Investment Management Templates to Turn Your Assets into Money Makers

An All-Encompassing Guide to Real Estate Business Plan (Best Templates Included)
![Top 12 Real Estate Brochure Templates to List and Win [Free PDF Attached]](https://www.slideteam.net/wp/wp-content/uploads/2022/06/Top-12-Real-Estate-Brochure-Templates_1-1013x441.png "floor plan presentation")
Top 12 Real Estate Brochure Templates to List and Win [Free PDF Attached]

Construction Management PowerPoint Templates to Manage Your Deliverables Explicitly!
![Top 17 PowerPoint Templates to Document a Construction Plan [Free PDF Attached]](https://www.slideteam.net/wp/wp-content/uploads/2022/03/1013x441no-button-17-1013x441.jpg "floor plan presentation")
Top 17 PowerPoint Templates to Document a Construction Plan [Free PDF Attached]

What Makes Having a Construction Playbook So Essential?

Top 12 Construction Contract Templates to Minimize Disputes
![Vital Elements of a Construction Company Business Profile [With Template] [Free PDF Attached]](https://www.slideteam.net/wp/wp-content/uploads/2022/07/bloggg-144-1013x441.png "floor plan presentation")
Vital Elements of a Construction Company Business Profile [With Template] [Free PDF Attached]
This form is protected by reCAPTCHA - the Google Privacy Policy and Terms of Service apply.

Digital revolution powerpoint presentation slides

Sales funnel results presentation layouts
3d men joinning circular jigsaw puzzles ppt graphics icons

Business Strategic Planning Template For Organizations Powerpoint Presentation Slides

Future plan powerpoint template slide

Project Management Team Powerpoint Presentation Slides

Brand marketing powerpoint presentation slides

Launching a new service powerpoint presentation with slides go to market

Agenda powerpoint slide show

Four key metrics donut chart with percentage

Engineering and technology ppt inspiration example introduction continuous process improvement

Meet our team representing in circular format

- Residential
Video Render
Let’s Talk: [email protected]
- Goldman Sachs
- BOOK A CALL
- Book a Call
Architectural Visualization 3D Rendering Services
Unlock the potential of compelling floor plan presentations.
Visualizations play a crucial role in real estate, particularly in aiding communication among stakeholders and enhancing marketing efforts.
In this regard, floor plan presentations are indispensable tools in the buying, selling, and construction of real estate. They facilitate an accurate, detailed, and accessible visual representation of a property’s layout and structure which can encourage a better understanding of the overall area, the placement of objects, and how a space flows.
This is crucial for allowing stakeholders to determine whether a particular property or design concept is viable and meets their requirements.
Let’s explore all there is to these relatively straightforward yet highly effective visual aids.
What Is a Floor Plan Presentation?
A floor plan presentation is a technical drawing that is made to scale while providing a bird’s eye view of a particular space. This includes the layout of the rooms, the placement of doors and balconies, and other structural elements. It may also include outlines of furniture and other design features.
Floor plan presentations can be as simple or detailed as required based on what they are being used for and what they need to showcase.
A floor plan presentation can include different components such as:
- Scale and measurements
- Suggested furniture
- Clearly defined rooms with staircases, walls, windows, doors, and partitions
- Dimensions of different elements
- Flower beds, balconies, patios, and other additional features
- Annotations such as labels or explanatory notes
All these components come together to provide an accurate depiction of a space. They help visualize how one might move through a property, and help stakeholders decide whether the layout, placement of furniture, and other considerations suit their purpose.
It’s possible to create your own floor plans. You can use online software or use traditional drawing instruments. However, it’s important to consider that the possibility of making mistakes with inaccurate scaling and placement increases if you produce them yourself.
This can easily become more costly and time-consuming than you planned in the long run. In many cases, hiring a floor plan creator specialist is a better option as they are experienced and familiar with designing floor plans that accurately depict a space. Professionally designed floor plans are also clearer while effectively communicating all the required design elements, dimensions, and spatial arrangements.
Types of Floor Plans
Different types of floor plans can be used to depict a space in different ways. Each has its own unique appeal and function.
Here are the most popular types of floor plans:
2D Floor Plans
2D floor plans are diagrams that outline the fundamental layout and structure of a space. They can provide basic depictions where the perimeters of rooms are outlined along with labels for what a particular room is and what its dimensions are. Other essential features such as doors and windows may also be highlighted.
Other 2D floor plans may be slightly more detailed, such as color-coded 2D plans that highlight different areas of a property, including sections or levels in multi-level properties.
2D plans can also include furniture, but this is done in a highly simple, schematic manner. Squares, rectangles, circles, and other simple shapes are used to depict the furniture with little to no realism or detail.
These are affordable, less time-consuming, and only include the essential details that are strictly necessary, thus reducing distractions.
3D Floor Plans
3D floor plans, as the name suggests, offer a 3-dimensional outline of a property or space. They have a higher visual impact as they include color, detailed furniture, design elements, and textures.
These floor plans may show the different building materials, interior designs, and decorative elements such as furniture, plants, and other aesthetic features. They are more detailed and realistic, providing a more immersive visualization of what a space can look like, and an accurate portrayal of its utility once it is finished.
Floor plans are not limited to interior design floor plan presentations. Site plans are also an option. These provide an accurate depiction of the overall property, including its interiors, exteriors, and landscaping.
For a holistic presentation, floor plans that include the external areas of a structure can be highly effective in displaying the overall scope of the property. These can be designed as detailed 2D or 3D floor plans. They may also include outdoor features such as pools, ponds, sheds, garages, and other similar external structures.
Functions of Floor Plans for Different Stakeholders
Floor plans can be used by all the stakeholders of a property as they are extremely versatile, practical, and convenient. In this section, we share how real estate agents, brokers, property developers, architects, designers, and homeowners benefit from floor plans.
Real Estate Agents and Brokers
Floor plan presentations are highly effective for creating a visual representation of a property that is easily understood and accessed. People who are unfamiliar with advanced technology may struggle with virtual tours and immersive walkthroughs. Floor plans are ideal solutions because they provide accurate depictions of spaces without requiring the user to be familiar with technology. They are also less overwhelming since they require minimal active participation.
Real estate agents can thus benefit from these qualities and use floor plans to attract potential buyers and renters by showcasing properties with simpler tools. They can enhance listings and brochures by providing a basic outline of the space so interested individuals can understand what they are working with.
Property Developers
Property developers can use floor plans to market their projects to investors by showcasing the basic layout of the structure. This can allow investors to ascertain whether the spatial flow is appealing and meets their needs.
Developers can also use floor plans to enhance communication among their crews. Floor plans offer clarity on the dimensions and the other essential details of a space.
Architects and Designers
Floor plans provide an accurate visual reference, thus reducing the risk of misunderstandings and miscommunications. They also offer accessible clarity regarding a project as they transcend language barriers and can be easily shared.
These help reduce costly mistakes by enhancing coordination and collaboration between architects and their clients as well as construction crews.
Furthermore, architects can also make changes and offer alternatives with greater ease compared to other more intensive design models. Clients can thus pick between different layouts and arrangements at a lower cost.
When planning remodels or renovations, floor plans can help homeowners more easily communicate with their architects and design teams. This helps streamline feedback and revisions while promoting more informed decision-making.
Since floor plans are simpler and more affordable, homeowners have more freedom to request changes and alternative options. They also help reduce errors and revisions in later stages of building as owners can clearly envision what the space will look like and suggest changes. Meanwhile, construction crews can be updated on any changes with ease.
How Do Floor Plans Aid in Marketing?
Floor plan presentations can significantly enhance marketing strategies and results as they increase properties’ appeal to potential buyers and renters.
Enhances Visualization
Floor plans provide a clear and accurate representation of a property’s layout, placement of furniture, and other spatial and structural elements and design features. This allows potential buyers or renters to envision the space and discern whether or not it suits their needs and preferences.
Increases Interest
Properties with professionally designed floor plans look more legitimate and receive higher levels of interest compared to other properties that don’t have them. They provide a competitive advantage that makes listings stand out, attracting interested buyers and tenants.
An increase in viewership, be it online listings, or brochures, can further help in expediting the decision-making process, thus resulting in quicker sales.
Floor plans are more accessible than other forms of visualizations as they are simpler and can be easily navigated without technical literacy.
They can also be printed out and used in brochures and other marketing materials without requiring a screen. They can thus be easily viewed and shared as they don’t require the advanced technology or digital storage space required by large files like renders, images, and videos.
Enhances Trust
Buyers and renters may be apprehensive about trusting 3D renders and visualizations as they can be regarded as marketing gimmicks that don’t provide an accurate depiction of a property.
Floor plans can enhance trust as they include all essential details about the dimensions of a space. Anyone viewing a floor plan can immediately understand the exact measurements of a property.
Final Thoughts
Effective marketing and communication are crucial in real estate and floor plans are a valuable asset in this regard. Be it real estate agents, property developers, architects, or homeowners, a floor plan presentation is critical for showcasing properties and design concepts.
While it’s possible to take a DIY approach to creating floor plans, hiring a specialist will ensure better accuracy and a precise, professional floor plan presentation.
If you’re looking to create a floor plan presentation of a property, our passionate and experienced professionals at PlusRender will deliver realistic, detail-oriented renders to optimize your communication and marketing strategies.
Related Posts
Futurism in architecture and other trends.
The concept of futurism in architecture goes beyond the range...
What Stops a House From Selling:
Has your property been on the market for far too...
The Power of Walkthrough Videos in
Video marketing is dominating the real estate industry and it’s...
Big enough to deliver, small enough to care.
- [email protected]
- + 34 633 266 577
- Calle Mayor 10B, 48930 Bilbao, Spain
- plusrender.com
Virtual Tour
Image Render
Plus Render
© 2022-2024 +Render Architectural Solutions. All Rights Reserved.
Free Site Analysis Checklist
Every design project begins with site analysis … start it with confidence for free!
How to Create a Successful Architecture Presentation Board
- Updated: December 31, 2023

Architecture is as much about effective communication as it is about innovative design. At the heart of this communicative process lies the architecture presentation board, a tool quintessential for architects to convey their vision, ideas, and concepts.
These boards are more than mere visual aids; they are the narrative bridge between an architect’s imaginative conception and the practical world where these ideas may take shape. They are not just a requirement for academic submissions or professional proposals but are a fundamental aspect of the architectural design process.
They serve as a canvas where ideas are visualized, concepts are explained, and designs are brought to life for various audiences, be it clients, peers, competition judges, or the general public.
Understanding how to effectively create and present these boards is crucial, as a well-crafted presentation not only showcases a finished scheme but also reflects the thought process, attention to detail, and the authors ability to communicate complex ideas succinctly and visually.
What are architecture presentation boards used for?
Architecture presentation boards serve several different purposes:
- Students use them to present work to their professors and peers.
- Professionals use them to present designs to clients, committees, shareholders, and exhibitions.
- They may be a means to win a commission, or they may help to take a project into the next stage.
What is the purpose of an architecture presentation board?
Architecture presentation boards are a tool to showcase your work. They are a way to draw your viewers into your design process and methods, providing an overall summary and vision for the project. You are communicating your design and showcasing your artistic skills, and your sense as a designer.
Every successful project has a central concept, a “big picture” theme that gives it purpose. When you look at your project, what is that big idea?
As it is central to your whole project, this will guide you as you prioritize your work and determine the flow of your ideas. The primary purpose of your project is to communicate this central concept in the best way possible.

AutoCAD Template Kit
Format your drawings with the correct set of tools. This CAD template enables you as a designer to spend your time on what matters – the design!

Stop searching for CAD blocks!
How do you layout an architecture presentation board, 01 – structure/order.
Before you begin laying out your presentation board, think about the main points you want to convey. From there, determine what images and graphics will best represent those ideas. Gather all of the information you will need, making a note of what graphics and text you will need to communicate your ideas.
Remember, you are essentially telling a story, so pay close attention to the flow of the narrative as you arrange your elements. Consider the beginning, middle, and end of the story you want to tell.
Depending on the guidelines you are given, you may present your boards side-by-side, as separate boards presented in a sequence, or as one big poster. If no strict parameters are in place, figure out what structure and layout will tell your story the best. While a series of boards will logically convey your story, one big board is often the easiest option.

02 – Orientation
Will your presentation board be oriented in portrait or landscape? Sometimes you will get to make that call, but many times it will be determined for you by your director, client, or professor. Make sure you know beforehand what the parameters are.
If you get to choose, give it some careful thought. Which orientation will give your graphics the room they need to be the most impactful? Which orientation gives your whole project a natural flow for your narrative?
03 – Size
Much like orientation, you may or may not get to decide what size your presentation boards will be. You will often have restrictions that limit you to a specific board size and a certain number of boards.
Make sure you know your limitations before you start working on your layout. Your boards should all be the same size to achieve continuity.
You can use a combination of different sizes to produce a board of equivalent size. For example, a combination of two A1 boards will add up to an A0 board.

04 – Layout
The most common way to organize your layout is by using a grid. Using a grid will help keep the boards in your project consistent.
If you are using InDesign , you can achieve this uniformity by creating a master page that acts as a template for your whole project.
Templates are useful because they can save you a great deal of time, and they ensure uniformity throughout your project. Your grid should include spaces for titles, numbering, your name, and any other information that will repeat on each board.
Before you start laying out your actual boards, sketch out various configurations so you can determine what will work best. You can do a small-scale sketch to get the basic idea of the flow of each board. This allows you to change the arrangement of the elements before you commit to anything on your boards.
You can do this initial phase using software or sketching it out on paper.
After you have determined what type of layout you want to use, estimate how much space you will need for each element on the page. Each graphic needs to be large enough to have an impact. Determine how much space you would like to leave in between each graphic.
Use equal spacing throughout your project to create continuity. Here is an excellent tutorial on planning your layout using Indesign:
The layout of each board should show the relationship between all of the elements. It should be clear to read and follow a logical left-to-right and top-to-bottom progression.
Imagine a viewer looking at your presentation. What do you want them to see first? What is the best way to make them understand your project? Does your layout achieve this?
You should also pay attention to the relationship between each board. Is there a logical progression from one board to the next? Does the sequence make sense? If you will not display the boards in a configuration that makes them all visible at once, make sure you number them, so your viewers follow the correct sequence.
Don’t feel the need to fill every square inch of your presentation board. Leave enough space so that it doesn’t look too busy or cluttered. On the other hand, don’t leave too much space either, or it will look like you didn’t finish the board, didn’t have enough material for the board, or that you didn’t work very hard.
05 – Visual Hierarchy
Some of your images need to garner more attention than others. Consider all of the graphics and text you will be using. Which images are central to your main idea?
The images that are essential for communicating your vision should take up more space in the grid. You should have an image that people can see from a distance and other images that they can see from up close. This creates a visual hierarchy.
What is the most important aspect of your project? Make that the element people can see from a distance. There are ways to accomplish this in addition to making it the largest element on the board. For example, you can use color to draw the viewer’s eye to a particular graphic, especially if the rest of the board is monochromatic.

06 – Background
The background of your presentation board should be simple. This allows the viewer to see all of the elements without the distraction of a busy background. You don’t want anything to detract from the critical details of the board. Your graphics and text should be the primary focus; don’t use bold colors or textures that will detract from that.
A white, or even light gray, background will make your graphics and text stand out. It will give your presentation a professional look that isn’t too busy. You can use other colors if they help convey your central concept; just make sure the background is plain enough that the viewer focuses on the design, not the background.
Be very selective when using a black background, as it may make the text harder to read, and your graphics may not stand out as much as you would like them to.
Whatever color you choose for your background, use it to your advantage. Effective use of negative space can make your design look clean and professional.

07 – Color Scheme
Many professionals and students stick with black, white, and gray for presentation boards. While this can give your boards a professional look, don’t be afraid to add a pop of color. While sticking with greyscale may seem like a safe choice, there is a risk of blacks and greys making your design seem cold and lifeless.
Think about ways you can use color to bring life to your design. You may opt to add just one color, such as green for landscaping, to provide contrast to an otherwise monochromatic presentation. You could also bring in an additional color to represent a particular building material (brick, glass, wood, etc.).
You can also choose a brighter, more eye-catching color, such as yellow or orange, as a feature in your diagrams . Whatever you choose, use the same color across all of your boards to maintain a consistent flow.
If color is one of the main focuses of your project, or if there are details that you cannot adequately represent in greyscale, then you should feel free to delve deeper into the world of color. Don’t limit yourself to merely an accent color in this case, but don’t take it too far and make the mistake of overusing color to the point where it is a distraction.
08 – Font
All of the text throughout your project should be in one font. Don’t use font style as an avenue for creativity; it is more important to make sure the font style and size produce a readable, consistent product.
Sans serif fonts, such as Helvetica or Futura, will give your presentation a clean, minimalist look.
Avoid script or handwriting fonts, as they will not give your boards a clean, professional look. Keep the color of your font dark (black or dark grey work well) to provide contrast to a light background.
Whichever font you select, make sure the style and size are readable for your viewers before you finalize your boards. The best way to do this is to print out your text on an A3 paper, pin it up somewhere, and stand back to see how it will look when it is displayed.

A full breakdown, list, and description of the most popular fonts for architecture can be found here .
09 – Title
The most common placement for a title bar is the top left since your board will most likely follow a left-to-right and top-to-bottom progression. Many successful and professional-looking boards have titles at the top right, at the bottom, or somewhere in the middle.
Choose the position that makes the most sense for your project. As with other design decisions, make sure it does not distract the viewer from seeing the big picture.
Make sure the title placement is consistent from board to board. This consistency will be both visually appealing and professional.
10 – Text
Keep your explanations concise. People are not going to spend much time reading lengthy descriptions, so only include relevant information and keep it short. Remember that your text boxes are part of your visual hierarchy, so utilize the size and alignment to complement your graphics. Consider the various ways you can align the text within the text box. What flows best? What is pleasing to the eye?
Aside from your title, do not use all capitals in your text. Your work will look more professional and be easier to read if you stick with the standard rules of capitalization.
Whenever possible, use a graphic or a sketch, rather than an explanation, to portray an idea. Since this is a graphic presentation, you want your graphics to tell the story, not your text. Include a concise statement that highlights the features of your design. This is basically your sales pitch; lengthy explanations will make you lose your audience.
11 – Image Selection
The selection of images is a critical part of putting your presentation board together. The graphics you choose can make or break your entire design presentation.
You want to select the images that best convey the important details of your project. If you use too many images, your presentation may appear cluttered and confusing. If you use too few images, it may look like you did not put much effort into your presentation.
Over the course of your project, you have generated countless sketches, renderings, models, and drawings. Resist the temptation to include everything just to show how hard you worked. Keep your big picture in mind and determine which images will directly show or best support that idea.

12 – Models
On occasion, a physical model, or even several models showing different aspects of your design, may be required for your presentation board. This is an additional means of communicating your vision to your viewers.
There are several materials you can choose for your model. Card and cardboard are inexpensive and come in various weights, finishes, and colors.
Foam board is also available in various widths and thicknesses. It is generally white, but it also comes in other colors. It is very lightweight and sturdy, making it an ideal material for your presentation board.
Balsawood is another good option. It is easy to work with and comes in varying weights. The material you choose will depend on the look you are trying to achieve as well as how much weight you can adhere to your presentation board.
Your model pieces can be cut by hand with tools such as an X-Acto knife or a scalpel. If you have access to a laser cutter, it will save you some time and give you more precision.

13 – Time Constraints
Give yourself enough time to produce a well-thought-out, effective, visually appealing presentation. You spent a considerable amount of time on your design; it would be a shame to rush through your presentation boards. Give each part of the process enough attention so that your final product really showcases and highlights your talent and hard work.
Time management is critical when working on a big project like this. It can seem overwhelming at first, so split the project into smaller sub-tasks to make it more manageable. Give yourself a deadline for each of those smaller tasks. Make a schedule that shows which tasks you will accomplish each day. Make sure you leave yourself a little wiggle room in case anything unexpected comes up.
What should be included in an architecture presentation board?
Unless you receive explicit instructions regarding what to include in your presentation boards, it is up to you which elements make the cut. When you are deciding what elements to incorporate into your project, reflect on what will best explain your design.
When someone completely unfamiliar with your project is looking at your boards, what do you want them to see?
When deciding what text to include in your project, make sure you include an introduction, your design brief, and any applicable precedents. In addition, you will want to include concise textual explanations as needed throughout your presentation.
For your graphic representations, you want to include the basics: elevations, floor plans, and sections. You can represent these with 3d drawings, perspectives, or renders. You may also include some key features of your design that make it unique, and in addition to highlighting the finished product, select elements that show your concept and design development.
Some additional tips:
- When choosing a perspective view, select one that highlights the best aspects of your design. This graphic is usually the most prominent picture on the presentation board. The hero image!
- You will want to include at least two different elevation views so your viewers can get a sense of the bigger picture.
- Don’t be afraid to include sketches. If you include some sketches that show the progression from a simple idea to the final product, you can communicate your vision as well as your process.
When you are adding all of these elements to your presentation board, make sure each graphic representation of the plan has the same orientation. If one picture has north pointed in one direction and another picture has north pointed in a different direction, it can be disorienting for the viewer.
Likewise, each graphic should use the same scale unless there is one picture that is bigger than the others for the purpose of visual hierarchy.
There is one obvious detail that you may inadvertently overlook. Make sure your name is on your presentation board. If you have more than one board, put your name on each one. The name is in the bottom right-hand corner, but it can also appear in the title bar.

Types of Architectural Presentation Boards
Organizing your architectural presentation sheets into specific categories can be a very effective way to present your projects. There are several types of architectural presentation boards, and the following tips can help you present your project at different stages:
C onceptual board
Concept sheets are a type of presentation board that showcase your initial ideas and approach to a project. They typically include information about the concept behind the project and how design decisions were made. It is important to submit concept sheets before presenting your architectural drawings and renderings.
When creating concept sheets, you may want to include conceptual collages and diagrams to help explain your ideas to the audience. These can be created using 3D modeling software or programs like Adobe Photoshop or Illustrator. The goal of concept sheets is to clearly and simply present the various stages of your project to the review panel.
Site a nalysis board
Before beginning a project, architects perform thorough analyses to determine the needs, conditions, and limitations of the site. This analysis serves as the foundation for the concept development. Site analysis boards may include site analysis, urban scale analysis, sociocultural analysis, analysis of physical conditions, and environmental analysis.
It is important to conduct extensive research and present your findings in a clear and organized way, as analysis boards can help reinforce the concepts presented in your architectural drawings.
It is also important to keep in mind that the jury members may have difficulty understanding analysis presented alongside the architectural drawings.
Technical / Detail Board
Technical drawings are a crucial aspect of architectural projects, as they help to depict the structural elements of a design and guide the construction process. It is important to present technical drawings in a clear and organized manner, particularly in application projects and student projects.
Technical drawing boards should typically include a master plan at a scale of 1/5000 or 1/1000, as well as site plans and floor plans at a scale of 1/500, and sections and elevations at a scale of 1/200. Detail drawings, including system sections and details at scales of 1/20, 1/10, and 1/5, should also be included on the technical drawing boards.
These drawings will help to provide a more complete understanding of the project to the review panel.

Professional Boards
While student projects and competition entries are evaluated by a panel of judges, in professional practice, the client serves as the “jury” for your work. Instead of preparing presentation boards in the same way you would for school or competition projects, it is important to create presentations that will appeal to clients.
The most important factor for most clients is the design of the living space, so it can be helpful to focus on renderings and plain plans rather than technical drawings. The visual appeal of your presentation boards, including the color scheme and atmosphere in the renderings, as well as your ability to effectively present and explain your ideas to the client, will also be important factors in their evaluation of your work.
Programs, Software, and Tools
There are several software applications you can use to build your presentation board. Choose one that you are already familiar with, so you aren’t trying to learn new software while you are doing your layout. That is an added stressor that you just don’t need!
InDesign, Illustrator, and Photoshop are excellent programs, but if you need something a bit more simple, Microsoft Word, Pages, Powerpoint, or Keynote will also work.
InDesign was designed for making presentations. AutoCAD was designed for constructing plans. Photoshop was designed for editing raster images. Illustrator was designed for creating vector art. While some people are able to make their whole presentation using Illustrator, Photoshop, or even PowerPoint, it makes more sense to use each piece of software in a way that takes advantage of its strengths.
You can import files from AutoCAD, Photoshop, and Illustrator into InDesign and take advantage of the strengths of each application.
Before you delve into your own presentation board, do some research. Look online for examples and make a note of the elements you like. Combine that inspiration with your creativity to produce a stunning presentation.
Here are some websites you can use for inspiration:
The President’s Medals Winners
Pinterest – Architectural Presentation Boards
World Architecture Students Community – Presentation Boards
FAQ’s about architecture presentation boards
How do you present an architecture presentation.
Here are some general guidelines for presenting an architecture presentation:
- Define your objective : Clearly define the purpose of your presentation and the main ideas or arguments you want to convey.
- Organize your material : Gather and organize your material in a logical and coherent manner that supports your objectives. This may include drawings, images, models, diagrams, and text.
- Create a clear and visually appealing layout : Use a layout that is easy to follow and that effectively presents your material. Consider using contrast, hierarchy, and balance to guide the viewer’s eye.
- Practice your presentation : Practice your presentation to ensure that you are comfortable with your material and can deliver it in a clear and confident manner.
- Use visual aids effectively : Use visual aids such as slides, drawings, and models to supplement your presentation and help illustrate your points. Avoid overloading the viewer with too much information and focus on presenting the most important ideas.
- Engage your audience : Engage your audience by using a variety of presentation techniques, such as asking questions, using storytelling, and using interactive elements.
- Conclude with a summary : Recap the main points of your presentation and conclude with a clear and concise summary.
Why do architects use presentation boards?
As explained above, architecture presentation boards are commonly used by architects and designers to visually communicate their ideas and designs.
Presentation boards typically consist of a series of large format panels that can be mounted on a wall or a stand. These panels can be used to display a variety of materials, such as drawings, images, models, diagrams, and text.
Presentation boards are an effective way to present a comprehensive overview of a project or design concept, and they can be used to showcase the key features and characteristics of a project.
They are often used in design reviews, presentations, exhibitions, and competitions , and can be a useful tool for architects and designers to communicate their ideas to a variety of audiences, including clients, stakeholders, and reviewers.
Presentation boards can be customized to suit the specific needs of the project and can be designed to effectively convey the key ideas and concepts of the design, enabling architects and designers to effectively present and showcase their work in a clear and visually appealing manner.
To Sum Up…
Even the most exceptional design concept can appear uninspired if you do not present it well.
You have spent weeks, maybe even months, on your design. Don’t sell yourself short by not communicating your vision well. The professional, creative, and aesthetic quality of your presentation will affect how your work is received.

Every design project begins with site analysis … start it with confidence for free!.
Leave a Reply Cancel reply
You must be logged in to post a comment.
As seen on:

Providing a general introduction and overview into the subject, and life as a student and professional.
Study aid for both students and young architects, offering tutorials, tips, guides and resources.
Information and resources addressing the professional architectural environment and industry.
- Concept Design Skills
- Portfolio Creation
- Meet The Team
Where can we send the Checklist?
By entering your email address, you agree to receive emails from archisoup. We’ll respect your privacy, and you can unsubscribe anytime.
- All Resource
PPT Templates
Single slides.
- Pitch Deck 209 templates
- Animation 326 templates
- Vertical Report 316 templates
- Business 803 templates
- Finance 56 templates
- Construction 45 templates
- IT/Commerce 171 templates
- Medical 64 templates
- Education 45 templates
- Lifestyle 394 templates
- Pitch Decks 138 templates
- Business 541 templates
- Finance 20 templates
- Construction 75 templates
- IT/Commerce 73 templates
- Medical 27 templates
- Lifestyle 578 templates
- Pitch Decks 140 templates
- Business 469 templates
- Finance 19 templates
- Construction 64 templates
- IT/Commerce 72 templates
- Medical 29 templates
- Education 39 templates
- Lifestyle 490 templates
- Cover 266 templates
- Agenda 97 templates
- Overview 216 templates
- CEO 28 templates
- Our Team 142 templates
- Organization 48 templates
- History 38 templates
- Vision, Mission 109 templates
- Problem, Solution 193 templates
- Opportunity 154 templates
- Business Model 158 templates
- Product, Services 299 templates
- Technology 65 templates
- Market 155 templates
- Prices 56 templates
- Customers 55 templates
- Competitor 113 templates
- Business Process 151 templates
- Analysis 222 templates
- Strategy 120 templates
- Marketing, Sales 61 templates
- Profit, Loss 69 templates
- Financials 247 templates
- Timeline 122 templates
- Proposal 40 templates
- Contact Us 272 templates
- Break Slides 16 templates
- List 361 templates
- Process 351 templates
- Cycle 177 templates
- Hierarchy 98 templates
- Relationship 152 templates
- Matrix 86 templates
- Pyramid 67 templates
- Tables 145 templates
- Map 96 templates
- Puzzles 163 templates
- Graph 217 templates
- Infographics 436 templates
- SWOT 111 templates
- Icon 418 templates
- Theme Slides 138 templates
- Mockup 42 templates
- Column 315 templates
- Line 199 templates
- Pie 139 templates
- Bar 179 templates
- Area 130 templates
- X Y,Scatter 16 templates
- Stock 59 templates
- Surface 3 templates
- Doughnut 256 templates
- Bubble 65 templates
- Radar 83 templates
- Free PPT Templates 2,101 templates
- Free Keynote 2,017 templates
- Free Google Slides 2,098 templates
- Free Theme Slides 35 templates
- Free Diagram 126 templates
- Free Chart 49 templates
- New Updates
Result for ' floor plan '
56 Templates are available.
- Sort by Accuracy
- Sort by Newest

Tile Design PPT Background
Quick and easy to customize Highly editable presentation template. Easy to change colors All images included 16:9 aspect ratio Data charts editable via Excel

Office Interior Design slide members
Modern, simple, and clean design Shapes and text are 100% editable Possible to change shape and color properties Easy to customize without graphic design skills Replaceable the image into placeholder

Architecture Blueprints PowerPoint Slides
Easy to edit and customize Fully editable content (graphics and text) via PowerPoint - No Photoshop needed! Professional business presentation Shapes: fully editable vector graphics Drag & drop image placeholders

Construction Design Tool - Free Design Template
Creative slides Aspect ratio - 4:3 (normal) Clean style Creative and innovative presentation slides

An Architectural Forkcrane - Free Design Template
Easy to edit in PowerPoint All images included 4:3 aspect ratios Easy color change

Design - Free Design Template
Smart and innovative presentation slides Clean, modern, and creative slides Trend template Easy to change colors

Architecture Blueprints PowerPoint Templates
Easy customization 100% fully editable PowerPoint slides Easy to change colors Vector icons 100% editable Free images and artwork Smart and innovative presentation slides

Construction Industry Slide Presentation
Easy customization Easy to change colors 100% vector objects & icons 16:9 aspect ratio Smart and innovative presentation slides Dark and light versions of each

Real Estate PowerPoint Templates for Presentation
100% fully editable PowerPoint slides 16:9 aspect ratio Modern layouts based on master slides Drag & drop image placeholders

Space is the breath of art. - Frank Lloyd Wright? Good design is making something intelligible and memorable. Great design is making something memorable and meaningful. - Dieter Rams? Successful design is not the achievement of perfection but the minimization and accommodation of imperfection. - Henry Petroski
_16:9_MS Powerpoint")
Real Estate (Housing & Propertie) Easy Presentation Template
Easy to edit and customize 100% fully editable PowerPoint slides Easy to change colors All images included

Construction Industry powerpoint presentation template
Premium & modern multipurpose Free font used Created with high quality slides Creatively crafted slides

Business Startup PowerPoint Templates Design
Easy customization Data charts (editable via Excel) Easy editable data driven charts (pie, bar, line) 100% vector objects & icons Presentation photos are included; No animation template 16:9 aspect ratio Smart and innovative presentation slides

Modern, simple, and clean design Modern and clean design Free images and artwork Format: PowerPoint (.pptx) - designed with Microsoft PowerPoint 2016

Interior Design Slide Presentation
Quick and easy to customize Data charts (editable via Excel) Creative slides No animation template 16:9 aspect ratio Modern layouts based on master slides Drag & drop image placeholders

Digital Marketing PowerPoint Presentation Templates
100% fully editable PowerPoint slides Modern and clean design Easy color change Non-animated Modern layouts based on master slides Drag & drop friendly

Free PPT Template - Rhythmic Gymnastics
Modern and clean design Free images and artwork Landscape orientation style Easy to change colors

Free PPT Template - Gustave Caillebotte "Raboteurs de Parquet"
Smart and innovative presentation slides Free images and artwork Image placeholders Latest Templates support version

Scuba Diving - Free Template Design
Easily editable content Image placeholders 4:3 slide size Easy color change

Easy to edit and customize Easy editable data driven charts (pie, bar, line) Modern and clean design Non-animated Modern layouts based on master slides Drag & drop friendly
Free Slides
Slide Members
All Rights Reserved 2024 © Copyright Slide Members
Information
- Privacy Policy
- Terms & Conditions
Recent Slides
- 26+ Latest weekly update Powerpoint Templates & Google slides
- 19+ Recently Powerpoint Templates & Google slides Update
- 9+ New Powerpoint Templates & Google Slides Update
Find anything you save across the site in your account
The Art of the Client Presentation
By Danine Alati

Be prepared. Be thoughtful. Be specific. And be careful to not get your ideas swiped! When approaching a client presentation, it’s essential to do your homework and present your ideas in a way that suits the job at hand and conveys your passion and expertise clearly and concisely—all without giving away too much. Though there’s no one-size-fits-all solution or general script to follow, using the simple strategies suggested by these three seasoned design professionals can help you deliver a winning presentation.
Know your stuff
It’s worth stressing the fact that preparation is key to any successful client presentation. All of the designers AD PRO consulted agree that there is no such thing as being too prepared. “If you are organized during your presentation, you are exhibiting the way their project will be managed,” says Victoria Sanchez, principal designer and owner of the Santa Fe and Washington, D.C.–based firm Victoria at Home. “A designer should be able to walk a client through their project,” she adds. “Starting with a floor plan, presentation board, or other presentation materials, a designer should know their design inside and out. Be ready to answer questions related to the product you are presenting, pricing, lead times. A potential client will want to know more than just the visual aspects.”
“Your presentation should be flawless, detail-oriented, and professional,” urges Richard Ouellette, president of Canadian design firm Les Ensembliers . “The packaging is as important as the product. It is your entry ticket to making [the client] feel important and at ease and that they have chosen the right person even before you have presented any ideas.”
Ouellette offers additional tips: “Understand and organize your presentation. You want to inspire them, so make sure you have a clear idea of what you are proposing. Present your portfolio or body of work first. If it’s a full design presentation, start with layouts, then inspiration. Explain what you feel works for their space with your images, move to hard surfaces, then soft, and lastly product.”
Curate the material
“The goal is to present a cohesive idea and give plenty of options without overwhelming the client,” says Mark Cunningham , founder of his 15-year-old namesake New York design firm. Outlining how to offer the information in a digestible format, he says:
“Everything you’re showing should be for something specific—shapes for the furniture in each room on your floor plan, fabrics for pillows or drapery, lighting fixtures for specific locations.”
“Show a range of options so your client can rule out what they don’t like. Negative comments are just as productive to you as positive ones.”
“Put care into how you present. It should be neatly organized. And fresh flowers and natural light never hurt.”
Show, don’t tell…
“The more a client can see and feel before buying, the more successful you will be in designing a space they love,” Cunningham explains. “I use mood boards to convey my concepts. I find they’re a great tool to begin the conversation about how the client envisions their home.” He also suggests getting samples of everything you’re proposing—from fabrics and finishes to hardware and plumbing. “Even get furniture prototypes if you can,” he adds.
Ouellette suggests that the components of a winning presentation include the following: the perfect layout, with options; inspiring reference images that can be translated to their home; detailed drawings and designs that function; and aspirational and accessible materials and finishes.
…But don’t reveal all your cards
How do you share your vision with potential clients without having it stolen? “Skill and practice,” advises Sanchez. “You don’t show all your cards when you are playing poker. So why would you share your shopping list without a contract and payment? Share enough to make sure they are asking for more.” She adds, “A presentation is meant to propose your vision, not your product numbers. I don’t share vendor information during initial presentations.”
Ouellette admits that he trusts in karma when it comes to stealing ideas. “I believe it starts with the screening process of the potential client: If you establish a good and trustworthy connection, you have a better chance to get to the end,” he says. “But believe me, the ones that take your idea and run are usually the ones that you are better off running from, and it’s much better to know at the beginning than at the end.”
Exude confidence—to a degree
But don’t be smug, urges Ouellette. “Feel great about what you’re presenting. Believe in the design concept and that the products you are sharing are the right ones for the job,” offers Sanchez. “If you don’t believe in yourself and your ability to execute the project you are proposing, your potential client will see right through you.”
Ouellette says, “Go in with passion and an open heart. Be real. You start from a stronger place. Be humbled. Remember it’s their home and money, not yours. No one wants to work with a diva.”

By Valentina Raggi

By Jesse Dorris

By Lori Keong

By Alia Akkam
Got any suggestions?
We want to hear from you! Send us a message and help improve Slidesgo
Top searches
Trending searches

suicide prevention
8 templates

computer network
75 templates

spring season
28 templates

cybersecurity
6 templates

46 templates

18 templates
Architecture Presentation templates
Build your own successful presentation with the use of these free nicely designed templates about architecture. work in google slides or download them as ppt files to customize them in powerpoint or keynote..

Spring Cleaning Tips!
Download the "Spring Cleaning Tips!" presentation for PowerPoint or Google Slides and start impressing your audience with a creative and original design. Slidesgo templates like this one here offer the possibility to convey a concept, idea or topic in a clear, concise and visual way, by using different graphic resources....

Construction Project Proposal
Are you an architect? Do you like designing new buildings and supervising their construction? If you need to present a project proposal related to the construction industry, let Slidesgo help you with your slide deck.

Architecture Studio
Designing new offices, skyscrapers, stadiums, bridges and any other kind of building is what architecture studios are about. Help spread the word giving a professional presentation thanks to this new free company profile template, totally customizable, formal and nicely designed.

Traditional German Architecture
Get ready to dazzle the thesis committee with this Slidesgo template. It's perfect for you if your research is related to German architecture. We have included illustrations and images of typical buildings from the Central European country. Its design is elegant, with white background and wave shapes in brown tones....

Environmental Impact of Residential Areas Construction
Download the "Environmental Impact of Residential Areas Construction" presentation for PowerPoint or Google Slides. The world of business encompasses a lot of things! From reports to customer profiles, from brainstorming sessions to sales—there's always something to do or something to analyze. This customizable design, available for Google Slides and PowerPoint,...

Residential Planning Consulting
Download the "Residential Planning Consulting" presentation for PowerPoint or Google Slides. Your business demands smart solutions, and this consulting toolkit template is just that! This versatile and ingenious toolkit will provide you with the essential tools you need to shape your strategies and make informed decisions. Whether you are devising...

Daily Routines and Personal Hygiene - French - 6th Grade
Download the "Daily Routines and Personal Hygiene - French - 6th Grade" presentation for PowerPoint or Google Slides. If you’re looking for a way to motivate and engage students who are undergoing significant physical, social, and emotional development, then you can’t go wrong with an educational template designed for Middle...

Premium template
Unlock this template and gain unlimited access
Construction Engineering Business Plan
Do you need to bring order to your enterprise? If you answered yes, we have the solution for you: a business plan! This document is key to the good health of your company. In it you can always have at hand the market analysis, develop the operations plan, define marketing...

Architecture Major for College: Landscape Architecture
Floor plans, rough lines, numbers and rulers… We’re talking about architecture! You can speak about this major with photos of awesome buildings and floor plans to inspire future architects! The soft colors with a pop of color green will make your presentation seem so professional and attractive. Write down all...

Real Estate Open House Website Design
Come on in! It’s time to show everyone this house! When you're ready to show off your property, you want it to look its best. With a Google Slides or PowerPoint template presentation, you can create an engaging and inviting virtual open house experience for potential buyers. And with the...

Construction Projects and Activities for Pre-K
Pre-K students are fascinated by construction work and construction equipment, and this template full of projects and activities takes advantage of this fact to help you put together a great lesson! Its colorful design is full of illustrations of people in hard hats and all the tools needed to design...

Rural and Urban Areas
Download the "Rural and Urban Areas" presentation for PowerPoint or Google Slides and start impressing your audience with a creative and original design. Slidesgo templates like this one here offer the possibility to convey a concept, idea or topic in a clear, concise and visual way, by using different graphic...

Architecture and Environmental Design Major for College
Why are cities built the way they are? It's probably due to environmental design, combined with architecture. Sounds like a headache? For us, it sounds like a great degree to study! If you agree with us, download this template and prepare future students for what's to come! What will they...

Architectural Studies Degree for College
Attention! Dedicated template for all architects in the room! Slidesgo brings you this professional style design for you to make a presentation about Architecture university studies. This template fits perfectly with the theme, as it is full of isometric illustrations of buildings. Super cool! Also, at the end of the...

Civil Construction Company Profile
Download the "Civil Construction Company Profile" presentation for PowerPoint or Google Slides. Presenting a comprehensive company profile can be a game-changer for your business. A well-crafted profile connects with potential clients and vendors on another level, giving them a deep understanding of your organization. This company profile template can help...

Civil Engineering Safety
Download the "Civil Engineering Safety" presentation for PowerPoint or Google Slides. The world of business encompasses a lot of things! From reports to customer profiles, from brainstorming sessions to sales—there's always something to do or something to analyze. This customizable design, available for Google Slides and PowerPoint, is what you...

Architect Infographics
Download the "Architect Infographics" template for PowerPoint or Google Slides to get the most out of infographics. Whether you want to organize your business budget in a table or schematically analyze your sales over the past year, this set of infographic resources will be of great help. Start using infographics...

Engineering Project Proposal
What is the best way to build your own successful future? Giving a presentation made thanks to our new free business template! Your audience will appreciate your engineering project proposal, paving the way for new deals and investments.
- Page 1 of 19
New! Make quick presentations with AI
Slidesgo AI presentation maker puts the power of design and creativity in your hands, so you can effortlessly craft stunning slideshows in minutes.

Register for free and start editing online

Create moving, zooming presentations that grab attention and keep it.

Appear right alongside your content while presenting to your audience.

Make stunning interactive charts, reports, maps, infographics, and more.
You're about to create your best presentation ever
Floor Plan Presentation Template

Floor Plan Presentation
Transcript: The bed I have in my room is an average sized single bed, with some very fabulous polka-dot design on it. The reason i chose such a cool yet warm design pallet was to make my room more of a comfortable environment for me to reside within.My bed is by far the most major part of my current life, so of coarse it needs to be perfect. Floor Plan Presentation Bed By: Jaafar Elkhalifa add logo here

Transcript: Timeline Development Stages Introduction This section will provide an overview of the house's floor plan, focusing on the distribution of space and square footage. Initial planning and layout design Construction and structural development Completion and handover to the homeowner Interior design and finishing touches Final inspection and quality assurance Floor Plan Presentation Architectural Features Understanding the Structure and Square Footage The architectural features of the house merge form and function, showcasing a blend of modern design and practicality. Interior Design The interior design reflects a cohesive style, harmonizing elements of comfort, sophistication, and individual expression. Room Distribution The distribution of rooms in the house reflects a well-planned layout that optimizes space and functionality. Living Room The living room serves as the central gathering space, designed for comfort and entertainment while maintaining a seamless connection with the outdoor area. Conclusion The floor plan presentation provides a comprehensive understanding of the house's structure, emphasizing functional elegance and thoughtful design. Space Utilization Details Details The utilization of space within the house emphasizes versatility, efficiency, and aesthetic appeal, contributing to a harmonious living environment. Details Details

Transcript: Floor Plan Presentation Taylor Whitis, Alan Barajas, Derian Hendricks Bedrooms Kitchen, Dining room, & Pantry Living Room & Closets Flooring cost for entire house: $5211.84 Skills Gained: Taylor: Learned how to use Floor planner Derian: Improved working with my Area & Perimeter skills. Alan: Improved working with linear expressions. Official Blue Print The End. Perimeter: 26 Ft. Area: 80 Square Ft. Flooring: Vinyl Tile Flooring Cost:$394.40 Bathroom Office, Laundry Room, Bathroom & Hallway Bedroom #1 Dining Room Closet #1 Pantry Laundry Room Bedroom #2 Perimeter: 36 Ft. Area: 80 Square Ft. Flooring: Carpet Flooring Cost: $267.20 Perimeter: 36 Ft. Area: 60 Square Ft. Flooring: Carpet Flooring Cost: $200.40 Living Room Perimeter: 40 Ft, Area: 100 Square Ft. Flooring: Carpet Flooring Cost: $334.00 Kitchen Perimeter: 32 Ft. Area: 60 Square Ft. Flooring: Marble Tile Flooring Cost: $444.60 Perimeter: 31 Ft. Area: 155 Square Ft. Flooring: Carpet Flooring Cost: $517.70 Hallway Perimeter: 32 Ft. Area: 60 Square Ft. Flooring: Hard Wood Flooring Cost: $426.00 Perimeter:44 Area:120 Flooring: Carpet Flooring Cost: $400.80 Perimeter: 34 Ft. Area: 66 Square Ft. Flooring: Carpet Flooring Cost: $220.44 Perimeter: 40 Ft. Area: 100 Square Ft. Flooring: Marble Tile Flooring Cost: $815.10 Perimeter: 42 Ft. Area: 110 Square Ft. Flooring: Carpet Flooring Cost: $367.40 Office Closet #2 Perimeter: 32 Ft. Area: 60 Square Ft. Flooring: Vinyl Tile Flooring Cost: $295.80 Perimeter: 46 Ft. Area: 132 Square Ft. Flooring: Carpet Flooring Cost: $440.88 Master Bedroom

Transcript: Home Exterior Porch Dimension: 10"8' Material: Granite Master Bathroom Extirior (Porch/Patio) Dimension: 17" 15' Light Fixture Price: $25.99 Wall Paint Color: Light Brown Floor Type: Wood Master Bedroom Bathrooms:2 Bedrooms:3 Dimension: 12 by 10 Material: Stone,Tile, & etc. floor Plan By : David j. Heated Heated sqft: 2,322 Sink Brand: whirlpool Cost: $115.99 Interior of Home Kitchen Fridge Brand: Whirlpool Cost: $699.99 ~Material: Brick & stucco ~website for Info: www.floorplans.com ~Floorplan title/description: Handsome Cfraftsman Ranch With Great outdoor space. ~Total House sqft: 2,578 Number Of Stories: 2 floors dishwasher Brand: Whirlpool Cost: $459.99 Stove/oven Brand: Philips Cost: $589.99

Transcript: Verizon 5 GB per person, unlimited talk and text Cost for three years: $1800 Office Business Essentials Total Cost: $600 Laptops Actual Floor Plan Printers (5) Microsoft Lumia 640 ($59.99) AT&T U-Verse Cost for three years: $3600 Includes enough data & speed to provide free wi-fi for customers Internet Front Desk: Dell Inspiron - Touchscreen Laptop ($399.90) Employee Computers - (5) HP Pavilion x2 Laptop ($249.99) Floor Plan Presentation Router: OnHub AC1900 ($199.99) Work Area: Canon Image Class Printer ($1,295) Total: $9,743.72 Below budget by: $256.22 Front Desk: HP Officejet Pro 8100 ($149.99) Phones Internet Connection Devices (LAN) Extras for Computers Phone Plan Total Cost Modem: VDTV2-BLOODVDSL2 LAN Extender ($149.00)

Transcript: Living room Kitchen Rooms Bathrooms Outro of floor plans Introduction to Floor Plan A floor plan is a a scale diagram of the arrangement of rooms in one story of a building. Features of map floor plans are important to making building and places like schools, houses, and workplaces. Christian Gutierrez Scivis 1 Mr Ngoma 2015-2016 Sizes Specific rooms Items in Rooms Ability's Entrances/Exits Structure of Floor Plan Floor plans are essential when designing and building a home. A good floor plan can increase the enjoyment of the home by creating a nice flow between spaces and can even increase its resale value Purpose of Map Floor Plan

Transcript: Fig. 5 Floor Plan CT Scan Graphic Sign Elevations Nursing Station Operation Room Family Meeting Room Fig. 1: Le blog - connecsens. (2015, August 04). Retrieved April 10, 2016, from http://www.connecsens.com/index.php/le-blog Fig. 2: CrystEngComm. (n.d.). Retrieved April 10, 2016, from http://pubs.rsc.org/en/content/articlelanding/2011/ce/c0ce00971g#!divAbstract Fig.3: Skeletal muscle. (n.d.). Retrieved April 09, 2016, from https://en.wikipedia.org/wiki/Skeletal_muscle Fig. 4: 500 illustrations and clipart. (n.d.). Retrieved April 10, 2016, from http://www.canstockphoto.com/illustration/500.html Fig. 5: Pin - #anatomia - anatomia. (n.d.). Retrieved April 10, 2016, from http://www.taringa.net/mi/pin/#anatomia Fig. 4 Diagnostic Imaging Perspectives Elevator Entrance Welcome to The Strength & Stability Hospital! Concept By: Monique Carroll & Alessia Fontana Common Areas Main Elevator Entrance Nursing Station Surgical Department Corridor Diagnostic Suite Sketches Main Corridor Patient Room Scrub Station Surgical Suite Elevations Fig. 1 Nurse Station Fig. 3 Ultrasound Room The Strength & Stability Hospital design concept is created around the human bodies muscles and bones. The Surgical Department is based around the muscles and the Diagnostic Imaging Department is based around the bones. The design concept reflects the colour, shapes, and make-up of each of the human bodies element. We would like to encourage you to view our final designs for the Strength & Stability Hospital and we hope you enjoy the space. Graphic Sign Elevation Surgical Suite Patient Room Nurse Station Patient Room Diagnostic Suite Elevations Plans Operating Room Reception Area That concludes our presentation of the Strength & Stability Hospital. Before you go please feel free to view and touch the materials for the hospital, and look at our model of the space. We hope you have enjoyed our designs for the Strength & Stability Hospital. Thank You! Surgical Suite Sketches References Diagnostic Suite Reception RCP Pre-Operation Area Patient Room Waiting Area Fig. 2 Patient Room Elevations Pre/Post Op

Transcript: Floor Plan fittings, fixtures, furniture Room Plan Sketch Up drawings Jacqueline Lee - Technology Presentation Site Plan Floor Layouts colour schemes and paint choice Final technical drawing Final Outcome
Explore our templates for more presentation inspiration

Best Creative Resume Templates to Customize | Prezi
Description: Stand far above the stacks and stacks of flat, boring resumes on any hiring manager’s desk with a Prezi resume template. Just customize this Prezi presentation template to create your very own “Prezume” and impress them with your dynamism, coolness, and originality.

Grant Proposal Presentation for NonProfit & Education | Prezi
Description: For grant requests, program proposals, or any other kind of nonprofit or education presentation, this graphite drawing-inspired creative Prezi template is the way to generate interest. Like all Prezi education templates and Prezi nonprofit templates, it’s easy to customize.

Report - EDU
Description: If you work in education, make your next report visually interesting and easy to navigate. The line-drawn illustrations in this edu report presentation template encourage curiosity and discovery.

Lesson Plan - Board
Description: A well-organized lesson plan is the difference between getting things done and things getting out of hand. This vibrant, customizable, easy-to-use Prezi presentation template features a sticky note theme, so you'll be able to keep track of topics, assignments, exams, and more without missing a beat.
Now you can make any subject more engaging and memorable
- The Science
- Conversational Presenting
- For Business
- For Education
- Testimonials
- Presentation Gallery
- Video Gallery
- Design Gallery
- Our Customers
- Company Information
- Prezi Support
- Prezi Classic Support
- Hire an Expert
- Data Visualization
- Infographics
April 18, 2024
April 16, 2024
April 13, 2024
- Latest posts
© 2024 Prezi Inc. Terms
Floor Plans With Dimensions
Cedreo’s easy to use online design tool helps bring your floor plans to life for amazing client presentations.
Create Dimensional Floor Plans in Minutes
With Cedreo, you can create easy-to-read professional floor plans in minutes. Draw plans from scratch or upload an existing plan. Move or add walls, and Cedreo will automatically update your floor plan measurements. Add furnishings and textures to help clients visualize how the project will look when complete.

Draw Floor Plans with Dimensions With Ease
Cedreo is the go-to platform for home builders, remodelers, and interior designers for drawing and rendering complete floor plans. It’s never been easier to create dimensional floor plans, all online. Bring your designs to life in 2D and 3D for the most professional client presentations every time. Plus, do it all in just a matter of minutes. Your design time is valuable, so let us help you make the most of your projects and deliver first-class results.
Floor Plan Dimensions in One Pla ce

Why You Need Floor Plans with Dimensions

Floor Plans with Dimensions Examples
How to Read A Floor Plan with Dimensions
How to Draw a Floor Plan with Dimensions

Floor Plan with Dimensions FAQs
Every Floor Plan Dimension in One Place
Floor plan dimensions are necessary to plan, design, and complete new construction and remodeling projects. Cedreo’s floor plan software helps you create floor plans with every dimension you need.
Meters vs Feet
Cedreo has users around the world, which means it’s important we offer both imperial and metric dimensions options. If you work with foreign clients you may also need to switch between meters and feet, and with Cedreo that’s easy to do.

Configure Measurements
Inside and outside measurements differ to create overall dimensions and actual liveable space. Both measurements are needed for different things. You can add all the dimensions, or just include the ones you wish to see.

Calculate Total Area
Calculating total area, as well as specific rooms, helps designers create functional, useable space. With Cedreo’s easy surface area table you are able to view the total area of a floor, room, or entire house.

Why Do You Need Floor Plans With Dimensions?
There are many reasons that adding dimensions to floor plans is beneficial. Here are a few examples:
Property Sales & Marketing
If clients are unable to visit the home, or the home isn’t complete yet, they may have trouble visualizing the space. Sharing detailed floor plans with dimensions can help clients understand the space and close deals.
Close Remodeling Sales
It’s often hard for homeowners to understand the ins and outs of a remodel. Detailed floor plans with dimensions help clients visualize what the added square footage will add to their current home.
Communicate Measurements
Many people are involved in construction and remodeling projects. Floor plans with dimensions help easily and effectively communicate the project details to everyone from designers to contractors.
Calculate Areas
Once dimensions are added to floor plans, Cedreo’s area table automatically updates to show you the total area as well as the area per room. This helps clients plan furniture decisions, calculate ventilation and materials needed, as well as resale value.
Avoid Costly Mistakes
Knowing the dimensions and area of everything from the walls to countertops helps avoid overordering materials, ordering the wrong size appliances, and more.
Building Permit Requirements
Major building and remodeling projects require building permits. Often to receive these permits you will need to submit a floor plan with dimensions.
Examples of Floor Plans With Dimensions
Give your clients the most professional presentation you can. Help them visualize the final project through Cedreo’s easy floor planning software. Impress clients with 2D and 3D floor plans with dimensions that will bring your design and their vision to life.

Complete house floor plan with dimensions

Master bedroom floor plan with dimensions

Living room floor plan with dimensions

Bathroom floor plans with dimensions
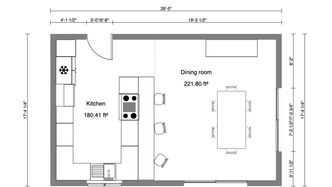
Kitchen floor plans with dimensions

Patio floor plan with dimensions

Apartment floor plans with dimensions

Multi-level floor plans with dimensions

Commercial floor plans with dimensions
How to Read A Floor Plan With Dimensions
Floor plans with dimensions can feel overwhelming at times. Here is a few ways to read detailed floor plans with dimensions.
Floor Plans to Scale
Drawings are done to scale. Standard fractions are used in relation to the actual size of the project.

Site Plan Dimensions
Creating a full site plan with dimensions shows the dimensions/area of the entire plot as well as the buildings on the property.

Total Home Area
Calculate the total area of the home in imperial or metric measurements.
Ceiling Heights
Add dimensions to show the ceiling heights on each floor to determine window and door openings.

Room Dimensions
Detailed floor plans so the dimensions and areas of each room, including areas within open floor plans.

Layout Features
Dimensions on appliances, kitchen and bath components, as well as doors and windows to ensure everything fits correctly.
How to Draw a Simple House Floor Plan With Dimensions
A simple floor plan with dimensions is a basic layout of a home, but there’s no reason not to make it a stunning and detailed visual presentation. Cedreo gives you the tools you need to easily create feature-rich floor plans that will make your clients happy.
Step #1: Start From Scratch or Import an Image
Create your floor plan by drawing from scratch or uploading an existing floor plan with your house dimensions. You will have the ability to resize the floor plan, and even enlarge or reduce walls. Just draw right over an existing floor plan to get it ready to customize. With continuous drawing mode, it’s easy to draw walls and make changes in real-time.

Step #2: Draw Walls and Add Openings
The next thing you will want to do is add the inner walls to divide the large area into rooms. A good rule of thumb is to start with the largest room in the house and build the other rooms off of it. Once levels and internal walls have been added, the next step is to insert wall openings, such as doors and windows, from the Cedreo product library. Use the software to duplicate wall openings and keep dimensions accurate. Drag and drop doors into place, and the 3D view will update in real-time to reflect the additions.

Step #3: Add the Roof
The Cedreo online design tool allows users to add a roof automatically, based on the exact dimensions of the building levels. You can choose from several different roof types, including multi-slope, gable, single-slope, or flat roofs. Then, using the roof automation tool, add a roof in just one click. Add features like dormers, downspouts, and gutters. Once you add one piece of guttering, Cedreo can automatically add the rest with a single click.

Step #4: Add Dimensions
Easily customize room sizes, activate or deactivate floor plan measurements, or move them within your plan, all during the planning step. You can even decide what dimensions to show on your plan when it’s rendered for presentation to your client. Color-code sections of the floor plan and add furniture and appliance symbols to make the 2D floor plan even easier to read.

Step #5: Add Furnishings
Instead of drawing furnishings individually, just search Cedreo’s 3D library of over 7,000 customizable pieces of 3D furniture, appliances, decorative objects, and surface coverings, and then add them to each room. We even offer an anti-collision feature that stops you from accidentally placing items on top of each other when adding them to the plan.

Step #6: Make Final Customizations
Review your designs and make any necessary changes before rendering your final plan. (Remember: You can save several versions of a floor plan if you want to present different options for a client). Have peace of mind knowing that changes are quick and easy to make if needed.

Step #7: Finalize Your Area Table
The last step in creating a floor plan with measurements is to finalize the area table on the drawing. Decide which parts of each level are to be included in the home’s overall calculations and if you want to customize the dimensions of any areas. Just select which house floor plan dimensions to include in the final plan.
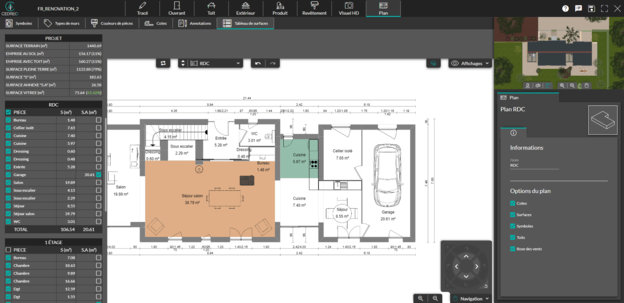
Floor Plans With Dimensions FAQs
Can i hide and edit dimensions on the floor plan.
Yes. You can add, hide, and edit any dimensions you need on your floor plan in Cedreo’s floor plan software.
Can I add interior and exterior dimensions?
Yes. You can add interior and exterior dimensions, as well as site plan and exterior object dimensions.
Do I need dimensions to plan my interior layout?
You don’t need dimensions to plan your interior layout, but it does ensure that materials are ordered correctly and that appliances, features, and furniture fit within the space.
How Do I Calculate Square Footage?
Calculating a floor plan with dimensions can be time-consuming, but the best way is to measure the width and length of every room, then multiply those to calculate the area. Cedreo does it for you with a surface area table that includes dimensions for each room on the floor plan and total area calculations for internal and external.
Create Dimensional Floor Plans Online in Minutes

Floor Plans for Houses: Everything You Should Know

The process of building your dream home starts with a lot of planning and implementation. And one integral part of the whole planning process is a floor plan .
With a floor plan, you will have a realistic view of what your building or house will eventually look like (especially the interior) when it's completed.
So, whether you’re planning to build a house, renovate your old home or even revamp the interior part of your home to have a new design or look, a floor plan is essential to enable you to have a successful project.
For this reason, this article has been written to expose you to all you need to know about floor plans for houses.
Once you’re done reading, you’d have been well-informed about what a floor plan is all about, particularly if you intend to have one for any housing project.
What are Floor Plans All About?
Floor plans are the visual representation or display of houses from above. They are used to show or illustrate the key elements of any house. Such elements include windows, kitchen , doors , stairs, and other major furniture found on the floor of a building project.
In other words, floor plans are manual or digital architectural drawings that depict what the floor of buildings or houses will look like once they are built. They can also be described as orthographic projection drawings that help to give a vivid description of buildings and their surroundings.
It is pertinent to note that, unlike site plans, floor plans are often concerned with the interior design of a building project.
Floor plans are used by various building professionals like interior designers , real estate developers, home builders, remodelers, architects , home designers, among others. It serves as a layout or template that these professionals can show their clients whenever they decide to work on any building or construction project. It equally helps them to bring the vision of the client's ideal home to reality.
Benefits of Having a Floor Plan
- It helps you visualize and understand the type of job your building professional will carry out before the project starts
- It helps to give a realistic and precise appearance of the interior space planning of your house to ensure that it perfectly fits your desires or lifestyle
- It assists in communicating different floor information to you in a clear, attractive, and detailed manner through 2D and 3D presentations
- It helps to show a detailed and accurate layout that will enable you to understand what your building will turn out to be while helping you be sure of the type of job that will be executed
- A floor plan will enable you to have a functional and practical space to work with, particularly when pieces of furniture are included
- It is used to illustrate newly built homes, plan home renovation and home improvement projects , sell a home , and create a real estate listing
- It helps real estate professionals seal deals or contracts on time with their clients because clients are usually interested in seeing a plan before commencing any housing project
- It helps to show the relationship between spaces and rooms and how you can navigate the house
Types of Floor Plans
Contemporary floor plans.

When it comes to modern home designs , the contemporary floor plan is what you should look out for. This type of plan has minimal walls and can enable you to have more space to work with as one room directly leads to the next without a barrier.
For instance, you can eliminate the walls between the kitchen and living room , enabling you to easily know what's going on in the kitchen while you're in the living room and vice versa.
This type of plan is becoming more popular in today's world because of the open space and opportunities for better family bonding it provides.
- It enables more natural light into the house
- The bigger space makes it easier to move around the house
- Due to its modernity and popularity, it's easier to sell on the real estate market
- It creates little or no privacy in the house
Traditional or closed plans

Unlike the contemporary floor plans, these plans have more walls, which help to partition different rooms. Their spaces are pretty normal, while the walls help separate one room from another, like the bedroom from the living room.
- It gives room for privacy
- The walls help to enable a better insulation system to reduce energy bills
- It gives you the liberty to design each room differently without mismatching colors
- The walls make small rooms appear larger , especially if it's just one person occupying them
- It’s relatively expensive to build
Custom floor plans

A custom floor plan is a bespoke type of floor plan that you intend to create for yourself. It involves working with your builder or architect to create your plan from scratch by navigating catalogs of different homes and tailoring them to your personal needs or taste.
With this type of plan, you have the liberty to choose fixtures, rooms, materials, styles, colors, among other features you wish to include in our house.
Forms of Floor Plan Presentation/ Representation
Floor plans are majorly presented in three ways. They include the following;
This usually comes in the form of a blueprint, sketch, or computer drawing. It shows the overall layout of the house interior from above.
A 2D representation is mostly considered a technical type of floor plan presentation because it is a flat, plain drawing without depth or perspective that shows the various measurements of the spaces in a house. Also, it does not provide a real-time image of the floor.
Due to its technical nature, it is usually presented to clients with 3D representation for better understanding.
3D is the most visually appealing and popular way of presenting a floor plan. It helps to display the height and perspective of the house and gives more detail that is easily comprehended.
Here, you will easily spot where the doors, windows, rooms, and furniture are located in the house through virtual reality mode.
Even though it is costlier to make compared to 2D, it gives a better user experience that makes its usage worthwhile.
Live 3D is similar to the 3D representation, but it's more advanced because it gives you a virtual tour of the house. It is a very realistic representation that brings your floor plans and home designs to life while giving you a virtual 3D walkthrough.
Factors to Consider before Drawing/Designing a Floor Plan
1. structure or layout.
One of the foremost things to put into consideration before drawing a floor plan is a layout. Whether it's a ready-made or bespoke plan, you must ensure that the layout is functional and practical to work with.
Do you wish to go for a contemporary or traditional floor plan ? Or do you prefer a modern custom-made plan? Whatever type of plan you decide to go for must be implementable as you work with your builder to achieve a successful result.
2. Lifestyle
Among the things to consider adequately during the cause of planning is the lifestyle of the client. The type of job, personality, or activity that the client performs daily will influence the floor plan of the house. Is the client a fitness enthusiast? If so, then a gym should be incorporated into the plan.
In the same vein, a client who works from home should have a home office entirely separated from other rooms in the plan.
3. Family size
What kind of family is planning on living in the house? Is it extended or nuclear? How large is the family? These, among other pertinent questions, must be answered when designing a floor plan.
4. Functionality and versatility

A functional and versatile floor plan will go a long way in aiding a successful house makeover when the need arises. For example, a gym can easily be converted to a study and a bedroom into a home office if the floor plan is versatile enough.
The amount of space available for the plan is another crucial factor to consider. A good floor plan must work effectively with the limited space available without causing clusters in the house.
6. Furniture
When the pieces of furniture for the house are already available, it will most likely determine how to design the plan. Therefore, you should consider furniture during planning to ensure that every piece perfectly fits the places they are meant to be.
The available budget will absolutely determine the possibility of successfully implementing a floor plan. If you wish to go for a luxurious house plan, you must prepare to spend higher on the plan and implementation.
Get Your Floor Plan
There is no quality building project that doesn't require planning. Having a good floor plan for your house will go a long way to prevent you from making any mistakes during construction. It will also help to effectively make your home more organized and aesthetically appealing after it has been built.
Recommended Articles

What is an Epoxy Floor?
Epoxy flooring is a synthetic material made of resin and hardening agent, forming a durable, glossy coating applied to concrete substrates.

What is the Difference between a Villa and a House?
While both villas and homes provide the basic need for shelter, the distinctions between them are in their architectural styles, locations, available space, and amenities.

What is the Concept of a Villa?
Villas are known for being a symbol of luxury and primarily feature lots of space, large landscaped lawns, high-end amenities, and open floor plans.

Building a Villa
To build a beautiful villa, define your needs clearly, choose a suitable location, and plan a realistic budget that allows you to work closely with an architect and other construction professionals.

Updating a Kitchen
To update your kitchen, consider painting cabinets and walls, swapping in new hardware, adding new lighting, choosing new floor tiles and backsplash, and incorporating stylish accessories like artwork and shelving.

What to Know Before Choosing Concrete
By multiplying the length, width, and height of a planned structure, the volume of concrete required for construction can be determined.
New House Plans
Bills of quantities minimum, structural drawings minimum, mechanical drawings minimum.
- floor plan design
- floor plans for houses
- floor plans open concept
- What is a complete floor plan?
About Company
- Frequently Asked Questions
- Terms and Conditions
- Privacy Policy
- Terms of Service
- Refund policy
Subscribe to our newsletter!

Connect With Us
Copyright © 2024 Maramani House Plans Ltd.
Architectural Design Series
Rendering a floor plan in concepts.
Learn how to scale and render a floor plan in Concepts with Architect Osama Elfar.
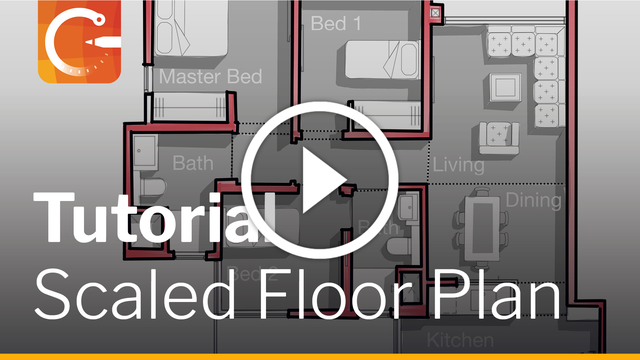
Watch the video on YouTube . Read below for additional insights by Osama Elfar along with tutorial details, tips and brush settings from the video.
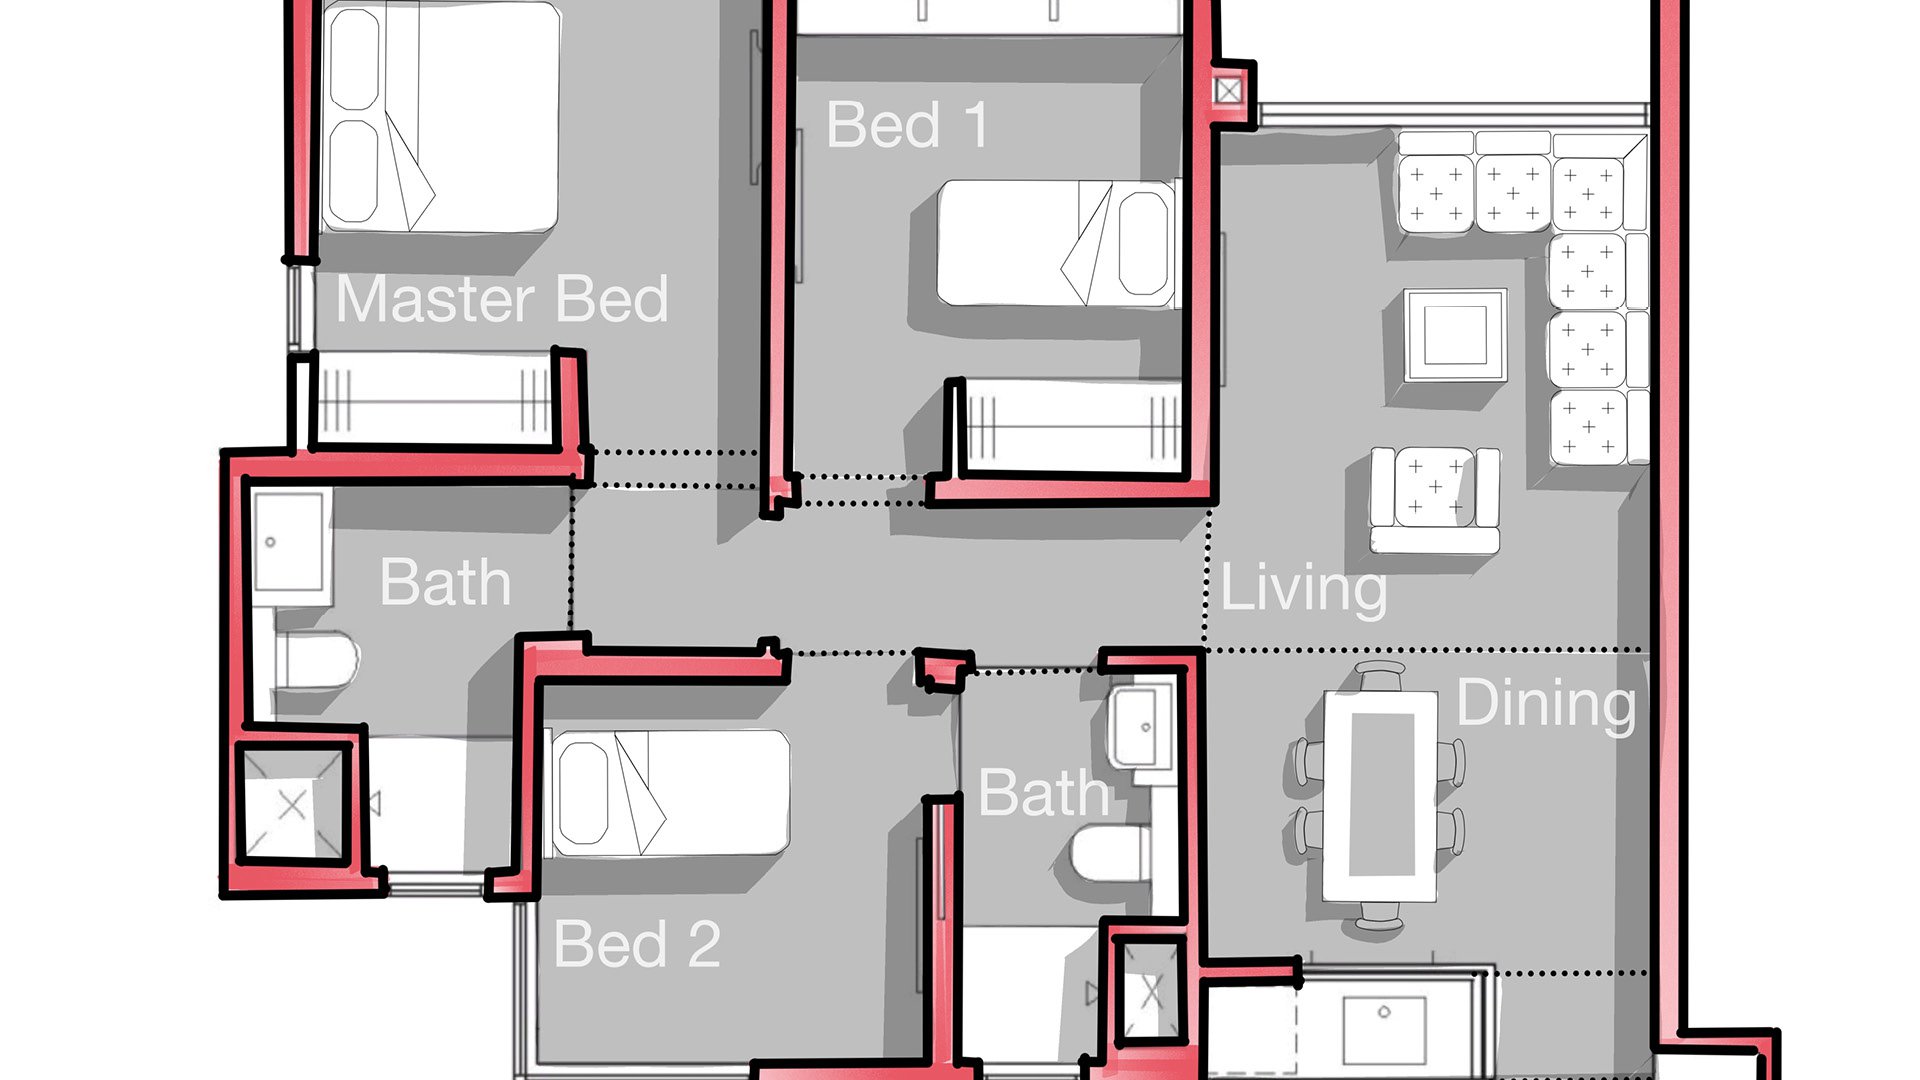
1. What is your creative process like for creating your initial floor plans for a client?
Once I have a specification from our client meeting or receive the project brief, I will translate the client's requirements into drawings. I begin working on the plan by using a bubble diagram for spaces. This allows me to study the connection between them. Then I'll draw with single lines to test if the required dimensions will work, and add more details to the floor plan. Once the client and I are ready for more detailed drawings, I'll move on to using AutoCAD to finalize the plan.
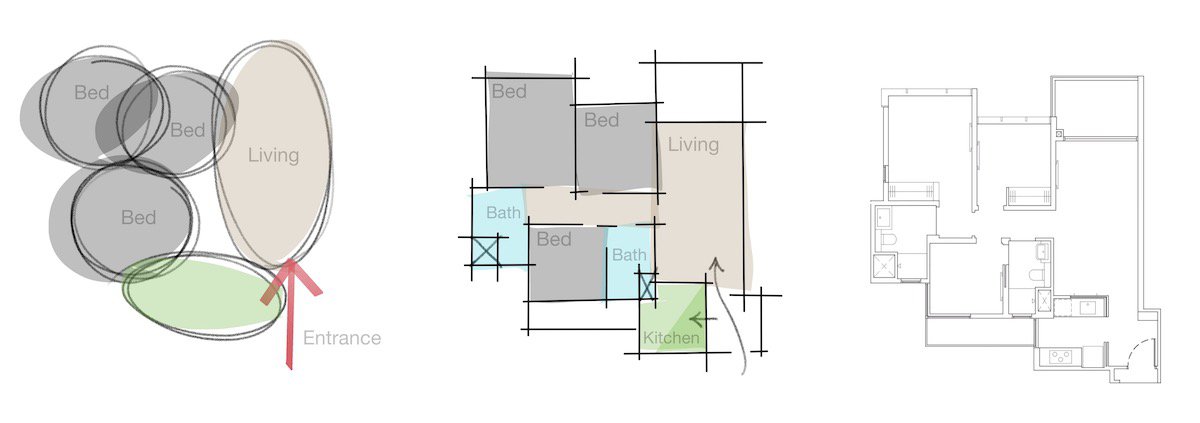
2. How does your coloring / rendering process sell your architectural solution to the client?
Coloring the floor plan is an important step. It helps the client who usually doesn’t have an architectural background to understand the project. They can imagine the spaces and dimensions and see how the furniture will fit.
The hard part in this step is when the client asks for modifications. As an architect, you head back to the office to modify the drawings, knowing the client expects to receive the same quality drawing as the first submission. The best way is to find a quick method to color in the floor plan. This helps the client understand that his project is given full attention.
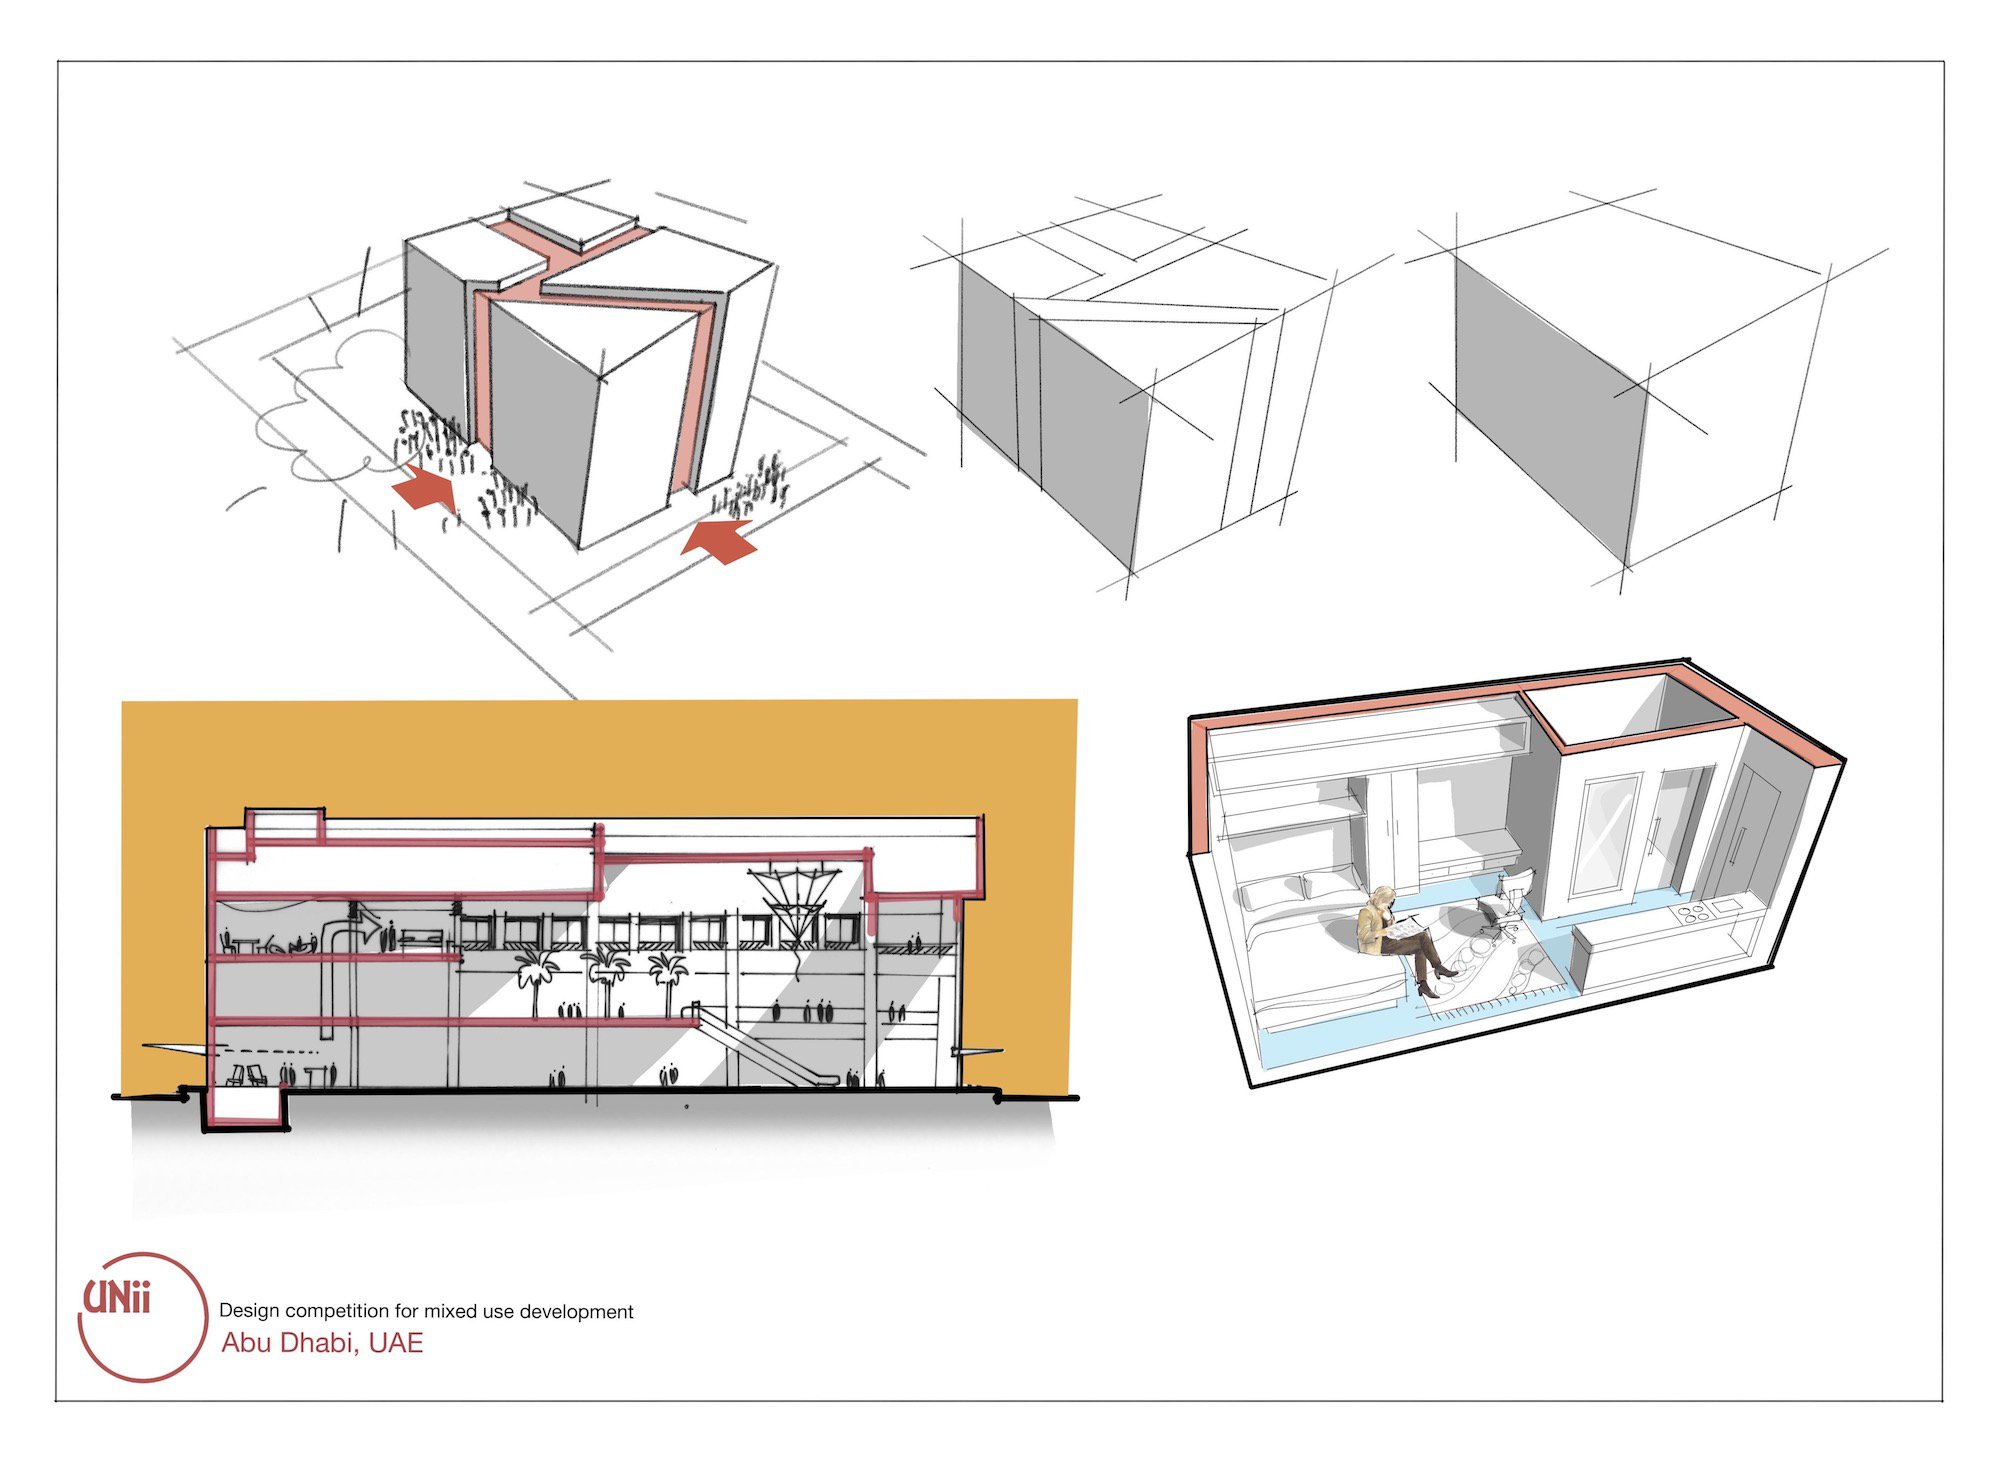
3. How do you export and use the finished floor plan?
Usually I export PDF files, which is a flexible format to send by email, print hard copy or present on screen.
I have a tip here which saves some time. When I start a project, the first thing I do is create the project sheet. This is a drawing template displaying the company logo and project name. I use it for each of my Concepts drawings, so that I am ready at any time to share the progress in a presentable way.
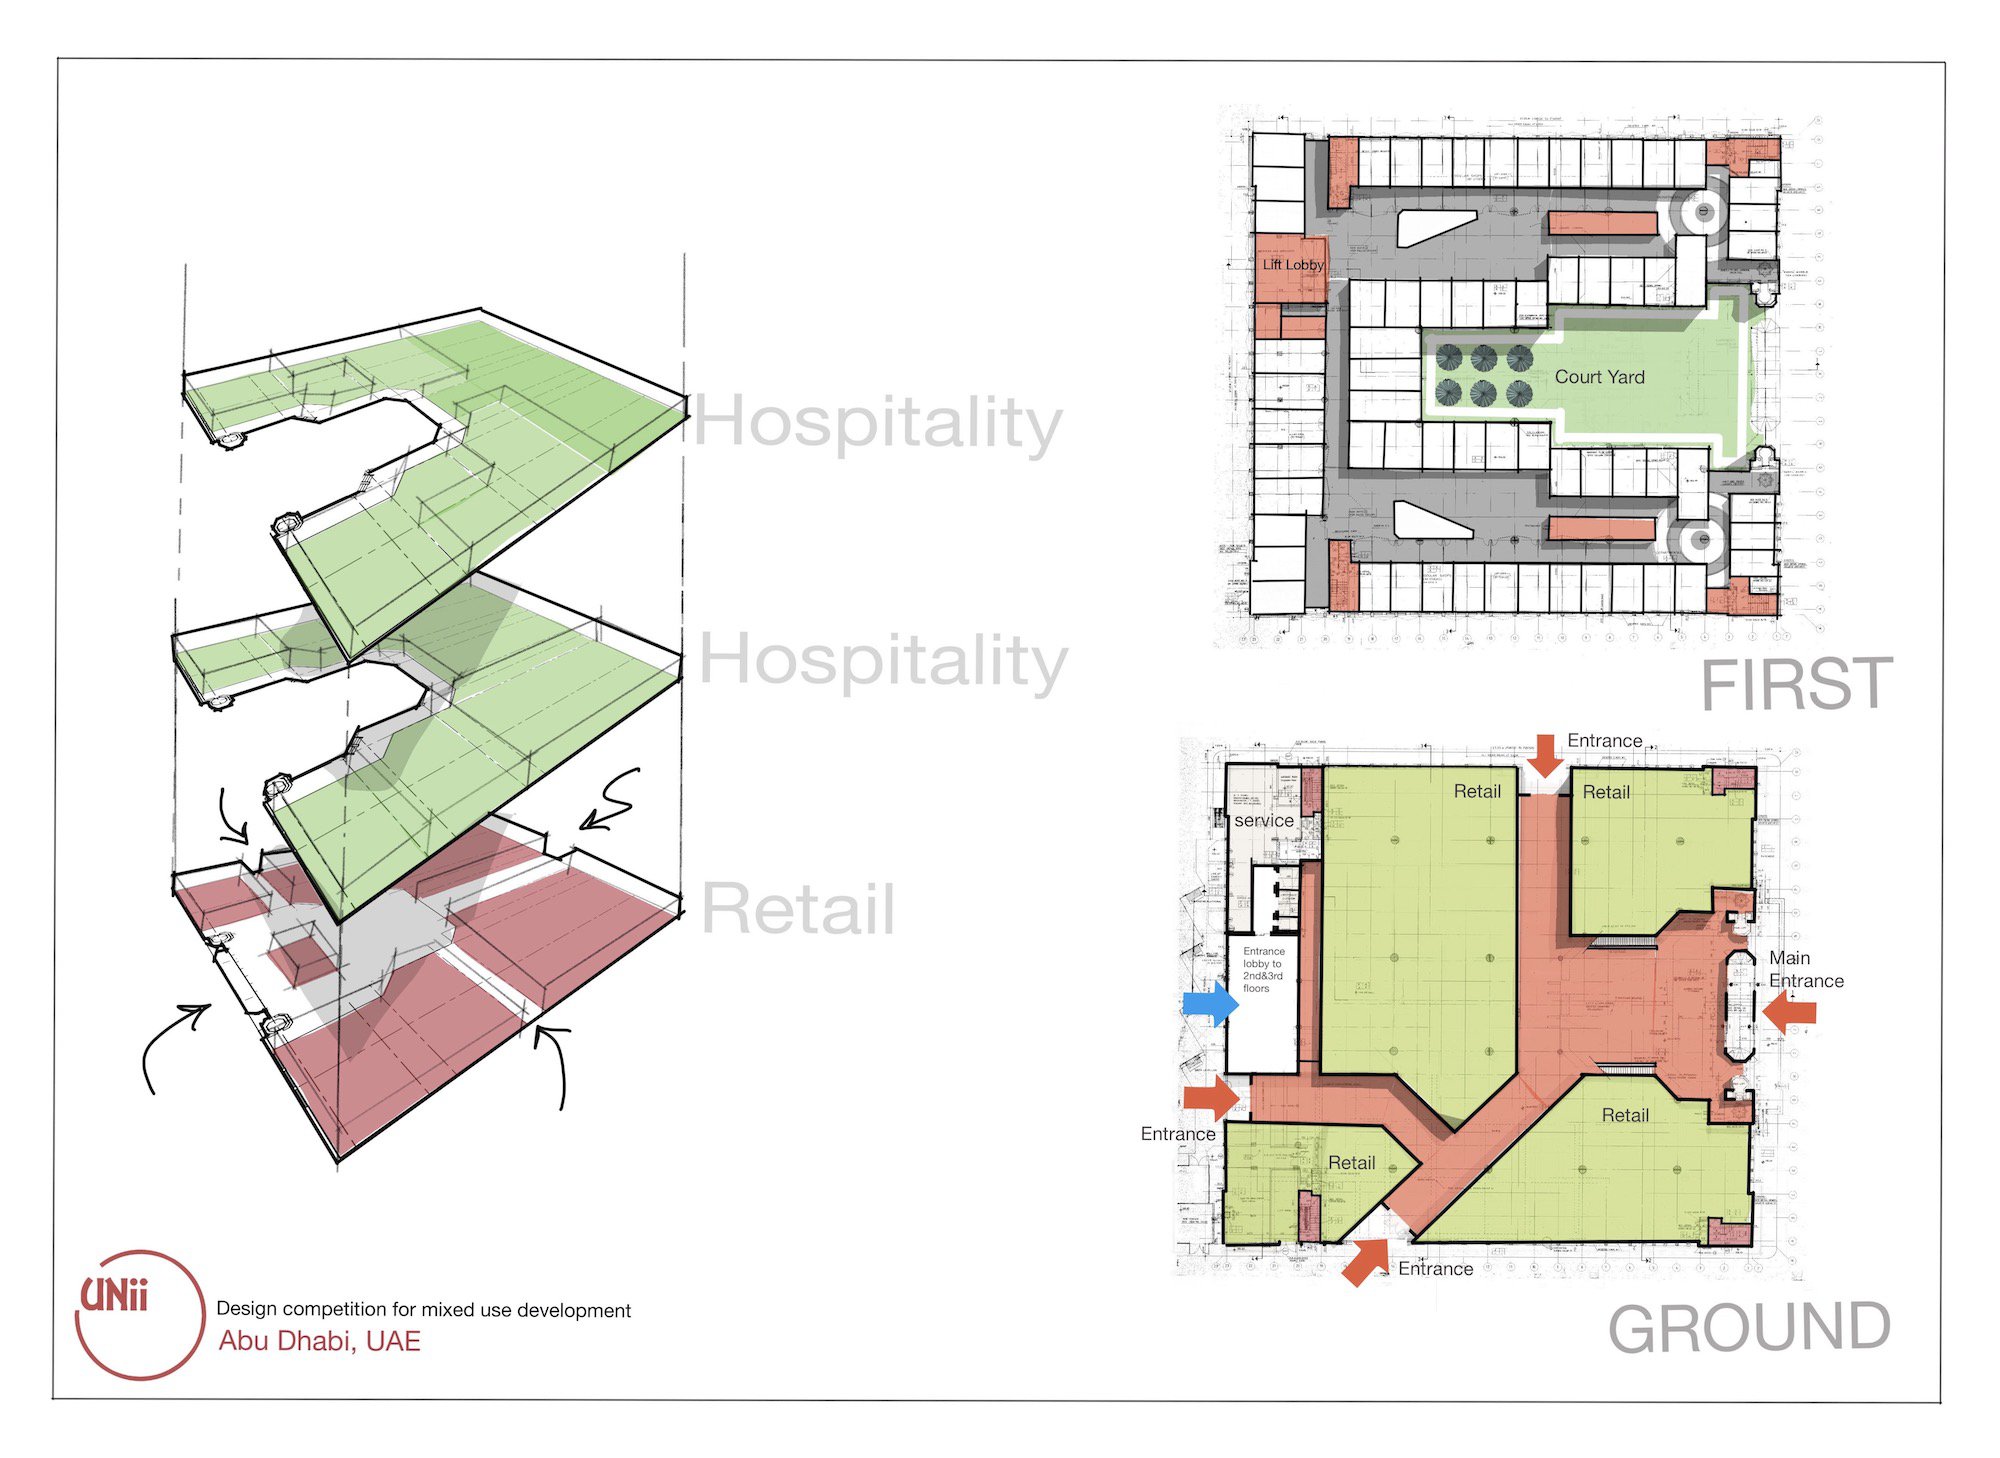
Video Details
If you're interested in learning how to draw a floor plan from scratch or from a previously detailed plan, please take a look at our illustrated tutorial How to Create a Floor Plan .
Setting Up Your Floor Plan
1. Before you import your plan, make sure your units are set. Head to Settings > Units and set it to the metrics of your plan. In Osama's case, this is inches.
2. Import a floor plan as a PDF or as an image.
3. Open the Precision menu and activate the Line Guide. Use two fingers to move the guide to a wall or section you already know the measurement of .
4. Head to Settings > Drawing Scale and enter in a known measurement off your plan into the second field.
5. Tap out of the menu. From here, you can use the Line Guide to measure any feature in the plan with your real world scale.
Rendering Your Floor Plan
Note: Keep your layers set to Automatic Mode. This will help you to keep your drawing organized, and allows you to easily edit colors, pen sizes and so forth later on.
1. Once you have your floor plan imported, select a marker, set it to 100% smoothing, and fill the walls. Varying the marker pressure will give a nice dynamic to the floor plan.
2. Next, outline the walls. Use the Pen tool with 100% smoothing. At any time, you can select your pen strokes (or select the entire layer via the Selection arrow in the Layer menu) and change the thickness of your Pen.
3. From here, you can design your space. This gives the client a visual of how their space might look like once built. Use objects from the Object Market or objects you've designed yourself and drag them into the plan. (Read our illustrated tutorial on Objects and Make Your Own Objects .)
Using the Clipboard: If you've drawn objects in another drawing and want to drag them into the plan, enter the drawing, select your object (it helps if it's grouped), and tap the paperclip either in the Selection menu or in the Import library. Enter your new drawing (fastest from the breadcrumbs menu in the status bar), then tap+hold on an empty section of canvas to bring up the Paste function or access it from the Import library, and paste the object.
Make Your Own Objects: If you have multiple objects, use Make Your Own Objects to create your own objects library and drag them straight into the plan.
4. If you know the measurement of your furniture item, you can size it to exact dimensions. Activate Measure in the Precision menu, tap+hold on a measurement tag and enter in your dimension.
5. Select and duplicate items like sectionals for quick placement. Feel free to move objects around the canvas and try out positions, design options and room flow.
6. Use the Filled Stroke tool to fill in the flooring. Fill in the entire room. You can set the Filled Stroke tool to ~20% smoothing for straighter edges. It doesn't have to be perfect, you can go back later and use the Nudge tool on smaller or larger settings to gently push the fill into place.
7. Use the Hard Mask to block out internal spaces like tables, rugs etc. Then apply new fills with different brushes for additional texture or color.
8. Create depth in your drawing by adding drop shadows, using the Filled Stroke tool. Pay attention to where you start as the final edge is perfectly straight, which can help with lining up edges.
9. Use the Text tool to add labels to your floor plan.
10. Double-tap on a layer thumb for Focus Mode. Focus Mode helps you to isolate a single layer so you can edit strokes. Tap+hold to lasso select, or select the entire layer via the Selection arrow in the layer's menu, and change the thickness or color of your brush to add final polish.
Brush Settings
1:21 - Filling the Walls: Marker, 8.08 in, 100% Line Smoothing
2.35 - Inking the Walls: Pen, 1.77 in, 100% Line Smoothing
6:20 - Flooring: Fill Tool, Black, 25% Opacity
8:05 - Polishing the Fill: Nudge Tool
8:20 - Furniture: Hard Mask, 33.2 in
8:48 - Drop Shadows: Fill Tool, Black, 25% Opacity
10:18 - Labels: Text Tool

Architect Osama Ahmad Elfar graduated from Alexandria University in 1992. He is a Partner at UNii Engineering Consultancy with offices in UAE, Qatar and Egypt. He has won several recognized design competitions. His work spans across many different building areas including high rise, mixed use, residential, commercial and hospitality. He has projects located in several countries including UAE, Qatar, Egypt, KSA, USA, Switzerland, Belgium, Oman, Libya and Japan. He also does design training, teaches courses and speaks at events.
Follow Osama on YouTube , Instagram and Facebook . Find more of his work at www.uniidesign.com and www.osamaelfar.com .
Content created by Osama Elfar Video editing by Lasse Pekkala Text by Erica Christensen
Recommended
How to Create a Floor Plan - Everything you want to know about creating a floor plan in Concepts.
Scale and Measurement in Concepts - Learn how to apply accurate scale and measurements to your drawings and plans.
How to Clean Up a PDF or Image on Your iPad - 5 tricks to help you clean up your PDF or image on your iPad.
IMAGES
VIDEO
COMMENTS
At its simplest, a floor plan presentation is you showing the client their floor plan. That's the simplest version, and it usually involves a 2D site plan presentation or a handful of slides to represent multiple floor plan projects. But technology has enabled home building professionals to do a lot more with their presentations.
Assets Required to Make a 3D Floor Plan Presentation in PowerPoint. The main asset required is a 3D house plan model, which can be built using free 3D software like Blender, a web-based application such as Sweet Home 3D, or professional tools such as AutoCAD, 3ds Max, Revit, SketchUp, Rhino, Cinema4D, etc. Hand-drawn floor plans can be scanned ...
Step 1: Setting Up and Importing Floor Plan. In this first step, we will begin by setting up PowerPoint and importing the floor plan into PowerPoint. Convert floor plan to image file format: Begin by ensuring that your floor plan is in JPEG or PNG format. If it's in PDF, convert it to an image file format. You can easily convert the floor ...
Floor Plans. A key part of any presentation is the floor plan, whether it is on paper or a screen. They help show architectural details such as the location of windows, doors, and walls, as well as fully furnish the space with furniture pieces, appliances and fixtures.
After creating the floor plan, you can export it into PPT formats and other important formats, like JPG, PNG, Docs, and more. This 2D floor plan also lets you share your floor plan design on different social media platforms, like Twitter, Facebook, LinkedIn, and Line. In addition to this, you can present the floor plan right from the dashboard.
Here are some steps to get you started: Open PowerPoint and create a new slide. Go to the "Insert" tab and select "Shapes" to access the shape library. Select the "Rectangle" shape and draw the outline of the walls of your floor plan. Use the "Line" shape to draw any internal walls or partitions.
Axonometric plan ©www.pinterest.co.uk Axonometric drawing showing layers of building components ©www.archdaily.com Axonometric drawing exploded to show construction details ©www.archdaily.com 4. Representing Plan as GIF Images. Graphics Interchange Format (GIF) images support animation in presentation, thus, helping to incorporate movement. This format allows for the presentation of floor ...
Template 1: Floor Plan PowerPoint Presentation Template . This presentation deck will help you put forward your real estate project ideas. It includes high-quality slides for the presentation of commercial and residential construction plans. Use the space in these graphics to write key points about the project or design.
Brand your floor plans by including your logo, company name, and colors for a professional touch. Download your floor plans on a letterhead with a logo and custom disclaimer text to complete the look. 6. Share and collect feedback. RoomSketcher automatically creates a professional Project Presentation that you can easily share with others.
What Is a Floor Plan Presentation? A floor plan presentation is a technical drawing that is made to scale while providing a bird's eye view of a particular space. This includes the layout of the rooms, the placement of doors and balconies, and other structural elements. It may also include outlines of furniture and other design features.
There are many ways to portray plans to meet these needs, but here are 5 of the most popular styles to consider for your next project. 1. Textured Floor Plan. Drawing by em_designs. One simple way to enhance a plan for presentation purposes is to add textures denoting different floor finishes and ground conditions, as illustrated above by em ...
Technical drawing boards should typically include a master plan at a scale of 1/5000 or 1/1000, as well as site plans and floor plans at a scale of 1/500, and sections and elevations at a scale of 1/200. Detail drawings, including system sections and details at scales of 1/20, 1/10, and 1/5, should also be included on the technical drawing boards.
You can use a simple program like PowerPoint to draw out your floorplan as well instead of spending hours to learn other softwares that designers use. Subscr...
This is a versatile floor plan design option that works for many presentations. 3. Calm Green 3D Floor Plan. The sea glass colors of this floor plan style evoke the calm and soothing feel of a vacation at the beach. The sand-colored wood flooring is a lovely color combination with the aqua wall top color.
Free Chart. floor plan PPT Templates,Google Slides Download over 6,300+ complete free templates in high resolution. Quick and Easy to Customize. Unique slides with a clean and professional look.
Ouellette says, "Go in with passion and an open heart. Be real. You start from a stronger place. Be humbled. Remember it's their home and money, not yours. No one wants to work with a diva ...
Floor plans, rough lines, numbers and rulers… We're talking about architecture! You can speak about this major with photos of awesome buildings and floor plans to inspire future architects! The soft colors with a pop of color green will make your presentation seem so professional and attractive. Write down all...
Floor Plan Presentation. Transcript: Timeline Development Stages Introduction This section will provide an overview of the house's floor plan, focusing on the distribution of space and square footage. Initial planning and layout design Construction and structural development Completion and handover to the homeowner Interior design and finishing touches Final inspection and quality assurance ...
Step #1: Start From Scratch or Import an Image. Create your floor plan by drawing from scratch or uploading an existing floor plan with your house dimensions. You will have the ability to resize the floor plan, and even enlarge or reduce walls. Just draw right over an existing floor plan to get it ready to customize.
Floor plans are the visual representation or display of houses from above. They are used to show or illustrate the key elements of any house. Such elements include windows, kitchen, doors, stairs, and other major furniture found on the floor of a building project. In other words, floor plans are manual or digital architectural drawings that ...
Whether you're a beginner or a professional, creating 2D floor plans is a breeze on Canva Whiteboards. Use our intuitive design tools and editable templates to reimagine the layout of your room. Sketch out decors with the Draw tool or drag and drop floor plan elements from our media library for a more accurate design — all on an infinite ...
Simply email the Project Presentation link, or post it on your social media accounts. Your recipients see a beautiful presentation, including floor plans, Live 3D, 3D Photos, plus the furniture used in the project. They can even open a copy of your project in RoomSketcher and edit the floor plan themselves.
Free Floor Plan Google Slides Themes And Powerpoint Templates. Designing an eyecatching presentation template is time-consuming. Download the following free and ready-to-use Floor plan powerpoint templates and Google slides themes for the upcoming presentation. You only need to change text, logo or colors on the professional PPT templates.
2. Import a floor plan as a PDF or as an image. 3. Open the Precision menu and activate the Line Guide. Use two fingers to move the guide to a wall or section you already know the measurement of. 4. Head to Settings > Drawing Scale and enter in a known measurement off your plan into the second field. 5.
During a public presentation Wednesday at Soldier Field, the Bears unveiled their plans to build a state-of-the-art fixed-roof stadium along Chicago's lakefront. The Burnham Park Project includes a new publicly-owned multipurpose replacement stadium located just south of Soldier Field that's part of a singular year-round hub centered on park ...