How to Create the Perfect Professional Presentation in Canva
You may not need Microsoft PowerPoint! Canva can help you make professional presentations in half the time.
These days there's a lot of options for creating workplace presentations, ranging from old-school classics like Microsoft PowerPoint to relative newcomers like Google Slides. Another platform that you can use to create a presentation is Canva.
As a template design site where you can craft beautiful documents, Canva makes the act of creating presentations as simple as Google Slides---perhaps even simpler. Here's how to design a workplace presentation in Canva.

Step 1: Launch Canva
If you don't have an account with Canva yet, check out our rundown on what the site is and what it's good for . If you already have an account, log in and go to your homepage.
Under Create a design , click Presentation .
You can also look for Presentation in the search bar, under the sign that says Design anything .
After you click on Presentation , you'll be taken to a blank workspace. Like all Canva's workspaces, you'll see a collection of pre-made templates along the left-hand side.
If you want to create a presentation from the ground up, you can. We've already got a great tutorial on how to create a resume from scratch using Canva , and it uses very similar principals.
If you're creating this presentation for work, however---and you're short on time---then it's probably best to go with a template.
Canva divides these templates based upon their stated purpose, ranging from creative applications to pitch decks. For this tutorial, let's go to the Professional Presentation section, as it has templates that are well suited for our purpose. Pick one that you like.
Once you click on a design, you'll see a bunch of different pages displayed along your sidebar. Each of these pages has a slightly different layout, but they all use similar elements and color schemes.
Step 2: Pick a Page Design, Change Your Text
The great thing about Canva is that there's no order in which these individual pages have to be arranged. You can use one or several designs multiple times, back-to-back, or never use them at all.
To apply a design to your first page, simply click on your blank workspace so the page is active. Then click on one of the premade designs sitting to the left. Canva will automatically load it into the page and you can begin modifying.
For this tutorial, I've decided to pick a design that would work well as a title page. By clicking on the individual text boxes within this page, I can erase the placeholder text and put down my own.
If you want to further adjust the size, color, weight, and spacing, you can do so in the Text editing box, seen here highlighted in red.
Step 3: Adjust Your Visual Elements
Having the right text---but not too much text---is one of the most important things you can consider when you're putting together your presentation. Making sure the visual elements match up is really important too.
In Canva, you can keep or delete however many graphic elements you want. You can also move them around.
To Delete an element, click on it so its bounding box shows up. Press Delete .
To Move an element, click and drag it around the page.
If you want to change the color of an element, go to the color swatch icon at the top of the screen. You can pick a color swatch from the premade palette, or you can choose a custom color with the color picker by clicking on the + .
Step 4: Add Page Notes
One of the last things that you'll want to add to your page is your presentation notes. Notes are not required, of course, but they can help you remember what you're going to say, especially if you're presenting in front of a group.
To add notes in Canva, go to the top right-hand corner of your page and click on the Add notes icon, seen here in red. When you do, another pop-up box will emerge.
Start typing your notes into the box. There's a word limit, of course, but we doubt you'll run over it. When you're done, click Save .
Step 5: Add a New Page
The whole point of slideshows is that you're showing off a series of pages. If you just had one page, for example, it would technically be a poster, so chances are high you'll want to add more.
After you finish your first page, go to the bottom of your workspace and click on +Add a new page . Canva will add another page to your presentation.
If you want to switch this page to a different style, go to the page designs on the left-hand side of your screen. Click on the one that you want.
Once you create more than one page, you might want to label them to keep your workspace organized.
To label your pages, go to the top left-hand corner of your active page where you see the dotted line. Click on it and start typing. From there you'll be able to enter a new title.
If you're not happy with this new page at all, you can delete the whole thing. At the top right-hand corner of the page, you'll see a trash can icon. Click on it.
Did you hit delete by accident, or have you changed your mind? No worries: just use the Undo button in the top left-hand corner of your workspace.
Step 6: Add a Graph
One of the best features about Canva is its ability to easily insert graphs into your presentation. It then allows you to customize those graphs to your needs.
To add a graph, find a page design that has a graph in it. Once that page is applied to your presentation, double-click on the graph inside that page so its bounding box lights up.
In the left-hand toolbar, you'll see your graph controls emerge. At the top of those controls is a dropdown menu showing you what type of graph you're using. Beneath that is a list of items, along with their values.
To change the name of these items, click on each individual box and start typing. To change the values, click on the box and insert the appropriate number.
Every time you change these values, Canva will automatically update your graph in real time, so you can see how it looks.
If you want to change the style of the graph you're using, click on the dropdown menu and choose another. Canva will automatically change the appearance of your graph while keeping your values intact.
Finally, you can also adjust the color of your graph.
Make sure your graph's bounding box is active, then go to your Edit controls in the top left-hand corner of your screen, seen here in red. Start experimenting with them to get the right effect.
Step 7: Check Your Presentation and Add Transitions
As you wrap things up, you'll want to check your presentation for errors. You might also want to add transitions between your pages.
To add transitions, go to the Present button at the top right-hand corner of your screen. Click on the icon.
When you click on that icon, Canva will open up a dropdown menu where you can pick the Transition style that you want.
After you choose your Transition style , you can also choose your Type . Type allows you to control the speed at which your presentation plays.
When you have all these things squared away, click on the blue Present button to watch your slideshow play out. It will take you to a full-screen version of it, where you can scan for errors.
When you're done checking your presentation for errors, press the Escape key to exit out of the window. Make any changes that you need to---if applicable---then finalize the design.
Step 8: Download Your Presentation for Work
Once your presentation is finished, you're ready to download. To download your presentation---or use it in another format---click on the dropdown menu beside the Present button.
Most of these options are free-to-use with a basic account, but for those that aren't, you'll see a gold "crown" symbol beside it. There's also a ton of options, ranging from downloading the file, emailing it to your coworkers, or embedding the file on another platform.
And that's it. You're done.
Ace That Slideshow Presentation
Now that you've seen how to put together a workplace presentation in Canva, you can start exploring. There's a lot of customization options, so it's best if you fiddle with those settings yourself.
Looking for other things you can design? Here's how to create a cover letter with Canva .
We explain and teach technology, solve tech problems and help you make gadget buying decisions.
How to Create Presentations in Canva
Canva recently introduced new tools to create docs, whiteboards, videos, websites, and presentations. As such, you no longer need to rely on traditional software solutions like Google Slides, PowerPoint, or Keynote to create an upcoming business presentation. You can easily create presentations in Canva using its familiar suite of editing tools.

Canva offers real-time collaboration, several export options, a present tool, AI add-ons, and much more to make a professional PPT. Canva also lets you make instant presentations with pre-filed slides. Without further ado, let’s get started.
Pick Up an Aspect Ratio and Template
Before you start, make sure to pick a relevant aspect ratio for your presentation. If it’s a traditional PPT, go with a 16:9 aspect ratio. If you plan to show your PPT on mobile, use the 9:16 aspect ratio.
Tablet users can start with a 4:3 aspect ratio. Canva also offers some ready-to-use templates to get started. We highly recommend starting with a template to save some time.

You can also filter templates via style, theme, feature, and color. For example, you can check company, marketing, corporate, marketing, school, and other templates. Most templates are free to use, while some may require a Canva Premium subscription.
Under templates, you also find an option to create instant presentations. You can enter a prompt and check Canva’s suggestions to get started.

Customize a Page With Editing Features
Once you pick up a template, you have the option to add all pages to your presentations. You can click ‘Apply all pages’ and check every slide at the bottom. You can always select a slide and hit delete to remove it from your presentation.

Canva lets you change every aspect of the template with different text styles, filters, and image editing tools. You can change color, tweak transparency, copy style, and more.

We suggest spending some time with editing tools to customize your Canva presentation and add some personal touches.
Add Graphics, Stickers, and Images
Your presentation will not seem as interesting without graphics, stickers, images, and videos. Unlike Google Slides or PowerPoint, you don’t need to import media files to Canva to complete your slides. You can easily add relevant elements from the sidebar.
Step 1: Open a slide in your Canva presentation.
Step 2: Select Elements from the sidebar. Add graphics, icons, stickers, tables, videos, and more.
Step 3: You can explore the AI image generator and turn your creative ideas into images and videos with a single click.

You can add simple descriptions and even turn generated images into videos. Canva also offers a long list of graphics packs in several categories. The possibilities are endless here. It’s up to you to make a compelling slide using useful tools.
Tweak Page Animation
Once you create a page, tweak its animation to make a smooth transition between pages.
Step 1: Select a slide in Canva.
Step 2: Click Animate at the top.
Step 3: Check basic, exaggerated, photo movement, and other animation types from the left sidebar.

You can also tweak the animation intensity, which is great.
Add Presenter Notes
Do you plan to present your Canva PPT on a video conference? You can add notes to each slide so they appear during the Presenter view (more on that later).
When you create a PPT, select a slide and hit Notes at the bottom. Enter your notes that you want to remember or talk about during a video meeting.

Collaborate and Edit in Real Time
Similar to Google Slides and Microsoft PowerPoint, Canva lets you share and edit a presentation in real time. You can take inputs from your colleagues and create a share-worthy presentation in no time.
Step 1: When you are done making changes to your presentation, click Share at the top.
Step 2: Enter people, groups, or your team. Expand the collaboration link menu and select Anyone with the link.
Step 3: Expand the permission menu and select Can edit.

You can also share a link with view or comment-only permission. Select the Copy link and share it with your co-workers.
Enable Presenter View
Presenter view is a thoughtful touch from Canva to give presentations over a Google Meet or Teams call.
You can open a presentation in Canva and select Present at the top. Click Presenter View and check two windows opening up on your computer.

One window shows your presentation with notes open on the sidebar. Another window displays the current slide you are sharing with others over a call.

Download and Share Your Presentation
As expected, Canva gives several options to share and export your presentation. When you complete your presentation, click Share in the top-right corner and expand Download.
You can convert a presentation to PDF, PPTX (Microsoft PowerPoint compatible), MP4, JPG, PNG and SVG formats. Check our dedicated post if you wish to print your Canva presentation .

Use Canva Like a Pro
Canva has done a solid job, granting users access to rich tools to create a convincing presentation. We can’t wait to see how the Australian startup enhances our PPT experience with AI features in the future. Speaking of which, we would love to see a feature similar to ‘Design Ideas from Microsoft PowerPoint’ on Canva. Do let us know if you use Canva for presentations in the comments below.
Was this helpful?
Last updated on 07 January, 2024
The above article may contain affiliate links which help support Guiding Tech. However, it does not affect our editorial integrity. The content remains unbiased and authentic.

The article above may contain affiliate links which help support Guiding Tech. The content remains unbiased and authentic and will never affect our editorial integrity.
DID YOU KNOW

Parth Shah is an evergreen freelance writer covering how-tos, app guides, comparisons, listicles, and troubleshooting guides on Android, iOS, Windows, Mac, and smart TV platforms. He has over five years of experience and has covered 1,500+ articles on GuidingTech and Android Police. In his free time, you will see him binge-watching Netflix shows, reading books, and traveling.
More in Internet and Social

How to Remove Followers on Spotify Desktop and Mobile App

How to Use Two WhatsApp Accounts on iPhone
Join the newsletter.
Get Guiding Tech articles delivered to your inbox.
Home Blog Design How to Use Canva and PowerPoint for Presentations
How to Use Canva and PowerPoint for Presentations

Creating the perfect presentation design is a challenge that speakers often aim to achieve, only to find themselves lacking graphic design knowledge. Although high-tier options like Adobe Photoshop and Adobe Illustrator help users worldwide to put their ideas into pixels, the reality is they are not user-friendly interfaces for people outside the graphic design industry, namely business professionals, marketers, and educators. Hence, the need to find an alternative for making powerful graphics to use in our presentations – and here’s where Canva comes into the picture.
This web-based graphic design tool has quickly become the preferred choice of teachers, social media influencers, and small business owners due to its free-tier plans and pro plans at a convenient subscription-based fee.
In this article, we will see how to use Canva presentation in PowerPoint and how to export Canva to PPT, to create visually appealing presentations.
Table of Contents
Canva vs. Microsoft PowerPoint: Pros and Cons for Presenters
Designing with canva, how to export a canva presentation to powerpoint, how to use canva-made graphics in powerpoint, final words.
Although presenters often see Canva as an alternative to PowerPoint, the reality is that they differ in one single aspect: Canva is a graphic design tool, whereas PowerPoint is a presentation design software. Some of the tools available in PowerPoint are not there in Canva, and vice versa.

Going into more technical aspects, here are the Pros and Cons of working with either software as a presenter.
Pros of Canva as a Presentation Tool
User-friendly interface.
Canva’s drag-and-drop feature makes it easy for non-designers to create presentations by using its library of shapes, graphics, text styles, and other resources.
Wide Range of Templates
It offers a vast library of Canva templates, which can be easily customized in their online editor, saving time on design. There’s a con associated with this point, which we shall discuss later.
Magic Studio for Canva was released mid-Q3 this year with the idea of powering designs with AI tools. This tool is available in Canva search features and in the editor at the bottom right corner, which features the list options:
- AI text generation
- Suggested graphics to match your design
- Suggested photos to match your design
Collaboration Feature
Allows multiple users to simultaneously work on the same presentation, which is great for small team projects. Compared with PowerPoint, it does not require all users to be Premium to collaborate online.
Web-Based Platform
Being an online platform, it allows users to work from any device with Internet access without needing software installation. This particularly helps users with legacy computers who cannot install current versions of Microsoft Office.
Integrated Stock Library
Provides access to a broad selection of stock photos, illustrations, and icons within the platform. Just like with the Canva templates, there’s also a con to this point.
Customization Options
Users can upload images and fonts, enabling brand consistency across presentations. Note: The upload fonts feature is only available for Canva Pro users.
Photo Editing and Animation Features
Canva lets users tweak their graphics with simple-to-use controls. These options help us to adjust opacity, apply photo filters, add animation effects, add bevels and shadows, and more.
Cross-Platform Compatibility
Can export presentations to various formats (as a PDF document, as a video presentation in MP4 format, or even as images), making them viewable on different devices and platforms. The export options allow us to post directly into social media, create printables, post to the web, etc. While some export formats require an upgrade to a Canva Pro subscription (like the ability to export to SVG format), the basic export features are enough for simple presentations and beginners.
Cons of Canva as a Presentation Tool
Limited offline functionality.
Requires an internet connection for full functionality, which can be a limitation in areas with poor connectivity, for business people working on an airline flight, while using Airplane mode, or for people traveling in other zones without Internet access.
Fewer Animation and Transition Options
Unlike PowerPoint, the available options for animations and transitions are limited. Users can find this reiterative, which may be unappealing to using these effects in our presentations.
Premium Content
Although the Canva library is extensive in terms of assets, the reality is that most of these elements are only available for premium users. This applies to templates, shapes, images (mostly), and exporting options. Resizing the graphics you create in Canva to repurpose your design is only available to premium users.
Template Overuse
Popular templates can be overused, making presentations look similar to many others. This is of particular interest to business professionals, as people tend to easily associate some designs as being made with Canva.
Design Decisions
Unlike using a PowerPoint template , you have to work your way with Canva content, as the PPT templates tend to be quite generic and do not offer tools for data representation. Consequently, you have to know how and where to introduce those elements on your own rather than working with a presentation template that already assigned the space for such graphics.
Lack of Advanced Multimedia Integration
Integrating complex multimedia elements like videos is not as seamless as in some desktop applications. You won’t find options to link to source elements; you need to upload the content to your personal Canva library and manually add the resource to the slide. Presenters can also lose third-party integrations via plugins for some multimedia resources.
Pros of PowerPoint as a Presentation Tool
Widespread use and familiarity.
PowerPoint is the leading market tool for presentations, making most audiences and presenters are familiar with it at a basic operational level. This can help us to outsource technical issues quickly rather than aiming to use web-based interfaces to share Canva-created content.
Offline Access
PowerPoint can be used offline, which is ideal for people traveling, areas where the Internet connection is unreliable, or simply because we want to focus on creating the slides rather than facing distractions via the Internet.
Integration with Other Microsoft Office Tools
Seamlessly integrates with other Microsoft products like Excel and Word, making it easy to import data and documents. This is ideal for creating complex graphics for data representation, where the content can be synced, importing databases, working with Gantt Charts in software like Microsoft Project, and more.
Also, Microsoft PowerPoint has the same text editing capabilities as Microsoft Word – a striking contrast with Canva’s limited features.
Templates and Design Options
This is PowerPoint’s forte: the capability of using third-party presentation templates, like the ones provided by SlideModel . Users can buy pre-designed slide decks from professional vendors and ease the need to make design-related decisions. On top of that, Microsoft already includes some basic templates with its 365 subscription.
Advanced Features
Offers a broad range of features, including detailed animations and transitions, which can enhance presentations. For example, the ability to work with SVG graphics allows presentation designers to make pixel-perfect presentations without losing image quality. This is available to all users, unlike Canva, which requires a subscription to unlock certain elements.
Multimedia Capabilities
Supports embedding of various multimedia elements like audio, video, and images directly into presentations. You can use hyperlinks to embed content or work with third-party plugins for specific tasks.
Extensive Support and Resources
As a long-established tool, users can find tutorials everywhere, support communities, and additional resources available online.
Cons of PowerPoint for Presenters
Some features can be complex to use, and the interface may be overwhelming for new users. In particular, this is linked to editing PowerPoint Shapes and graphs, working with Slide Master , applying advanced animation effects and so on.
Unlike Canva or Google Slides, PowerPoint requires purchasing Office 365 or a standalone license.
Heavy Files
PowerPoint files, especially those with multimedia content, can become large and difficult to share via email. As a side effect, those heavy files can be complicated to handle in computers that lack sufficient RAM and processing power. Moreover, they require significant free disk space on your PC.
Time-Consuming
Creating a high-quality presentation with custom animations and graphics can be time-consuming. That’s the reason why we highly recommend users work their way with PowerPoint templates, and mix and match designs to create a unique slide deck .
Learning Curve
Users need to invest time in learning the software to fully utilize its advanced features. This applies to both acquiring the knowledge and practicing the skills you learned. And still, for some users, it feels frustrating not to achieve results relatively quickly.
In this section, we will learn how to use Canva to create graphics for a product presentation. The idea is to create placeholder graphics containing images of a product; then, we will export that content to continue creating our presentation in PowerPoint.
After creating our Canva account, we find ourselves at the Home screen. Go to Templates, and you will see something similar to this UI.

We can go straight to the Presentations (16:9) option or use the search bar to locate the template we want. In this case, we will opt for that scenario and search “Product.”
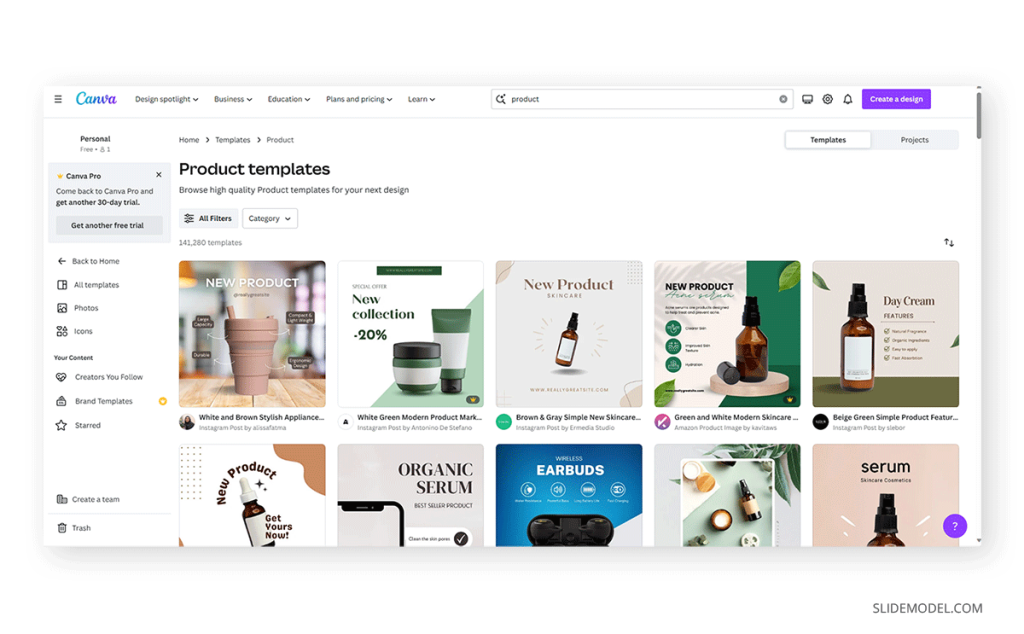
The images that show a little crown at the low right corner are premium templates, which means we cannot use them with a free account. We will pick a template that fits the needs of our presentation by clicking over it. At the contextual window that opens, select Customize this template .

The Canva builder may take a bit to load, especially if your internet connection is slow. You will find yourself with a window like this one, opened at the Design tab, which offers alternatives for other templates similar to the one you chose.

The Styles tab allows us to quickly change the layout, altering color themes and fonts. Sometimes, that can suit our needs immediately; sometimes, it requires extra work to customize to our preferences.

We can click on any element in this design and customize its content. Depending on the element type, the options are available for us. For this presentation, we will change the text and images, and alter font color at the button to make it stand out.

Next, it’s time to replace the images. We can drag and drop the image into Canva, or we can go to the Uploads button and add the content from there.

In this case, we’re using DALL-E-generated images for this product presentation, you can also use illustrations, photos, videos, or Midjourney illustrations . Once the images are uploaded, drag and drop them to replace the images in the placeholder areas. To complete this design, we removed the shape that came with the template – you can add a new shape by going to Elements > Graphics .

Learning how to use Canva for PowerPoint is pretty straightforward. Download your Canva design as a PowerPoint presentation, which you can do by accessing your design and going to the top-right corner to locate the button Share . Click on it, and then click on Download .
Under File Type , we will select PPTX , as it’s PowerPoint’s native format. Click on Download , and wait for the process of downloading the file to be completed. Depending on the graphic assets included, it can take a while.

At this point, don’t be surprised if you’ll be prompted to upgrade your Canva plan (if you don’t have a premium account). The reason is that Canva will charge you for exporting what they call premium graphics, and since most of the Canva presentation templates use premium graphics, this will be a limitation when exporting your Canva slides to PowerPoint.
A simple workaround is removing the premium graphics before exporting from Canva to PowerPoint. Although, take in mind this may affect the overall design of your presentation.
As you can see below, the PowerPoint file is entirely editable. Something to consider is that unless you have the font installed on your computer, PowerPoint will reassign to a generic font.

Remember the design we created before? Well, it’s time to use that image as part of a marketing deck presentation , which will represent a social media post to be used by the marketing team to promote the brand.
The first step is to download the design we created as PNG. We can close Canva after that.

We opened our PPT template, which is the Annual Marketing Plan PowerPoint Template , and customized the PowerPoint theme colors . Go to Insert > Pictures > This Device .

Select the image we created in Canva and upload it here. We will add some image shadow effects via Shape Format, and a textbox below that describes what the image is about.

And that’s how easily we can use graphics from Canva in our PowerPoint presentations. Remember, it’s best to work with PNG images rather than JPG to reduce file size and preserve image quality.
You can invite others to collaborate on your design by sharing a link to the editable design or by adding them via email as team members on your Canva account.
Canva uses standard cloud storage security measures to protect your data, but like any online platform, it’s important to use a strong password and follow good security practices.
There are two methods for this. You can upload a PPT template into Canva via the Canva Homepage by clicking on Projects , and then go to the Uploads folder. Drag and drop or click on Upload, as we’ve seen before. Once imported, you must click on that file to open it in the Canva editor. The second method is on the editor: go to the Uploads button and upload your PPT file as if it were an image or another media asset.
Yes, you can use SlideModel presentation templates in Canva. As a SlideModel subscriber, you can download .pptx files to import into Canva presentations. This way, you can enjoy the creative slide templates and graphics provided by SlideModel in your Canva presentations
Unfortunately, no, as Canva doesn’t have the same toolset to enable editing functions. That also applies to changing color, so we highly recommend you work with a final PPT file before switching to Canva.
Objects like charts, SmartArt, 3D objects, and WordArt aren’t supported in Canva and won’t be rendered if you upload a slide that contains them.
Yes, all users can download Canva presentations to PPTX format. In case the original Canva design isn’t a presentation file, like a banner or social media post, you won’t be able to resize for that output unless you have a premium account.
Yes, the file must be smaller than 70 MB, and you can import up to 300 slides.
Canva and PowerPoint can collaborate as complementary tools to help presenters overcome the limitations of each individual tool. It takes a while to create your desired workflow, but once that’s accomplished, you can elevate the quality of your PowerPoint or Google Slides presentations with Canva.
We don’t advise using Canva as an alternative to PowerPoint as the current state-of-the-art indicates it won’t support data representation or other PowerPoint stellar tools that make part of most PPT templates.

Like this article? Please share
Design, Microsoft PowerPoint Filed under Design
Related Articles

Filed under PowerPoint Tutorials • April 2nd, 2024
How to Round Corners in PowerPoint
Learn how to add rounded corners to shapes and images in PowerPoint. Elevate your presentations with sleek designs. Expert tips and step-by-step guides.

Filed under PowerPoint Tutorials • March 26th, 2024
How to Translate in PowerPoint
Unlock the experience of PowerPoint translation! Learn methods, tools, and expert tips for smooth Spanish conversions. Make your presentations global.

Filed under PowerPoint Tutorials • March 19th, 2024
How to Change Line Spacing in PowerPoint
Adjust text formatting by learning how to change line spacing in PowerPoint. Instructions for paragraph indenting included.
Leave a Reply
Prezentt Blog
50 awesome presentation designs from canva.
By Justin Davies
The bar has really been lifted when it comes to expectations on slide design. There is greater pressure than ever before to have a great looking slide deck, rather than the traditional bullet point style that comes with presentation software.
At Prezentt, we are big fans of Canva . If you haven’t tried it yet, Canva allows you to easily create beautiful presentation designs and all sorts of other documents. It is a cloud-based service that is intended to make it easy for everyone to create stunning designs.
The cloud-based service is free – you only pay for stock photos or particular layout and graphic items if you need them.
They now offer an online Design School
(again, free) to help with understanding the choices of fonts, colours, layouts and so on. With so many choices (and without 3 years of design training!) it is often better to start with a template and customise to your needs. There are two of those fifty designs here so you can get an idea of how great they look…

Canva has just released 50 Branding Kits for Your Startup – and in each, there is a great presentation design. So whilst you may not wish to completely change all your branding, it is highly likely that you can find something to suit your brand and tweak it to make it fit. Or if your brand is a bit tired and in need of an update – problem solved!

Once you have designed your presentation, it is one click to save to PDF.
You can then upload your new glorious presentation to Prezentt to add online interactivity and interaction for your great new presentation.
Leave a Reply Cancel reply
You must be logged in to post a comment.
Get started by taking a tour of our demo


10 Free Canva Alternatives For Eye-Catching Designs And Presentations
I n the digital age, eye-catching designs and stunning presentations are more important than ever. Canva has long been a go-to tool for creating these visuals. However, there's a world of options beyond Canva, each with its unique strengths and capabilities.
Whether you're a small business owner, a blogger, or someone looking to spruce up a presentation, each of these tools has something helpful to offer. They made the list not just for their affordability but also for their ease of use and flexibility in design. From editing PDFs to creating social media graphics and beyond, these platforms can expand your creative possibilities.
We have explored each alternative's features, such as background removal tools, advanced editing capabilities, and user-friendly templates. The goal is to equip you with the knowledge to choose the right tool for your design needs so you can create stunning visuals without breaking the bank. Here are the best 10 free Canva alternatives for eye-catching designs and presentations.
Read more: Major PC Brands Ranked Worst To Best
Stencil is a great tool for creating easily shareable images tailored for social media, small business owners, and bloggers. Stencil's focus is to make image creation easy with a free all-in-one app. It has an impressive stock photo library available to both free and premium users, and creating images for social media or blog posts is intuitive. The actions are simple clicks and drag-and-drop functions that users of all tech and graphic design levels will recognize.
Posting images is simplified through several convenient features. Users can directly send images via SMS or post them to Facebook or Instagram feeds through login integration. Additionally, there's an option to connect with a Buffer account to schedule posts after creation. Stencil's free option allows users to save 10 images per month with access to a limited stock library. It won't be enough for a full-time blogger, but it's a great test drive. Unlocking everything Stencil has to offer costs $12 per month or a yearly fee of $86.40. This essentially removes all limitations and gives full access to its stock library. There are no other microtransactions or add-ons.
Snappa is another great alternative to Canva, especially if you're not a graphic designer. Its user interface is remarkably user-friendly, with easy adjustments made through simple sliders and menus. Snappa has over 6,000 templates to get started with, as well as an impressive library of free images and graphics. The images provided are royalty-free and can be used for any project without incurring additional costs.
The downside to Snappa's simplicity and ease of use is that graphic designers may find it lacks the functionality of some of the other services on this list. It's ideal for beginners and those who need an image but don't have any idea how to make one.
Snappa's free version functions more like a trial, granting access to all templates and images but limiting users to only three downloads per month. Access to all other features requires a paid account, which is priced at $15 per month or $120 annually -- equivalent to $10 per month.
Adobe Express
While the AI image creator Adobe Firefly has been getting most of the press these days, Adobe still has plenty of traditional image editing tools available. One of the most affordable is Adobe Express , an entry-level software that's ideal for those unfamiliar with Adobe's range of products and as a user-friendly image creation and editing tool.
You'll find many of the standard Adobe tools you would with Photoshop and other Adobe products , but they have been streamlined for ease of use for beginners. Users can quickly create images for social media and smaller projects with ease. Included are numerous templates that can be customized for different projects, as well as options for creating vector images.
The free version of Adobe Express provides users with a limited capacity for image generation each month and offers access to a basic range of templates and stock photos. For those who want more comprehensive features, there's a premium subscription available at $100 per year or $10 per month that unlocks full access to all tools and an extensive stock library.
Adobe Express is much more intuitive and easy to use than Photoshop, making it a good starting point for beginners. However, those without any design experience may find it a bit challenging. In addition, more experienced users will find it easy to use but less comprehensive than Photoshop.
If you're looking for a powerful no-frills editor, Pixlr X is a great place to start. It's completely free, although the website monetizes itself through ads. However, this means you don't even have to make an account and can jump right into editing and content creation.
As a free product, Pixlr X offers its complete range of features through a web app. The app itself has a streamlined interface with menus that provide a wide array of customization tools and options, allowing precise image alterations according to user preferences.
The software includes templates and settings for virtually every need. It features ready-made templates for popular social media platforms like Facebook, Instagram, and Twitch, allowing users to create perfectly sized images right from the start. Additionally, Pixlr offers templates for podcast cover art and much more.
The user interface of Pixlr X is clean and uncluttered, without any distracting graphics. It presents a simple menu packed with various editing options. The toolset is comprehensive, making it easy for beginners to use while also offering enough advanced features to satisfy experienced users and graphic designers.
VistaCreate
VistaCreate is an excellent tool for creating visual marketing materials and ads for your business. The platform is designed to be easy to use and user-friendly while still providing visually impressive results. It offers templates for different seasons and industries that users can easily alter and customize to quickly create promotional materials, even if they lack an eye for design. Included with the editor is a massive library of tools like stock photos, videos, logos, fonts, and more that all can be used for free without licensing issues.
Signing up for the premium membership unlocks all of the available templates and graphics. Most users won't be stunted by the offerings from the free version, but the premium version has significantly more variety. If you want to try it before you buy, VistaCreate does offer a 14-day trial that gives access to the premium version. However, this trial requires a credit card entry, so you need to remember to cancel before the trial period ends to avoid charges.
The free version is free forever. It offers a respectable 10 GB of storage for projects and files. The premium version has unlimited storage, more templates and graphics, and access to unique tools like a background remover and instant sticker makers. VistaCreate premium costs $13 per month or $10 per month if paid annually.
Visme is a fantastic and incredibly versatile tool. It's a single app that can do most things that you'd want from an image editor, plus a few extra features that go beyond simple image content creation and editing.
Like many other platforms, it has a host of templates, fonts, and stock images that make it easy to create brandable materials, social media posts, and digital media. However, in addition to the simple image editor, Visme also has a lot of intuitive tools for small businesses. Users can easily upload data from spreadsheets and graph it visually using a simple, drag-and-drop interface that can readily be branded. Images and content you create on Visme can also be turned into videos and edited directly on the platform.
The only downside to Visme is its price. The website offers a free version that allows you to take the system for a test drive, but it doesn't allow you to export any of the files that you create. While there may be workarounds, it may be better to consider purchasing a membership or choosing another service from this list. The Starter membership costs $12.25 per month when paid annually, or $29 monthly, and the Pro membership costs $24.75 per month when paid annually, or $59 billed monthly. Although this pricing is on the higher end compared to other services, Visme's comprehensive all-in-one solution justifies the cost for many users.
If you need infographics, PowerPoint presentations, or short videos, then Piktochart is one of the best alternatives to Canva. The platform doesn't concentrate on pure image design and generation. Instead, it focuses on bringing data to life through fun and interesting infographics.
For businesses that generate significant traffic through social media or understand the value of SEO, Piktochart recognizes that a well-crafted infographic can be a powerful asset. Its tools and templates are designed to present data in a visually attractive manner, highlighting key points. All of Piktochart's tools and templates present data in visually appealing ways while still clearly showing key data points. The user interface is very user-friendly and comes with tutorials on every aspect of the system. There's even a quick crash course that claims can get you up and running within an hour.
Piktochart also has rudimentary video editors that are surprisingly easy to edit. While it may not offer the extensive functionality of dedicated video editing software, it meets the needs of most users. There's also the option to quickly turn images into PowerPoint presentations and videos, making it an excellent choice for office workers. Piktochart is free but only offers limited online storage options. It's essentially a forever-free trial that allows users to get started with the system and determine if they can make use of it. The paid version costs $14 per month when paying annually or $29 monthly.
The makers of DesignCap took all the fun aspects of making a poster or collage for grade school and turned it into software. Surprisingly, the software is known for its ease of use, making image creation as straightforward as those school projects.
DesignCap presents itself as a one-stop shop for all of your design needs, but in reality, it works better if you look at it like a poster maker. The platform can help users create simple images using templates and tools for social media posts, cards, wedding invitations, posters, and social media.
While it's not advanced enough for a professional graphic designer, it is ideal for someone who needs to make some eye-catching visuals. The free version has a smaller library of templates and stock photos available and is limited to five image saves. The only other limitation is export file formats. It has fewer options than some of the others on this list, but if you just need JPEGs to post or create images quickly, DesignCap is a great resource.
For more advanced users on a budget, Photopea is a fantastic solution. Photopea is not specifically tailored for bloggers or social media users -- instead, it is fundamentally an image editor. This focus on image editing first is reflected in its user interface and color scheme, which might not be specifically designed for bloggers and influencers but still offers useful functionality for them. The UI is very bare bones, devoid of any testimonials or marketing trying to upsell users.
Upon visiting the Photopea site, users can immediately upload and start editing images. The more you use Photopea, the more functionality you'll discover in the software. Users can create vector images, create layers, apply filters, and so much more. There's a dedicated tutorial section of the site to help users navigate the numerous features. If you can't find the answer there, Photopea also has a very active Reddit community as well as email support.
Photopea is unique in that beginners can do all of the simple editing that they'll need, while advanced graphic designers will also find a lot of useful tools to make something truly memorable. Photopea is a free service that supports itself through ads. Users have the option to purchase a premium membership, which removes ads and supports the developers. The free version already provides full access to all features, although premium users benefit from prioritized email support.
Desygner is a budget-friendly alternative to Canva that was specifically designed to be a more user-friendly alternative to Adobe InDesign. Desygner has intuitive controls that allow users to easily choose and modify templates. Like many of the other alternatives on this list, it comes equipped with a large stock image and template library that is free to use for commercial and personal use.
One of its best features is its PDF editor. All of the easy-to-use tools can be used to edit and alter PDFs to create impressive documents. These are perfect for flyers, notices, resumes, and much more. This task can often be tricky in standard word processors, but Desygner simplifies it with the same tools used for image creation. Another standout feature of Desygner is its background removal tool. If you've been creating images for a business, you'll know how essential this feature is, not to mention how frustrating it can be when it doesn't work well.
In terms of affordability, Desygner is very budget-friendly. Its pricing is among the most economical on this list, at approximately $5 per month when paid annually or $10 paid monthly. The free version of Desygner provides access to many of its tools and templates. While the free version is sufficient for smaller businesses and casual users, the premium version is a worthwhile investment for regular image creators. It includes the background remover tool and offers a significantly larger selection of stock images and templates.
Read the original article on SlashGear .

Got any suggestions?
We want to hear from you! Send us a message and help improve Slidesgo
Top searches
Trending searches

solar eclipse
25 templates

16 templates

autism awareness
28 templates

12 templates

35 templates

7 templates
Travel Guide: Moscow
Travel guide: moscow presentation, free google slides theme and powerpoint template.
Do you know some acquaintances that want to travel to Russia, the biggest country in this planet? Now you can be their own tour guide with this template. Include as much information as possible about tourist attractions, monuments and things to do in Moscow. Let the simplicity of these slides and their cool illustrations speak in favor too!
Features of this template
- 100% editable and easy to modify
- 25 different slides to impress your audience
- Contains easy-to-edit graphics such as graphs, maps, tables, timelines and mockups
- Includes 500+ icons and Flaticon’s extension for customizing your slides
- Designed to be used in Google Slides and Microsoft PowerPoint
- 16:9 widescreen format suitable for all types of screens
- Includes information about fonts, colors, and credits of the free resources used
How can I use the template?
Am I free to use the templates?
How to attribute?
Attribution required If you are a free user, you must attribute Slidesgo by keeping the slide where the credits appear. How to attribute?
Related posts on our blog.

How to Add, Duplicate, Move, Delete or Hide Slides in Google Slides

How to Change Layouts in PowerPoint

How to Change the Slide Size in Google Slides
Related presentations.

Premium template
Unlock this template and gain unlimited access

- Hispanoamérica
- Work at ArchDaily
- Terms of Use
- Privacy Policy
- Cookie Policy
Moscow Has a New Standard for Street Design

- Written by Strelka Magazine
- Published on August 25, 2016
Earlier this year the development of a new Street Design Standard for Moscow was completed under a large-scale urban renovation program entitled My Street , and represents the city's first document featuring a complex approach to ecology, retail, green space, transportation, and wider urban planning. The creators of the manual set themselves the goal of making the city safer and cleaner and, ultimately, improving the quality of life. In this exclusive interview, Strelka Magazine speaks to the Street Design Standard 's project manager and Strelka KB architect Yekaterina Maleeva about the infamous green fences of Moscow, how Leningradskoe Highway is being made suitable for people once again, and what the document itself means for the future of the Russian capital.

Strelka Magazine: What is the Street Design Standard and what does it include?
Yekaterina Maleeva: The Street Design Standard is a manual for street planning in Moscow . The Standard is divided into four books, each one of them covering particular aspects of street design. Many cities across the globe have developed their own standards and the concept has gained a lot of popularity over the last decade. The New York Street Design Manual is a famous example; the book has even been translated into Russian. However, Moscow streets have little in common with New York streets, for example; every city has its own unique urban typology and simply copying existing solutions from another manual is not a viable option.
When we started our work on the Standard , the first thing we did was study Moscow streets, their peculiarities and common features. The first volume of the Standard focuses on the typology and distinctive attributes of the streets of Moscow. We gathered data on more than 3,000 streets and processed the data. Despite the large sample size, we discovered certain similarities. We managed to identify ten of the most common street types, but some unique streets could not be categorized. For instance, Tverskaya Street, built in 19th century, originally fell under category "10C." But after it was widened in the 1930s, Tverskaya ended up in a unique place within the urban fabric of Moscow. Such objects as that require a case by case approach and an individual project.
What can be found in the other volumes?
After we identified these ten street types, we started working on defining the best way to approach the development of each. The second book describes what a street of each type must have. We developed a general profile and functional zoning for each type. The pavement is more than just a pedestrian lane: there is a buffer zone between the roadway and the walking lane where the parking posts, street lights and communication lines are located. It’s a mandatory utility zone that has to be paved in such a way that any section can be easily unpaved and replaced. There is also a pedestrian fast lane for people walking to their workplace and a promenade with benches and other objects. Building façades have a large impact on the street they are facing. Restaurants and shops are located in these buildings. Making the adjacent zone retail-friendly is important. Cafes and restaurants must be able to open street patios to attract customers without disrupting the pedestrian traffic. How to apply these concepts to each of the street types is thoroughly explained in the Standard .
The third book describes eleven groups of design elements, including surface materials, benches, trash bins and lights. This catalogue of elements contains no mention of suppliers. It does not promote any manufacturers; instead it describes the attributes which define a quality product. For instance, the third book explains which type of tree grates will serve the longest while causing no damage to the root system of a tree. Styles of grates, bins, benches and other elements may vary, but all the items must comply with the quality standard.
Finally, the fourth book focuses on the planning process: how to perform preliminary analysis, how to apply user opinions during the development and how to achieve quality implementation. Additionally, there is a special emphasis on the fact that street planning cannot be carried out without any regard for the context of the street. A street should be regarded as a part of an interconnected system of various public spaces, together with adjacent parks, garden squares, yards and plazas.

Does the Standard have an official status? Should it be considered a law or merely a guideline?
There are a number of state-level laws and regulations relevant to street design issued by the Moscow Government. They were taken into account during the development of the manual. These regulations ensure safety standards and must be complied with. While the existing legislation covers safety aspects, our books introduce comfort standards. The Standard is basically a non-binding, advisory guideline created with the goal of improving the urban environment everywhere across the capital and maintaining it at a high level.
What happens if a street does not fit any of the mentioned types (and is not as significant as Tverskaya)? For instance, what if a street located in the New Moscow territory has cottages on one side, apartment complexes on the other and an entrance to the Moscow Ring Road somewhere along the way?
A standard is not a ready-made solution. The streets share common features yet also retain their individual attributes at the same time. Applying a single standard profile to every street is impossible. Adjustments are always in order.
The Standard offers three sets of solutions for each type of street with a large potential for combining various elements. The manual basically offers a convenient database that a designer working with a new space could use. That does not mean that all the new projects will look exactly the same. Some solutions featured in the Standard are yet to be implemented anywhere in Moscow . For instance, our collaboration with Transsolar, a German company consulting us on environmental comfort, revealed that Moscow’s largest environmental problem was not in fact CO2, but small-particle dust produced by studded tyre traction. And a simple method to control this type of pollution already exists. Many busy streets outside the city center have a green buffer zone separating the roadway from the sidewalks. A 1.5m high ground elevation running along this zone could filter out up to 70% of the tyre dust, preventing it from spreading into the residential areas. Western countries have been successfully using this technology for many years. Now it is a part of Moscow Standard . By the way, a terrain elevation could also help reduce the level of road noise.
.jpg?1471881026 "presentation design in canva")
Does the Standard offer anything for the main roads? For example, nowadays Leningradskoye Highway basically splits the city into two disconnected parts; it’s a car dominion.
The Standard does not offer solutions for transportation problems. When we were defining our street typology, we relied on traffic load data calculated using Moscow ’s transportation model. We pursued a goal of only offering solutions that would not aggravate the current transport situation. Any planned sidewalk extension or addition of a bicycle lane or road crossing should first be approved by the Moscow Department of Transport.
As for the main roads, our research revealed that the streets with the highest traffic load also have the heaviest pedestrian traffic. One would think that it should be the other way around. However, the main roads have metro stations, which generate a lot of pedestrian traffic, which in turn draws retail. Treating main roads the same way as highways is impossible. The needs of both vehicle traffic and local residents must be taken into account, which creates a paradox.
These territories have every opportunity to become more comfortable. Some have relatively large green buffer zones that currently remain underused. The Standard proposes to augment these zones with additional functionality. On one hand, some of the main streets will gain attraction centers, especially near intersections connecting them to the adjacent residential areas. Weekend markets are one example of such centers. On the other hand, the Standard involves the creation of zones able to absorb extra precipitation flowing from the roads and filter it. There is a list with types of vegetation best fit to handle this task. The same zones could be used to store snow in the winter. The meltwater will be naturally absorbed by the soil, alleviating the need for moving the snow out to melt. This, however, would require decreasing the quantity of melting chemicals sprayed over the snow, as the plants underneath might be susceptible to their effects.

Can the new Standard rid us of green lawn fences, yellow curbs and other eternal eyesores?
The choice of yellow and green appears random, so we have no idea how to actually fight that. The Standard offers no colour schemes. As long as fences meet the set requirements, their colour does not matter. However, currently they seem to fail to comply. The Standard states that lawns do not require fencing. This is a waste of materials: people will not trample grass and bushes just for the sake of it, while dog owners will trespass anyway. There are many other options for protecting lawns from being trampled. For instance, a same-level pavement strip with a different texture could protect a lawn from accidental intruders just as well as a curb can.
Natural soil water absorption is currently largely ignored, with most precipitation going down the storm drains. Meanwhile patches of open terrain on a street are able to absorb water. Employing these natural cycles in street layout could save resources.
Does the Standard provide any financial estimations? For instance, an approximate cost of renovating a street of a particular type?
No, as the Standard does not list any products of any particular brand, there are no prices to refer to. Nonetheless, the Standard was developed to fit three potential price ranges. Whether their estimated price is low or high, all the elements ensure that quality requirements are met. The same quality level must be maintained across the whole city and never drop below the set standard.

Let’s say a world-famous architect arrives to Moscow to design a street. He puts incredibly beautiful things into his project, which, unfortunately, contradict the Standard and are not guaranteed to work as intended. In that scenario, will the architect be told to stick to the Standard ?
This could happen and I think it would be a good thing. If an architect plans to place a sculpture on a 1.5 meter wide sidewalk, would that really be a good idea? Following the Standard ensures smooth movement. Its goal is to reinvigorate the streets. In Copenhagen, new design manuals helped increase average time spent by residents outside by 20% over 10 years. That was achieved through creating convenient and attractive public spaces. Moreover, implementation of the Standard enables the creation of professional documentation for architects, which excludes the possibility of any instructions that will later be unclear to the experts trying to work with them. Finally, the Standard also pursues the task of providing the opportunity for the development of street retail.
Isn’t retail a whole different story? How can retail be introduced in such places as Strogino District, where the ground floors are living floors and have security bars on windows? By reintroducing street vendors?
True, business has no direct relation to street renovation. However, there is a strong connection between them. In Strogino, building façades are mostly located far from the sidewalk. Moreover, facades are often concealed by shrubbery and trees, making local businesses even less noticeable. Another problem is that first floor apartments cannot be used for commercial purposes due to insufficient ceiling height (3 m compared to 3.5 m required minimum). Nonetheless, we discovered multiple examples of shop owners reconstructing apartments in residential districts to meet the requirements.
Our British consultant Phil Wren, a street retail expert, travelled Moscow ’s residential districts and studied the existing examples. He came up with a great idea: building an expansion connected to the façade and facing the sidewalk. This makes it possible both to achieve the required ceiling height and increase the visibility of the business to the passers-by. The part of the shop located in the apartment can be used as a utility room or a stockroom. This way the noise level is reduced, regulations are met and store space is increased. Our Russian consultants confirmed the viability of the proposed concept. And the Standard will ensure that any added expansions will look presentable.

Does the Standard also regulate façade appearances, an architectural element? What should be expected from this? It is unlikely that all houses which fail to comply will be demolished once the Standard is implemented.
Renovation works with what is given. Of course, façades cannot be changed. Central Moscow has a problem with mansions and many other buildings being fenced off, which prevents them from accommodating street retail. Central streets are also relatively narrow. The Standard proposes sidewalk expansion wherever the access to the first floors is open. Street renovation does not always involve planting trees. Some places require enhanced crossings so that people can quickly reach the other side of the street to get to a shop or a café. Those streets where the facades are windowless are a more suitable place to plant more vegetation.
Can an average person – not an architect, designer or construction worker – understand the new Standard , or is it a technical document which can only be interpreted by a professional?
Any person can. The Standard is written in a way that both professionals and common citizens are able to understand. The Standard contains multiple images, photos, infographics and diagrams and is written in plain language. We would love for more people to read it: the books contain many interesting solutions for our city that affect every pedestrian.
In late March it was revealed that Strelka KB would be developing a standard for recreational zones and public areas in Moscow . What differences will that document have from the Street Design Standard ?
The two standards will have a lot in common. The city currently faces a task of developing a connected system of public spaces. The first logical step was to work with the streets which actually connect areas of attraction and other public spaces. Now the work on all other public spaces takes off. Parks, garden squares, yards, water bank recreation areas, plazas near metro stations must all fall into place. Work with these territories will set a single quality standard. In addition, it will improve Moscow ’s quality of life and reduce air pollution. Simple solutions could improve airflow, increase biodiversity and reduce noise levels at the same time.
The renovation program is quite long and depends on numerous standards and documents. But when exactly will the endless repair works end? Are there any time estimations for when all these concepts will finally get implemented?
This is not an easy question. Full renovation may last decades. The Standard is the first step towards actually controlling the renovation process and its timeline. Until now renovation has been proceeding rather haphazardly. Now the city has decided that the way the streets are designed should be clarified. We understand that the Standard cannot last unchanged for eternity and should, just like any regulation, undergo periodical updates. The Standard uses flexible typology: a street of one type could transition to another within a few years under certain conditions, such as changes in its usage and its user categories. Everything must stay regularly updated according to the accumulated experience.
During our work on the Standard , we held regular roundtables joined by experts and ordinary citizens. One of our guests mentioned that he had recently started paying attention to Moscow ’s facades, their beauty and their drawbacks. He was able to do that because he no longer had to watch his step. So the process has already started and we already see some results.

- Sustainability
世界上最受欢迎的建筑网站现已推出你的母语版本!
想浏览archdaily中国吗, you've started following your first account, did you know.
You'll now receive updates based on what you follow! Personalize your stream and start following your favorite authors, offices and users.
IMAGES
VIDEO
COMMENTS
Make it simple and hassle-free with a collection of well-designed and easy-to-use presentation templates from Canva. To captivate your target audience, you need the proper presentation template design that suits your subject. After all, a pleasing visual, coupled with helpful and relevant content, can go a long way in creating a solid presentation.
I've made the switch! Presentations on Canva are SUPER EASY and convenient to put together. In this Canva tutorial video, I'll show you how to put a great lo...
What you'll learn. Duplicate your title graphics across slides. Create a content slide to match your title graphic. Place padding around your text to make it easy to read. Increase your font size to emphasise your points. Reduce the amount of text on each slide to avoid clutter. Share. Start tutorial. Learn how Canva can help you create ...
Wondering how to make presentations in Canva that look both cool and professional? When it comes to creating presentations, Canva just makes it much easier, ...
Learn how to use Canva to create presentations. In this tutorial series you'll discover Canva tips and tricks to create better presentations but also deliver...
Presentation Tutorial: How To Make a Presentation in Canva (FREE & EASY) // In this video, I'm going to show you a simple presentation tutorial on how use (F...
Create better-looking PowerPoint presentations using these Canva hacks. 🎨NEED CANVA PRO? Use my link to receive a FREE 45-Day Trial of Canva Pro - https://l...
Another platform that you can use to create a presentation is Canva. As a template design site where you can craft beautiful documents, Canva makes the act of creating presentations as simple as Google Slides---perhaps even simpler. Here's how to design a workplace presentation in Canva. Step 1: Launch Canva
Step 1: Open a slide in your Canva presentation. Step 2: Select Elements from the sidebar. Add graphics, icons, stickers, tables, videos, and more. Step 3: You can explore the AI image generator ...
Creating presentations becomes an easy task if you use Canva. In this video, you will discover the different functions that will help you create a unique pre...
Canva Pro is without doubt a better choice for design and presentations, and it will definitely take your presentations and work to the next level, enhance your productivity, and improve teamwork.
Creating the perfect presentation design is a challenge that speakers often aim to achieve, only to find themselves lacking graphic design knowledge. ... In case the original Canva design isn't a presentation file, like a banner or social media post, you won't be able to resize for that output unless you have a premium account.
50 Awesome Presentation Designs from Canva. By Justin Davies. The bar has really been lifted when it comes to expectations on slide design. There is greater pressure than ever before to have a great looking slide deck, rather than the traditional bullet point style that comes with presentation software. At Prezentt, we are big fans of Canva.
Discover Our Range of Canva Presentation Templates. Looking to spice up your presentations? Look no further than Canva templates! With a wide range of options in style, use case, layout, theme, industry, color, and events, you'll never be at a loss for the perfect design.
With Canva, you get even more creative freedom: An easy drag-and-drop tool to help you add graphics; Page animation features, emojis, color palettes and font sets; Millions of professionally designed images and photos; Pre-recorded Talking Presentation tools to help you practice; A notes feature for adding talking points to your design
In the digital age, eye-catching designs and stunning presentations are more important than ever. Canva has long been a go-to tool for creating these visuals. However, there's a world of options ...
Free Google Slides theme and PowerPoint template. Do you know some acquaintances that want to travel to Russia, the biggest country in this planet? Now you can be their own tour guide with this template. Include as much information as possible about tourist attractions, monuments and things to do in Moscow. Let the simplicity of these slides ...
Walking tour around Moscow-City.Thanks for watching!MY GEAR THAT I USEMinimalist Handheld SetupiPhone 11 128GB https://amzn.to/3zfqbboMic for Street https://...
Canva. Create professional content with Canva, including presentations, catalogs, and more. ... The master plan design has focused on creating a monumental and powerful plan with long axises, wide ...
Published on August 25, 2016. Share. Earlier this year the development of a new Street Design Standard for Moscow was completed under a large-scale urban renovation program entitled My Street, and ...
651 likes, 8 comments - socialcanvasbyrahulApril 6, 2024 on : "Day 57 of 100 Days 100 Designs Challenge - Canva AI Presentation Follow @socialcanvasbyrahul for more ...