Advertisement

Microsoft PowerPoint for Windows
- V 2021
Microsoft PowerPoint: Create attractive presentations without complicating your life
Microsoft PowerPoint is a presentation software application that has been the industry standard for decades. It is used by millions of people worldwide to create presentations for a variety of purposes, including business, education, and personal use. PowerPoint is known for its user-friendly interface and its wide range of features, making it a powerful tool for creating visually appealing and informative presentations.
What is Microsoft PowerPoint?
Microsoft PowerPoint for Windows is the latest version of PowerPoint that is available for Windows PCs. It is included with the Microsoft 365 suite of applications, which also includes Word , Excel , and Outlook . PowerPoint for Windows can also be purchased as a standalone application .
Key features of Microsoft PowerPoint
PowerPoint for Windows offers a wide range of features that make it a versatile tool for creating presentations. Some of the key features include:
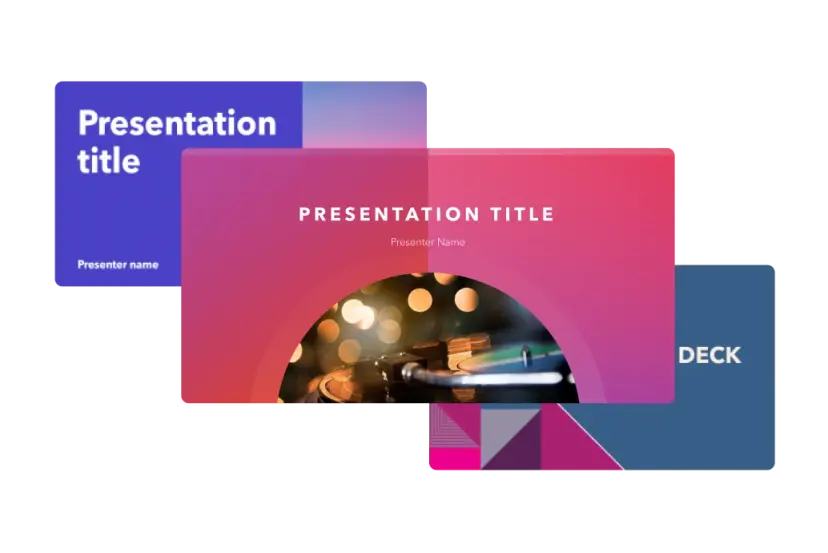
- Templates : PowerPoint offers a variety of templates that can be used to create presentations with a professional look and feel.
- Themes : PowerPoint themes allow you to change the overall look of your presentation, including the colors, fonts, and layout.
- Slides : PowerPoint presentations are made up of individual slides, each of which can contain text, images, videos, and other multimedia content.
- Transitions : PowerPoint transitions allow you to smoothly move between slides in your presentation.
- Animations : PowerPoint animations can be used to add visual interest to your presentations.
- Multimedia : PowerPoint supports a variety of multimedia content, including images, videos, and audio.
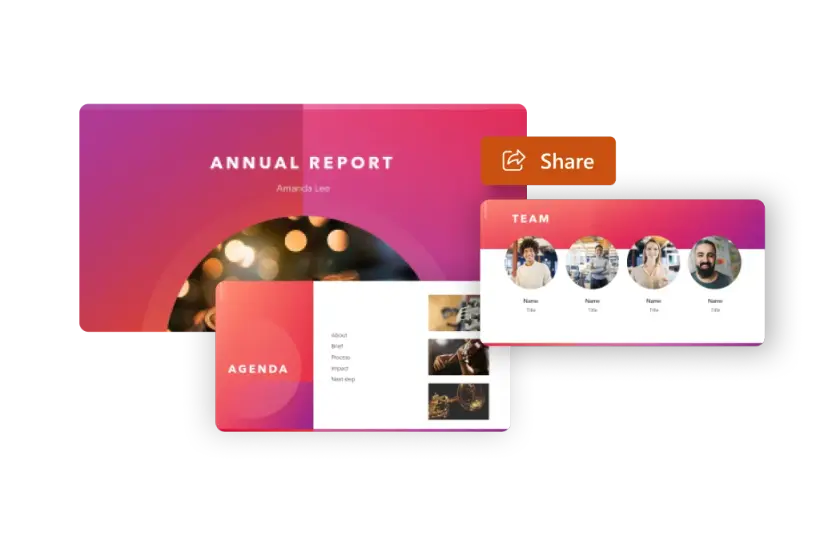
- Collaboration : PowerPoint allows you to collaborate on presentations with others in real time.
Creating a presentation with Microsoft PowerPoint
Creating a presentation with PowerPoint is a straightforward process. To create a new presentation, simply open PowerPoint and select the desired template . Once you have selected a template, you can start adding content to your slides.
Adding content to slides
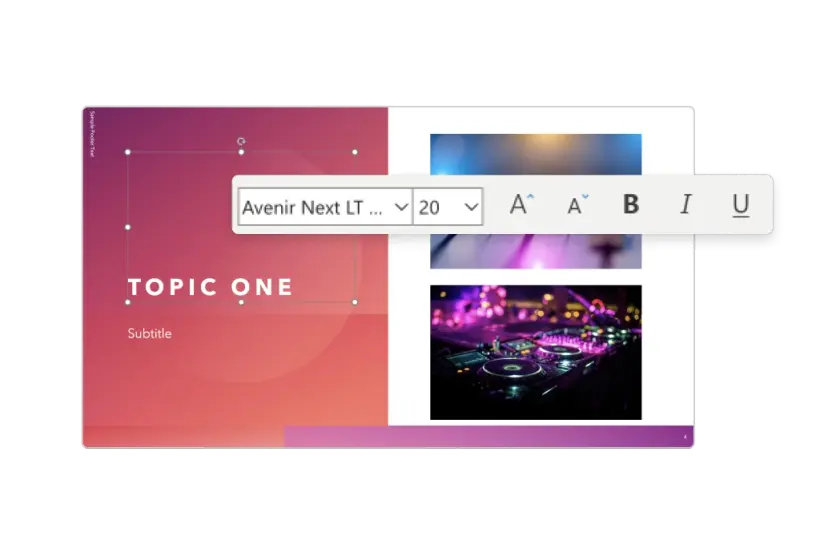
To add content to a slide, you can simply type text into the text box. You can also add images, videos, and other multimedia content by clicking on the appropriate button on the ribbon .
Customizing slides
You can customize the appearance of your slides by changing the background color, font, and layout. You can also add transitions and animations to your slides .
Reviewing and saving your presentation
Once you have finished creating your presentation, you can review it in slide show mode to see how it will look when presented. You can save your presentation in a variety of formats, including PPTX, PPT, and PDF .
Why Microsoft PowerPoint so popular?
Microsoft PowerPoint is incredibly popular for several reasons, making it the go-to presentation software for individuals and businesses worldwide. Its widespread adoption can be attributed to its user-friendly interface, comprehensive feature set , and ability to create visually appealing and informative presentations.
User-friendly interface
PowerPoint's intuitive and straightforward interface makes it accessible to users with varying levels of technical expertise. The drag-and-drop functionality, familiar menus, and clear visual elements enable users to navigate and utilize the software effortlessly . This simplicity has been a key factor in its widespread adoption, particularly among non-technical individuals who need to create presentations.
Comprehensive feature set
PowerPoint boasts a robust feature set that caters to a wide range of presentation needs. Its extensive library of templates and themes provides a foundation for professional-looking presentations, while its design tools allow for customization and personalization. Additionally, the inclusion of multimedia elements, transitions, animations, and interactive features enhances the visual appeal and engagement of presentations .
Visual appeal and informational content
PowerPoint's ability to combine text, images, videos, and other multimedia content makes it an effective tool for delivering information in a visually engaging and impactful manner. Users can effectively communicate their message through a combination of visual elements and clear, concise text . This combination of visual appeal and informational content holds the audience's attention and enhances the overall effectiveness of the presentation.
Widespread familiarity and compatibility
PowerPoint's widespread use and familiarity among individuals and organizations have made it the de facto standard for presentation software. This commonality ensures compatibility across platforms and organizations, facilitating collaboration and knowledge sharing. Moreover, PowerPoint's integration with Microsoft Office suite further enhances its practicality and accessibility.
Global adoption and educational usage
PowerPoint has become an essential tool in educational settings, empowering instructors to effectively deliver lectures, presentations, and course materials . Its versatility enables teachers to incorporate various multimedia elements, interactive exercises, and collaborative activities to enhance student engagement and learning outcomes.
Business and corporate use
In the business world, PowerPoint is indispensable for meetings, presentations, and communicating information to clients, partners, and stakeholders. Its ability to visually present complex data, highlight key points, and engage the audience makes it a valuable tool for effective communication and decision-making .
Microsoft PowerPoint's enduring popularity stems from its user-friendliness, comprehensive feature set, ability to enhance visual appeal and informational content, widespread familiarity, and exceptional compatibility across platforms and organizations. Its versatility makes it a preferred choice for individuals, educators, and businesses worldwide, cementing its place as the industry standard for presentation software .
Final words about the app
Microsoft PowerPoint for Windows is a powerful tool for creating presentations. It is easy to use, offers a wide range of features, and can help you create presentations with a professional look and feel. However, PowerPoint is a paid software application and can be limited in terms of creativity.
PowerPoint for telling your story. A new, modern take on the familiar PowerPoint application to design and share your most impactful presentations
Get your ideas across with beautiful design, rich animation, cinematic motion, 3D models and icons. Let intelligent technology help you bring your presentation to life with a few clicks.
Tell your story with confidence with slide-by-slide notes only viewable by you. Easily translate your slides into the preferred language and use the built-in accessibility checker to be sure your audience doesn’t miss a thing.
Get premium versions of PowerPoint and other Office apps like Word and Excel by subscribing to Office 365. With Office 365 you'll get great PowerPoint features like Designer, Editor, and real-time co-authoring. Plus, you'll receive exclusive, new features every month ensuring you're always up-to-date.
- Ease of use
- Wide range of features
- Professional look and feel
- Collaboration
- Limited creativity
Also available in other platforms
- Microsoft PowerPoint for Android
- Microsoft PowerPoint for Mac
- Microsoft PowerPoint for iPhone
Microsoft PowerPoint for PC
User reviews about microsoft powerpoint.
to continue there improving this important application because it downloading weakly
by محمد ناصر
I WANT TO LEARN MORE ABOUT THIS PROGRAM AND RESTORE IT IN MY COMPUTER
by francis t lopaz
Would've given it a better rating had you let me downloaded it!
by Anonymous
i love it. it works well and it has very good animations transistions and fonts
Why do we need to pay now. why do we have to pay i mean before we had it for free why now tho i cant pay even tho i need to do presentations bu t how im i supposed to pay for a powerpoint when i cant convince my parents to give me money to go to the cinema? More
yes we can summarize. power point no there was problem for receive their own point Pros: to add the file in power point Cons: t o save correctly not anywhere More
- Read all reviews
Free PowerPoint Password Recovery
A free program for Windows, by Amazing-Share.
Microsoft PowerPoint 2010
The software par excellence for creating digital presentations.
Microsoft PowerPoint Viewer 2007
Open PowerPoint PPT files without Powerpoint
Microsoft PowerPoint 2016
Important note: Microsoft PowerPoint 2016 is no longer available
Alternatives to Microsoft PowerPoint
Photo slideshows reborn
Adobe Captivate
- Trial version
Create E-Learning Content with Adobe Captivate
Explore More
iOffice Suite
Benefits of Using Office Suites for Business & Productivity
Windows 365
Microsoft’s virtual desktop infrastructure
Spreadsheet Conversion Tool
Spreadsheet Conversion Tool Review
Microsoft Office 2010
Important note: Microsoft Office 2010 is no longer available.
Prevent unwanted changes with Tweakeze
PDF Squeeze
Free PDF compressor
Microsoft Excel 2016
Important note: Microsoft Excel 2016 is no longer available.
Microsoft Office
A powerful office suite
Microsoft Word 2010
Microsoft Office 2010 for Windows: Efficient work with ease.
Microsoft Office 2007 Service Pack 3
Make Microsoft Office 2007 better than ever
Master PDF Editor
A multifunctional PDF editor for PC
Microsoft Word 2016
Microsoft Word 2016: a revolution in word processors
Related Articles

What Is PowerPoint and How it Works

How to Make Invitations With Microsoft Powerpoint in 3 Steps

How to Convert Microsoft Powerpoint to Google Slides in 2 Easy Methods

Top 3 Microsoft PowerPoint Tips
Breaking news.

Akira Toriyama wrote an exclusive story before he died, and soon we will be able to see it

Cities Skylines 2 confirms that its DLC causes the game to stop working

The emotional reunion between two legendary actors from The Office who have coincided in a highly anticipated movie

Null's Brawl: How to Download and Play Brawl Stars Server

Ace Your Job Interview: Common Questions and How to Answer Them

Steam is imposing new restrictions on its refunds.
Laws concerning the use of this software vary from country to country. We do not encourage or condone the use of this program if it is in violation of these laws. Softonic may receive a referral fee if you click or buy any of the products featured here.
Your review for Microsoft PowerPoint
Thank you for rating!
What do you think about Microsoft PowerPoint? Do you recommend it? Why?
OOPS! This is embarrassing...
Something’s gone terribly wrong. Try this instead

How to make a slide show
Learn how to make a slide show with photos, videos, music, and custom settings using a slide show maker.
Learn how to make a slide show with PowerPoint
Discover how to make a slide show with photos, videos, music, and custom settings using a slide show app like PowerPoint.
What is a slide show maker?
To create a slide show, you’ll want to use a slide show maker—or slide show app—which is a software program or online service that enables you create digital slide shows with text, photos, videos, music, and other special effects. The full range of slide show features and functionality varies from program to program.
Once you’ve created a slide show, it can be published on the internet or shared with others as a video file. Additionally, you can use slide shows to create dynamic, interactive content on websites.
Slide show software can be used for a variety of purposes, such as creating presentations for work, school, and even your personal life. For instance, slide shows are often used to:

Display photos during an event
Slide shows are a great way to share photos and videos with guests at a wedding, birthday, or other special event.
Create a digital photo album
Some slide shows are created for personal reasons, such as sharing important memories with family or friends.

Highlight products or services
Businesses can use slide shows to showcase their products, promote special offers and sales, or pitch their services to potential clients.
Enhance teaching, training, and public speaking
Slide shows can also provide helpful visuals in educational settings, classroom presentations, and public speaking forums.
What you need to make a slide show
When it comes to creating a slide show, there are a few things you'll need to get started. First and foremost, you'll need a device equipped with presentation software or access to an online slide show app. Secondly, you’ll need a way to display your slide show, which usually means connecting your device to a projector or big screen TV. Beyond that, you’ll need some visual aids and other media to bring your slide show to life.
Explore each of these slide show requirements in more detail:
Devices and equipment —To create a slide show, you’ll use a computer or other device—such as a tablet or mobile phone—with PowerPoint or a similar program installed. You will also need a way to project the slides onto a screen or wall. This can be done with a projector, but if you don't have one available, you can use your TV or computer monitor. Simply connect your device to the TV or monitor using an HDMI cable and select the correct input. Your slides will now be projected onto the screen.
Media —Of course, creating a slide show requires media that adds visual and even audio elements to your presentation. This can be anything from photos and videos to music and text. You can use search engines to find copyright-free media to use in your slide show.
Another option is to purchase royalty-free stock footage, images, and audio files from online media libraries. This could be a bit more expensive, but it guarantees that you have the legal right to use the media in your presentation.
Finally, you can also use your own videos, images, and even music. While this can be a time-consuming process, it does allow you to create custom content specifically for your slide show.
Slide show creator —To bring your slide show together, you’ll need a slide show creator. The slide show software you choose will depend on your presentation requirements and preferences. There are many slide show makers on the market, with Microsoft PowerPoint being one of the most popular and widely used programs globally.
How to choose a slide show maker
When choosing slide show software, it's important to consider the features and specifications that are most important to you. Some of the questions you might ask when choosing a slide show maker include:
- How easy is the software to use?
- Is the software Mac or PC compatible?
- Can I access and edit my slide show on the cloud?
- What kind of slide shows can be created with the software?
- How many photos and/or videos can be included in a slide show?
- Can text and other elements be added to slide shows?
- Are transitions and effects available for slide shows?
- Is music accompaniment an option?
- What are the options for saving and sharing your slide show?
Building a slide show doesn't have to be difficult. With the right software, you can create an engaging presentation in no time.
Six steps for creating a slide show

1. Plan your slide show
Before getting too deep into your slide show project, it’s a good idea to select and save the photos and videos you want to use. This helps you create a slide show more efficiently and purposefully, ensuring a better outcome.
4. Import media
Start adding photos, videos, and other desired media to your slides. You can upload these from your device or online media libraries. If you planned your slide show in advance, you should have all your media saved in one place.

2. Launch your slide show app
Once you’ve decided on a slide show maker, you’ll want to launch the app from whatever device you’ll be using to create your presentation.
5. Add text, music, and transitions
After you’ve arranged the visuals in your slide show, you can provide additional information and communicate sentiment using custom text, music, and timed slide transitions.

3. Choose your theme
Most slide show software offers a variety of pre-set themes, colors, and designs. You can choose one that best suits your slide show or create a custom theme using the program’s various tools and features.
6. Record, save, and share your slide show
Now you’re ready to record your slide show, which can include a voiceover or Cameo . Once your slide show is complete, you can save it as a video to your device or to the cloud, such as OneDrive . You can access your saved slide show at any time to display at events, use in meetings, share online, or send directly to other people.
How to make a slide show with photos
Adding photos to your slide show is a great way to enliven your presentation and make it more visually interesting. Here are a few different ways you can add photos to your slide show in PowerPoint.

Add photos from your device
Whether you’re using a computer, tablet, phone, or other device, you can use photos that are saved to your device to create your slide show. In PowerPoint, simply select “Insert” then “Pictures” from the program menu, then choose “This Device.” This will open your photo library and allow you to find the photos you want to use. Once you’ve selected the photos that you want to import, just click on the "Insert" button and they will be added to your slide show. If you’re using a pre-made theme, you can also right-click the image in the slide show and select “Change Picture.” Again, you will choose “This Device” to access your photo library. After inserting your photo, you can reposition it on your slide or resize it however you like.

Use stock photos
Another way to add photos in PowerPoint is to follow the same process you would when adding photos from your device, but when prompted to choose your photo source, select “From Stock Images” instead of “This Device.” This will display a library of photos that you can use in your slide show without worrying about copyright infringement. There are thousands of stock images available in most slide show maker programs. Once the library is open, you can explore existing photo categories or use keywords to search for photos that fit your needs.

Explore online photo sources
Online photos are images you can insert into a PowerPoint slide show directly from the internet, as opposed to using those you have saved on your device. This is a convenient option if you don't have photos already prepared for your slide show, or if you can’t find the right kind of photo in the stock image library. However, there are some potential risks associated with using online photos, namely that you must be careful to use royalty-free images so not to infringe on any copyrights. In PowerPoint, there is a filtering option to ensure your search results only show royalty-free photos. Inserting photos from online sources follows the same process as the previous two methods, but this time, you’ll select “From Online Sources.”
How to add videos, music, and text

How to add videos to PowerPoint slide shows
Adding videos to your slide show involves accessing videos from your device, a stock video library, or online video sources—just as you would when adding photos. In this case, however, you’ll navigate to the menu in PowerPoint and select “Insert,” followed by “Media,” then “Video.” Once your video appears on your slide, you can resize or reposition it to fit your presentation needs. You can also set your video to play automatically in the slide show by selecting “Playback” on the menu and choosing “Start Automatically.”

How to add music to PowerPoint slide shows
Much like adding videos, you can add music to individual slides in PowerPoint by navigating to “Insert” on the menu, then “Media,” and finally “Audio.” You can then import music from your device, or you can record your own audio directly in PowerPoint. However, if you want your audio to play across multiple slides in your presentation—for example, as background music for a slide show—you’ll have to take a couple of extra steps. Once you’ve imported your audio file, select “Playback” from the menu and choose the “Play in Background” option. Your music will now play across all slides. You can set one song to loop for the duration of the slide show, or you can add more songs to play continuously throughout the slide show.

How to add text to PowerPoint slide shows
Premade themes in PowerPoint make adding text slide shows easy. On slides that already have templated content, you can simply click on the text and begin editing. In addition to changing what the text says, you can resize, recolor, reposition, and add special effects to the text. Of course, you can also change the font—or style—of the text. Most of this can be done from the “Home” tab on the menu while certain effects, such as shadows, can be found on the “Shape Format” tab. If you’re designing your presentation slides from scratch, or want to create additional text, find “Insert” on the menu, then choose “Text Box” or “Word Art,” depending on your desired text effect.
Discover custom slide show settings
Add even more effects to your PowerPoint slide show with custom settings like timing, transitions, and looping.

Set slide show timing
Adding timing to your slide show is a great way to control the pacing and flow of your presentation. To add timing in PowerPoint, go to the "Transitions" tab on the menu and find the "Advance Slide" area. Make sure the box next to “After:” is checked, then input the amount of time you’d like each slide to appear on-screen. The slides will automatically advance, creating a movie-like effect that’s great for events and special occasions.

Create slide show transitions
Now that you’ve added automatic timing to your slide show, you can make it more visually appealing by creating slide transitions. Transitions are special effects that allow you to animate the way your slides change from one to the next, and there are a variety of different transitions in PowerPoint that you can choose from. You can add these transitions to your slide show from the "Transitions” tab. From there, you’ll select the transition you want to add. To preview the transition, simply click on it. You can click “Apply To All” to automatically add the same transition to every slide in your slide show, or you can manually add different transitions to different slides.

Loop your slide show
If you want your slide show to play continuously until you choose to turn it off, you can set your PowerPoint presentation to loop. This will ensure your slide show automatically starts over from the beginning once it reaches the end. To get started, navigate to the “Slide Show” tab on the menu and select “Set Up Slide Show.” When the settings window opens, check the box next to “Loop continuously until ‘ESC’” and then click “OK.” When you’re ready to turn your slide show off, simply press the Esc key on your keyboard.
Slide show template and theme tips
Search themes and templates online.
With numerous slide show themes and templates available, it’s easy to find one that fits your needs.
Customize your design
If you can’t find the perfect theme or template, you can change things like colors and fonts.
Build a custom template
If you want a blueprint to use with future slide shows, you can create your own template.
Add new slides
If you need more slides, you can choose a specific layout and your theme will be carried over.
Edit your slide layouts
Even when using a theme or template, you can rearrange slide content to highlight key information.
Add photos, videos, and text
Themes and templates make adding media easy since most slides have designated content areas.
Change or resize your fonts
If your theme’s font is too small, you can resize it or choose a new font to make it easy to read.
Reorder your slide show
Some themes and templates have a predefined sequence, but you can reorder slides to meet your needs.
Create your own slide show
Slide shows are a great way to engage your audience and present important information. Whether you're creating a slide show for personal or professional reasons, slide shows are an essential tool for anyone who wants to share information in a visually appealing manner.
Discover more ways to improve your slide show
What options are available to create a slide show?
Slide show makers come in many forms. Some slide show software can only be used on specific devices, while other slide show creators can be accessed via the cloud from any device at any time.
It’s a good idea to evaluate a variety of slide show makers to ensure that you find one with all the features you need. For instance, some slide show software skews toward business use cases and others toward personal.
Microsoft PowerPoint is a popular slide show app that allows you to save presentations to your device or the cloud, and is widely used for personal, professional, and educational purposes.
Frequently asked questions
What are slide show apps and software.
Slide show apps and software are used to create and share slide shows. Slide show programs are typically used to communicate information, diagrams, plans, or processes. They can also be used to display photos and videos at events or retail stores. Usually, slide show makers have a range of built-in features and layouts, making them easy to use, regardless of technical skill levels.
What should a slide show include?
An effective slide show should be engaging, visually appealing, and informative. To achieve this, you'll want to make sure to include the following elements:
- A catchy headline or title. This will help grab your audience's attention and set the tone for the rest of your presentation.
- A variety of images. Don't just rely on text—incorporate photos, illustrations, or even video to maximize viewership.
- Bullet points or short blocks of text. Keep your slide content concise and easy to digest; too much information will only overwhelm your viewers.
How do I make a picture slide show?
There are a few different ways to make picture slide shows. You can use online programs, or you can create a slide show directly on your computer, phone, tablet, or other device using slide show software. Some programs, such as Microsoft PowerPoint, can be accessed on your personal device and on the cloud.
How long should a slide show be?
The length of your slide show will depend on several factors, such as the topic of your presentation, the audience you're presenting to, and the amount of time you have. That said, slide shows are generally between five and ten minutes long.
How can I make a slide show better?
Here are a few tips to make your slide show more engaging:
- Add images, videos, and music to bring your slide show to life.
- Use a font that is easy to read from a distance.
- Try not to use too many words on each slide.
- Use custom transitions and timing to make your slide show flow.
- Ensure a cohesive slide show by using a theme or template.
- For live presentations, practice with the Speaker Coach feature .
Follow Microsoft 365
Find the perfect PowerPoint presentation template
Bring your next presentation to life with customizable powerpoint design templates. whether you're wowing with stats via charts and graphs or putting your latest and greatest ideas on display, you'll find a powerpoint presentation template to make your ideas pop., presentations.
Help your data, insights, and recommendations make a statement with beautiful and easily customizable presentation templates.
Certificates
Celebrate accomplishments big and small with customizable certificate templates. From gift certificates to awards for finishing a course or training, find a template that highlights their accolades.
Boost visibility for your show, project, or business with easily customizable poster templates. Find templates for all your promotion needs and make them uniquely yours in a flash.
Keep track of whatever you need to in style. From personal planning to promotional calendars, find templates for every kind of project and aesthetic.

Infographics
Say more with less using helpful and easily customizable infographic templates. Add clarity to business presentations, school projects, and more with these helpful templates.
Start with the best PowerPoint templates

Elevate your storytelling
Tips, tricks, and insider advice from our business and design experts
A quick way to create beautiful, powerful PowerPoint presentations
Create captivating, informative content for PowerPoint in just a few minutes—no graphic design experience needed. Here's how:
1. Find the perfect PowerPoint template
2. Customize your creation
3. Show it off
Let's create a powerpoint design, frequently asked questions, where can i find slide templates and themes that i can customize.
To find customizable slide templates and themes, you can explore the business presentations templates or search by PowerPoint templates . Once you find a template that resonates with you, customize it by changing its color scheme, add in your own photos, and swap out the font.
How do I use pre-made PowerPoint templates?
After you've chosen a PowerPoint template to use, customize it. Explore [design tips] on how to customize a deck that resonates with your brand while putting emphasis on the topic at hand. Play with other design elements, like photo shapes, to make each slide unique.
How can I make or edit my own custom PowerPoint templates?
Start from scratch by creating your own PowerPoint template . Follow tips for designs and business presentations so that your unique template is cohesive and relevant to your brand. Incorporate your brand's color scheme and graphics so that all your slides aren't text only.
What kinds templates can I get online for PowerPoint?
You can get PowerPoint templates that have modern designs, animated ones, or even hand-drawn art in each slide. The color schemes range from bold to subtle. Each template's slides are also organized based on what you may want to include in your presentation . You can use the template as a starting point and customize its specific details from theme.
Popular categories

This browser is no longer supported.
Upgrade to Microsoft Edge to take advantage of the latest features, security updates, and technical support.
Desktop Guide (WPF .NET)
- 5 contributors
Welcome to the Desktop Guide for Windows Presentation Foundation (WPF), a UI framework that is resolution-independent and uses a vector-based rendering engine, built to take advantage of modern graphics hardware. WPF provides a comprehensive set of application-development features that include Extensible Application Markup Language (XAML), controls, data binding, layout, 2D and 3D graphics, animation, styles, templates, documents, media, text, and typography. WPF is part of .NET, so you can build applications that incorporate other elements of the .NET API.
There are two implementations of WPF:
.NET version (this guide):
An open-source implementation of WPF hosted on GitHub , which runs on .NET. The XAML designer requires, at a minimum, Visual Studio 2019 version 16.8 . But depending on your version of .NET, you may be required to use a newer version of Visual Studio.
Even though .NET is a cross-platform technology, WPF only runs on Windows.
.NET Framework 4 version:
The .NET Framework implementation of WPF that's supported by Visual Studio 2019 and Visual Studio 2017.
.NET Framework 4 is a Windows-only version of .NET and is considered a Windows Operating System component. This version of WPF is distributed with .NET Framework. For more information about the .NET Framework version of WPF, see Introduction to WPF for .NET Framework .
This overview is intended for newcomers and covers the key capabilities and concepts of WPF. To learn how to create a WPF app, see Tutorial: Create a new WPF app .
Why upgrade from .NET Framework
When you are upgrading your application from .NET Framework to .NET, you will benefit from:
- Better performance
- New .NET APIs
- The latest language improvements
- Improved accessibility and reliability
- Updated tooling and more
To learn how to upgrade your application, see How to upgrade a WPF desktop app to .NET 7 .
Program with WPF
WPF exists as a subset of .NET types that are, mostly located in the System.Windows namespace. If you have previously built applications with .NET with frameworks like ASP.NET and Windows Forms, the fundamental WPF programming experience should be familiar, you:
- Instantiate classes
- Set properties
- Call methods
- Handle events
WPF includes more programming constructs that enhance properties and events: dependency properties and routed events .
Markup and code-behind
WPF lets you develop an application using both markup and code-behind , an experience with which ASP.NET developers should be familiar. You generally use XAML markup to implement the appearance of an application while using managed programming languages (code-behind) to implement its behavior. This separation of appearance and behavior has the following benefits:
Development and maintenance costs are reduced because appearance-specific markup isn't tightly coupled with behavior-specific code.
Development is more efficient because designers can implement an application's appearance simultaneously with developers who are implementing the application's behavior.
Globalization and localization for WPF applications is simplified.
XAML is an XML-based markup language that implements an application's appearance declaratively. You typically use it to define windows, dialog boxes, pages, and user controls, and to fill them with controls, shapes, and graphics.
The following example uses XAML to implement the appearance of a window that contains a single button:
Specifically, this XAML defines a window and a button by using the Window and Button elements. Each element is configured with attributes, such as the Window element's Title attribute to specify the window's title-bar text. At run time, WPF converts the elements and attributes that are defined in markup to instances of WPF classes. For example, the Window element is converted to an instance of the Window class whose Title property is the value of the Title attribute.
The following figure shows the user interface (UI) that is defined by the XAML in the previous example:

Since XAML is XML-based, the UI that you compose with it's assembled in a hierarchy of nested elements that is known as an element tree . The element tree provides a logical and intuitive way to create and manage UIs.
Code-behind
The main behavior of an application is to implement the functionality that responds to user interactions. For example clicking a menu or button, and calling business logic and data access logic in response. In WPF, this behavior is implemented in code that is associated with markup. This type of code is known as code-behind. The following example shows the updated markup from the previous example and the code-behind:
The updated markup defines the xmlns:x namespace and maps it to the schema that adds support for the code-behind types. The x:Class attribute is used to associate a code-behind class to this specific XAML markup. Considering this attribute is declared on the <Window> element, the code-behind class must inherit from the Window class.
InitializeComponent is called from the code-behind class's constructor to merge the UI that is defined in markup with the code-behind class. ( InitializeComponent is generated for you when your application is built, which is why you don't need to implement it manually.) The combination of x:Class and InitializeComponent ensure that your implementation is correctly initialized whenever it's created.
Notice that in the markup the <Button> element defined a value of button_Click for the Click attribute. With the markup and code-behind initialized and working together, the Click event for the button is automatically mapped to the button_Click method. When the button is clicked, the event handler is invoked and a message box is displayed by calling the System.Windows.MessageBox.Show method.
The following figure shows the result when the button is clicked:

Input and commands
Controls most often detect and respond to user input. The WPF input system uses both direct and routed events to support text input, focus management, and mouse positioning.
Applications often have complex input requirements. WPF provides a command system that separates user-input actions from the code that responds to those actions. The command system allows for multiple sources to invoke the same command logic. For example, take the common editing operations used by different applications: Copy , Cut , and Paste . These operations can be invoked by using different user actions if they're implemented by using commands.
The user experiences that are delivered by the application model are constructed controls. In WPF, control is an umbrella term that applies to a category of WPF classes that have the following characteristics:
- Hosted in either a window or a page.
- Have a user interface.
- Implement some behavior.
For more information, see Controls .
WPF controls by function
The built-in WPF controls are listed here:
Buttons : Button and RepeatButton .
Data Display : DataGrid , ListView , and TreeView .
Date Display and Selection : Calendar and DatePicker .
Dialog Boxes : OpenFileDialog , PrintDialog , and SaveFileDialog .
Digital Ink : InkCanvas and InkPresenter .
Documents : DocumentViewer , FlowDocumentPageViewer , FlowDocumentReader , FlowDocumentScrollViewer , and StickyNoteControl .
Input : TextBox , RichTextBox , and PasswordBox .
Layout : Border , BulletDecorator , Canvas , DockPanel , Expander , Grid , GridView , GridSplitter , GroupBox , Panel , ResizeGrip , Separator , ScrollBar , ScrollViewer , StackPanel , Thumb , Viewbox , VirtualizingStackPanel , Window , and WrapPanel .
Media : Image , MediaElement , and SoundPlayerAction .
Menus : ContextMenu , Menu , and ToolBar .
Navigation : Frame , Hyperlink , Page , NavigationWindow , and TabControl .
Selection : CheckBox , ComboBox , ListBox , RadioButton , and Slider .
User Information : AccessText , Label , Popup , ProgressBar , StatusBar , TextBlock , and ToolTip .
When you create a user interface, you arrange your controls by location and size to form a layout. A key requirement of any layout is to adapt to changes in window size and display settings. Rather than forcing you to write the code to adapt a layout in these circumstances, WPF provides a first-class, extensible layout system for you.
The cornerstone of the layout system is relative positioning, which increases the ability to adapt to changing window and display conditions. The layout system also manages the negotiation between controls to determine the layout. The negotiation is a two-step process: first, a control tells its parent what location and size it requires. Second, the parent tells the control what space it can have.
The layout system is exposed to child controls through base WPF classes. For common layouts such as grids, stacking, and docking, WPF includes several layout controls:
Canvas : Child controls provide their own layout.
DockPanel : Child controls are aligned to the edges of the panel.
Grid : Child controls are positioned by rows and columns.
StackPanel : Child controls are stacked either vertically or horizontally.
VirtualizingStackPanel : Child controls are virtualized and arranged on a single line that is either horizontally or vertically oriented.
WrapPanel : Child controls are positioned in left-to-right order and wrapped to the next line when there isn't enough space on the current line.
The following example uses a DockPanel to lay out several TextBox controls:
The DockPanel allows the child TextBox controls to tell it how to arrange them. To do this, the DockPanel implements a Dock attached property that is exposed to the child controls to allow each of them to specify a dock style.
A property that's implemented by a parent control for use by child controls is a WPF construct called an attached property .
The following figure shows the result of the XAML markup in the preceding example:

Data binding
Most applications are created to provide users with the means to view and edit data. For WPF applications, the work of storing and accessing data is already provided for by many different .NET data access libraries such as SQL and Entity Framework Core. After the data is accessed and loaded into an application's managed objects, the hard work for WPF applications begins. Essentially, this involves two things:
Copying the data from the managed objects into controls, where the data can be displayed and edited.
Ensuring that changes made to data by using controls are copied back to the managed objects.
To simplify application development, WPF provides a powerful data binding engine to automatically handle these steps. The core unit of the data binding engine is the Binding class, whose job is to bind a control (the binding target) to a data object (the binding source). This relationship is illustrated by the following figure:

WPF supports declaring bindings in the XAML markup directly. For example, the following XAML code binds the Text property of the TextBox to the Name property of an object using the " {Binding ... } " XAML syntax. This assumes there's a data object set to the DataContext property of the Window with a Name property.
The WPF data binding engine provides more than just binding, it provides validation, sorting, filtering, and grouping. Furthermore, data binding supports the use of data templates to create custom user interface for bound data.
For more information, see Data binding overview .
Graphics & animation
WPF provides an extensive and flexible set of graphics features that have the following benefits:
Resolution-independent and device-independent graphics . The basic unit of measurement in the WPF graphics system is the device-independent pixel, which is 1/96th of an inch, and provides the foundation for resolution-independent and device-independent rendering. Each device-independent pixel automatically scales to match the dots-per-inch (dpi) setting of the system it renders on.
Improved precision . The WPF coordinate system is measured with double-precision floating-point numbers rather than single-precision. Transformations and opacity values are also expressed as double-precision. WPF also supports a wide color gamut (scRGB) and provides integrated support for managing inputs from different color spaces.
Advanced graphics and animation support . WPF simplifies graphics programming by managing animation scenes for you; there's no need to worry about scene processing, rendering loops, and bilinear interpolation. Additionally, WPF provides hit-testing support and full alpha-compositing support.
Hardware acceleration . The WPF graphics system takes advantage of graphics hardware to minimize CPU usage.
2D graphics
WPF provides a library of common vector-drawn 2D shapes, such as the rectangles and ellipses. The shapes aren't just for display; shapes implement many of the features that you expect from controls, including keyboard and mouse input.
The 2D shapes provided by WPF cover the standard set of basic shapes. However, you may need to create custom shapes to help the design of a customized user interface. WPF provides geometries to create a custom shape that can be drawn directly, used as a brush, or used to clip other shapes and controls.
For more information, see Geometry overview .
A subset of WPF 2D capabilities includes visual effects, such as gradients, bitmaps, drawings, painting with videos, rotation, scaling, and skewing. These effects are all achieved with brushes. The following figure shows some examples:

For more information, see WPF brushes overview .
3D rendering
WPF also includes 3D rendering capabilities that integrate with 2D graphics to allow the creation of more exciting and interesting user interfaces. For example, the following figure shows 2D images rendered onto 3D shapes:

For more information, see 3D graphics overview .
WPF animation support lets you make controls grow, shake, spin, and fade, to create interesting page transitions, and more. You can animate most WPF classes, even custom classes. The following figure shows a simple animation in action:
For more information, see Animation overview .
Text and typography
To provide high-quality text rendering, WPF offers the following features:
- OpenType font support.
- ClearType enhancements.
- High performance that takes advantage of hardware acceleration.
- Integration of text with media, graphics, and animation.
- International font support and fallback mechanisms.
As a demonstration of text integration with graphics, the following figure shows the application of text decorations:

For more information, see Typography in Windows Presentation Foundation .
Customize WPF apps
Up to this point, you've seen the core WPF building blocks for developing applications:
- You use the application model to host and deliver application content, which consists mainly of controls.
- To simplify the arrangement of controls in a user interface, you use the WPF layout system.
- You use data binding to reduce the work of integrating your user interface with data.
- To enhance the visual appearance of your application, you use the comprehensive range of graphics, animation, and media support provided by WPF.
Often, though, the basics aren't enough for creating and managing a truly distinct and visually stunning user experience. The standard WPF controls might not integrate with the desired appearance of your application. Data might not be displayed in the most effective way. Your application's overall user experience may not be suited to the default look and feel of Windows themes.
For this reason, WPF provides various mechanisms for creating unique user experiences.
Content Model
The main purpose of most of the WPF controls is to display content. In WPF, the type and number of items that can constitute the content of a control is referred to as the control's content model . Some controls can contain a single item and type of content. For example, the content of a TextBox is a string value that is assigned to the Text property.
Other controls, however, can contain multiple items of different types of content; the content of a Button , specified by the Content property, can contain various items including layout controls, text, images, and shapes.
For more information on the kinds of content that is supported by various controls, see WPF content model .
Although the main purpose of XAML markup is to implement an application's appearance, you can also use XAML to implement some aspects of an application's behavior. One example is the use of triggers to change an application's appearance based on user interactions. For more information, see Styles and templates .
The default user interfaces for WPF controls are typically constructed from other controls and shapes. For example, a Button is composed of both ButtonChrome and ContentPresenter controls. The ButtonChrome provides the standard button appearance, while the ContentPresenter displays the button's content, as specified by the Content property.
Sometimes the default appearance of a control may conflict with the overall appearance of an application. In this case, you can use a ControlTemplate to change the appearance of the control's user interface without changing its content and behavior.
For example, a Button raises the Click event when it's clicked. By changing the template of a button to display an Ellipse shape, the visual of the aspect of the control has changed, but the functionality hasn't. You can still click on the visual aspect of the control and the Click event is raised as expected.

Data templates
Whereas a control template lets you specify the appearance of a control, a data template lets you specify the appearance of a control's content. Data templates are frequently used to enhance how bound data is displayed. The following figure shows the default appearance for a ListBox that is bound to a collection of Task objects, where each task has a name, description, and priority:

The default appearance is what you would expect from a ListBox . However, the default appearance of each task contains only the task name. To show the task name, description, and priority, the default appearance of the ListBox control's bound list items must be changed by using a DataTemplate . Here is an example of applying a data template that was created for the Task object.

The ListBox retains its behavior and overall appearance and only the appearance of the content being displayed by the list box has changed.
For more information, see Data templating overview .
Styles enable developers and designers to standardize on a particular appearance for their product. WPF provides a strong style model, the foundation of which is the Style element. Styles can apply property values to types. They can be applied automatically to the everything according to the type or individual objects when referenced. The following example creates a style that sets the background color for every Button on the window to Orange :
Because this style targets all Button controls, the style is automatically applied to all the buttons in the window, as shown in the following figure:

For more information, see Styles and templates .
Controls in an application should share the same appearance, which can include anything from fonts and background colors to control templates, data templates, and styles. You can use WPF's support for user interface resources to encapsulate these resources in a single location for reuse.
The following example defines a common background color that is shared by a Button and a Label :
For more information, see How to define and reference a WPF resource .
Custom controls
Although WPF provides a host of customization support, you may encounter situations where existing WPF controls do not meet the needs of either your application or its users. This can occur when:
- The user interface that you require cannot be created by customizing the look and feel of existing WPF implementations.
- The behavior that you require isn't supported (or not easily supported) by existing WPF implementations.
At this point, however, you can take advantage of one of three WPF models to create a new control. Each model targets a specific scenario and requires your custom control to derive from a particular WPF base class. The three models are listed here:
User Control Model A custom control derives from UserControl and is composed of one or more other controls.
Control Model A custom control derives from Control and is used to build implementations that separate their behavior from their appearance using templates, much like most WPF controls. Deriving from Control allows you more freedom for creating a custom user interface than user controls, but it may require more effort.
Framework Element Model . A custom control derives from FrameworkElement when its appearance is defined by custom rendering logic (not templates).
For more information on custom controls, see Control authoring overview .
- Tutorial: Create a new WPF app
- Migrate a WPF app to .NET
- Overview of WPF windows
- Data binding overview
- XAML overview
.NET Desktop feedback
Coming soon: Throughout 2024 we will be phasing out GitHub Issues as the feedback mechanism for content and replacing it with a new feedback system. For more information see: https://aka.ms/ContentUserFeedback .
Submit and view feedback for
Additional resources
Best free presentation software of 2024
Find an alternative to PowerPoint
Best overall
Best for speed, best for functionality, best for collaboration, best user interface.
- How we test
The best free presentation software makes it simple and easy to create presentations as an alternative to subscribing to Microsoft PowerPoint.

1. Best overall 2. Best for speed 3. Best for functionality 4. Best for collaboration 5. Best user interface 6. FAQs 7. How we test
While PowerPoint is the market leader when it comes to presentation software, some people may be unwilling to subscribe to a Microsoft 365 subscription, especially if they don't expect to need to use it very often.
However, there are plenty of great alternatives to PowerPoint available for free that you can use. While these won't have the same advanced features as PowerPoint, they still offer a very competent platform to design most any presentation that you need.
To help you choose, we've listed below the best free presentation software currently available.
Add images to your presentations using the best free photo editor .

Google Workspace : Collaboration + productivity apps There are many different presentation software packages but Google Workspace formerly known as G Suite remains the original cloud office software and one of the best business office suites, offering a huge range of features and functionality that rivals can't match, especially when it comes to presentation software. Try it free for 14 days .
The best free presentation software of 2024 in full:
Why you can trust TechRadar We spend hours testing every product or service we review, so you can be sure you’re buying the best. Find out more about how we test.

Our expert review:
Reasons to buy
Reasons to avoid.
Prezi turns the traditional approach to presentations on its head. Instead of creating slide after slide, this presentation software gives you a single giant canvas. You can add blocks of text or images, or even create miniature slides. During your presentation, you can seamlessly fly around the canvas and zoom in to look at individual chunks of content.
For how complex Prezi seems, it’s impressively simple to use the platform. The only major divergence from Microsoft PowerPoint is that you need to add animated paths from one part of the canvas to another. The tools for this are fairly straightforward, especially if you’ve ever used an animation or video editing software.
Of course, this type of presentation structure isn’t always ideal. Prezi makes it hard to visualize structured data like financials, which can make it difficult to use in business applications. Some viewers also might not appreciate the fly-around animation style that’s inherent to the presentation software.
Read our full Prezi review .
- ^ Back to the top

Canva is perfect for making speedy presentations right in your web browser. This software offers a handful of free layouts to help you get your slideshow started, and it’s easy to customize the templates to fit your needs. There isn’t a huge variety of content elements to add to your presentation, but Canva makes up for this with a searchable library of more than 1 million images you can use.
Your Canva presentations live online, which makes it extremely easy to collaborate. You can invite colleagues to edit your slideshow (although simultaneous editing is not supported) or seamlessly share your finished presentation. However, beware that Canva can’t import presentations from Microsoft Powerpoint or export finished work to a Powerpoint-editable format.
Read our full Canva review .

3. LibreOffice
LibreOffice is a free alternative to Microsoft Office, and it includes a Powerpoint equivalent called Impress with nearly all of the same functionality. The only big difference you’ll find between the two slideshow creation tools is the LibreOffice lacks some modern features like built-in collaboration and integration with Microsoft OneDrive.
However, Impress does have a few advantages of its own. The software can import files from Keynote, the default presentation software on Mac computers. Plus, there are hundreds of free templates that you can download for free. Even better, there’s no limit on what fonts you can use with Impress, so it’s easy to change the look of your presentation from what Powerpoint typically allows.
On the whole, LibreOffice Impress is about as close as it gets to simply replicating Microsoft Powerpoint for free.
Read our full LibreOffice review .

4. Google Slides
Google Slides is part of Google Workspace (formerly G Suite), and it does a nice job of matching a number of PowerPoint’s capabilities. This free presentation software supports embedding videos, creating diagrams, and adding animations to your slides. While the selection of templates is somewhat limited, you can easily import hundreds of additional templates for free or create your own.
Even better, Google Slides supports the collaboration tools users have come to expect from Google. Multiple people can work on a slideshow simultaneously, and there’s a built-in group chat so you can keep track of what everyone is doing. It’s also nice that you can play your presentation in presenter mode, which allows you to preview how it will look to your audience and rehearse timing.
The only downside to Google Slides is that bloated slideshows can experience some loading delays. Also beware that while you can move between Slides and Powerpoint, the conversion often messes with the layout of your slides.
Read our full Google Slides review .

5. WPS Office Free
WPS Office Free is a Microsoft Office look-alike that fully support PowerPoint files without any layout issues during import. The WPS Presentation tool has all of the same capabilities of PowerPoint, including tons of animations, slide transitions, content effects, and video embedding. The selection of included presentation templates is also very impressive for a free software.
One of the best things about this presentation software is that the user interface will feel incredibly familiar if you’re coming from Microsoft. All of the tools are displayed in a top ribbon, with your slides shown on the left side of the screen for easy navigation. It’s simple to display your presentation right from WPS Presentation, which means there’s no unexpected troubleshooting when it’s time to show off your work.
There’s not much to dislike about WPS Presentation. However, keep in mind that the software is supported by ads. Some users find the ads annoying, but they’re not overly in the way.
Read our full WPS Office Free review .
We've also featured the best free office software .
Best free presentation software FAQs
Which alternative to powerpoint is best for you.
When deciding which alternative to PowerPoint to download and use, first consider what your actual needs are, as sometimes free platforms may only provide basic options, so if you need to use advanced tools you may find a paid platform is much more worthwhile. Additionally, free and budget software options can sometimes prove limited when it comes to the variety of tools available, while higher-end software can really cater for every need, so do ensure you have a good idea of which features you think you may require.
How we test the best free presentation software
To test for the best free presentation software we first set up an account with the relevant software platform, whether as a download or as an online service. We then tested the service to see how the software could be used for different purposes and in different situations. The aim was to push each software platform to see how useful its basic tools were and also how easy it was to get to grips with any more advanced tools.
Read how we test, rate, and review products on TechRadar .
Get in touch
- Want to find out about commercial or marketing opportunities? Click here
- Out of date info, errors, complaints or broken links? Give us a nudge
- Got a suggestion for a product or service provider? Message us directly
- You've reached the end of the page. Jump back up to the top ^
Are you a pro? Subscribe to our newsletter
Sign up to the TechRadar Pro newsletter to get all the top news, opinion, features and guidance your business needs to succeed!

Michael Graw is a freelance journalist and photographer based in Bellingham, Washington. His interests span a wide range from business technology to finance to creative media, with a focus on new technology and emerging trends. Michael's work has been published in TechRadar, Tom's Guide, Business Insider, Fast Company, Salon, and Harvard Business Review.
Webflow announces acquisition of Intellimize - expanding beyond visual development to become an integrated Website Experience Platform
Square Online review 2024: Top ecommerce platform pros, cons, and features tested
'AI will be a watershed moment and the great mega-trend of our generation' – photo contest experts tell us how they’re dealing with a tidal wave of AI-generated images
Most Popular
- 2 The obscure little PC that wanted to be a big NAS — super compact Maiyunda M1 doesn't cost that much, offers up to 40TB SSD storage, runs Windows and has 4 Gigabit Ethernet ports
- 3 Microsoft strips Windows 11's Control Panel of another tool - is the writing on the wall?
- 4 Meta’s massive OS announcement is more exciting than a Meta Quest 4 reveal, and VR will never be the same again
- 5 NYT Strands today — hints, answers and spangram for Thursday, April 25 (game #53)
- 2 Sony dropped OLED for its flagship 2024 TV – here's why
- 3 Sony merging with Paramount Plus could be bad news for Netflix – here’s why
- 4 A full list of Samsung Galaxy Z Flip 6 and Z Fold 6 colors has leaked
- 5 Sony’s wearable air conditioner is the first step towards a real Dune stillsuit
Critical PowerPoint Shortcuts – Claim Your FREE Training Module and Get Your Time Back!
How to Make a PowerPoint Presentation (Step-by-Step)
- PowerPoint Tutorials
- Presentation Design
- January 22, 2024
In this beginner’s guide, you will learn step-by-step how to make a PowerPoint presentation from scratch.
While PowerPoint is designed to be intuitive and accessible, it can be overwhelming if you’ve never gotten any training on it before. As you progress through this guide, you’ll will learn how to move from blank slides to PowerPoint slides that look like these.

Table of Contents
Additionally, as you create your presentation, you’ll also learn tricks for working more efficiently in PowerPoint, including how to:
- Change the slide order
- Reset your layout
- Change the slide dimensions
- Use PowerPoint Designer
- Format text
- Format objects
- Play a presentation (slide show)
With this knowledge under your belt, you’ll be ready to start creating PowerPoint presentations. Moreover, you’ll have taken your skills from beginner to proficient in no time at all. I will also include links to more advanced PowerPoint topics.
Ready to start learning how to make a PowerPoint presentation?
Take your PPT skills to the next level
Start with a blank presentation.
Note: Before you open PowerPoint and start creating your presentation, make sure you’ve collected your thoughts. If you’re going to make your slides compelling, you need to spend some time brainstorming.
For help with this, see our article with tips for nailing your business presentation here .
The first thing you’ll need to do is to open PowerPoint. When you do, you are shown the Start Menu , with the Home tab open.
This is where you can choose either a blank theme (1) or a pre-built theme (2). You can also choose to open an existing presentation (3).
For now, go ahead and click on the Blank Presentation (1) thumbnail.

Doing so launches a brand new and blank presentation for you to work with. Before you start adding content to your presentation, let’s first familiarize ourselves with the PowerPoint interface.
The PowerPoint interface

Here is how the program is laid out:
- The Application Header
- The Ribbon (including the Ribbon tabs)
- The Quick Access Toolbar (either above or below the Ribbon)
- The Slides Pane (slide thumbnails)
The Slide Area
The notes pane.
- The Status Bar (including the View Buttons)
Each one of these areas has options for viewing certain parts of the PowerPoint environment and formatting your presentation.
Below are the important things to know about certain elements of the PowerPoint interface.
The PowerPoint Ribbon

The Ribbon is contextual. That means that it will adapt to what you’re doing in the program.
For example, the Font, Paragraph and Drawing options are greyed out until you select something that has text in it, as in the example below (A).

Furthermore, if you start manipulating certain objects, the Ribbon will display additional tabs, as seen above (B), with more commands and features to help you work with those objects. The following objects have their own additional tabs in the Ribbon which are hidden until you select them:
- Online Pictures
- Screenshots
- Screen Recording
The Slides Pane

This is where you can preview and rearrange all the slides in your presentation.
Right-clicking on a slide in the pane gives you additional options on the slide level that you won’t find on the Ribbon, such as Duplicate Slide , Delete Slide , and Hide Slide .

In addition, you can add sections to your presentation by right-clicking anywhere in this Pane and selecting Add Section . Sections are extremely helpful in large presentations, as they allow you to organize your slides into chunks that you can then rearrange, print or display differently from other slides.

The Slide Area (A) is where you will build out your slides. Anything within the bounds of this area will be visible when you present or print your presentation.
Anything outside of this area (B) will be hidden from view. This means that you can place things here, such as instructions for each slide, without worrying about them being shown to your audience.

The Notes Pane is the space beneath the Slide Area where you can type in the speaker notes for each slide. It’s designed as a fast way to add and edit your slides’ talking points.
To expand your knowledge and learn more about adding, printing, and exporting your PowerPoint speaker notes, read our guide here .
Your speaker notes are visible when you print your slides using the Notes Pages option and when you use the Presenter View . To expand your knowledge and learn the ins and outs of using the Presenter View , read our guide here .

You can resize the Notes Pane by clicking on its edge and dragging it up or down (A). You can also minimize or reopen it by clicking on the Notes button in the Status Bar (B).
Note: Not all text formatting displays in the Notes Pane, even though it will show up when printing your speaker notes. To learn more about printing PowerPoint with notes, read our guide here .
Now that you have a basic grasp of the PowerPoint interface at your disposal, it’s time to make your presentation.
Adding Content to Your PowerPoint Presentation
Notice that in the Slide Area , there are two rectangles with dotted outlines. These are called Placeholders and they’re set on the template in the Slide Master View .
To expand your knowledge and learn how to create a PowerPoint template of your own (which is no small task), read our guide here .

As the prompt text suggests, you can click into each placeholder and start typing text. These types of placeholder prompts are customizable too. That means that if you are using a company template, it might say something different, but the functionality is the same.

Note: For the purposes of this example, I will create a presentation based on the content in the Starbucks 2018 Global Social Impact Report, which is available to the public on their website.
If you type in more text than there is room for, PowerPoint will automatically reduce its font size. You can stop this behavior by clicking on the Autofit Options icon to the left of the placeholder and selecting Stop Fitting Text to this Placeholder .
Next, you can make formatting adjustments to your text by selecting the commands in the Font area and the Paragraph area of the Home tab of the Ribbon.

The Reset Command: If you make any changes to your title and decide you want to go back to how it was originally, you can use the Reset button up in the Home tab .

Insert More Slides into Your Presentation
Now that you have your title slide filled in, it’s time to add more slides. To do that, simply go up to the Home tab and click on New Slide . This inserts a new slide in your presentation right after the one you were on.

You can alternatively hit Ctrl+M on your keyboard to insert a new blank slide in PowerPoint. To learn more about this shortcut, see my guide on using Ctrl+M in PowerPoint .
Instead of clicking the New Slide command, you can also open the New Slide dropdown to see all the slide layouts in your PowerPoint template. Depending on who created your template, your layouts in this dropdown can be radically different.

If you insert a layout and later want to change it to a different layout, you can use the Layout dropdown instead of the New Slide dropdown.
After inserting a few different slide layouts, your presentation might look like the following picture. Don’t worry that it looks blank, next we will start adding content to your presentation.

If you want to follow along exactly with me, your five slides should be as follows:
- Title Slide
- Title and Content
- Section Header
- Two Content
- Picture with Caption
Adding Content to Your Slides
Now let’s go into each slide and start adding our content. You’ll notice some new types of placeholders.

On slide 2 we have a Content Placeholder , which allows you to add any kind of content. That includes:
- A SmartArt graphic,
- A 3D object,
- A picture from the web,
- Or an icon.
To insert text, simply type it in or hit Ctrl+C to Copy and Ctrl+V to Paste from elsewhere. To insert any of the other objects, click on the appropriate icon and follow the steps to insert it.
For my example, I’ll simply type in some text as you can see in the picture below.

Slides 3 and 4 only have text placeholders, so I’ll go ahead and add in my text into each one.

On slide 5 we have a Picture Placeholder . That means that the only elements that can go into it are:
- A picture from the web

To insert a picture into the picture placeholder, simply:
- Click on the Picture icon
- Find a picture on your computer and select it
- Click on Insert
Alternatively, if you already have a picture open somewhere else, you can select the placeholder and paste in (shortcut: Ctrl+V ) the picture. You can also drag the picture in from a file explorer window.

If you do not like the background of the picture you inserted onto your slide, you can remove the background here in PowerPoint. To see how to do this, read my guide here .
Placeholders aren’t the only way to add content to your slides. At any point, you can use the Insert tab to add elements to your slides.
You can use either the Title Only or the Blank slide layout to create slides for content that’s different. For example, a three-layout content slide, or a single picture divider slide, as shown below.

In the first example above, I’ve inserted 6 text boxes, 3 icons, and 3 circles to create this layout. In the second example, I’ve inserted a full-sized picture and then 2 shapes and 2 text boxes.
The Reset Command: Because these slides are built with shapes and text boxes (and not placeholders), hitting the Reset button up in the Home tab won’t do anything.
That is a good thing if you don’t want your layouts to adjust. However, it does mean that it falls on you to make sure everything is aligned and positioned correctly.
For more on how to add and manipulate the different objects in PowerPoint, check out our step-by-step articles here:
- Using graphics in PowerPoint
- Inserting icons onto slides
- Adding pictures to your PowerPoint
- How to embed a video in PowerPoint
- How to add music to your presentation
Using Designer to generate more layouts ideas
If you have Office 365, your version of PowerPoint comes with a new feature called Designer (or Design Ideas). This is a feature that generates slide layout ideas for you. The coolest thing about this feature is that it uses the content you already have.
To use Designer , simply navigate to the Design tab in your Ribbon, and click on Design Ideas .

NOTE: If the PowerPoint Designer is not working for you (it is grey out), see my troubleshooting guide for Designer .
Change the Overall Design (optional)
When you make a PowerPoint presentation, you’ll want to think about the overall design. Now that you have some content in your presentation, you can use the Design tab to change the look and feel of your slides.
For additional help thinking through the design of your presentation, read my guide here .
A. Picking your PowerPoint slide size
If you have PowerPoint 2013 or later, when you create a blank document in PowerPoint, you automatically start with a widescreen layout with a 16:9 ratio. These dimensions are suitable for most presentations as they match the screens of most computers and projectors.
However, you do have the option to change the dimensions.
For example, your presentation might not be presented, but instead converted into a PDF or printed and distributed. In that case, you can easily switch to the standard dimensions with a 4:3 ratio by selecting from the dropdown (A).
You can also choose a custom slide size or change the slide orientation from landscape to portrait in the Custom Slide Size dialog box (B).

To learn all about the different PowerPoint slide sizes, and some of the issues you will face when changing the slide size of a non-blank presentation, read my guide here .
B. Selecting a PowerPoint theme
The next thing you can do is change the theme of your presentation to a pre-built one. For a detailed explanation of what a PowerPoint theme is, and how to best use it, read my article here .
In the beginning of this tutorial, we started with a blank presentation, which uses the default Office theme as you can see in the picture below.

That gives you the most flexibility because it has a blank background and quite simple layouts that work for most presentations. However, it also means that it’s your responsibility to enhance the design.
If you’re comfortable with this, you can stay with the default theme or create your own custom theme ( read my guide here ). But if you would rather not have to think about design, then you can choose a pre-designed theme.
Microsoft provides 46 other pre-built themes, which include slide layouts, color variants and palettes, and fonts. Each one varies quite significantly, so make sure you look through them carefully.
To select a different theme, go to the Design tab in the Ribbon, and click on the dropdown arrow in the Themes section .

For this tutorial, let’s select the Frame theme and then choose the third Variant in the theme. Doing so changes the layout, colors, and fonts of your presentation.

Note: The theme dropdown area is also where you can import or save custom themes. To see my favorite places to find professional PowerPoint templates and themes (and recommendations for why I like them), read my guide here .
C. How to change a slide background in PowerPoint
The next thing to decide is how you want your background to look for the entire presentation. In the Variants area, you can see four background options.

For this example, we want our presentation to have a dark background, so let’s select Style 3. When you do so, you’ll notice that:
- The background color automatically changes across all slides
- The color of the text on most of the slides automatically changes to white so that it’s visible on the dark background
- The colors of the objects on slides #6 and #7 also adjust, in a way we may not want (we’ll likely have to make some manual adjustments to these slides)

Note: If you want to change the slide background for just that one slide, don’t left-click the style. Instead, right-click it and select Apply to Selected Slides .
After you change the background for your entire presentation, you can easily adjust the background for an individual slide.

Inside the Format Background pane, you can see you have the following options:
- Gradient fill
- Picture or texture fill
- Pattern fill
- Hide background
You can explore these options to find the PowerPoint background that best fits your presentation.
D. How to change your color palette in PowerPoint
Another thing you may want to adjust in your presentation, is the color scheme. In the picture below you can see the Theme Colors we are currently using for this presentation.

Each PowerPoint theme comes with its own color palette. By default, the Office theme includes the Office color palette. This affects the colors you are presented with when you format any element within your presentation (text, shapes, SmartArt, etc.).

The good news is that the colors here are easy to change. To switch color palettes, simply:
- Go to the Design tab in the Ribbon
- In the Variants area, click on the dropdown arrow and select Colors
- Select the color palette (or theme colors) you want
You can choose among the pre-built color palettes from Office, or you can customize them to create your own.
As you build your presentation, make sure you use the colors from your theme to format objects. That way, changing the color palette adjusts all the colors in your presentation automatically.
E. How to change your fonts in PowerPoint
Just as we changed the color palette, you can do the same for the fonts.

Each PowerPoint theme comes with its own font combination. By default, the Office theme includes the Office font pairing. This affects the fonts that are automatically assigned to all text in your presentation.

The good news is that the font pairings are easy to change. To switch your Theme Fonts, simply:
- Go to the Design tab in the Ribbon
- Click on the dropdown arrow in the Variants area
- Select Fonts
- Select the font pairing you want
You can choose among the pre-built fonts from Office, or you can customize them to create your own.
If you are working with PowerPoint presentations on both Mac and PC computers, make sure you choose a safe PowerPoint font. To see a list of the safest PowerPoint fonts, read our guide here .
If you receive a PowerPoint presentation and the wrong fonts were used, you can use the Replace Fonts dialog box to change the fonts across your entire presentation. For details, read our guide here .
Adding Animations & Transitions (optional)
The final step to make a PowerPoint presentation compelling, is to consider using animations and transitions. These are by no means necessary to a good presentation, but they may be helpful in your situation.
A. Adding PowerPoint animations
PowerPoint has an incredibly robust animations engine designed to power your creativity. That being said, it’s also easy to get started with basic animations.
Animations are movements that you can apply to individual objects on your slide.

To add a PowerPoint animation to an element of your slide, simply:
- Select the element
- Go to the Animations tab in the Ribbon
- Click on the dropdown arrow to view your options
- Select the animation you want
You can add animations to multiple objects at one time by selecting them all first and then applying the animation.
B. How to preview a PowerPoint animation

There are three ways to preview a PowerPoint animation:
- Click on the Preview button in the Animations tab
- Click on the little star next to the slide
- Play the slide in Slide Show Mode
To learn other ways to run your slide show, see our guide on presenting a PowerPoint slide show with shortcuts .
To adjust the settings of your animations, explore the options in the Effect Options , Advanced Animation and the Timing areas of the Animation tab .

Note: To see how to make objects appear and disappear in your slides by clicking a button, read our guide here .
C. How to manage your animations in PowerPoint

The best way to manage lots of animations on your slide is with the Animation Pane . To open it, simply:
- Navigate to the Animations tab
- Select the Animation Pane
Inside the Animation Pane, you’ll see all of the different animations that have been applied to objects on your slide, with their numbers marked as pictured above.
Note: To see examples of PowerPoint animations that can use in PowerPoint, see our list of PowerPoint animation tutorials here .
D. How to add transitions to your PowerPoint presentation
PowerPoint has an incredibly robust transition engine so that you can dictate how your slides change from one to the other. It is also extremely easy to add transitions to your slides.
In PowerPoint, transitions are the movements (or effects) you see as you move between two slides.

To add a transition to a PowerPoint slide, simply:
- Select the slide
- Go to the Transitions tab in the Ribbon
- In the Transitions to This Slide area, click on the dropdown arrow to view your options
- Select the transition you want
To adjust the settings of the transition, explore the options in the Timing area of the Transitions tab.
You can also add the same transition to multiple slides. To do that, select them in the Slides Pane and apply the transition.
E. How to preview a transition in PowerPoint

There are three ways to preview your PowerPoint transitions (just like your animations):
- Click on the Preview button in the Transitions tab
- Click on the little star beneath the slide number in the thumbnail view
Note: In 2016, PowerPoint added a cool new transition, called Morph. It operates a bit differently from other transitions. For a detailed tutorial on how to use the cool Morph transition, see our step-by-step article here .
Save Your PowerPoint Presentation
After you’ve built your presentation and made all the adjustments to your slides, you’ll want to save your presentation. YOu can do this several different ways.

To save a PowerPoint presentation using your Ribbon, simply:
- Navigate to the File tab
- Select Save As on the left
- Choose where you want to save your presentation
- Name your presentation and/or adjust your file type settings
- Click Save
You can alternatively use the Ctrl+S keyboard shortcut to save your presentation. I recommend using this shortcut frequently as you build your presentation to make sure you don’t lose any of your work.

This is the standard way to save a presentation. However, there may be a situation where you want to save your presentation as a different file type.
To learn how to save your presentation as a PDF, see our guide on converting PowerPoint to a PDF .
How to save your PowerPoint presentation as a template
Once you’ve created a presentation that you like, you may want to turn it into a template. The easiest – but not technically correct – way, is to simply create a copy of your current presentation and then change the content.
But be careful! A PowerPoint template is a special type of document and it has its own parameters and behaviors.
If you’re interested in learning about how to create your own PowerPoint template from scratch, see our guide on how to create a PowerPoint template .
Printing Your PowerPoint Presentation
After finishing your PowerPoint presentation, you may want to print it out on paper. Printing your slides is relatively easy.

To open the Print dialog box, you can either:
- Hit Ctrl+P on your keyboard
- Or go to the Ribbon and click on File and then Print

Inside the Print dialog box, you can choose from the various printing settings:
- Printer: Select a printer to use (or print to PDF or OneNote)
- Slides: Choose which slides you want to print
- Layout: Determine how many slides you want per page (this is where you can print the notes, outline, and handouts)
- Collated or uncollated (learn what collated printing means here )
- Color: Choose to print in color, grayscale or black & white
There are many more options for printing your PowerPoint presentations. Here are links to more in-depth articles:
- How to print multiple slides per page
- How to print your speaker notes in PowerPoint
- How to save PowerPoint as a picture presentation
So that’s how to create a PowerPoint presentation if you are brand new to it. We’ve also included a ton of links to helpful resources to boost your PowerPoint skills further.
When you are creating your presentation, it is critical to first focus on the content (what you are trying to say) before getting lost inserting and playing with elements. The clearer you are on what you want to present, the easier it will be to build it out in PowerPoint.
If you enjoyed this article, you can learn more about our PowerPoint training courses and other presentation resources by visiting us here .
🔒 Unlock the PowerPoint Shortcuts Trusted by Industry Leaders KKR, American Express, HSBC, and More!
Join over 114,880 professionals from diverse fields including consulting, investment banking, advertising, marketing, sales, and business development who have supercharged their PowerPoint game with our proven methods.
✅ Customize compelling presentations effortlessly.
✅ Master time-saving techniques for faster deck creation.
✅ Boost your career prospects with top-notch PowerPoint skills.
Get FREE access to the Critical PowerPoint Shortcuts module of our premium training course by entering your name and email below.
DISCLAIMER: PC Users Only!
We respect your privacy and will keep your info safe and confidential.
About The Author

Popular Tutorials
- How to Strikethrough Text (l̶i̶k̶e̶ ̶t̶h̶i̶s̶) in Word, Excel & PowerPoint
- How to Make Animated Fireworks in PowerPoint (Step-by-Step)
- Strikethrough Shortcut (l̶i̶k̶e̶ ̶t̶h̶i̶s̶) for Word, Excel & PowerPoint
- How to Create a Flash Card Memory Game in PowerPoint (Like Jeopardy)
- Keyboard Shortcuts Not Working: Solved
PowerPoint Tutorial Categories
- Strategies & Opinions
- Shortcuts & Hacks
- Pictures, Icons, Videos, Etc.
- New Features
- Miscellaneous
- Charts & Data Viz
We help busy professionals save hours and gain peace of mind, with corporate workshops, self-paced courses and tutorials for PowerPoint and Word.
Work With Us
- Corporate Training
- Presentation & Template Design
- Courses & Downloads
- PowerPoint Articles
- Word Articles
- Productivity Resources
Find a Tutorial
- Free Training
- For Businesses
We help busy office workers save hours and gain peace of mind, with tips, training and tutorials for Microsoft PowerPoint and Word.
Master Critical PowerPoint Shortcuts – Secure Your FREE Training Module and Save Valuable Time!
⌛ Master time-saving expert techniques.
🔥 Create powerful presentations.
🚀 Propel your career to new heights.
We value your privacy – we keep your info safe.
Discover PowerPoint Hacks Loved by Industry Giants - KKR, AmEx, HSBC!
Over 114,880 professionals in finance, marketing and sales have revolutionized their PPT skills with our proven methods.
Gain FREE access to a full module of our premium PowerPoint training program – Get started today!
We hate spam too and promise to keep your information safe.
You are currently viewing a placeholder content from Facebook . To access the actual content, click the button below. Please note that doing so will share data with third-party providers.
- PRO Courses Guides New Tech Help Pro Expert Videos About wikiHow Pro Upgrade Sign In
- EDIT Edit this Article
- EXPLORE Tech Help Pro About Us Random Article Quizzes Request a New Article Community Dashboard This Or That Game Popular Categories Arts and Entertainment Artwork Books Movies Computers and Electronics Computers Phone Skills Technology Hacks Health Men's Health Mental Health Women's Health Relationships Dating Love Relationship Issues Hobbies and Crafts Crafts Drawing Games Education & Communication Communication Skills Personal Development Studying Personal Care and Style Fashion Hair Care Personal Hygiene Youth Personal Care School Stuff Dating All Categories Arts and Entertainment Finance and Business Home and Garden Relationship Quizzes Cars & Other Vehicles Food and Entertaining Personal Care and Style Sports and Fitness Computers and Electronics Health Pets and Animals Travel Education & Communication Hobbies and Crafts Philosophy and Religion Work World Family Life Holidays and Traditions Relationships Youth
- Browse Articles
- Learn Something New
- Quizzes Hot
- This Or That Game New
- Train Your Brain
- Explore More
- Support wikiHow
- About wikiHow
- Log in / Sign up
- Computers and Electronics
- Presentation Software
- PowerPoint Presentations
Simple Steps to Make a PowerPoint Presentation
Last Updated: April 28, 2024 Fact Checked
Creating a New PowerPoint
Creating the title slide, adding a new slide, adding content to slides, adding transitions, testing and saving your presentation.
This article was co-authored by wikiHow staff writer, Darlene Antonelli, MA . Darlene Antonelli is a Technology Writer and Editor for wikiHow. Darlene has experience teaching college courses, writing technology-related articles, and working hands-on in the technology field. She earned an MA in Writing from Rowan University in 2012 and wrote her thesis on online communities and the personalities curated in such communities. This article has been fact-checked, ensuring the accuracy of any cited facts and confirming the authority of its sources. This article has been viewed 4,322,645 times. Learn more...
Do you want to have your data in a slide show? If you have Microsoft 365, you can use PowerPoint! PowerPoint is a program that's part of the Microsoft Office suite (which you have to pay for) and is available for both Windows and Mac computers. This wikiHow teaches you how to create your own Microsoft PowerPoint presentation on a computer.
How to Make a PowerPoint Presentation
- Open the PowerPoint app, select a template and theme, then like “Create.”
- Click the text box to add your title and subtitle to create your title slide.
- Click the “Insert” tab, then “New Slide” to add another slide.
- Choose the type of slide you want to add, then add text and pictures.
- Rearrange slides by dragging them up or down in the preview box.
Things You Should Know
- Templates make it easy to create vibrant presentations no matter your skill level.
- When adding photos, you can adjust their sizes by clicking and dragging in or out from their corners.
- You can add animated transitions between slides or to individual elements like bullet points and blocks of text.

- If you don't have a Microsoft Office 365 subscription, you can use the website instead of the desktop app. Go to https://powerpoint.office.com/ to use the website version.
- You can also use the mobile app to make presentations, though it's easier to do this on a computer, which has a larger screen, a mouse, and a keyboard.

- If you don't want to use a template, just click the Blank option in the upper-left side of the page and skip to the next part.

- Skip this step if your selected template has no themes available.

- If you're creating a PowerPoint presentation for which an elaborate title slide has been requested, ignore this step.

- You can change the font and size of text used from the Home tab that's in the orange ribbon at the top of the window.

- You can also just leave this box blank if you like.

- You can also click and drag in or out one of a text box's corners to shrink or enlarge the text box.

- On a Mac, you'll click the Home tab instead. [1] X Research source

- Clicking the white slide-shaped box above this option will result in a new text slide being inserted.

- Title Slide
- Title and Content
- Section Header
- Two Content
- Content with Caption
- Picture with Caption

- Naturally, the title slide should be the first slide in your presentation, meaning that it should be the top slide in the left-hand column.

- Skip this step and the next two steps if your selected slide uses a template that doesn't have text boxes in it.

- Text boxes in PowerPoint will automatically format the bulk of your text for you (e.g., adding bullet points) based on the context of the content itself.
- You can add notes that the Presentation will not include (but you'll still be able to see them on your screen) by clicking Notes at the bottom of the slide.

- You can change the font of the selected text by clicking the current font's name and then clicking your preferred font.
- If you want to change the size of the text, click the numbered drop-down box and then click a larger or smaller number based on whether you want to enlarge or shrink the text.
- You can also change the color, bolding, italicization, underlining, and so on from here.

- Photos in particular can be enlarged or shrunk by clicking and dragging out or in one of their corners.

- Remember to keep slides uncluttered and relatively free of distractions. It's best to keep the amount of text per slide to around 33 words or less. [2] X Research source

- Slide content will animate in the order in which you assign transitions. For example, if you animate a photo on the slide and then animate the title, the photo will appear before the title.
- Make your slideshow progress automatically by setting the speed of every transition to align with your speech as well as setting each slide to Advance . [3] X Trustworthy Source Microsoft Support Technical support and product information from Microsoft. Go to source

- If you need to exit the presentation, press Esc .

- Windows - Click File , click Save , double-click This PC , select a save location, enter a name for your presentation, and click Save .
- Mac - Click File , click Save As... , enter the presentation's name in the "Save As" field, select a save location by clicking the "Where" box and clicking a folder, and click Save .
Community Q&A
- If you save your PowerPoint presentation in .pps format instead of the default .ppt format, double-clicking your PowerPoint presentation file will prompt the presentation to open directly into the slideshow view. Thanks Helpful 5 Not Helpful 0
- If you don't have Microsoft Office, you can still use Apple's Keynote program or Google Slides to create a PowerPoint presentation. Thanks Helpful 0 Not Helpful 0
- Your PowerPoint presentation (or some features in it) may not open in significantly older versions of PowerPoint. Thanks Helpful 1 Not Helpful 1
- Great PowerPoint presentations avoid placing too much text on one slide. Thanks Helpful 0 Not Helpful 0
You Might Also Like

- ↑ https://onedrive.live.com/view.aspx?resid=DBDCE00C929AA5D8!252&ithint=file%2cpptx&app=PowerPoint&authkey=!AH4O9NxcbehqzIg
- ↑ https://www.virtualsalt.com/powerpoint.htm
- ↑ https://support.microsoft.com/en-us/office/set-the-timing-and-speed-of-a-transition-c3c3c66f-4cca-4821-b8b9-7de0f3f6ead1#:~:text=To%20make%20the%20slide%20advance,effect%20on%20the%20slide%20finishes .
About This Article

- Send fan mail to authors
Reader Success Stories
Artis Holland
Sep 22, 2016
Is this article up to date?
Oct 18, 2016
Jul 23, 2016
Margery Niyi
Sep 25, 2017
Jul 21, 2016

Featured Articles

Trending Articles

Watch Articles

- Terms of Use
- Privacy Policy
- Do Not Sell or Share My Info
- Not Selling Info
Keep up with tech in just 5 minutes a week!

Cloud Storage

Custom Business Email

Video and voice conferencing

Shared Calendars

Word Processing

Spreadsheets
Presentation Builder

Survey builder

Google Workspace
An integrated suit of secure, cloud-native collaboration and productivity apps powered by Google AI.
Tell impactful stories, with Google Slides
Create, present, and collaborate on online presentations in real-time and from any device.
- For my personal use
- For work or my business

Jeffery Clark
T h i s c h a r t h e l p s b r i d g i n g t h e s t o r y !

E s t i m a t e d b u d g e t

Make beautiful presentations, together
Stay in sync in your slides, with easy sharing and real-time editing. Use comments and assign action items to build your ideas together.

Present slideshows with confidence
With easy-to-use presenter view, speaker notes, and live captions, Slides makes presenting your ideas a breeze. You can even present to Google Meet video calls directly from Slides.

Seamlessly connect to your other Google apps
Slides is thoughtfully connected to other Google apps you love, saving you time. Embed charts from Google Sheets or reply to comments directly from Gmail. You can even search the web and Google Drive for relevant content and images directly from Slides.

Extend collaboration and intelligence to PowerPoint files
Easily edit Microsoft PowerPoint presentations online without converting them, and layer on Slides’ enhanced collaborative and assistive features like comments, action items, and Smart Compose.

Work on fresh content
With Slides, everyone’s working on the latest version of a presentation. And with edits automatically saved in version history, it’s easy to track or undo changes.

Make slides faster, with built-in intelligence
Assistive features like Smart Compose and autocorrect help you build slides faster with fewer errors.

Stay productive, even offline
You can access, create, and edit Slides even without an internet connection, helping you stay productive from anywhere.
Security, compliance, and privacy

Secure by default
We use industry-leading security measures to keep your data safe, including advanced malware protections. Slides is also cloud-native, eliminating the need for local files and minimizing risk to your devices.
Encryption in transit and at rest
All files uploaded to Google Drive or created in Slides are encrypted in transit and at rest.
Compliance to support regulatory requirements
Our products, including Slides, regularly undergo independent verification of their security, privacy, and compliance controls .
Private by design
Slides adheres to the same robust privacy commitments and data protections as the rest of Google Cloud’s enterprise services .

You control your data.
We never use your slides content for ad purposes., we never sell your personal information to third parties., find the plan that’s right for you, google slides is a part of google workspace.
Every plan includes

Collaborate from anywhere, on any device
Access, create, and edit your presentations wherever you are — from any mobile device, tablet, or computer — even when offline.

Get a head start with templates
Choose from a variety of presentations, reports, and other professionally-designed templates to kick things off quickly..

Photo Album

Book Report

Visit the Slides Template Gallery for more.
Ready to get started?
Got any suggestions?
We want to hear from you! Send us a message and help improve Slidesgo
Top searches
Trending searches

teacher appreciation
11 templates

tropical rainforest
29 templates

46 templates

pediatrician
27 templates

spring season
34 templates

23 templates
Computer Presentation templates
Use these google slides themes or download our ppt files for powerpoint or keynote to give a presentation about a computer-related topic, including information technology..

Premium template
Unlock this template and gain unlimited access
Linear Grid Newsletter
Give an original touch to your employee newsletters with this grid design. It perfectly combines colors like green, yellow or orange with geometric icons to give dynamism to your news. You can use a different tone for each section, so they can be easily differentiated. Report on the latest company...

Statistics and Data Analysis - 6th Grade
Download the "Statistics and Data Analysis - 6th Grade" presentation for PowerPoint or Google Slides. If you’re looking for a way to motivate and engage students who are undergoing significant physical, social, and emotional development, then you can’t go wrong with an educational template designed for Middle School by Slidesgo!...

Computer Science Degree for College
Computer science degrees prepare students for the jobs of the future (and the present!). If you are interested in getting an education about coding, math, computers, and robots, this is the degree for you! Speak about it with this futuristic template that will take the viewers to another digital dimension....

Network Monitoring Software Pitch Deck
Download the Network Monitoring Software Pitch Deck presentation for PowerPoint or Google Slides. Whether you're an entrepreneur looking for funding or a sales professional trying to close a deal, a great pitch deck can be the difference-maker that sets you apart from the competition. Let your talent shine out thanks...

Virtual Slides for Education Day
Digital learning is making its way into the world of education. For this reason, we've designed this new template so that the slides look like the screen of a laptop (complete with reflections!). Apart from graphs and infographics, the font is quite "computer-esque" and a perfect fit for this theme....

Soft Colors UI Design for Agencies
Agencies have the most creative employees, so having boring meetings with traditional Google Slides & PowerPoint presentations would be a waste. Make the most out of this potential with this creative design full of editable resources and beautiful decorations in calming, pastel tones. Let the creativity of your agency be...

Work Program Project Proposal
Download the "Work Program Project Proposal" presentation for PowerPoint or Google Slides. A well-crafted proposal can be the key factor in determining the success of your project. It's an opportunity to showcase your ideas, objectives, and plans in a clear and concise manner, and to convince others to invest their...

Multimedia Software Pitch Deck
Download the "Multimedia Software Pitch Deck" presentation for PowerPoint or Google Slides. Whether you're an entrepreneur looking for funding or a sales professional trying to close a deal, a great pitch deck can be the difference-maker that sets you apart from the competition. Let your talent shine out thanks to...

Web Project Proposal
We live in the internet era, which means that web design is currently one of the most demanded skills. This free template is perfect for those designers who want to present their web project proposal to their clients and see a preview of the final work.

How to Code Workshop
Are you an expert of Java? Yes, it's a beautiful island in Indonesia and more than half of the population of this country lives there... No! Well, yes, those facts are true, but we were talking about the programming language! We think workshops on how to code are a necessity,...

Silicon Valley Programmer Portfolio
Download the "Silicon Valley Programmer Portfolio" presentation for PowerPoint or Google Slides. When a potential client or employer flips through the pages of your portfolio, they're not just looking at your work; they're trying to get a sense of who you are as a person. That's why it's crucial to...

Global Technology Investments Project Proposal Infographics
Download the "Global Technology Investments Project Proposal Infographics" template for PowerPoint or Google Slides to get the most out of infographics. Whether you want to organize your business budget in a table or schematically analyze your sales over the past year, this set of infographic resources will be of great...

Silicon Valley Programmer Minitheme
No matter your actual profession, you can’t say you’ve never ever imagined being one of those fabled Silicon Valley programmers that make alternate realities come to life and can make us question the structures that govern our world. The good news: With this minitheme, you can join them for a...

Tech Startup Newsletter
Download the "Tech Startup Newsletter" presentation for PowerPoint or Google Slides. Attention all marketers! Are you looking for a way to make your newsletters more creative and eye-catching for your target audience? This amazing template is perfect for creating the perfect newsletter that will capture your audience's attention from the...

Computer Science College Major
If you are a guru of computers, most likely you've studied computer science in college. Would you like to show others what a major in this field has to offer and what it could contribute to their professional development? Customize this template and let them feel the future, at least...

Robotic Workshop Infographics
Download the "Robotic Workshop Infographics" template for PowerPoint or Google Slides and discover the power of infographics. An infographic resource gives you the ability to showcase your content in a more visual way, which will make it easier for your audience to understand your topic. Slidesgo infographics like this set...

Computer Science Proposal
A slide deck whose overall look and feel is very techie is what you need to put forward a proposal for a computer science project. And that’s what you’ll get with this template. The details on the backgrounds are so enticing and the neon tone used for the text contrasts...

Software Testing Company
Software testing might not be the sexiest part of coding, but that doesn't mean it lacks intrigue or importance. After all, who wants to use a buggy app? It's software testing that ensures smooth operation and prevents annoying glitches from making it into the final product. Without it, our lives...
- Page 1 of 29
New! Make quick presentations with AI
Slidesgo AI presentation maker puts the power of design and creativity in your hands, so you can effortlessly craft stunning slideshows in minutes.

Register for free and start editing online
- Support Home
- Printer Support
- Computer Support
- Poly Collaboration Devices
- Ink & Toner Cartridges
- Software and Drivers
- Printer Diagonostic Tools
- Computer Diagnostic Tools
- Windows Support
- Print and Scan Doctor
- HP PC Hardware Diagnostics
- Create a new case
- Find an existing case
- Manage contracts and warranties
- Register an account
- MyHPSupport Help
- Security Bulletins
- Support Dashboard
- HP Account benefits
HP PCs – Support for Windows 11
In June 2021, Microsoft introduced the newest Windows ® operating system, Windows 11.
For more information Windows 11, see Upgrade to the New Windows 11 OS | Microsoft .
How do I update Windows 11 to the latest version?
Windows 11 update was released in September 2022 and will continue to roll out to Windows 11 PCs.
For more information about updating Windows 11, see HP PCs - Installing the latest version of Windows 11 .
What are the new features in the latest version of Windows 11?
The latest version of Windows 11 includes new security features, Start Menu customization, tools, and app support.
For more information, see Upgrade to the New Windows 11 OS | Microsoft .
What is Smart App Control?
Smart App Control provides enhanced protection from untrusted apps. If Smart App Control spots a malicious or untrusted application, Smart App Control blocks that application to protect your computer. Some apps might be blocked from installation if Smart App Control is enabled. After you disable Smart App Control, it can be re-enabled only after reinstalling Windows or performing a factory reset.
What is Core Isolation and Memory Integrity?
The latest version of Windows 11 features new device security features that protect the core parts of the computer. Using Virtualization Based Security (VBS), Windows isolates the computer memory, which prevents attacks from inserting malicious code into high-security processes. This feature is enabled in the Windows Security app.
Some HP products might have applications with features that do not work with VBS enabled. These features include overclocking features in OMEN Gaming Hub, fan control in HP Command Center, and others. For more information, see HP Consumer Notebook and Desktop PCs - Certain features in HP applications might not function due to Virtualization-Based Security (VBS) being enabled .
Enabling VBS on the computer can affect the overall performance of the computer when using graphics or processor intensive applications. To enable or disable VBS in BIOS Setup, see HP PCs - Enable Virtualization Technology in the BIOS .
What is the difference between Windows 10 and Windows 11?
Windows 11 has all the power and security of Windows 10 with a redesigned and refreshed look. It also comes with new tools, sounds, and apps. Every detail has been considered. All of it comes together to bring you a refreshing experience on your PC.
For more information, see Introducing Windows 11 | Microsoft (in English) and HP PCs - Understanding and using Windows 11 .
How do I install Windows 11?
There are several different ways to install Windows 11 including using Windows Update, creating Windows 11 installation media, or creating an installation image.
When your PC is eligible for the Windows 11 upgrade, Microsoft sends a notification in Windows Update. For more information on different ways to install Windows 11, see Ways to install Windows 11 (Microsoft) (in English). For instructions on installing Windows 11, see one of the following options:
HP PCs - Upgrading to Windows 11 using Windows Update
HP PCs - Installing Windows 11 from a USB flash drive
What are the minimum system requirements for Windows 11?
The minimum system requirements for Windows 11 are available on the Microsoft website.
See Windows 11 Specifications - Microsoft (in English) for the minimum system requirements.
How do I know if my PC meets Windows 11 minimum system requirements?
Use Microsoft’s PC Heath Check to determine if your PC meets the minimum system requirements.
For more information, see Upgrade to the New Windows 11 OS | Microsoft (in English).
What do I do if PC Health Check says my PC can’t run Windows 11?
Based on your location and the model of your computer, you might need to enable the Trusted Platform Module (TPM) to meet the minimum system requirements.
For more information about enabling TPM on your computer, see How do I enable TPM on my computer? .
Specific models of HP computers were sold with TPM 1.0 and cannot be upgraded to TPM 2.0.
How do I enable TPM on my computer?
To upgrade to Windows 11, you might need to enable TPM on your computer by following these instructions.
Turn on the computer and press the f10 key to start to the BIOS setup menu.
On the Security tab, check whether your TPM Device status is Hidden .
Toggle the TPM device status to Available .
Change TPM State to Enabled .
Press f10 to exit, and then click Yes to save changes. If prompted, press f1 to confirm the changes and restart the computer.
What if my device doesn’t meet the minimum hardware specifications?
Devices that do not meet the minimum system requirements will remain on Windows 10 and continue to be supported with security updates.
Customers using long term service releases (LTSC and LTSB) will continue to be supported through those published end of support dates.
For more information about Windows 10 support, see HP products tested with Windows 10 | HP® Customer Support .
Will my printer work with Windows 11?
If your printer worked with Windows 10, it should continue to work with Windows 11.
For more information, see HP printer does not work after upgrading to Windows 11 and Windows 11 compatible printers .
When can I buy a new PC with Windows 11?
HP notebooks and desktops, for personal and business use, are available with a preinstalled Windows 11 operating system.
While some new devices will be sold with Windows 11 preinstalled, other new devices will need to upgrade to Windows 11.
Will the upgrade to Windows 11 be free?
Windows 10 devices that meet the Windows 11 minimum system requirements will be eligible for the free upgrade.
If I buy a new PC now, will it be eligible for the free upgrade?
New Windows 10 devices that meet the Windows 11 minimum system requirements will be eligible for the free upgrade.
Will availability of the Windows 11 upgrade be staggered?
Upgrades to Windows 11 will begin to roll out late in 2021 and continue into 2022.
HP notebooks and desktops, for personal and business use, will be available with Windows 11 preinstalled starting later this year.
Most HP devices that meet the minimum system requirement will be eligible for the upgrade when Windows 11 is available starting later this year.
Some older HP devices that meet the minimum system requirements will be eligible for upgrade in 2022.
How will I know when the upgrade is available for my Windows 10 PC?
Windows Update provides a notification when your PC is eligible for upgrade to Windows 11. You can check to see if your device is ready by going to Settings > Windows Update .
Do I have to upgrade to Windows 11?
When Windows Update displays that the upgrade is ready for the device, you can choose whether to install it. If you decline the upgrade, you can still choose to upgrade via Windows Update in Settings.
How long will the free upgrade offer last?
The free upgrade offer does not have a specific end date for eligible systems. However, Windows reserves the right to eventually end support for the free offer. This end date will be no sooner than one year from general availability.
Will HP support customers through the upgrade process?
Yes. HP has worked closely with Microsoft to ensure a trouble-free upgrade experience.
Depending on the device’s hardware configuration (processor, storage, memory) the time to perform the upgrade varies.
What version of Windows 10 is required to receive the upgrade?
The device must be running Windows 10 version 20H1 or later to receive the upgrade offer. If your device is running a previous version of Windows 10, you must update your device to Windows 10 version 20H1 or later.
Does Windows 11 take up more space on my PC than Windows 10?
No. Windows 11 and Windows 10 require approximately the same amount of disk space. During the upgrade process, however, extra space is required. Windows will clean up this extra disk space about ten days after the upgrade is complete.
How long does it take to install Windows 11?
Downloading and installing Windows 11 will most likely take longer than a typical Windows 10 feature update. You can use your PC while you’re downloading the operating system, and then you have the option to schedule the installation at a specific time when you aren’t planning on using your PC.
The time that it takes to download and upgrade a device depends on a number of factors, including bandwidth and system specifications like memory and storage. The upgrade is currently estimated to be over 3 GB.
Can I upgrade my Windows 10 PC to Windows 11 if I’m running S mode?
If your PC meets the minimum hardware specifications, the Windows 10 Home edition in S mode can upgrade to Windows 11 Home edition in S mode. The only Windows 11 edition with S Mode is the Home Edition. If you use Windows 10 Home in S Mode, you will be able to upgrade directly to Windows 11 from Windows Update and remain in S Mode.
For other editions, such as Windows 10 Pro, you will need to exit S Mode to upgrade to Windows 11 and will not have the option to switch back into S Mode.
When I upgrade to Windows 11, what will happen to my files?
By default, all your files and data will transfer to Windows 11. However, HP recommends backing up your files before installation.
For more information, see HP PCs - Back up your files (Windows 11, 10) .
Can I go back to Windows 10 if I don’t like Windows 11?
Yes. After you have installed Windows 11, there is a 10-day period where you can switch back to Windows 10 while keeping your files and data. After the 10-day period, you’ll need to back up your data and do a clean install or full recovery to return to Windows 10.
Will my accessories work with Windows 11?
If your accessories worked with Windows 10 and meet the Windows 11 requirements, they should work with Windows 11.
What is the upgrade path from Windows 10 to Windows 11?
HP recommends that you upgrade your device via the Windows Update app in Windows 10. However, if you are an advanced user, you will have the option to upgrade or do a clean install of Windows 11 using media from Microsoft.
Can I upgrade my Windows 7 device to Windows 11?
For Windows 7 devices that meet the hardware requirements, you will need to do a clean install of Windows 11. A Windows 10 activation will be required to upgrade for free.
Will Windows IoT also upgrade to Windows 11? If so, is it following the same timeline?
More information about Windows IoT Enterprise Edition will be available at a later date.
Additional support options
Enter a topic to search our knowledge library
How-To Geek
Windows 10 is now better at downloading updates.
It's still dying next year, though.
Windows 10, initially promised as "the last version of Windows," was released back in 2015. It was subsequently succeeded by Windows 11 several years later, and now mainstream support is set to end in October 2025. Microsoft has mostly just released bug fixes and minor app updates for Windows 10 over the past few years, but now an improvement for update packaging is rolling out.
Microsoft is bringing a significant under-the-hood improvement introduced in Windows 11 to Windows 10 PCs: decreasing the size of update downloads. Windows 11's updates are notably more efficient due to optimized packaging, including the elimination of reverse differentials from cumulative update packages. Now, this optimization is being extended to Windows 10, version 22H2, with the release of the April 23, 2024 (KB5036979) update. Starting from this update, you can expect a significant reduction in update package size, from approximately 830 MB to around 650 MB, facilitating smoother updates and conserving network bandwidth. This applies for both the current update and any updates that might land on your PC in the future.
The benefits of this reduction include decreased bandwidth consumption, faster downloads, minimized network congestion, and improved performance, particularly for users with slower connections. The difference is just a few megabytes, but it's an important one nonetheless. Right now, most computers still running Windows 10 (that aren't purposely avoiding the bigger update) are probably lower-resource ones that are not eligible for Windows 11. As those computers age, then, every saved megabyte will matter.
Other than this, the newest update to Windows 11 only carries a few bug fixes and stability improvements. As previously mentioned, it's an operating system that's about to reach the end of its lifespan, so Microsoft isn't really going to add a lot of new, exciting stuff to it. Microsoft recently rolled out the Copilot sidebar to Windows 10 , but there haven't been many other changes since development shifted to Windows 11.
The reduced update size is probably as exciting of an improvement to Windows 10 as we'll get at this point. Make sure to download it and install it now.
Source: Microsoft ( 1 , 2 )
Curious about 'Manor Lords'? It's the most addictive city-builder I've ever played — it's coming to PC Game Pass too.
I'm not even a huge fan of its genre, but Manor Lords has me absolutely hooked.

- Presentation
- Performance
• Gameplay • Presentation • Performance • Conclusion
The most wishlisted game on Steam right now, Manor Lords , is finally here — and it's been a long time coming. Slavic Magic solo developer Greg Styczeń has been building the indie for seven years, with hype for it swelling after a team-up with publisher Hooded Horse and the release of a popular demo during the 2022 October Steam Next Fest. Now, the ambitious medieval city-builder is just a few days away from launching publicly in Early Access on Steam, GOG, and the Microsoft Store, and you'll be able to jump into it with PC Game Pass , too.
I've had access to a pre-release build of the game for review during these last few weeks, and even though I wouldn't exactly call myself a city-builder guy, I've been having a grand time with it. It's not without problems — it can be a bit obtuse at times, for example, and I've run into a few bugs that've caused issues for my peasants — but overall, it's one of the most addicting games I've played in recent memory, with finely tuned systems, satisfying progression curves, and engaging strategic battles on the side.
This Early Access review was made possible by a Steam code provided by Hooded Horse and Slavic Magic. The contents of this review were not shared with these companies prior to publication.
Manor Lords review: City gameplay and army battles

Though Manor Lords gives you three different options for scenarios to play through — peaceful growth, a lengthy campaign of conquest, or a race to build up defensive armies as raiders close in — they all begin the same way: with basic tents on a plot of land, five families ready to be assigned work, and just enough timber and food to get your settlement started. Beyond that, it's up to you to gather additional materials, designate burgage plots, and raise your settlement through freeform building mechanics (most of my structures looked grid-like anyway, because I'm boring) and commercial expansion.

Developer: Slavic Magic Publisher: Hooded Horse Genre: City-builder / Strategy Release date (Early Access): April 26, 2024 Platforms (Early Access): Windows PC (Steam, GOG, Microsoft Store) Reviewed on: PC (Steam) Xbox Game Pass : Yes (PC Game Pass) Learn more: Manor Lords FAQ
The journey from humble beginnings to sprawling kingdom starts small, with lumber camps to fell and plant trees and grounds for hunters and berry gatherers to base out of. Then, once you've got the necessary resources, you build homes for your serfs, as well as a granary and a storehouse to stockpile your growing materiel. That leads to the development of a central marketplace where citizens can peddle their wares in the heart of your village; roads, which can be freely drawn at any time, are its veins. From there, your advancement continues exponentially, with various upgrades and new families moving in allowing you to develop new goods and services, which in turn leads to further population growth.
It's a progression loop all too familiar to fans of the genre, but Manor Lords really makes you work for it, and that's precisely what makes the payoffs meaningful. They come slowly, and only with careful management of and improvements for your resources, workforce, and logistical networks. You'll also need to be flexible and adapt to the pros and cons of your land; handy soil fertility UI elements and map icons show that you may only be able to grow certain crops in or harvest an abundance of one or two natural resources from the terrain you're on. Additionally, berries, trees, and crops can't be gathered or planted in the winter, so it's wise to temporarily order those workers to help with firewood instead (the rate at which it's burned doubles in these months, so you'll need plenty of it).
Not only do these limitations ensure that no two Manor Lords playthroughs feel the same, but they also drive you to trade what your land provides in spades for what it can't — and trade adds yet another layer to Manor Lords' rich management gameplay, with dynamic supply and demand challenging you to diversify the goods you're selling as much as possible so you're always making money while buying the resources you need to maximize progress. Indeed, trade is the largest growth accelerator in Manor Lords, and playing the market is one of the best ways to succeed in the late game.

Eventually, you'll get to the point where it's time to expand to other regions on the map and build entirely new settlements in them, which is where Manor Lords' battle system comes into play (you'll also need to defend yourself from brigand attacks from time to time, too). Using arms and armor you've either made yourself or purchased through trading, you can order your citizens to raise a militia and fight against bandits or troops serving the Baron — the off-screen rival that challenges you for control of the land. You can also use personal wealth accrued through taxation to hire mercenaries for monthly fees, and to employ a small, but extremely capable retinue of men-at-arms kitted out with heavy plate armor.
Get the Windows Central Newsletter
All the latest news, reviews, and guides for Windows and Xbox diehards.
Both you and the Baron can stake a claim to a province, which almost always leads to conflict unless you opt not to challenge (you can try to take the land later, but it will require more of the "Influence" resource gained from tithes paid to the church and victories against bandits). Once war for a region is declared, you have 90 days to amass your forces and send them to the specified battlefield location.

The combat itself is extremely similar to Total War , with a strong emphasis placed on positioning, troop formations (you can adjust these on the fly to react to incoming threats), and choosing when to order your men to press forward, form phalanxes, or fall back as battles unfold. Ultimately, it's pretty simple — the basic principle of "spearmen up front, archers in the back" will generally win you most fights as long as you're not significantly outnumbered or underequipped — but it's still good fun, and a nice change of pace to enjoy every so often between lengthy periods of city management.
What I like most about Manor Lords' skirmishes is the lasting impact they have. Losing a few men isn't a big deal, but heavy casualties from defeats or pyrrhic victories can plunge your fiefdom into economic recession. Every soldier killed in battle is also a lost farmer or craftsman, and having to deal with the consequences of that adds interesting twists to your playthroughs. You might have to temporarily pause much of your industrial production in the winter to ration firewood, or purchase additional food from traders to compensate for lost hunters and bakers.

On the whole, I'm in love with Manor Lords' gameplay, though I do think it can sometimes be rather opaque. Something I want very badly is some sort of broad economic overview panel, which the game currently lacks; this makes it difficult to figure out why resources aren't being produced or making it to your marketplaces for distribution in a large settlement with complex supply chains (hot tip: building an extra granary and storehouse or more workers to your existing ones has helped me with this often). Of course, it is in Early Access, and I expect helpful features like this will come to the game in time.
Indeed, as fantastic as Manor Lords is now, it's poised to get even better in the future. Many various development and policy options are locked since they're still a work-in-progress, and there's even a diplomacy system on the way for those that prefer to negotiate when possible (it's in the game now, but it's barebones and doesn't really affect anything). Perhaps we'll eventually get options like persuading brigands to serve in our militia if we threaten them with overwhelming force, or ways to trade plots of land with the Baron.
- Back to the top ⤴
Manor Lords review: Visuals and presentation

Simply put, Manor Lords is a gorgeous game, especially for something that was almost entirely put together by a single developer. Its various structures and NPCs are some of the most detailed I've ever seen in a city-builder, and the beauty of its medieval European landscapes is accentuated by its natural lighting and color balance. The environment also changes as seasons come and go, with heavy spring rains, autumnal color shifts, and winter snowfalls highlighting the passage of time.
The game's presentation is very lifelike in general, with tons of comprehensive animations, NPC voice lines, and ambient sound effects selling the development and day-to-day hustle and bustle of your towns. You can watch in real time as serfs construct longhouses on their burgage plots, work at their jobs, and transport and sell their goods, and doing so is almost too satisfying — there have been a few times I was actually slow to address a problem because I was having fun watching my people go about their business with the game sped up.
There's also the soundtrack, comprised of a collection of orchestral themes that prominently feature fipple flutes, bagpipes, lutes, and other instruments of the era ( this video on the creation of the score is a great watch). Much like the game world, it too changes dynamically over time, with spring and summer bringing catchy and cheerful music you'd hear in a bustling tavern and winter months begetting somber and melancholy melodies. Some of the tracks even get more energetic as your village grows, adding to the satisfaction of making hard-earned progress.
Manor Lords review: Early Access performance

It's not uncommon for Early Access games to (understandably) launch with lots of bugs and performance issues, but so far, I've had very few problems with Manor Lords. It runs well at 3440x1440 resolution with balanced DLSS and max settings, with the game getting a stable 100 FPS in smaller towns and battles and around 70-80 in larger ones on my i5-12600K/RTX 3070 rig with 32GB of DDR4 RAM. Aside from a few hitches in the seconds after I open my saves and the rare momentary framerate drop, it's been a smooth experience.

• Best Xbox / PC headsets in 2024 • Best upcoming Xbox / PC games • Best Xbox controllers • Best Xbox accessories • Best small gaming PCs • Best gaming laptops in 2024
The game also doesn't have too many bugs, though I have noticed a few. Specifically, I've had my townsfolk inexplicably stop selling food at their marketplace stalls, forcing me to demolish them so they could be rebuilt and reset before everyone in my city began starving. I've also seen supply wagons bunch up in roads while the game speed is increased, freezing your trade operations until the AI figures out how to "clear the blockage." Very rarely, workers may also stop carrying out their daily tasks despite having the necessary materials and logistical support, forcing you to either demolish and rebuild their workplace or save and reload the game.
Overall, these glitches are few and far between, but they're nevertheless vexing and can lead to confusion about why there's something wrong in your village. If you're having issues staying supplied with food or another important resource and you can't figure out what the problem is, try restarting the game — it could be a bug like one of these.
Manor Lords review: Final thoughts
Manor Lords may be an Early Access release, but it already feels like a full, complete game — and with its developer planning to expand it with additional upgrade paths, some extra gameplay systems, and a full-fledged diplomacy mechanic, things can only go up from here. Despite a few confusing elements and a handful of annoying bugs, it ultimately stands tall as one of the best new games of 2024, as well as one of the best PC games for city-builder and strategy fans.
Notably, Manor Lords is launching onto PC Game Pass (and Xbox Game Pass Ultimate, by extension) when it comes out on April 26, so you can play it that way if you subscribe to the service. Of course, it's also releasing on Steam and GOG, and is headed to Xbox and Xbox Game Pass at some point in the future as well.
 |$39.99$29.99 at GOG")
Manor Lords (PC) | $39.99 $29.99 at GOG
Greg Styczeń's highly anticipated city-builder Manor Lords is finally here, and it's just as amazing as everyone was hoping it'd be. I'm not even a huge fan of the genre, but it's absolutely hooked me with its addictive gameplay loops, and I'm confident you're going to love it, too.
See at: Microsoft Store | CDKeys (Steam) | Steam

Brendan Lowry is a Windows Central writer and Oakland University graduate with a burning passion for video games, of which he's been an avid fan since childhood. You'll find him doing reviews, editorials, and general coverage on everything Xbox and PC. Follow him on Twitter .
- 2 This ultraportable AI laptop wants to travel with you, and it's got insane battery life to do it
- 3 What's Windows 11 LTSC, and can you install it on your computer?
- 4 Why do the Ghouls in Fallout have no noses? I ventured into the digital wasteland to try and find out
- 5 How to increase ROG Ally VRAM to improve gaming handheld GPU performance
- Windows 11 vs Windows 10
- Split Screen in Windows 11
- Windows 11 Requirements
- Get Windows 11 for Free
- Screenshot on Windows 11
- Uninstall Windows 11
- Android Apps on Windows 11
The next big Windows 11 update has a new hardware requirement

Microsoft’s upcoming Windows 11 24H2 update is expected to arrive with yet another hardware requirement. Centered around SSE4.2 or Streaming SIMD Extensions 4.2, a crucial component for modern processors, the new Windows 11 24H2 with build 26080 will only boot on CPUs that support the instruction set.
This information comes from Bob Pony on X (previously known as Twitter), following earlier reports in February where he claimed that CPUs lacking support for the POPCNT instruction were no longer compatible with Windows 11 . The updated requirement is essentially the same, except that they now mandate the entire SSE 4.2 instruction set instead of just the POPCNT instruction within it, as was previously required.
⚠️ UPDATE: Since Windows 11 Build 26080, a CPU with the SSE4.2 instruction is ALSO REQUIRED TO BOOT Windows 11 Version 24H2!! Attempting to boot Build 26080+ on systems without the SSE4.2 instruction present will trigger an automatic reboot once it reaches the boot screen phase. https://t.co/iLkYuqQojZ pic.twitter.com/5RCxzoFexQ — Bob Pony (@TheBobPony) April 21, 2024
- You’re going to hate the latest change to Windows 11
- Windows 11 tips and tricks: 8 hidden settings you need to try
- Windows 11 vs. Windows 10: finally time to upgrade?
These newly discovered changes surpass the initial criteria to be eligible for installing or updating to Windows 11, which included Secure Boot, TPM support, and a Kaby Lake or newer CPU. Notably, POPCNT and the SSE 4.2 requirements are going to be exclusive to 24H2 and are expected to extend over subsequent iterations of Windows 11 .
While this move is likely aimed at streamlining performance and ensuring compatibility with newer hardware architectures, Microsoft has essentially made it tougher for users aiming to run the latest Windows 11 version.
It is important to note that Windows 11’s hardware compatibility list excludes older CPUs, meaning anyone with compatible hardware should not be affected by the strict requirements. However, users with aging hardware and limited expertise to navigate the hardware check may encounter challenges.
With Windows 11 24H2 set to release later this fall, it is expected that AI is going to be a big focus for Microsoft. With Intel, AMD, and even Qualcomm bringing new chips featuring integrated Neural Processing Units (NPU), Copilot in Windows 11 24H2 should bring much-needed improvements. Additionally, we can expect new gaming features like “Super Resolution,” which can use AI to upscale the graphics quality in games, voice clarity support, a revamped energy-saver mode, and various other design changes.
Editors' Recommendations
- Windows 11 might nag you about AI requirements soon
- The most common Windows 11 problems and how to fix them
- Microsoft announces a new threat to push people to Windows 11
- The best Windows 11 themes we’ve tried so far this year
- Windows 11 24H2 or Windows 12? Here’s what’s coming soon
- Microsoft Windows

Microsoft first brought over the option to run Android apps natively in Windows 11 in 2021, but the dream is coming to an end after just a few years. Today, the company quietly updated its documentation for the Windows Subsystem for Android (WSA) to indicate that it will be ending support for the feature on March 5, 2025. Amazon has also published updated guidance for the same issue about its Amazon App Store on Windows 11, which powers the WSA.
What's causing this change is unknown, as Microsoft did not dive into specific details. Left to speculate, we can assume it's due to either lack of use or licensing issues, but until we hear more, it's left ambiguous.
Most Windows users will agree that one of the most annoying things about the operating system is the updates. While Windows Updates are necessary, they often tend to come up at the worst possible time, interrupting work and gaming sessions with persistent reminders that the system needs to reboot. Microsoft might be fixing that problem in the upcoming Windows 11 24H2 build, but it's still too early to bid farewell to those ill-timed reboots.
As spotted in the latest Windows 11 Insider Preview Build 26058, Microsoft is testing "hot patching" for some Windows 11 updates. Hot patching refers to a dynamic method of updating that often doesn't change the software version and may not even need a restart. In the context of Windows 11, it's pretty straightforward -- Windows will install the update, and you won't have to reboot your system.
Microsoft appears to finally be putting its foot down on how far back it's willing to go when it comes to supporting older hardware. As of the upcoming Windows 11 24H2 build, Microsoft will require that your processor supports the POPCNT instruction. If you're wondering what that is and whether this will affect you, you're not alone.
This new addition was spotted by Bob Pony on X (formerly Twitter). According to the user, if the CPU doesn't support the POPCNT instruction or it's disabled, Windows won't work at all. Multiple system files now require this instruction, starting with the Windows 11 kernel. Long story short -- no POPCNT, no Windows 11 24H2.

How to transfer files between Android and Windows PC
Quick links, move files with a usb cable, transfer files with quick share (nearby share), using adb to move files, using usb otg to transfer files, using cloud storage services to transfer files, using bluetooth to transfer files, move files using the phone link app, move files by sharing them in a chat app, move files by sharing them via email, using apps to transfer files over-the-air.
Moving files between your Android phone and your PC has never been easier, so much so that you might not be aware of all your options. These days, there are a ton of ways you can link your phone and PC to transfer files, plus some internet-based methods. If you're interested in knowing all the options available for moving files between an Android phone and your laptop or PC, you've come to the right place. We have a wide range of options here for just about any and all needs.
Best file manager apps for Android in 2023
It's pretty straightforward to transfer files from an Android phone to a Windows PC and vice versa using a USB cable. Typically, you’ll get a USB cable in the box when you buy a new phone, so you already have everything you need.
1. Unlock your Android phone and connect it to your PC using a USB cable.
2. Your phone will detect the connection and show a notification.
3. If you’ve connected the phone for the first time to a computer, you’ll see something like Charging this device via USB .
4. Tap the notification and you'll see a list of options under Use USB connection for . Select the option called File Transfer or MTP (Media Transfer Protocol) . You can select to choose this option for just one time or always.
5. Your phone will now start showing up in the computer’s File Explorer, and you'll be able to transfer files between the phone and the PC as you would do with a USB drive.
6. Once you’re done, remove the cable. Just make sure all transfer tasks have been completed.
Android phones have had a feature called Quick Share (formerly known as Nearby Share) for some time now, but recently, Google made it available for Windows. This is arguably one of the easiest and fastest ways to move files between your phone and Windows PC. However, it's important not to confuse this with the Nearby sharing functionality built into Windows. These are separate features that aren't inter-compatible, and the Windows Nearby share feature doesn't work on Android.
To use Quick Share, you first have to install the Quick Share app on your Windows PC. On a modern Android phone, you shouldn't need to do anything since this is supported out of the box. Then, follow these steps:
1. Turn on Bluetooth on both devices.
2. Launch the Quick Share app on your Windows PC.
3. Sign in using the same Google account on your phone.
4. To send files from your phone, use your file manager or another app to find the file and choose the Share option.
5. Click the Quick Share button to share the file using Quick Share. Some apps and phones may have different menus.
6. Choose your PC from the list of devices to send the file over.
7. To send files from your PC, simply click the Select button and then choose either Files or Folders depending on what you want to share.
8. Choose the files or folders you want to transfer to your phone.
9. Choose your phone from the list of nearby devices. You may need to enable Quick Share/Nearby Share visibility in your phone's settings for your device to appear.
While Quick Share uses Bluetooth for discovery, files are transferred with a local wireless connection that's significantly faster, so transferring files this way is a lot faster and more convenient than most other methods.
The Android Debug Bridge (ADB) is also an option for transferring files between an Android device and a Windows computer. It's not the easiest method for most people, but if you're used to command-line interfaces, it may be a bit more familiar and efficient. To use ADB to transfer files, you’ll need the ADB setup on your computer.
How to install ADB on Windows, macOS, and Linux
To use ADB commands, you can either connect your phone to your PC using a USB cable or run the commands wirelessly. While wireless ADB is pretty easy with Android 11 or newer versions, it takes slightly more work with Android 10 or older versions. Google has explained all the steps required to make ADB work wirelessly on the Android developer website .
To send or receive files using ADB on your phone, you'll be using the following commands.
1. To get a file from your phone to your phone, use the command below, replacing %path-on-phone% with the path of what you want to transfer, and %path-on-PC% with the destination where you want the files to be saved. You can transfer entire folders or a single file.
adb pull /sdcard/%path-on-phone% %path-on-PC%
2. To send a file from your PC to your phone, you use the push command and enter the PC and phone paths in reverse order.
adb push /sdcard/%path-on-phone% %path-on-PC%
Make sure to use /sdcard/ in the path, even if your phone doesn't have an SD card slot. Also, keep in mind that the phone path will be formatted with forward slashes ( / ) as shown above, but the path on your PC must be formatted with backslashes ( \ ).
Android has supported USB OTG (on-the-go) since its early days. This USB specification allows devices like smartphones to act as a host to USB devices like flash drives, mice, and keyboards. USB OTG support depends on the hardware present in your smartphone but most phones these days support it. All you need is a USB drive that can be plugged into a phone, and there are a few USB-C flash drives out there you can use for this.
Once you have successfully connected your USB flash drive to your phone, you can use any file manager to open it and transfer files between the drive and your phone. Then, you can plug the same drive into your computer and transfer the files copied from your phone. This can be done the other way around as well.
Best USB-C flash drives in 2024
This is actually quite a handy way to transfer a large amount of content to and from your phone. Plus, it's easy to use with any PC without requiring much setup. It makes it easy to share files with other people in a pinch, for example, and there's a good chance you already know how flash drives work.
If you have internet access on both your Android phone and Windows computer, using a cloud storage service like Google Drive, OneDrive, or Dropbox, can be an easy way to transfer files between both devices. Using cloud storage will be useful for small to medium size files but if you have large files or a limited data connection, it's better to use one of the other methods.
1. To transfer files using a cloud storage service, open the cloud storage service provider’s app. For this guide, let’s say that app is Google Drive.
2. Upload the file or files you want to transfer to Google Drive.
3. Open Google Drive on the computer. You can use the Google Drive client (which can be installed from this page ) or open the web version .
4. Download the files you just uploaded, and you’re done. You can delete them from Google Drive to clear some space if you need to, or keep them as a backup.
You can also upload files from your computer and download them on your phone, so this method works both ways.
Bluetooth is another wireless connectivity option you can use to transfer files. But Bluetooth is quite slow and is only useful for small transfers. Otherwise, you’ll end up waiting a really long time for the transfer to complete. We're still documenting the process in case you want to still go ahead, although we strongly recommend trying out other methods first.
1. To transfer files using Bluetooth, you’ll first need to pair your phone with your PC.
2. Enable Bluetooth on both devices and make them discoverable. You can do this in the settings app on both devices, though each Android phone may organize these options differently.
3. Select the other device (you may need to click Add device first) and confirm the pairing request.
4. Once both devices are paired, you can start the file transfer.
5. On a Windows 11 PC, open the Settings app and go to Bluetooth & devices and then choose Devices .
6. Click Send or receive files via Bluetooth near the bottom of the page.
On Windows 10, this option can be found in the Devices section of the Settings app.
7. Choose Send files if you want to send files from your PC to your phone. To receive files on the computer, skip to step 10.
8. Select your phone from the paired devices list.
9. Pick the file or files that you want to send from the browser window, and hit Send .
10. Your phone will get a notification about the file being received. Approve it, and it will get transferred to your phone.
11. If you want to send a file from your phone to your PC, select Receive files from the Bluetooth File Transfer wizard.
12. Use a file manager to locate the file or files you want to transfer to your phone.
13. Tap on the share button, and use Bluetooth as the transfer mode from the share menu.
14. The other device will get a notification and you may need to approve the transfer.
15. Once approved, the transfer will be completed. You can now choose to pick the default or a different location to save the received file.
Windows 10 and 11 come with a preinstalled app called Phone Link, which lets you connect your phone to your PC to sync notifications, messages, calls, and photos. On select Samsung phones, as well as the Surface Duo family, you can also project your phone's screen on your PC, and use it to drag-and-drop any file from your phone to your PC and vice-versa. Here's what you need to do:
1. Download the Link to Windows app on your Android phone and open it. Alternatively, type in www.aka-ms/yourpc in your phone's browser. This will either take you to the Play Store or open the built-in Link to Windows feature on supported Samsung and Surface Duo phones.
2. Open the Phone Link app on your Windows PC and follow the on-screen instructions to link your phone to your PC.
3. On your phone, you'll need to accept permissions for the app to access your files.
4. Once you've completed the setup, you can visit the Photos tab on your PC to see your phone's photos, up to the latest 2,000 ones. You can right-click any of the photos here and click Save As to save the photo to your PC. Alternatively, you can open a specific photo and click Save As in the top bar menu.
If you want to move any kind of file between the two devices, you'll need a Samsung phone or either a Surface Duo or Duo 2. To do this, open the Phone screen tab in the Phone Link app, and navigate to the file manager app on your phone. Then, simply drag and drop the file you want from your phone to your computer or vice versa, and the transfer will begin.
You can use a chat app that's also accessible on your computer to transfer an occasional file. Apps like Slack, Telegram, and Signal can be accessed on both desktop and mobile, so users can send messages/files to themselves. Simply upload your files to one of these apps and you can then download it on a different device where you have the app.
This process will vary a bit depending on the messaging service you're using, but many will have a saved messages or notes option, or you may just have to try and start a conversation with yourself.
As with chat apps, you can also transfer files using your email, though attachments usually have a fairly small size limit. However, in some cases like Gmail or Outlook, attaching large files to an email can prompt you to upload them to a cloud service instead and share a link to it, which still works fairly well.
There are a number of Android applications that allow you to transfer content from one device to another. So you can use these apps to transfer files from Android to a Windows PC. Here are some of the most popular apps and how you can use them.
AirDroid is one of the popular Android file transfer apps that comes with a lot of other features as well. It supports the transfer of all kinds of files across platforms on the same wireless network as well as remotely.
1. Install the app on your phone. Once installed, open it and give the necessary permissions. You don’t need to create an account if you’re sending files on the same network.
2. When you are in the app, tap AirDroid Web .
3. AirDroid will show a new page with an IP address.
4. Type the IP address into any browser on your Windows computer.
5. When you open the IP address, AirDroid will ask for permissions on your phone.
6. AirDroid will open a detailed interface with a number of options. Just click on Files to transfer files to or from your PC.
7. The app will open a file manager showing the files on your phone. You’ll also see two buttons: Upload file and Upload Folder .
8. You can use Upload file and Upload folder to transfer any files from your PC to the phone.
9. To get files from your phone, navigate to the file in the file manager on AirDroid.
10. Right-click on a file or folder, and select Download . Folders will show a Download as Zip option.
11. Once you are done transferring, just click on the power button at the top to sign out.
The Pushbullet app can also be used to transfer files from your phone to your computer and vice versa. Unlike Airdroid, Pushbullet uploads the files on its own servers and then transfers them to the other devices. So it won’t be ideal for big transfers. Using Pushbullet is also pretty straightforward.
1. Install the app on your phone and computer. Instead of the app, you can also use the Pushbullet extension on your PC.
2. Once the apps have been installed, open and complete the setup formalities. You’ll need to sign in using your Google account.
3. When the app is set up, its interface is quite similar to a chat app. Click the Attach button to send files from your PC or phone to the other device.
4. Just select the file and tap on Send .
Intel Unison
With certain Windows PCs, you can use the Intel Unison app to move files between your Android phone and your computer more easily. Intel Unison is a relatively new app and, officially, it's only supported on laptops with Intel 12th-generation processors or newer. However, in our experience, it's possible to use it on just about any Windows PC. Here's how you can use Intel Unison to transfer files from your Android phone to your PC and vice versa:
1. Install the Intel Unison app for Windows on your computer, and the Unison app on your Android phone (linked below).
2. Use the app on your phone to scan the QR code shown in the app on your PC.
3. Confirm the connection code and accept the permission requests on your phone.
To send files from your phone to your PC
1. Tap the paper airplane icon in the bottom left corner.
2. Choose either Files or Camera depending on the files you want to send.
3. Select the files to send and they'll be automatically downloaded to your PC's Downloads library. Note: You can change the default download location in the app.
To send files from your PC to your phone
1. Choose the File transfer section from the menu on the left side
2. Click Add files .
3. Choose the files you want to send to your phone and click Open .
4. Received files will show up in the Received tab in the Unison app on your phone.
How to set up Intel Unison on Windows 11, iPhone, and Android
That's all there is to it. Intel Unison can do a lot more than simple file transfers, too. It can sync your notifications, send and receive SMS messages, and make calls. It also automatically syncs all your photos from your phone to your PC, so if that's what you want to transfer, you just have to open the Gallery tab on your PC to see pictures from your phone. You can learn more about how to set up Intel Unison here.
WiFi FTP server
The WiFi FTP Server app converts your Android phone into an FTP server. You can use this server to transfer files between your phone and your PC.
1. Install the WiFi FTP Server app on your phone.
2. Open the app and give the necessary permissions.
3. The app will then show the Wi-Fi status and other details.
4. Tap on Start to make the FTP server live.
5. After the server is live, the app will show a server IP address.
6. Open File Explorer on your PC and type the complete server URL in the address bar, including the ftp:// prefix. Make sure you remove everything from the File Explorer address bar before putting in the URL.
7. Press Enter and the FTP server will open in File Explorer. It will look like browsing any other drive on your PC.
8. Transfer the files you want from or to your phone, and simply tap Stop in the app to stop the server.
WiFi FTP Server
These are some of the most common ways to transfer files from an Android device to a Windows PC, and vice versa. If you're looking for a new phone, make sure to check our guides on the best phones, as well as the best Android phones you can buy right now, if your heart is already set on Android. Alternatively, if you are looking for a computer, we've also rounded up the best laptops you can buy today.

Windows 11 will reportedly display a watermark if your PC does not support AI requirements
File Explorer, Copilot and DirectX are some of Windows 11's functions that will use AI

With Windows 11 24H2 all geared up to have AI-intensive applications, Microsoft has added a code that will warn you if your PC does not meet the hardware requirements, according to code dug up by Twitter/X sleuth Albacore (via Neowin ). The warning will be displayed as a watermark so you know that you cannot use certain AI-powered built-in apps because of an unsupported CPU.
Earlier, it was thought that only PopCnt was the only requirement later but the coding revealed a mandatory SSE4.2 requirement. Regardless, this wouldn't make much difference to practically most users as CPUs that support Windows 11 have SSE 4.2 instructions. Still, it is interesting to see Microsoft adding this check for its AI-powered apps. Some of these applications are likely Advanced Copilot and AI File Explorer. It was also revealed that the upcoming Windows 11 build will include a DirectX AI Super Resolution .
Looking at bits present in insider build 26200, AI Explorer indeed checks these requirements and if they aren't met, a warning will be present in its overlays. You can however skip the check altogether by disabling ID 48486440. This only disables AIX making the check, not the API https://t.co/XmnjzCZqEw April 22, 2024
Albacore investigated the Windows 11 Insider Build 26200 and found the AI Explorer to have an AI Explorer requirements coded in the operating system. The coding included hardware requirements for the CPU with the required instructions and a minimum of 16GB of memory. For example, he installed the Insider version on a system with an ARM64 CPU. Albacore did find a way to bypass this check by disabling ID 48486440 on the RTM build.
Interestingly, the software giant added this check since the Windows 11 24H2 will not boot without these instruction sets, according to a previous report . Though speculative, one would wonder if the company has this extra step in case someone uses bypasses to force the OS to boot with an unsupported CPU.
Check comes during time of criticism
This check comes at a time where Windows 11 has been increasingly criticized by enthusiasts. Microsoft decided to display ads linking to its app store in the form of 'recommendations' i n the Start Menu. A few days ago, its Start menu's performance was criticized by a former developer . Microsoft also stifled the ability to customize Windows 11's UI using well-known apps . We'll simply have to see how the user experience is with the upcoming update, and how flexible Microsoft is willing to be with the wide variety of CPUs and other components in use today.
Stay on the Cutting Edge
Join the experts who read Tom's Hardware for the inside track on enthusiast PC tech news — and have for over 25 years. We'll send breaking news and in-depth reviews of CPUs, GPUs, AI, maker hardware and more straight to your inbox.
Museum criticizes Microsoft for 'mutilated' MS-DOS 4 open source release — posting on 'stupid' git blamed for the buggy blunder
Microsoft releases MS-DOS 4 source code on GitHub — 36 year old code now open-source
Drone maker DJI facing U.S. FCC ban — the national security risk and part China-state ownership are key issues
- hotaru251 Realllly want Linux to pop off loads more so MS starts to respect users again... "don't fix what isnt broken" is a saying for a reason. Reply
Admin said: Check comes during time of criticism
- bigdragon I wonder if the proliferation of AI garbage in Windows will motivate large corporations with significant proprietary information to migrate to a different OS. Can you really take the risk of Microsoft sucking up your IP, throwing it at their AI, and then regurgitating your own content back at you while retaining anonymized/unattributed proprietary data in their AI cloud? Reply
- Alvar "Miles" Udell Issue: Microsoft displays ads in the start menu!!! Solution: Untick display suggestions and ads in Settings. Issue: Microsoft displays watermarks on insider builds if you can't use those AI features!!! Solution: Don't use an insider build. I swear there are so few tech sites that aren't trying to sensationalize what are either minor annoyances others already do or are not actual problems people who aren't voluntarily opting into testing aren't affected by, though most of those sites are owned by Future PLC so they're probably being told to. If they, including TH, made this big of a stink about things which are actual issues, like automatically store opening ads in mobile apps or ads with 1x1 pixel sized close buttons or Windows computers shipping with 8GB or under RAM or quad core 2+2 core CPUs or tiny amounts of storage or phones with 128GB storage or any other thing that's ACTUALLY A PROBLEM maybe actual issues would be fixed. Bet you in short time one of THs "deal writers" posts a "deal" on a low spec computer and frames it as a can't miss by the end of the week, and one of their "freelance writers" posts something else bashing Microsoft for something else that's a non issue, like the Windows Store failing to update apps for some reason, or Microsoft removing Teams Classic support in a couple of months and putting prompts for users who can't use the new Teams to upgrade their system. Oh, here's one, post an article about Microsoft SwiftKey insisting autocorrect use "thr" instead of "the", or why the Microsoft 365 app tells me I have notifications when I have none, or why Microsoft Outlook says I have 20 unread emails in the notification sorn counter but I have none. But don't by all means mention anything positive, like Microsoft adding a 50GB per month VPN to Microsoft 365, or Microsoft and Google making it easier to use Microsoft 365 on Chromebooks. Reply
- Alvar "Miles" Udell Windows Central, another Future brand, doesn't bash Microsoft as much as TomsHardware does! Reply
- coromonadalix hell o I'm Synet Reply
Alvar Miles Udell said: I swear there are so few tech sites that aren't trying to sensationalize what are either minor annoyances others already do or are not actual problems people who aren't voluntarily opting into testing aren't affected by, though most of those sites are owned by Future PLC so they're probably being told to.
- vanadiel007 I will ask an online AI on how to get rid of the watermark, and problem solved! Reply
Alvar Miles Udell said: Issue: Microsoft displays ads in the start menu!!! Solution: Untick display suggestions and ads in Settings. Issue: Microsoft displays watermarks on insider builds if you can't use those AI features!!! Solution: Don't use an insider build. I swear there are so few tech sites that aren't trying to sensationalize what are either minor annoyances others already do or are not actual problems people who aren't voluntarily opting into testing aren't affected by, though most of those sites are owned by Future PLC so they're probably being told to. If they, including TH, made this big of a stink about things which are actual issues, like automatically store opening ads in mobile apps or ads with 1x1 pixel sized close buttons or Windows computers shipping with 8GB or under RAM or quad core 2+2 core CPUs or tiny amounts of storage or phones with 128GB storage or any other thing that's ACTUALLY A PROBLEM maybe actual issues would be fixed. Bet you in short time one of THs "deal writers" posts a "deal" on a low spec computer and frames it as a can't miss by the end of the week, and one of their "freelance writers" posts something else bashing Microsoft for something else that's a non issue, like the Windows Store failing to update apps for some reason, or Microsoft removing Teams Classic support in a couple of months and putting prompts for users who can't use the new Teams to upgrade their system. Oh, here's one, post an article about Microsoft SwiftKey insisting autocorrect use "thr" instead of "the", or why the Microsoft 365 app tells me I have notifications when I have none, or why Microsoft Outlook says I have 20 unread emails in the notification sorn counter but I have none. But don't by all means mention anything positive, like Microsoft adding a 50GB per month VPN to Microsoft 365, or Microsoft and Google making it easier to use Microsoft 365 on Chromebooks.
- Giroro So many mass layoffs in tech, yet we are in our 4th straight year of every Windows version being a noticably inferior downgrade to the previous version? When is the leadership in charge of Windows going to be the ones held accountable for this pattern of bad decisions? Reply
- View All 37 Comments
Most Popular
Present on multiple monitors (and view speaker notes privately)
You can present with 2 monitors: Using Presenter View is a great way to view your presentation with speaker notes on one monitor (your laptop, for example), while your audience views the notes-free presentation on a different monitor (like a larger screen you're projecting to).
Note: Make sure the device you're using for your presentation supports the use of multiple monitors. Check with your manufacturer for up-to-date information about multiple monitor support.
To do this procedure and split the view between projectors in this way, you must be connected to the second screen.
Set up PowerPoint to use Presenter view with two monitors
On the Slide Show tab, in the Monitors group, select Use Presenter View .

Windows Display Settings should open.
In the Display Settings dialog box, on the Monitor tab, select the monitor icon that you want to use to view your speaker notes, and then select the This is my main monitor check box.
If the This is my main monitor check box is selected and unavailable, the monitor is already designated as the primary monitor.
Select the monitor icon for the second monitor—the one the audience will watch, and then select the Extend my Windows Desktop onto this monitor check box.
Notes: If the Windows Display Settings don't open, do the following:
Windows 10: Click Start > Settings > System > Display . At the top, under Customize your display , is a diagram of the screens connected to your computer, with each screen numbered. If you are connected to a project, typically it will be represented in the diagram as screen 2. Select screen 1 in the diagram, then scroll downward. Ensure that the check box named Make this my main display is selected. Above that check box, in the Multiple displays list, select Extend these displays .
Windows 8: Right-click the Windows Start button, click Control Panel > Display > Adjust resolution . In the Multiple displays list, click Extend these displays . Select the monitor on which you want to view your speaker notes, and click Make this my main display .
You can use PowerPoint on your smartphone as a remote control to run your presentation and view your speaker notes. See Using a laser pointer on your smartphone when presenting in PowerPoint for more information, including a brief video.
Deliver your presentation on two monitors
On the Slide Show tab, in the Set Up group, click Set Up Slide Show .

In the Set Up Show dialog box, choose the options that you want, and then click OK . If you choose Automatic , PowerPoint will display speaker notes on the laptop monitor, if available. Otherwise, PowerPoint will display speaker notes on the main display identified in your Display settings ( Settings > Display ).

Extend vs. Duplicate: What happens after the slide show ends
PowerPoint does something behind the scenes to make the process of starting a slide show on a second monitor as smooth and quick as possible. When you enter Slide Show, PowerPoint automatically changes your display settings (also known as your display topology) to Extend .
What can be confusing is what happens after your slide show concludes:
In PowerPoint 2013 , when your slide show ends, PowerPoint leaves the display topology as Extend . (The benefit of this approach is that the next time you present on a second monitor, the first slide will appear with minimal delay. The drawback is that PowerPoint may be overriding your preferred display setting of "duplicate". Some people don't like this override.)
In newer versions , in the same end-of-slide-show scenario, PowerPoint reverts to your default setting, returning to Duplicate , if that's what you have chosen.
If you are using PowerPoint 2013 and you want PowerPoint to revert to the default setting, rather than keeping the Extend setting, you can tell it to do that by making a small change to the Windows registry as described below.
In this procedure, you are creating a command that adds a new setting to the Windows Registry for PowerPoint, and then you are running that command:
Create a new file in Notepad.
Copy and paste the following three lines of text into Notepad:
On the File menu in Notepad, click Save As .
Name the file Update.reg . (It's important that the file name extension be .reg ).
In the Save as type box, choose All Files (*.*) .
Take note of the folder in which you are saving the file. Then click Save , and close Notepad.
Open File Explorer from the Start menu and navigate to the folder where you saved Update.reg.
Double-click Update.reg .
Answer "Yes" to the two prompts that ensue.
With that completed, PowerPoint will now revert to your default display topology at the conclusion of a slide show.
(Read more technical details in this community forum post that was answered by a PowerPoint program manager .)
Video: Use Presenter view
View your speaker notes as you deliver your slide show
Video: Rehearse timings for a slide show
Zoom in to part of a slide in Slide Show view
Print your PowerPoint slides, handouts, and notes
Create a self-running presentation
Start the presentation and see your notes in Presenter view
PowerPoint videos not playing on secondary monitor

Need more help?
Want more options.
Explore subscription benefits, browse training courses, learn how to secure your device, and more.

Microsoft 365 subscription benefits

Microsoft 365 training

Microsoft security

Accessibility center
Communities help you ask and answer questions, give feedback, and hear from experts with rich knowledge.

Ask the Microsoft Community

Microsoft Tech Community

Windows Insiders
Microsoft 365 Insiders
Was this information helpful?
Thank you for your feedback.
Manor Lords out now via PC Game Pass
- Steve Clarke, Editor
Manor Lords is out today on the Microsoft Store and via PC Game Pass (Game Preview).
A city-building and strategy game that focuses on sandbox gameplay and intimate historical details, the game delivers authentic building designs, workplaces and fashion. But if you’re not careful there can be a downside to the authenticity – your people will starve if you don’t adequately prepare for the colder months.
Head over to Xbox Wire for some tips and tricks on establishing yourself as a new Lord and keeping your settlers happy.
IMAGES
VIDEO
COMMENTS
One person. Sharing and real-time collaboration. PowerPoint for the web and PowerPoint desktop app for offline use. Premium templates, fonts, icons, and stickers with thousands of options to choose from. Dictation, voice commands, and transcription. Advanced spelling and grammar, in-app learning tips, use in 20+ languages, and more.
Microsoft PowerPoint: Create attractive presentations without complicating your life. Microsoft PowerPoint is a presentation software application that has been the industry standard for decades. It is used by millions of people worldwide to create presentations for a variety of purposes, including business, education, and personal use.
Six steps for creating a slide show. 1. Plan your slide show. Before getting too deep into your slide show project, it's a good idea to select and save the photos and videos you want to use. This helps you create a slide show more efficiently and purposefully, ensuring a better outcome. 4.
Training: Watch and learn how to use PowerPoint in Windows. Explore PowerPoint training guides, articles, and how-to videos.
Create a new presentation. Open PowerPoint. Select Blank presentation, or select one of the themes. Select More themes to view the gallery and search for more. Add a slide. Select the slide you want your new slide to follow. Select Home > New Slide. Select Layout and the you type want from the drop-down.
Once inside, click the three-dot button in the top-right corner followed by the Slideshow option in the drop-down menu. Your display (s) will grow dark, and the slideshow will begin. You can view specific images in a slideshow by holding down the CTRL key while selecting each image in the folder.
Learn everything you need to know to get started using Microsoft PowerPoint! You'll learn all the basics plus more, including: how to choose a design theme...
The Best Slideshow Creation Apps. The slideshow format is the classic presentation option, and the best two apps in this category are Microsoft PowerPoint and Apple Keynote, which is a part of the ...
Find the perfect PowerPoint presentation template Bring your next presentation to life with customizable PowerPoint design templates. Whether you're wowing with stats via charts and graphs or putting your latest and greatest ideas on display, you'll find a PowerPoint presentation template to make your ideas pop.
Show 7 more. Welcome to the Desktop Guide for Windows Presentation Foundation (WPF), a UI framework that is resolution-independent and uses a vector-based rendering engine, built to take advantage of modern graphics hardware. WPF provides a comprehensive set of application-development features that include Extensible Application Markup Language ...
Best free presentation software of 2024. The best free presentation software makes it simple and easy to create presentations as an alternative to subscribing to Microsoft PowerPoint. 1. Best ...
To do that, simply go up to the Home tab and click on New Slide. This inserts a new slide in your presentation right after the one you were on. You can alternatively hit Ctrl+M on your keyboard to insert a new blank slide in PowerPoint. To learn more about this shortcut, see my guide on using Ctrl+M in PowerPoint.
Open the PowerPoint app, select a template and theme, then like "Create.". Click the text box to add your title and subtitle to create your title slide. Click the "Insert" tab, then "New Slide" to add another slide. Choose the type of slide you want to add, then add text and pictures. Rearrange slides by dragging them up or down in ...
Access, create, and edit your presentations wherever you are — from any mobile device, tablet, or computer — even when offline. Get a head start with templates Choose from a variety of ...
You need a reliable presentation remote that connects easily and travels well. Here are our recommendations for the best options for PCs. Satechi Bluetooth Smart Pointer. Logitech R800. Doosl ...
Get to your presentations from your computer, tablet, or phone. Share and work with others, wherever they are. Notes: If you're using the desktop version of PowerPoint on a Windows PC, see the PowerPoint Quick Start. If you're using the desktop version of PowerPoint on a Mac, see Office for Mac Quick Start Guides and PowerPoint for Mac Help.
Download our Computer-related Google Slides themes and PowerPoint templates and create outstanding presentations Free Easy to edit Professional ... Use these Google Slides themes or download our PPT files for PowerPoint or Keynote to give a presentation about a Computer-related topic, including Information Technology. Filter by. Filters ...
Enable or Disable Presentation Settings in Local Group Policy Editor. 1. Open the Local Group Policy Editor. 2. Navigate to the policy location below in the left pane of Local Group Policy Editor. (see screenshot below) Computer Configuration\Administrative Templates\Windows Components\Presentation Settings. 3.
2. Embed Microsoft Forms (Education or Business Only) If you plan to send your PPT presentation to others—for example, if you're a trainer sending step-by-step instruction presentation, a teacher sending an independent learning task to your students, or a campaigner for your local councilor sending a persuasive PPT to constituents—you might want to embed a quiz, questionnaire, pole, or ...
The latest version of Windows 11 features new device security features that protect the core parts of the computer. Using Virtualization Based Security (VBS), Windows isolates the computer memory, which prevents attacks from inserting malicious code into high-security processes.
Windows 10, initially promised as "the last version of Windows," was released back in 2015. ... This applies for both the current update and any updates that might land on your PC in the future. ... 6 Ways to Create More Interactive PowerPoint Presentations Engage your audience with cool, actionable features. Game Emulation.
Platforms (Early Access): Windows PC (Steam, GOG, Microsoft Store) Reviewed on: ... The game's presentation is very lifelike in general, with tons of comprehensive animations, NPC voice lines, and ...
Create a blank presentation. Open PowerPoint. Select one of the Blank Presentation and start typing. Note: Microsoft 365 subscribers will find Design Ideas based on the words you type. You can browse and select a new look.
⚠️ UPDATE: Since Windows 11 Build 26080, a CPU with the SSE4.2 instruction is ALSO REQUIRED TO BOOT Windows 11 Version 24H2!!. Attempting to boot Build 26080+ on systems without the SSE4.2 ...
Open the Phone Link app on your Windows PC and follow the on-screen instructions to link your phone to your PC. 3. On your phone, you'll need to accept permissions for the app to access your files. 4.
Yes, you can definitely download videos from Twitter to your Windows 11 PC. There are a bunch of third-party tools and apps that can help with that. One straightforward tool I'd recommend is AllClipDown . It's free, works on Windows, and is pretty good at handling video downloads from various sites, including Twitter.
With Windows 11 24H2 all geared up to have AI-intensive applications, Microsoft has added a code that will warn you if your PC does not meet the hardware requirements, according to code dug up by ...
Above that check box, in the Multiple displays list, select Extend these displays. Windows 8: Right-click the Windows Start button, click Control Panel > Display > Adjust resolution. In the Multiple displays list, click Extend these displays. Select the monitor on which you want to view your speaker notes, and click Make this my main display.
Manor Lords is out today on the Microsoft Store and via PC Game Pass (Game Preview). A city-building and strategy game that focuses on sandbox gameplay and intimate historical details, the game delivers authentic building designs, workplaces and fashion.